
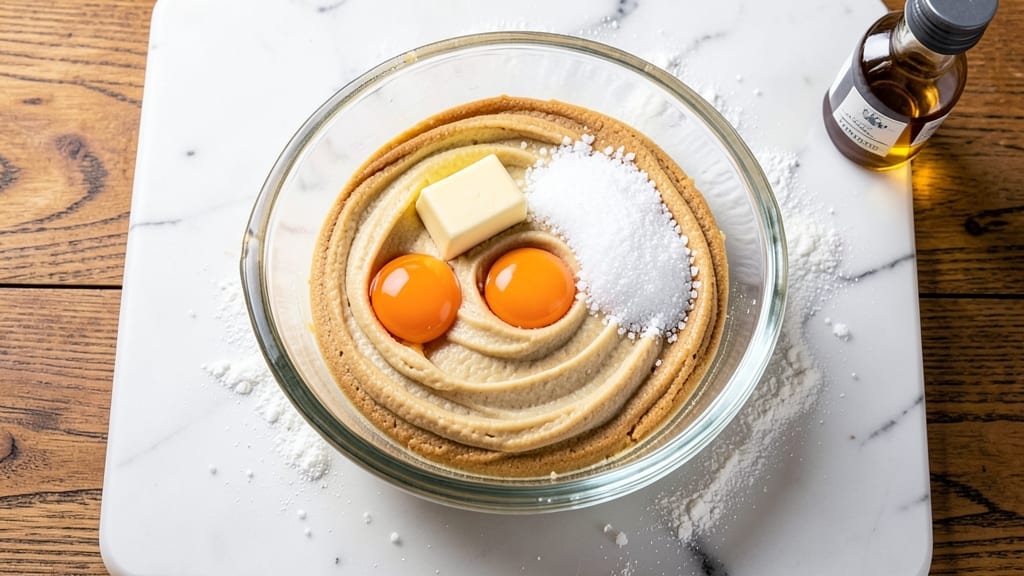
This 1-2-3 sugar cookie recipe delivers the buttery swirls and perfectly shaped cookies you crave—every single time. The magic lies in the simple ratio (1 cup butter, 2 cups sugar, 3 cups flour) that creates tender, melt-in-your-mouth cookies with just the right snap.
I’ve tested countless variations, and this method never fails to impress, whether you’re baking for a holiday gathering or a cozy weeknight treat.
The secret to foolproof results starts with proper dough preparation: chilling the dough for at least 24 hours ensures even baking and prevents spreading. Once rolled and cut, these cookies bake up with golden edges and a soft, pillowy center—no cracking or overbaking.
The dough’s simplicity makes it beginner-friendly, while the classic flavor keeps it universally loved.
What makes these cookies truly special is their versatility. Toss them in colorful sprinkles for a festive touch, pipe swirls for an elegant presentation, or keep them classic with a dusting of powdered sugar.
The dough can be prepped ahead, so you’re never stuck scrambling last minute. With just a few ingredients and minimal effort, you’ll have cookies that taste like they came from a bakery.
Perfect for holiday cookie exchanges, potlucks, or satisfying your sweet tooth, these cookies are a crowd-pleaser. The recipe scales easily, so you can bake a single batch or double it for sharing. Once you try this method, you’ll never go back to store-bought again.
Ingredients for 1 2 3 sugar cookie
The classic trio: butter, sugar, flour—plus a few magic touches for bakery-style perfection.
| Ingredient | Amount | Notes |
|---|---|---|
| Unsalted Butter 🧈 | 1 cup | Cold, cubed for even mixing |
| Granulated Sugar 🍚 | 2 cups | Superfine for smoother texture |
| All-Purpose Flour 🌾 | 3 cups | Sifted for lightness |
| Large Eggs 🥚 | 2 whole | Room temperature |
| Pure Vanilla Extract 🌿 | 2 tsp | High-quality for flavor |
| Baking Soda 🧂 | ½ tsp | Ensures proper rise |
| Salt 🧂 | ½ tsp | Fine sea salt preferred |
| Powdered Sugar 🍚 | 1 cup | For dusting finished cookies |
| Colorful Sprinkles 🎨 | ½ cup | Optional festive touch |
| Heavy Cream 🥛 | ½ cup | For optional swirls |
| Food Coloring 🎨 | ½ tsp | Optional for swirls |
| Parchment Paper 📄 | 1 sheet | For easy release |
The butter is non-negotiable—use unsalted and let it chill in the fridge until firm. Kirkland Signature or Plugrá are my go-tos, but any good-quality brand works. The sugar? Superfine makes a difference—it dissolves faster and gives a smoother texture. If you only have regular granulated, pulse it in a food processor for 30 seconds. The flour should be sifted before measuring—this prevents lumps and ensures light, airy cookies. King Arthur or Gold Medal are reliable choices. Pro tip: measure flour by scooping and leveling, never packing it down.
No vanilla extract? Vanilla bean paste works too, or even a scraped vanilla bean. Short on heavy cream for swirls? Substitute Greek yogurt or sour cream—they add richness without altering the dough too much. The sprinkles can be any kind you love—Jolly Rancher or Wilton are crowd-pleasers. For food coloring, Wilton or Americolor gel pastes are my favorites—they don’t thin the dough. If you’re making swirls, use a piping bag with a small round tip for clean lines. And yes, you can skip the swirls entirely—classic powdered sugar-dusted cookies are just as delicious.
The dough needs at least 24 hours in the fridge to develop flavor and prevent spreading. Wrap it tightly in plastic wrap, then foil, and store in the coldest part of your fridge. Once rolled, cut into perfect shapes with a fluted cookie cutter or a glass. Bake on parchment-lined sheets for easy release. Leftover dough? Freeze it for up to 3 months—just thaw overnight in the fridge before rolling. Cookies keep for 5 days in an airtight container, though they’re best fresh out of the oven. Double the batch—you’ll want seconds.
Why You’ll Love This Recipe
- No Mixer Needed: I swear by this dough—just creamed butter, sugar, and a splash of vanilla. No electric mixer, no fuss, just my wooden spoon doing all the work while I chat with whoever’s in the kitchen.
- Butter-Sugar Magic: That first bite? Pure comfort. The butter and sugar blend so smoothly, the cookies stay tender inside with just enough crisp at the edges—no dry, crumbly disappointment here.
- Holiday or Snack Attack: Between us, these work for everything. Roll them out for Christmas trees, cut into stars for birthdays, or just bake a sheet for a quick afternoon treat. (Yes, even on a Tuesday night.)
- Pantry Staple Power: Four ingredients, zero specialty items. If you’ve got flour, butter, and eggs, you’ve got cookies. And because they freeze perfectly, I always make a double batch—no last-minute grocery runs.
Step-by-step instructions for 1 2 3 sugar cookies
Here’s how to create buttery, swirled sugar cookies that bake up perfectly every single time.
Cream Butter and Sugar Until Light and Fluffy
In a large mixing bowl, combine the 1 cup unsalted butter (cold, cubed) and 2 cups granulated sugar. Using a hand mixer or stand mixer fitted with the paddle attachment, beat on medium speed for 3-4 minutes until the mixture is light in color and fluffy in texture.
You’re looking for nearly doubled volume with ribbons forming when the beaters are lifted. This step incorporates air, which creates those signature crackly tops and helps the cookies spread just enough. If your butter isn’t cold enough, the dough will be too soft—press a cube between your fingers to check before starting.
Add Eggs, Vanilla, and Dry Ingredients
Add the 2 whole large eggs (room temperature) one at a time, mixing well after each addition. Then stir in the 2 teaspoons pure vanilla extract. In a separate bowl, whisk together the 3 cups all-purpose flour, ½ teaspoon baking soda, and ½ teaspoon salt. Gradually add the dry ingredients to the wet mixture, mixing on low speed just until combined.
Don’t overmix—you should still see small flour streaks. Overmixing develops gluten, which makes cookies tough. For swirled cookies, divide the dough in half. To one half, add the ½ cup heavy cream and ½ teaspoon food coloring, mixing until evenly incorporated. Keep the other half plain for contrast.
Chill the Dough for Perfect Shape
Wrap the dough tightly in plastic wrap and refrigerate for at least 1 hour (or up to 24 hours). Chilling is crucial—it firms up the butter so the cookies hold their shape instead of spreading too thin. Cold dough also means better flavor development and a crispier texture.
I know it’s tempting to skip this step, but trust me—skipping it leads to flat, cakey cookies. For best results, let the dough rest in the fridge overnight. The longer it chills, the more flavorful the cookies will be.
Roll and Cut for Uniform Cookies
Preheat your oven to 350°F and line two baking sheets with the 1 sheet parchment paper. On a lightly floured surface, roll out one dough half to ¼-inch thickness. Use a 2-inch round cookie cutter to cut out shapes, then transfer to the prepared baking sheets, spacing them 2 inches apart. Repeat with the second dough half.
For swirled cookies, gently press the two dough colors together before rolling. Place the cut cookies back on the floured surface and sprinkle the tops with ½ cup colorful sprinkles before transferring to the baking sheets. This ensures the sprinkles stick and don’t slide off during baking.
Bake to Golden Perfection
Bake for 9-11 minutes until the edges are golden brown and the centers look just slightly underdone. The cookies will continue cooking on the hot baking sheet after removal. Rotate the pans halfway through baking for even heat distribution.
Let the cookies cool on the baking sheet for 5 minutes before transferring to a wire rack to cool completely. While they’re still warm, dust with the 1 cup powdered sugar for that classic sugar cookie finish. Store in an airtight container for up to 5 days or freeze for up to 3 months for fresh-tasting cookies anytime.
Pro Tips For Making 1 2 3 Sugar Cookie
- Chill the Dough First: I learned this the hard way—rolling out warm dough is a recipe for tears (and messy cookies). Give the dough a solid 30-minute rest in the fridge before cutting shapes. This firms it up, prevents spreading, and makes piping cleaner if you’re decorating.
- Use Cold Butter, Not Soft: The butter in this recipe is the thing that matters most. If it’s even slightly warm, your cookies will flatten like pancakes. Cut the butter into cubes, toss it in the freezer for 10 minutes, then measure. Cold butter = crisp edges and chewy centers.
- Skip the Overmixing: Once you add the egg and vanilla, stop mixing the second everything comes together. Overworking the dough develops gluten, and those cookies turn out tough instead of tender. Stir just until the flour is incorporated—about 10 seconds past that point is plenty.
- Weigh Your Flour: Scooping flour from the bag is where things go wrong. Use a kitchen scale for the all-purpose flour—this recipe is precise, and too much or too little throws off the texture. If you’re eyeballing, spoon it in and level it off; packing the cup compresses it and makes the dough dry.
Pro cooking tips for great 1 2 3 sugar cookie
Butter Temperature Matters
Your butter’s temperature makes or breaks these cookies. Use cold, cubed butter straight from the fridge—it should press into the sugar but not melt instantly. If your butter is too soft, the cookies will spread into thin, cakey disks.
I’ve ruined batches by using room-temperature butter, so always check by pressing a cube between your fingers. If it leaves a greasy thumbprint, it’s too soft—pop it back in the fridge for 10 minutes before starting. 🧈
Mixing Technique Secrets
Cream the butter and sugar until the mixture is light and fluffy, with ribbons forming when you lift the beaters. This takes 3-4 minutes on medium speed. I use my KitchenAid stand mixer with the paddle attachment—it incorporates more air than a hand mixer.
Overmixing develops gluten, so stop as soon as the dry ingredients are just combined. For swirls, divide the dough and tint one half with food coloring before gently pressing the colors together for a marbled effect.
Chilling is Non-Negotiable
Skip the chilling step, and you’ll end up with flat, greasy cookies. Wrap the dough tightly in plastic wrap and refrigerate for at least 1 hour (overnight is ideal). Cold dough holds its shape, prevents excessive spreading, and deepens the flavor.
Pro tip: Place the dough on a baking sheet before chilling—this makes it easier to slice off portions later without unrolling the whole log. I’ve even chilled dough for 48 hours with no issues—just bring it to room temperature for 30 minutes before rolling. ❄️
Roll and Cut Like a Pro
Roll the dough to a ¼-inch thickness using a rolling pin or a cookie press for even pressure. For uniform cookies, use a 2-inch round cutter or a glass of the same size. Press straight down and twist slightly to release clean edges.
For swirls, roll the dough into a log, twist the two colors together, then slice into ½-inch rounds before baking. Place cookies 2 inches apart on parchment-lined sheets—they’ll spread slightly during baking. 🎨
Baking Time Precision
Bake at 350°F for 9-11 minutes until the edges are golden and the centers look just set. Overbaking dries out the cookies, so pull them out when they’re slightly underdone—they’ll firm up as they cool. Rotate the pans halfway through for even browning.
I use an oven thermometer to confirm my oven’s accuracy—many run hotter than the set temperature. Let cookies cool on the sheet for 5 minutes before transferring to a rack to prevent cracking. 🔥
Post-Bake Finishing Touches
While cookies are still warm, dust them generously with powdered sugar using a fine-mesh sieve for an even coat. For extra flair, sprinkle with colored sugar or drizzle with melted chocolate. Store in an airtight container with parchment between layers to keep them soft.
I’ve kept these cookies fresh for 5 days this way, though they’re best enjoyed within 2 days. For longer storage, freeze the dough balls (unbaked) for up to 3 months—bake straight from frozen, adding 1-2 extra minutes to the cook time. ✨
Nutrition facts
Frequently asked questions
Why does my sugar cookie dough keep sticking to the rolling pin?
This usually happens when the dough isn’t chilled enough or your surface isn’t properly floured. Always work on a lightly floured surface and use a rolling pin that’s been dusted with flour as well. If the dough still sticks, let it chill for 30 more minutes—cold dough rolls much smoother. For extra insurance, use powdered sugar instead of flour on the rolling pin.
Can I make these cookies without a mixer?
Use a sturdy wooden spoon or fork to cream the butter and sugar by hand—just work it for 5-7 minutes until light and fluffy. For the eggs and vanilla, use a whisk in the same bowl. The dough will be slightly less aerated than with a mixer, but still delicious. Just be extra gentle when combining the dry ingredients to avoid overmixing.
How do I prevent my sugar cookies from cracking?
Cracking usually happens when cookies cool too quickly. Let them bake until the edges are just set (about 9-11 minutes), then transfer to a wire rack to cool completely. Never stack warm cookies—they’ll steam and crack. For extra protection, place parchment paper between layers when storing. If you’re decorating with icing, let cookies cool completely first so the icing doesn’t melt.
What’s the best way to store leftover dough?
Wrap the dough tightly in plastic wrap, then place it in an airtight container or resealable bag. Store in the fridge for up to 5 days or freeze for 3 months. When ready to bake, let frozen dough thaw in the fridge overnight or at room temperature for 1-2 hours. Never thaw dough at room temperature—it can develop condensation and make the cookies greasy.
Can I make these cookies gluten-free?
Yes, but you’ll need a 1:1 gluten-free flour blend designed for baking (like Bob’s Red Mill or King Arthur). Replace the all-purpose flour with the same 3 cups measurement. Add ½ teaspoon xanthan gum if your blend doesn’t contain it. Keep in mind gluten-free cookies tend to be denser and may spread more, so reduce baking time by 1-2 minutes. Test with one batch first to adjust ratios.

- 12 Bean Chili Recipe: Hearty Slow-Cooked Depth With 12 Legumes - October 17, 2026
- 5 Seed Bread Recipe: Nutty Crunch and Artisan Flavor in One Loaf - October 17, 2026
- 1 Lb Macaroni Salad Recipe: Bold, Crunchy, and Crowd-Pleasing - October 17, 2026