
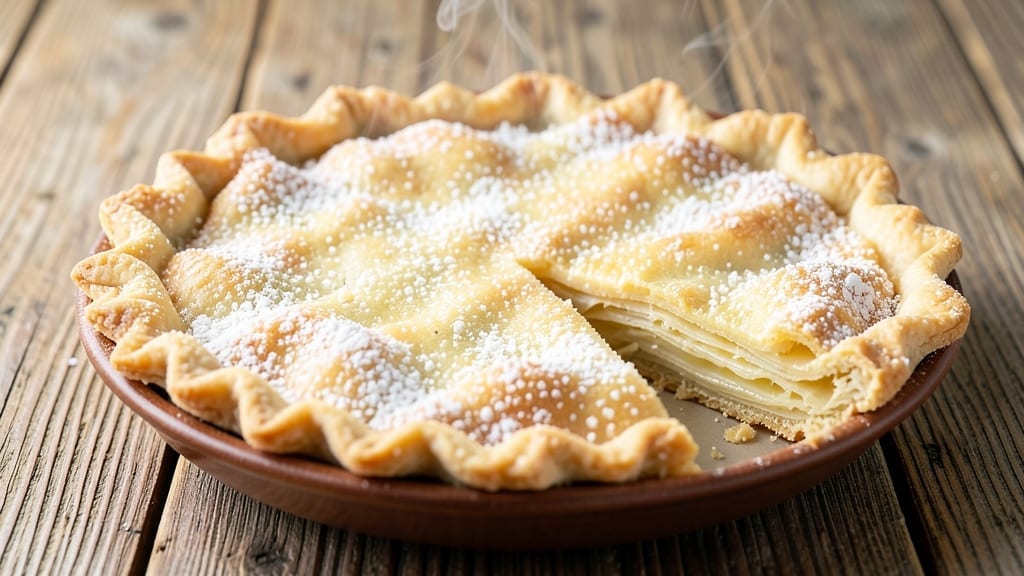
This 1 9-inch pie crust recipe nails the perfect balance of flour, fat, and technique—no shortcuts here. This classic recipe delivers layers so flaky they’ll make you question why you ever bought store-bought.
The secret lies in cold butter and minimal handling, ensuring every bite reveals that signature crispness and melt-in-your-mouth texture.
Using all-purpose flour and unsalted butter, we’ll create a dough that’s sturdy enough to hold fillings without shrinking or cracking. The key steps—cutting butter into pea-sized pieces, mixing just until combined, and chilling the dough—prevent gluten development, which keeps the crust tender.
For a 9-inch pie, we’ll roll it out to 1/8-inch thickness, ensuring even baking and a golden-brown finish.
This crust handles both sweet and savory fillings with ease, whether you’re baking a classic apple pie or a rich chocolate cream pie. The dough’s cold start prevents overworking, and the blind-baking method (if needed) guarantees a sturdy base for custards or fruit fillings.
With practice, you’ll achieve that restaurant-quality flakiness every time.
Ready to master the art of pie crust? Let’s break down the steps—from mixing to rolling and baking—so you can confidently create a crust that’s the star of your dessert. No more soggy bottoms or dense layers here.
Ingredients for 1 9 inch pie crust
Five ingredients, zero shortcuts. This is your flaky pie crust foundation—no substitutes, just pure technique.
| Ingredient | Amount | Notes |
|---|---|---|
| All-Purpose Flour 🌾 | 2 ½ cups | Sifted for even texture |
| Unsalted Butter 🧈 | 1 cup | Cold, cubed into pea-sized pieces |
| Ice Water 💧 | ¼ cup | Chilled for proper hydration |
| Diamond Crystal Kosher Salt 🧂 | ½ tsp | Fine grain preferred |
| Granulated Sugar 🍚 | 1 tbsp | For subtle sweetness |
The butter makes or breaks this crust. European-style butter (like Plugrá or Land O’Lakes European) has higher fat content—20% more—which translates to flakier layers. Grab it from the dairy case, not the baking aisle. The flour? King Arthur or Gold Medal are my go-tos—they’re consistent and reliable. Never use self-rising or bread flour; all-purpose is key here. Keep everything cold—your butter, your water, even your mixing bowl. If your kitchen’s warm, chill the bowl in the freezer for 10 minutes before starting.
No ice water? Cold tap water works in a pinch, but ice keeps the dough from warming up too fast. Running short on butter? Lard or shortening can substitute, but the flavor won’t be the same—this isn’t a shortcut crust. Salt is non-negotiable; Diamond Crystal measures differently than Morton, so if your recipe calls for ½ tsp with Morton, use ⅓ tsp with Diamond Crystal. The sugar? It’s not just for sweetness—it helps with browning. Skip it if you’re making a savory crust, but for sweet pies, it’s worth the tablespoon.
This dough needs at least 2 hours in the fridge—don’t rush it. Wrap it tightly in plastic wrap, then foil to prevent drying. For longer storage, freeze the dough ball for up to 3 months. Let it thaw in the fridge overnight before rolling. When rolling, keep the dough between two sheets of parchment paper—no flour on the rolling pin, just a light dusting on the dough itself. The goal is 1/8-inch thickness, but don’t stress if it’s slightly uneven; the oven will even it out.
Why You’ll Love This Recipe
- Cold Butter Magic: I swear by this method—cutting cold butter into flour until it’s pea-sized, then just barely adding ice water. No overworking, no stress, and that flaky, melt-in-your-mouth texture? It’s the kind of crust that makes you pause mid-bite.
- Pantry Staple Power: Five ingredients, all of which I already have. The butter’s richness, the flour’s structure, and that pinch of salt? It’s like a blank canvas—simple, but somehow always impressive when it comes together.
- Double-Duty Crust: I use this for pies, of course, but also as a quick quiche base or even a crispy tart shell. Freeze extras for later, and suddenly you’ve got a backup for last-minute desserts or savory surprises.
- Budget-Friendly Blanket: A single crust costs me pennies, and it stretches across meals. Leftover dough? Roll it out for hand pies or freeze it for future baking days. No waste, just pure versatility—and my wallet thanks me.
Step-by-step instructions for a perfectly flaky 9-Inch pie crust
Here’s how to build that legendary flakiness from scratch—no shortcuts, just science and technique.
Cut and Chill the Butter
Take the 1 cup unsalted butter and cut it into pea-sized pieces (about ½-inch cubes). Place them on a plate and refrigerate for 30 minutes while you prepare the flour. This cold temperature is non-negotiable—it creates the tiny pockets of steam that give you those signature flaky layers.
I like to use a sharp chef’s knife for this because it gives clean cuts. If your butter is too soft, pop it in the freezer for 10 minutes first. You want it firm enough to hold its shape when you handle it later. The goal is to keep these butter cubes cold and dry—any moisture will prevent proper layering.
Mix Dry Ingredients and Cut in the Butter
In a large bowl, whisk together the 2.5 cups all-purpose flour, 0.5 tsp diamond crystal kosher salt, and 1 tbsp granulated sugar. This dry mix should be uniform—no flour clumps. I use a whisk for this step because it aerates the flour slightly, which helps create more surface area for the butter to coat.
Add the chilled butter cubes to the flour mixture. Using your fingers (or a pastry cutter), work the butter into the flour until you have pea-sized crumbs with some larger butter pieces remaining. This is called the “cut-in” method, and it’s what creates those delicate layers. Press the mixture down gently—you should feel resistance from the cold butter. If it starts to clump into a dough, your butter wasn’t cold enough. Return it to the fridge for 10 minutes and try again.
Add Ice Water Gradually
Pour the 0.25 cup ice water into a small measuring cup. The water needs to be ice cold—this prevents the butter from melting too quickly. Sprinkle the water 1 tablespoon at a time over the flour-butter mixture, gently tossing with a fork after each addition. You want just enough moisture to bring the dough together when pressed, but not so much that it becomes sticky.
Here’s the thing—this dough should feel slightly crumbly when you press it. If it sticks to your fingers, you’ve added too much water. If it’s too dry, sprinkle in 1 teaspoon more ice water. The dough should hold together when pressed firmly but still feel cool to the touch. This is the sweet spot for flakiness. Don’t overwork it—just enough to form a shaggy mass.
Form and Chill the Dough
Turn the dough out onto a lightly floured surface and gently shape it into a disk about 1-inch thick. Wrap it tightly in plastic wrap and refrigerate for at least 1 hour (I prefer 2 hours for best results). This resting period allows the gluten to relax and the butter to firm up again, which prevents shrinking when you roll it out later.
I like to press the dough down firmly as I wrap it—this helps maintain its shape and makes rolling easier. The dough should feel cool and firm when you take it out. If it’s too soft, return it to the fridge for another 20 minutes. The longer it chills, the better the texture will be. Pro tip: If you’re in a hurry, you can chill the dough for 30 minutes in the freezer, but don’t skip this step entirely—it’s what gives you that professional bakery texture.
Roll and Transfer to the Pie Dish
On a lightly floured surface, roll the chilled dough into a 12-inch circle (about ⅛-inch thick). I use a rolling pin and keep rotating the dough to ensure even thickness. If it starts to stick, dust with more flour, but don’t go overboard—too much flour makes the crust tough.
Gently transfer the rolled dough to your 9-inch pie dish, letting it drape over the edges slightly. Here’s where precision matters: Press the dough gently into the bottom and up the sides, using your fingers to shape it. Don’t press too hard—this will make the crust dense. For a classic double-crust pie, roll out a second circle and fold the edges together after filling. For a single crust, trim any excess dough hanging over the edge. The crust is now ready for your filling—just don’t forget to prick the bottom with a fork in a few places to prevent puffing.
Pro Tips For Making 1 9 Inch Pie Crust
- CHILL THE BUTTER FIRST: Take your unsalted butter straight from the fridge—don’t let it sit out even for a minute. Cold butter creates flaky layers, and once it softens, you’re fighting an uphill battle. I used to skip this, and my crusts always came out dense and greasy.
- WEIGH THE FLOUR: Scoop that flour into your measuring cup, then level it with a knife—don’t pack it down. A packed cup adds extra flour, which dries out the crust faster than you’d think. I learned this the hard way when my first pie crust turned into a tough, brittle mess.
- WORK FAST WITH ICE WATER: Keep your ice water in a separate bowl with a spoon, and add it 1 tablespoon at a time. Dumping too much at once makes the dough sticky and hard to handle. My grandmother swore by this, and she was right—it’s the thing that matters most for a smooth roll-out.
- REST THE DOUGH TWICE: Wrap the dough and let it rest for 30 minutes before rolling, then another 15 minutes after shaping. This isn’t just about convenience—it relaxes the gluten so the crust doesn’t shrink like crazy in the oven. I skip this when I’m lazy, but the dish is noticeably better when I don’t.
Wine and beer pairings for these flavors
Sweet Wine Pairings
For sweet pies like apple or berry, a Moscato d’Asti from Italy is my go-to—its light effervescence and floral notes complement the fruit beautifully. The slight sweetness mirrors the pie’s natural sugars without overpowering.
Another fantastic choice is Riesling from Germany, especially a Kabinett-level wine with its bright acidity and hints of peach. 🍷
Rich Dessert Reds
When your pie has a custard or chocolate filling, opt for a Pinot Noir from Oregon or Burgundy. Its earthy, red fruit flavors and velvety texture stand up to the richness without tasting heavy.
A Zinfandel from California also works well—its jammy notes pair perfectly with spiced pies like pumpkin or pecan. 🍇
Beer Pairings
A crisp Belgian Witbier like Hoegaarden adds a refreshing contrast with its citrus and coriander notes. The effervescence cuts through the richness of a buttery crust, making each bite feel lighter.
For a malty option, try a brown ale—its caramel and toasted flavors complement the caramelized crust of a baked pie. 🍺
Coffee or Tea?
If you prefer non-alcoholic pairings, a strong espresso enhances the flavors of chocolate or coffee pies, while herbal tea like chamomile or lavender complements fruit pies. For a dessert wine alternative, try a Port—its sweetness and depth make it a perfect match for nut-based fillings. ☕
Seasonal Adjustments
In summer, lighter wines like Sauvignon Blanc work best with berry pies, while Cabernet Sauvignon pairs well with hearty fall pies like pecan or sweet potato. For winter, a Port or Madeira adds warmth and depth to spiced desserts. Adjust based on the pie’s filling and your personal taste. 🍂
Nutrition facts
Frequently asked questions
Why does my pie crust keep shrinking when baking?
The most common cause is overworking the dough or not chilling it long enough. When you handle the dough too much, gluten develops and tightens the structure, causing it to contract. Always chill the dough for at least 1 hour (preferably 2 hours) before rolling, and avoid pressing it too hard when shaping it into the pie dish. Keep everything cold—your butter, your water, and even your rolling surface.
Can I make this crust ahead of time?
This dough freezes beautifully for up to 3 months. Wrap the chilled dough ball tightly in plastic wrap, then foil, and store in your freezer. When ready to use, thaw it overnight in the fridge. For extra insurance, freeze it on a tray first to prevent sticking, then transfer to a bag. The texture remains perfect after freezing—just let it sit at room temperature for 10 minutes before rolling.
What’s the difference between a single and double crust?
A single crust uses one layer of dough (like for a fruit pie) while a double crust has dough on top and bottom (classic for pumpkin or pecan pies). For a double crust, roll out a second identical circle of dough. After adding your filling, place the top crust over it, trim the edges, and crimp with a fork or your fingers. For a lattice top, cut strips from the second dough circle and weave them over the pie.
Do I need to blind-bake my crust?
Blind-baking is essential for custard fillings (like pumpkin or cream pies) or wet fruit fillings (like blueberries) to prevent a soggy bottom. Preheat your oven to 375°F, line the crust with parchment paper, fill it with pie weights or dried beans, and bake for 15 minutes. Remove the weights and bake 5-10 minutes more until golden. For fruit pies with thick fillings, you can often skip blind-baking if your filling is cooked down enough to set properly.
Can I substitute butter with shortening?
While possible, shortening won’t give you the same rich flavor or flakiness. If you must substitute, use 1 cup vegetable shortening instead of butter, but reduce the ice water by 1 tablespoon since shortening is already moist. The crust will be more tender and less flavorful, but it will still hold together. For the best results, stick with cold butter—it’s what creates those signature flaky layers through steam pockets during baking.

- Pea Soup Instant Pot Recipe: Velvety Green Smoothness in 20 Minutes - November 1, 2026
- Pork Loin Pulled Pork Crock Pot Recipe: Slow-Smoked Tenderness With Zero Dryness - November 1, 2026
- Baked Potatoes in Crock Pot Recipe: Buttery Interiors and Crispy Top Magic - November 1, 2026