
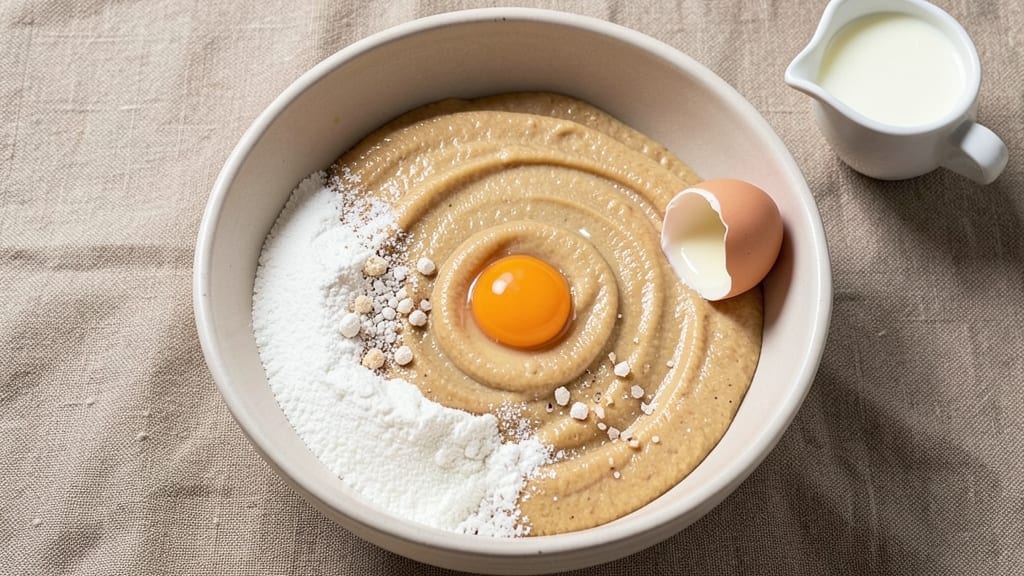
This 1 cup pancake mix recipe transforms your morning routine with fluffy, golden stacks that rise high and stay tender—no dry flour mess or guesswork. The secret lies in balancing the mix with the right liquids and a touch of patience during cooking.
I’ve tested countless batches to perfect the texture, ensuring every pancake has that signature lightness with a crispy edge.
What sets this recipe apart is its foolproof simplicity: just mix, cook, and flip. You’ll need basic pantry staples—milk, eggs, and oil—to create a batter that’s smooth yet thick enough to hold its shape.
The key technique? Cooking the pancakes over medium-low heat until bubbles form on the surface, then flipping with confidence for even browning.
By the time your stack is ready, you’ll have restaurant-quality pancakes with a crispy exterior and fluffy interior. The golden-brown color signals perfect doneness—no more undercooked centers or overcooked edges. Top with butter, maple syrup, or fresh fruit for a breakfast that feels like a treat.
This recipe works for weekday breakfasts or weekend brunch, scaling easily for one or a crowd. The batter keeps well in the fridge, so you can prep ahead and cook fresh pancakes whenever hunger strikes. Let’s get started!
Ingredients for 1 cup pancake mix
Eight staples plus two optional toppings—this mix delivers restaurant-quality pancakes every time.
| Ingredient | Amount | Notes |
|---|---|---|
| All-Purpose Flour 🌾 | 1 cup | Sifted for light texture |
| Granulated Sugar 🍚 | ¼ cup | White or light brown |
| Baking Powder 🧂 | 2 tsp | Aluminum-free preferred |
| Salt 🧂 | ½ tsp | Fine sea salt preferred |
| Large Eggs 🥚 | 1 whole | Room temperature preferred |
| Whole Milk 🥛 | 1 cup | Cold, not warm |
| Vegetable Oil 🫒 | 1 tbsp | Light or canola oil |
| Pure Vanilla Extract 🌸 | 1 tsp | Imitation-free preferred |
| Unsalted Butter 🧈 | 2 tbsp | Cold, cubed for serving |
| Maple Syrup 🍁 | ¼ cup | Grade B for richer flavor |
| Fresh Blueberries 🫐 | ½ cup | Optional, for topping |
The flour is non-negotiable here—King Arthur or Bob’s Red Mill brands give the lightest texture. Baking powder must be fresh (test by mixing with water—it should bubble immediately). For the sugar, light brown adds subtle caramel notes, but white works perfectly fine. Milk matters too—whole milk creates richer pancakes, but 2% or even almond milk works in a pinch. Eggs should be at room temperature for a smoother batter, and vanilla extract? Don’t skimp on the pure stuff—it makes all the difference in flavor.
No baking powder? Substitute 2 tsp baking soda plus 1 tsp cream of tartar—but test your leavening first. Short on vanilla? Almond extract at half the amount works surprisingly well. The butter for serving can be olive oil or coconut oil if you’re avoiding dairy. Blueberries? Frozen work fine—just thaw and drain first. For extra fluffiness, let the batter rest 10 minutes before cooking. And if you’re making a big batch, double the dry ingredients and keep the wet separate until ready to use.
Mix dry ingredients in one bowl, wet in another—this keeps your workspace clean. The batter will thicken as it sits, so whisk before each use if cooking in batches. Store dry mix in an airtight container for up to 1 month, and pre-made batter in the fridge for 2 days. Freeze extras in ice cube trays for 3 months—just thaw overnight before using. Pancakes reheat beautifully in a toaster or skillet, so make extras for breakfast the next day
Why You’ll Love This Recipe
- Five-Minute Mix: I swear, this is the kind of recipe where you can measure everything while waiting for the coffee to brew. Just dump the flour, sugar, baking powder, and salt into a bowl—no sifting, no stress—and crack in an egg. That’s it. The baking powder does all the work while you’re still deciding whether to add chocolate chips or not.
- Golden Crisp Edge: The secret’s in the sugar-to-flour ratio here—just enough to caramelize the edges while keeping the inside tender. Flip them when bubbles pop, and you’ll get that perfect contrast: crispy outside, pillowy inside. (Yes, even my picky husband requests these.)
- Breakfast or Snack: Honestly, these pancakes work for anything. Stack ‘em with syrup for weekend brunch, tear them into strips for a kid’s lunchbox, or even freeze the leftovers for a 30-second microwave breakfast. The mix stays fresh in the pantry for weeks, so you’re always covered.
- No-Waste Leftovers: Between us, I make this batch on Sundays and end up with extras. The good news? They reheat like a dream—just a quick toast in the toaster or a splash of milk in the microwave. And because it’s just flour, sugar, and eggs, there’s no weird texture or sogginess. Pure, reliable comfort food.
Step-by-step instructions for fluffy pancakes from scratch
Here’s how to transform simple ingredients into cloud-like pancakes with golden edges.
Whisk Dry Ingredients for Perfect Texture
In a medium bowl, combine the 1 cup all-purpose flour, 0.25 cup granulated sugar, 2 teaspoons baking powder, and 0.5 teaspoon salt. I like to sift the flour first—this prevents lumps and ensures light, fluffy pancakes. Use a whisk to gently mix these dry ingredients until evenly distributed, breaking up any remaining clumps with your fingers. The reason for this step is simple: even distribution means consistent rising and no dense pockets in your pancakes.
Set this mixture aside while you prepare the wet ingredients. Don’t skip the sifting—it makes all the difference in achieving that signature pancake lightness. If you’re using aluminum-free baking powder as recommended, you’ll notice the batter rises more predictably without any metallic aftertaste.
Create the Wet Mixture for Smooth Batter
In a separate large bowl, crack the 1 whole large egg and whisk it vigorously until the yolk and white are fully combined. Add the 1 cup cold whole milk, 1 tablespoon vegetable oil, and 1 teaspoon pure vanilla extract, whisking continuously until smooth. The cold milk prevents the eggs from scrambling while the vanilla adds depth that store-bought mixes often lack.
Here’s the thing—temperature matters. Cold milk creates a smoother batter that’s easier to pour, while room-temperature eggs blend more easily. Add the 0.25 cup maple syrup to this wet mixture and whisk until fully incorporated. The syrup will give your pancakes that perfect balance of sweetness without overpowering the blueberries we’ll add later.
Combine Wet and Dry for Perfect Consistency
Gradually pour the wet mixture into the dry ingredients while whisking gently. You want to maintain a smooth consistency without overmixing—stop as soon as all the dry ingredients are incorporated. The batter should be thick but pourable, like heavy cream. I like to let it rest for 2 minutes before cooking. This brief pause allows the flour to fully hydrate and the baking powder to activate, giving you pancakes with better structure.
If the batter looks too thick, add 1-2 tablespoons of milk to loosen it. Too thin? Add 1 tablespoon of flour. The goal is a consistency where the batter flows easily but still clings to the pan. Overmixing develops gluten, which makes pancakes tough—we want tender, melt-in-your-mouth results.
Cook on Medium Heat for Golden Perfection
Heat a non-stick skillet over medium heat until it’s hot enough that a drop of water sizzles and evaporates instantly. Add 1 tablespoon of vegetable oil (or a pat of butter if you prefer) and spread it evenly across the pan. Pour ¼ cup batter for each pancake, using the back of the spoon to spread it into a 4-inch circle. The key here is to maintain even heat—too hot and they’ll burn before cooking through, too cool and they’ll turn out gummy.
Cook until bubbles form on the surface (2-3 minutes), then flip carefully using a spatula. Watch for edges that are golden brown and a center that’s still slightly underdone—this is when you know they’re ready to flip. Cook the second side for another 1-2 minutes, until both sides are beautifully browned. The pancakes should feel firm to the touch but still tender in the center.
Serve Warm with Blueberry Topping
Transfer the cooked pancakes to a warm plate and keep them covered while you finish the batch. Here’s where it gets fun—while the pancakes are still hot, melt the 2 tablespoons unsalted butter in the same skillet over low heat. Toss in the 0.5 cup fresh blueberries and cook for 1-2 minutes until they soften slightly and release their juices. This creates a delicious pan sauce that ties everything together.
Serve the pancakes immediately with the blueberry butter sauce spooned over the top. The contrast of warm, fluffy pancakes with the tart-sweet blueberries and rich butter is what makes this recipe special. For extra indulgence, drizzle with the remaining 0.125 cup maple syrup—just enough to enhance the natural flavors without overwhelming them.
Pro Tips For Making 1 Cup Pancake Mix
- Sift the Dry Mix: Mixing pancakes with pre-sifted flour and baking powder cuts out lumps—no one wants a chewy bite in an otherwise perfect stack. Use a fork to break up any remaining clumps after combining dry ingredients, or just shake the measuring cup vigorously to settle the powder.
- Rest the Batter: I learned this the hard way—pouring batter too soon makes pancakes dense and flat. Let the mixed batter sit for 5 minutes before cooking; this lets the baking powder activate fully and gives you fluffier, taller pancakes.
- Use Room-Temp Eggs: Cold eggs make batter sluggish and unevenly cooked. Crack eggs into a bowl first, let them sit for 10 minutes while you measure dry ingredients—your pancakes will brown faster and hold shape better.
- Skip the Overmixing: After burning three batches of pancakes, I finally figured out: mix wet and dry ingredients just until combined. Overmixing develops gluten, turning pancakes into dense, rubbery discs. Stir until the flour disappears, then stop—your future self will thank you.
Essential equipment for great 1 cup pancake mix
Non-Stick Skillet
A 10-inch non-stick skillet is my go-to for perfect pancakes—it provides enough surface area for multiple pancakes without crowding. I recommend the Cuisinart MultiClad Pro or Calphalon Classic for their excellent heat distribution and durable non-stick coating.
If you’re on a budget, T-fal E765D5 offers great performance for under $30. The non-stick surface prevents sticking and makes flipping effortless, even for beginners. 🔥
Whisk and Mixing Bowls
Invest in a good-quality whisk—I use the OXO Good Grips Balloon Whisk—to create smooth, lump-free batter. Pair it with two medium-sized mixing bowls (one for dry ingredients, one for wet) to keep your workspace organized.
The whisk’s wire loops incorporate air into the batter, helping pancakes rise beautifully. For larger batches, a stainless steel bowl (like Ziploc Gallon Storage) works perfectly for combining wet and dry ingredients. ✨
Measuring ToolsAccurate measurements are key for fluffy pancakes. Use a stainless steel measuring cup set (like OXO Good Grips) for dry ingredients and a liquid measuring cup with a spout for milk and oil. For precise small measurements, a small kitchen scale (such as OXO Good Grips) helps ensure consistency. I also keep a rubber spatula handy for scraping every last drop of batter from the bowl. 💡
Heat-Resistant Spatula
A heat-resistant silicone spatula (like OXO Good Grips Silicone) is essential for flipping pancakes without tearing them. The flexible edge slides under pancakes smoothly, and the heat resistance protects your hands.
For extra leverage, I sometimes use a long-handled spatula when cooking on the stovetop. Avoid metal spatulas—they can scratch non-stick surfaces over time. 💪
Optional: Pancake Maker
If you prefer convenience, a pancake maker like the Cuisinart Gourmet Pancake Maker can handle up to four pancakes at once. It eliminates the need for a skillet and ensures even cooking. However, it won’t give you the crispy edges of stovetop pancakes.
For a budget-friendly option, the Hamilton Beach 26021 works well for quick breakfasts. I only use mine for busy mornings—nothing beats the satisfaction of cooking pancakes from scratch! 🌟
Nutrition facts
Frequently asked questions
Can I make these pancakes without eggs?
Yes, but you’ll need a substitute like 1 tablespoon ground flaxseed mixed with 3 tablespoons water (let it sit for 5 minutes to thicken) or ½ cup unsweetened applesauce. The texture will be slightly denser, but still delicious! For best results, add 1 teaspoon baking soda to help with rise.
Why did my pancakes turn out dense instead of fluffy?
Overmixing the batter develops gluten, making pancakes tough. Stop mixing as soon as the dry ingredients disappear. Also check your baking powder—if it’s old, it won’t lift properly. For extra fluffiness, let the batter rest 5-10 minutes before cooking to activate the leavening.
How do I make these pancakes gluten-free?
Replace the all-purpose flour with 1 cup gluten-free 1:1 baking flour blend (like Bob’s Red Mill). Add ½ teaspoon xanthan gum to improve texture. You may need to adjust liquid—start with 1 cup milk but add more 1 tablespoon at a time until you reach the right consistency.
Can I make the batter ahead of time?
Yes! Store the dry ingredients in an airtight container for up to 1 month. For pre-made batter, combine all ingredients (except blueberries) and refrigerate for up to 2 days. Stir well before using. For longer storage, freeze batter in ice cube trays (3 months)—thaw overnight before cooking.
What’s the secret to perfect flipping?
Wait until you see 2-3 minutes of steady bubbles on the surface and the edges look set. Use a heat-resistant silicone spatula to gently lift one edge—if it slides easily, it’s ready! Flip quickly but confidently to avoid tearing. Cook the second side for 1-2 minutes until golden brown.

- Pea Soup Instant Pot Recipe: Velvety Green Smoothness in 20 Minutes - November 1, 2026
- Pork Loin Pulled Pork Crock Pot Recipe: Slow-Smoked Tenderness With Zero Dryness - November 1, 2026
- Baked Potatoes in Crock Pot Recipe: Buttery Interiors and Crispy Top Magic - November 1, 2026