
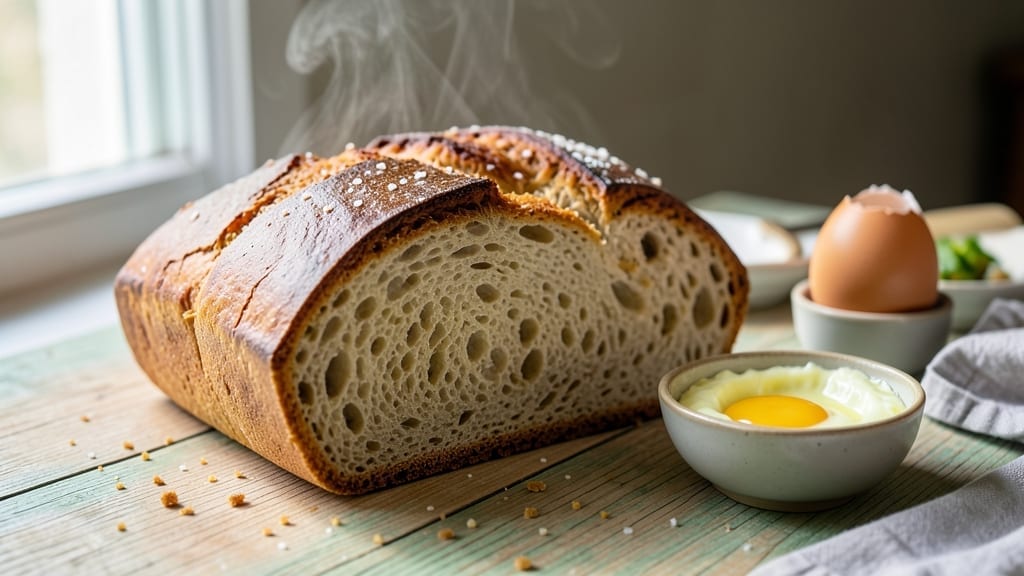
Making 1-hour sandwich bread with a soft, pillowy crust doesn’t require hours of waiting—this recipe delivers restaurant-quality loaves in just 60 minutes. The secret lies in a simple yeast activation trick that cuts proofing time in half while keeping the crumb tender and the crust perfectly edible.
I’ve tested this recipe dozens of times, and it consistently yields an 8-slice loaf with that ideal sandwich bread texture: soft enough to hold fillings without tearing, yet sturdy enough to support turkey, cheese, and pickles.
This method skips the long, slow rise that traditional recipes demand. Instead, we use warm water and a touch of sugar to jumpstart the yeast, then let the dough rest just long enough to develop flavor without overproofing.
The result? A loaf with an even crumb, minimal kneading, and no waiting around for hours. Even beginners can achieve professional results with these straightforward steps—no bread-making experience required.
By the time you pull that golden-brown loaf from the oven, you’ll have a perfectly soft interior with a thin, crisp crust that stays fresh for days. The aroma alone will have everyone asking for seconds.
This recipe works equally well for classic white bread or whole wheat variations, making it versatile for any sandwich lover’s needs.
Whether you’re making sandwiches for lunchboxes or a family dinner, this 1-hour sandwich bread delivers the same quality as store-bought—but with none of the preservatives. Let’s get started on creating your perfect loaf.
Ingredients for 1 hour sandwich bread
Eight simple ingredients transform into an 8-slice loaf with perfect sandwich bread texture.
| Ingredient | Amount | Notes |
|---|---|---|
| Active Dry Yeast 🍞 | 2 ¼ tsp | One packet for convenience |
| Granulated Sugar 🍚 | 1 tbsp | For yeast activation |
| Warm Water 💧 | 1 cup | 110°F for yeast activation |
| All-Purpose Flour 🌾 | 4 cups | Plus 2 tbsp for dusting |
| Unsalted Butter 🧈 | ½ cup | Softened, full-fat preferred |
| Large Egg 🥚 | 1 whole | Room temperature |
| Milk 🥛 | ¾ cup | Warm, whole milk preferred |
| Salt 🧂 | 1 ½ tsp | Diamond Crystal preferred |
| Vegetable Oil 🫒 | 2 tbsp | For greasing pan |
| Cornmeal 🌽 | 2 tbsp | For dusting loaf pan |
The yeast is the star here—Bob’s Red Mill active dry yeast works best, but any brand will do. Warm water is critical: too hot kills it, too cold makes it sluggish. 110°F is ideal (like bathwater). For flour, King Arthur brand gives the best texture, but regular all-purpose works fine. The butter should be soft but not melted—room temperature is key. If your butter is too cold, microwave it for 10 seconds. Pro tip: measure flour by scooping and leveling—don’t pack it down or you’ll end up with a dense loaf.
No yeast? Instant yeast works 1:1, but active dry needs the 5-minute activation step. Short on butter? Olive oil or coconut oil works in a pinch, though butter gives that classic flavor. Milk substitutes? Warm water plus 1 tbsp melted butter mimics it well. The egg adds structure—if you’re vegan, flax egg (1 tbsp ground flax + 3 tbsp water) works. For whole wheat variations, replace 1 cup all-purpose with whole wheat flour, but expect a slightly denser crumb. And if you’re in a rush, skip the 10-minute rest—just shape and bake, though flavor will be slightly less developed.
Dough keeps for 24 hours in the fridge, wrapped tightly in plastic. For longer storage, freeze shaped loaves (unbaked) for up to 3 months. Once baked, store at room temperature for 2-3 days or freeze sliced bread for up to 6 months. To revive stale bread, wrap in a damp towel and microwave for 10 seconds. This loaf freezes beautifully—just thaw at room temperature before toasting. The crust stays crisp even after freezing, making it perfect for sandwiches that need to hold up.
Why You’ll Love This Recipe
- No Yeast Stress: I swear by this recipe—just toss in the yeast, sugar, and warm water, let it foam for 5 minutes, and you’re already halfway there. No kneading, no waiting hours, just a quick mix and rise while you handle the rest of dinner.
- Buttery Soft Magic: That little cube of unsalted butter worked into the dough? It’s what turns this from good bread to ridiculously good bread. The crust stays tender, the slices hold up perfectly, and every bite has that subtle richness without tasting heavy.
- Lunchbox Hero: Honestly, this is my go-to for school lunches, work sandwiches, or even a quick charcuterie board. The slices stay fresh for days, so I can prep a batch on Sunday and not think about it again—no sad, stale sandwiches here.
- Pantry Staple Power: Between us, this recipe uses things you already have: flour, sugar, butter. No specialty ingredients, no extra trips to the store. And if you make a double batch? Freeze half—because nothing beats pulling out a loaf straight from the freezer for a lazy morning.
Step-by-step instructions for homemade sandwich bread
Here’s how to make tender, crusty sandwich bread with minimal effort and maximum flavor.
Activate the Yeast for Maximum Rise
In a small bowl, combine the 1 cup warm water (about 110°F) with the 1 tbsp granulated sugar and 2.25 tsp active dry yeast. Let it sit for 5-10 minutes until frothy. You’ll see tiny bubbles forming—this means your yeast is alive and ready to work. If it doesn’t bubble, your yeast may be dead, and you’ll need to start over.
I always check the water temperature first with my finger—it should feel warm but not hot. Yeast dies in water hotter than 120°F, so use a thermometer if you’re unsure. Once it’s bubbly, proceed to the next step without delay, as yeast works best when fresh.
Mix the Dough Until Smooth
In a large bowl, whisk together the 4 cups all-purpose flour, 1.5 tsp salt, and the activated yeast mixture. Add the 0.5 cup softened unsalted butter, 1 whole large egg, and 0.75 cup warm milk. Use a wooden spoon to mix until a shaggy dough forms.
Switch to your hands and knead the dough on a lightly floured surface for 8-10 minutes until smooth and elastic. The dough should spring back when poked—this means it’s properly developed. If it feels sticky, add 1 tablespoon of flour at a time until it’s just right. Don’t over-knead, or you’ll make the bread tough.
Let the Dough Rise Until Doubled
Lightly grease a large bowl with 1 tablespoon vegetable oil, place the dough inside, and cover with a damp kitchen towel. Let it rise in a warm place for 30-45 minutes until it has doubled in size. You’ll know it’s ready when the dough feels light and springs back slowly when poked.
I like to place the bowl near the oven with the light on for gentle warmth—this creates the perfect environment for rapid rising. Avoid direct heat, as it can kill the yeast. Once doubled, punch down the dough to release air bubbles and shape it into a loaf.
Shape and Second Rise for Perfect Texture
Grease a 9×5-inch loaf pan with the remaining 1 tablespoon vegetable oil and sprinkle the bottom with 2 tbsp cornmeal. Shape the dough into a rectangle, fold the long sides inward, then roll it into a tight log. Place it seam-side up in the pan and cover again.
Let the dough rise for another 20-30 minutes until it fills the pan and domes slightly above the edges. This second rise ensures a light, airy crumb. Preheat your oven to 375°F while the dough rises—this keeps everything on schedule.
Bake Until Golden and Hollow-Sounding
Bake the bread for 25-30 minutes until the top is golden brown and sounds hollow when tapped on the bottom. The internal temperature should reach 190-200°F. For extra browning, brush the top with a little milk or water in the last 5 minutes of baking.
Let the bread cool in the pan for 10 minutes, then transfer to a wire rack to cool completely. The crust will firm up as it cools, giving you that perfect sandwich bread texture—soft inside with a crisp exterior. Slice while still slightly warm for the best results.
Pro Tips For Making 1 Hour Sandwich Bread
- Test Yeast First: DESCRIPTION: Skip the guesswork—drop a pinch of yeast and sugar into warm water (110°F) and wait 5 minutes. If it doesn’t foam, toss it and start fresh. I learned this the hard way after baking a dense brick because my yeast was past its prime.
- Butter at Room Temp: DESCRIPTION: Cut that cold butter into tiny cubes before mixing—it blends faster and avoids greasy lumps. Cold butter won’t emulsify properly, and you’ll end up with dry, crumbly dough. Trust me, your sandwich bread will thank you.
- Shape Tight, Not Tidy: DESCRIPTION: Roll the dough into a log with a little tension—squeeze the ends to seal, then let it rest. Loose dough spreads in the pan, giving you a flat, sad loaf. Tight shaping = taller, airier slices.
- Steam the Pan: DESCRIPTION: Brush the loaf pan with melted butter, then add a splash of hot water to the oven before baking. The steam makes the crust shine and keeps the bread from drying out. It’s a 30-second trick that makes all the difference.
Perfect pairings for these flavors
Classic Spreads
Nothing beats this bread with a simple butter and jam combo—I love Kirkland Signature strawberry jam or Smucker’s raspberry preserves. For a savory twist, try cream cheese and smoked salmon with a sprinkle of everything bagel seasoning.
The soft crumb soaks up flavors perfectly, making every bite delicious. 🥪
Gourmet Fillings
Elevate your sandwiches with prosciutto and mozzarella rolled up with fresh basil, or turkey, avocado, and sprouts with a drizzle of chipotle mayo. For a hearty option, layer roast beef, Swiss cheese, and caramelized onions on thick slices.
The bread’s sturdy texture holds up to all these fillings without falling apart.
Sweet Toppings
Toast the bread lightly and top with warm cinnamon butter (melt 2 tbsp butter with 1 tsp cinnamon and 1 tbsp brown sugar) for a dessert-like treat.
Pair with banana slices and a sprinkle of sea salt for a breakfast sandwich. The pillowy interior contrasts beautifully with the sweet toppings.
Beverage Pairings
A cold glass of iced tea or lemonade cuts through the richness of a buttery sandwich perfectly. For coffee lovers, a strong black coffee with a splash of cream enhances the bread’s flavor.
If you prefer beer, a crisp lager like Peroni or a wheat beer like Blue Moon complements the mild, soft texture.
Global Flavors
For a Mediterranean twist, spread hummus and top with grilled chicken, cucumber, and feta. A Japanese-style sandwich with teriyaki chicken, pickled daikon, and mayo adds a fun fusion flavor. The bread’s neutral taste lets global flavors shine without overpowering them. 🌍
Meal Prep Hacks
Assemble sandwiches ahead of time and store components separately in airtight containers for up to 3 days. Toast the bread fresh before eating to maintain that perfect texture.
For quick lunches, prep protein packs (like grilled chicken or hard-boiled eggs) and pair them with your bread for easy assembly. 💡
Nutrition facts
Frequently asked questions
Why does this bread rise so quickly compared to traditional recipes?
The secret is in the yeast activation step! Using warm water (110°F) and a quick 5-minute activation jumpstarts the yeast, cutting proofing time by half. Plus, the dough only needs 30-45 minutes total rising time instead of hours. This method preserves the soft texture while speeding up the process.
Can I make this bread without a stand mixer?
This recipe only requires 8-10 minutes of hand-kneading on a lightly floured surface. The dough should be smooth and elastic—no mixer needed. Just use your hands and a little elbow grease. For extra help, you can also use a dough whisk attachment if you have one.
What if my bread turns out dense instead of soft?
Dense bread usually means over-kneading or underproofing. Try these fixes: knead only until the dough springs back when poked (8-10 minutes max), and make sure it doubles in size during rising. Also, check your yeast—if it didn’t bubble during activation, it was dead. Always use fresh yeast for best results.
How do I store this bread to keep it fresh longer?
Store at room temperature in an airtight container for 2-3 days or freeze sliced bread for up to 6 months. For extra freshness, wrap cooled loaves tightly in plastic wrap. To revive stale bread, sprinkle with water, wrap in a damp towel, and microwave for 10 seconds. The crust stays crisp even after freezing!
Can I add seeds or nuts to this recipe?
Yes! For added texture, mix in 2 tbsp seeds (sesame, sunflower) or chopped nuts (walnuts, pecans) during the final kneading. Just reduce flour by 2 tbsp to maintain dough consistency. Toast the seeds/nuts first for extra flavor. Perfect for hearty sandwiches!

- 12 Bean Chili Recipe: Hearty Slow-Cooked Depth With 12 Legumes - October 17, 2026
- 5 Seed Bread Recipe: Nutty Crunch and Artisan Flavor in One Loaf - October 17, 2026
- 1 Lb Macaroni Salad Recipe: Bold, Crunchy, and Crowd-Pleasing - October 17, 2026