
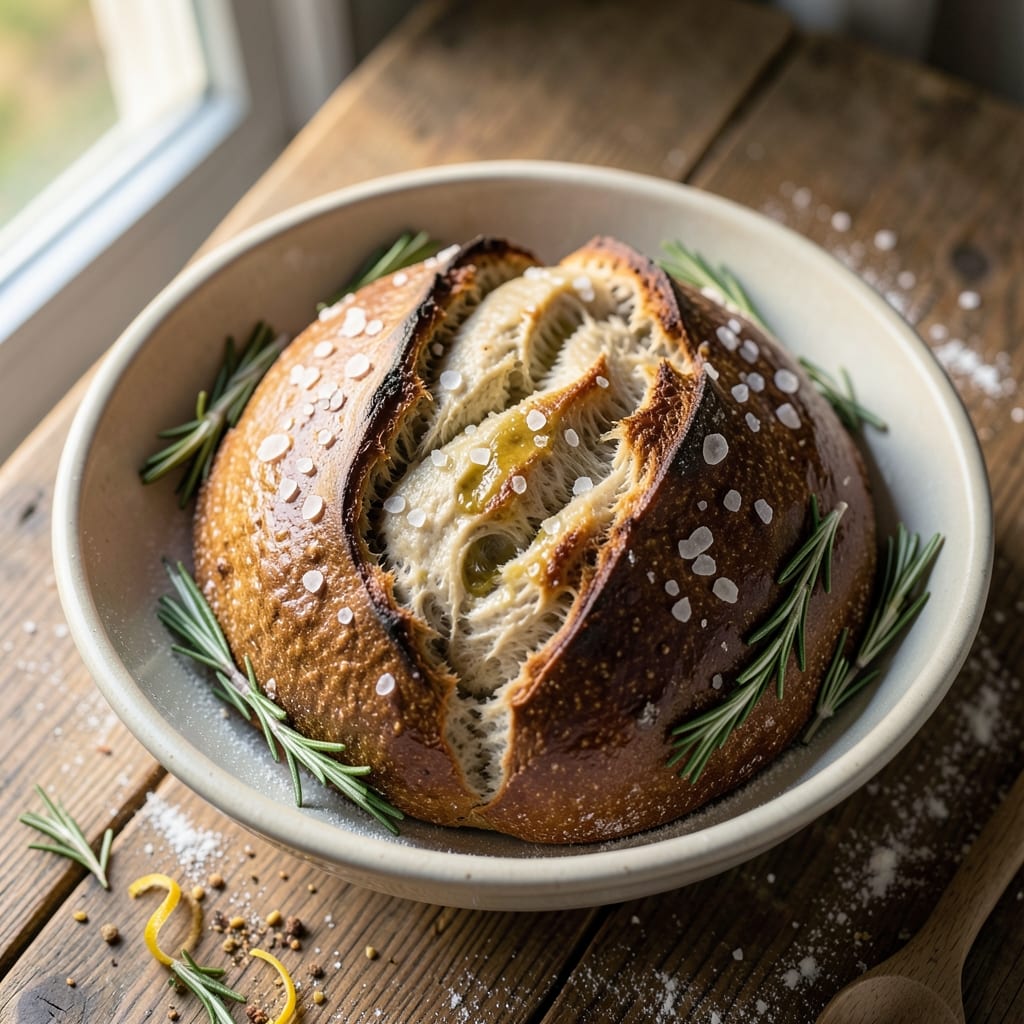
A 1 kg sourdough bread recipe delivers restaurant-quality crust and open crumb with minimal daily effort—no kneading, no fuss, just hands-off fermentation and a perfect bake. The tangy depth comes from a well-fed starter and precise hydration, while the structure relies on time and patience rather than brute force.
This method transforms simple flour and water into a loaf with a crisp, caramelized crust and an airy interior that holds up to days of storage.
The secret lies in the autolyse and bulk fermentation, which develop gluten gradually without overworking the dough. You’ll mix just 500g flour, 300g water, 10g salt, and 200g active starter, then let the dough rest for hours while the flour hydrates and gluten forms naturally.
This approach eliminates guesswork—no overproofing, no dense crumb—just reliable results every time.
By the final proof, your dough will be jiggly and domed, ready for shaping into a boule or batard. A sharp razor scores the surface just before baking, creating those signature ear-like openings while trapping steam for maximum oven spring.
The high-heat bake with steam produces that iconic crusty exterior and open crumb, while the slow cool prevents gummy texture.
This recipe scales perfectly for home bakers—no special equipment beyond a Dutch oven or baking stone. The hands-off method means you can prep dough in the morning and bake in the evening, with minimal active time.
Whether you’re feeding a family or perfecting your technique, this foolproof 1 kg sourdough delivers professional results without the complexity.
Ingredients for 1 kg sourdough bread
Simple flour, active starter, and precise hydration create this restaurant-quality sourdough with minimal effort.
| Ingredient | Amount | Notes |
|---|---|---|
| Unbleached Bread Flour 🌾 | 4.4 cups | High-protein, 12-14% for structure |
| Active Sourdough Starter 🍞 | 14.1 oz | 100% hydration, bubbly and active |
| Filtered Water 💧 | 1.6 cups | Room temperature, 70-75°F |
| Kosher Salt 🧂 | 0.35 oz | Diamond Crystal preferred |
| Olive Oil 🫒 | ½ tbsp | Extra-virgin for dough handling |
| Instant Vital Wheat Gluten 🌾 | 0.7 oz | Optional for extra chewiness |
| Ice Water ❄️ | ¼ cup | For final shaping and scoring |
The bread flour is non-negotiable—its high protein content (12-14%) develops the gluten structure essential for that open crumb. King Arthur or Caputo are trusted brands for consistent results. Your sourdough starter should be at peak activity (50-75% hydration), with visible bubbles and a tangy aroma. If it’s sluggish, feed it 1:1:1 (flour:water:starter) by weight 6-12 hours before using. The filtered water must be room temperature—cold water shocks the starter, while warm water overproofs the dough. For the salt, Diamond Crystal dissolves more cleanly than table salt, preventing flavor imbalances. Buy flour in 5 lb bags to maintain freshness and avoid oxidation from repackaging.
No bread flour? All-purpose flour plus 1 tbsp vital wheat gluten per cup works in a pinch, though texture will be slightly less open. Your starter weak? Add 1 tsp sugar or honey to the feed to boost activity. Short on time? Use a pre-fermented starter from a trusted source (like Breads Bakery) to skip the 5-7 day starter-building process. The olive oil isn’t for flavor—it coats your hands and dough, preventing sticking during shaping. For the gluten addition, Bob’s Red Mill instant vital wheat gluten is the most reliable brand. If you’re gluten-sensitive, omit it entirely—the dough will still rise, just with a slightly less chewy crumb.
Store unused flour in an airtight container in a cool, dark pantry for up to 3 months. Your active starter should be refrigerated between feeds, with a weekly 1:1:1 feed to maintain strength. The dough can be prepped 24 hours ahead—cover tightly and refrigerate until ready to shape. Once baked, cool the loaf on a wire rack for at least 2 hours to prevent gummy texture. Wrap in a clean kitchen towel and store at room temperature for 3-5 days, or freeze sliced bread for 3 months in a sealed bag. The crust hardens as it cools, so slice just before serving for maximum freshness.
Why You’ll Love This Recipe
- No-Knead Magic: I swear by this—just mix the unbleached flour, active starter, and water, let it rest overnight, and boom. No punishing kneading, no stress. The dough practically does the work while you sleep.
- Tangy Crust Perfection: That crispy, golden crust with a tangy bite? It’s all in the olive oil and kosher salt. The salt sharpens the flavor, while the oil keeps it moist—every slice tastes like a bakery secret.
- Weeknight Workhorse: This loaf is my go-to for sandwiches, toast, or even French toast. Bake one on Sunday, and you’ve got meals covered. (Yes, even when you’re too tired to think.)
- Budget-Friendly Staple: A 1 kg loaf feeds my family for days—leftovers become croutons, toast, or even breadcrumbs. Five ingredients, zero waste, and it’s cheaper than store-bought. My wallet thanks me every time.
Step-by-step instructions for artisan sourdough bread
Here’s the precise method for developing flavor and structure in your 1 kg loaf.
Autolyse the Dough for Optimal Development
In a large mixing bowl, combine the 4.41 cups unbleached bread flour and 1.6 cups filtered water at room temperature. Use your hands or a dough whisk to break up any dry patches until just combined—this initial hydration phase is called autolyse. The dough will look shaggy and wet at first.
Cover the bowl loosely with plastic wrap and let rest for 30 minutes. During this time, the flour begins absorbing water and developing gluten strands. You’ll notice the dough gradually transform from a rough mass into a smoother, more cohesive texture. This step ensures better gluten formation later, leading to a lighter crumb and improved oven spring.
Incorporate Starter, Salt, and Gluten
After the autolyse, add the 14.1 oz active sourdough starter and 0.35 oz kosher salt to the dough. Using a dough scraper, gently fold these ingredients into the center of the dough, then perform a series of stretch-and-folds. For each fold, wet your hands slightly, grab one side of the dough, stretch it upward, and fold it over itself. Rotate the bowl and repeat this process 4-5 times.
Next, sprinkle the 0.7 oz instant vital wheat gluten evenly over the dough surface. This optional ingredient enhances chewiness and structure. Cover the bowl again and let rest for 30 minutes. The gluten will begin developing more visibly during this time, creating a slightly tacky but elastic dough. If the dough feels too sticky, you can add up to 1 tablespoon of the reserved flour from your mixing bowl.
Bulk Fermentation with Controlled Development
After the 30-minute rest, perform another set of stretch-and-folds, this time rotating the bowl 90 degrees between each fold for even gluten development. Let the dough rest another 30 minutes, then repeat the stretch-and-folds once more. This three-stage bulk fermentation process typically takes 2-3 hours total, depending on your kitchen temperature.
During bulk fermentation, the dough should roughly double in size and develop visible bubbles along the surface. The ideal temperature for this stage is 75-78°F—if your kitchen is cooler, extend the fermentation time. You’ll know the dough is ready when it passes the “poke test”: gently press your finger into the dough. If it springs back slowly (not immediately) and leaves a slight indentation, it’s ready for shaping.
Shape and Final Proof
Turn the dough onto a lightly floured surface and gently shape it into a round boule. To do this, use your fingertips to create surface tension by pulling the dough toward you in a circular motion. As you work, rotate the dough clockwise to maintain even tension. The goal is to create a tight, smooth surface with no weak spots.
Place the shaped dough seam-side up in a lightly oiled proofing basket or bowl. Cover and refrigerate for 12-16 hours (overnight). This cold proof slows fermentation, allowing flavors to develop more deeply. In the morning, remove the dough from the fridge and let it come to room temperature for 1-2 hours before baking. The dough should have noticeably risen and developed a slightly domed shape with visible bubbles.
Score and Bake for Maximum Crust Development
Preheat your oven to 450°F with a Dutch oven inside for 45 minutes. While the oven heats, transfer the dough to a piece of parchment paper. Using a razor blade or sharp lame, score the dough with a ½-inch deep diagonal cut on the top. This prevents the dough from bursting open during baking and creates an attractive opening.
Carefully transfer the scored dough (with parchment) into the hot Dutch oven. Bake covered for 20 minutes, then remove the lid and bake uncovered for an additional 20-25 minutes until the crust reaches a deep golden brown color. The internal temperature should reach 205-210°F when measured at the center. The bread will have a hollow sound when tapped on the bottom.
Cool and Enjoy
Remove the bread from the Dutch oven and transfer it to a wire rack. Let it cool completely for at least 2 hours before slicing. This resting period allows the crumb to set properly and prevents a gummy texture. The bread should have a crisp crust with an open, airy crumb structure and a tangy, complex flavor from the well-developed sourdough starter.
Slice the bread with a serrated knife and serve with your favorite toppings. The first few slices should be reserved for immediate consumption—the fresh, warm bread has the best texture and most intense flavor. Store any leftovers wrapped in a bread bag at room temperature for up to 3 days or freeze for longer storage.
Pro Tips For Making 1 Kg Sourdough Bread
- STRETCH AND FOLD: Use a bench scraper to cut and fold the dough during bulk fermentation—it’s faster than your hands and gives you cleaner tension lines. I learned this the hard way after wrestling with sticky dough for years.
- WEIGH YOUR STARTER: Measure your active sourdough starter by weight, not volume. A 100g starter isn’t always 100g when scooped—scale it to avoid overproofing or underproofing your loaf.
- SALT THE WATER: Dissolve the kosher salt in the filtered water first—it prevents clumping and ensures even distribution in the dough. Skipping this step means you’ll end up with uneven flavor and potential salt pockets.
- COOL THE OVEN: Preheat your oven to 250°C (480°F) for 1 hour before baking, then drop the temperature to 230°C (450°F). This guarantees a proper oven spring and a crisp crust—no more sad, dense loaves from rushing the heat.
Pro cooking tips for great 1 kg sourdough bread
Autolyse Mastery
This 30-minute rest before mixing is where gluten development begins. I’ve found that skipping it leads to dense crumb and poor oven spring—don’t rush! The dough should look shaggy at first but gradually become smoother as gluten strands form.
If your kitchen is below 70°F, extend this to 45 minutes to compensate for slower hydration. 🌡️
Stretch-and-Fold Precision
Timing matters during bulk fermentation: perform stretch-and-folds every 30 minutes for 3 rounds. Each fold should create surface tension—wet your hands slightly to prevent sticking. I use a dough scraper to lift and fold edges, ensuring even gluten development.
Overfolding weakens structure; stop when the dough springs back slowly after a poke test. 💪
Cold Proof Secrets
Refrigerating dough overnight (12-16 hours) is non-negotiable for flavor depth. The cold slows fermentation, allowing enzymes to break down starches into sugars for that signature tang.
In the morning, let dough warm to room temp for 1-2 hours before baking—this final rise should show visible bubbles and a domed shape. Pro tip: Use a proofing basket lined with a floured towel for perfect tension. ✨
Scoring Like a Pro
A sharp razor blade or lame is essential for clean cuts. Score at a 45-degree angle with ½-inch depth—this directs oven spring and prevents random bursting. For a boule, make 3-4 diagonal cuts meeting at the center.
If your dough resists scoring, it’s underproofed; if it tears easily, it’s overproofed. Practice on scrap dough first! 🔪
Dutch Oven Hack
Preheat your Dutch oven with the dough inside for 45 minutes—this creates steam for maximum oven spring. I use a Lodge 5.5-quart with lid for even heat distribution.
After removing the lid, brush the crust with ice water (from your ¼ cup reserve) for extra shine. For a darker crust, bake uncovered 5 minutes longer. 🔥
Cooling Can’t Be Skipped
Resist slicing warm bread—cooling for 2+ hours on a wire rack prevents gummy texture. I place my loaf on a bamboo steamer rack to allow airflow. The crust will harden as it cools; slice just before serving. For storage, wrap in a clean kitchen towel to maintain moisture. 🌬️
Nutrition facts
Frequently asked questions
Can I substitute bread flour with all-purpose flour in this 1 kg sourdough?
Yes, but expect a slightly denser crumb. Replace bread flour with all-purpose flour and add 1 tablespoon vital wheat gluten per cup to mimic the protein structure. For best results, use King Arthur or Caputo brands—they’re formulated for optimal gluten development. The hydration ratio remains the same, but bulk fermentation may take 30 minutes longer since all-purpose flour develops gluten more slowly.
How do I know when my sourdough starter is ready for this recipe?
Your starter should be at peak activity: 50-75% hydration, bubbly, and pass the float test (drop a spoonful in water—it should float). Feed it 1:1:1 (flour:water:starter) by weight 6-12 hours before using. If sluggish, add 1 tsp sugar or honey to the feed to boost fermentation. For this recipe, use 200g of active starter—it should smell tangy and look domed with visible bubbles.
Why did my sourdough turn out dense instead of open and airy?
Dense bread usually means underdeveloped gluten or overproofing. Check these fixes: 1) Extend bulk fermentation by 30-60 minutes if your kitchen is cool (70°F or below). 2) Perform more stretch-and-folds (4-5 rounds total). 3) Verify your starter—weak starter = weak rise. 4) Don’t skip the autolyse—this critical 30-minute rest builds gluten foundation. For next time, use a digital thermometer to monitor dough temperature (75-78°F ideal).
Can I make this sourdough without a Dutch oven?
Use a baking stone or steel on the middle rack with a steam pan below. Place an ice cube tray or metal bowl with boiling water in the oven when loading the dough. For extra crust development, bake at 475°F for 5 minutes before reducing to 425°F. The steam mimics a Dutch oven’s effect, though results may be slightly less crisp. A commercial pizza peel helps transfer the dough safely.
How long can I refrigerate the dough before baking?
You can refrigerate the shaped dough for up to 24 hours before baking. The cold slows fermentation, allowing flavors to develop more deeply. When ready to bake, remove it from the fridge and let it come to room temperature for 1-2 hours—this final rise should show visible bubbles and a domed shape. For best results, don’t exceed 48 hours in the fridge, as overproofing becomes a risk. Store in an airtight container or wrapped tightly in plastic.

- Baked Potatoes in Crock Pot Recipe: Buttery Interiors and Crispy Top Magic - November 1, 2026
- Braised Beef Short Ribs Recipe: Crock Pot Fall-Off-Bone Magic in 6 Hours - November 1, 2026
- Crock Pot Cocoa Recipe: Velvety Warmth With Hidden Spice Magic - November 1, 2026