
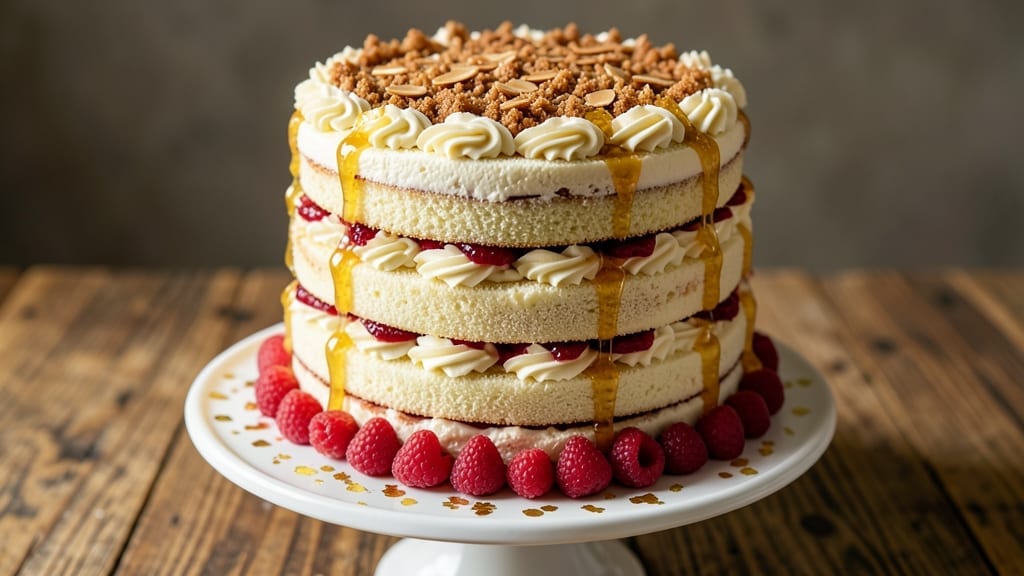
Creating a 10-layer cake that combines vanilla bean buttercream swirls with rich chocolate ganache is a showstopper for any celebration. 💛 The secret lies in precise layering and expert frosting techniques that transform this dessert into a masterpiece.
This recipe balances traditional elegance with modern flair, making it perfect for weddings, anniversaries, or special occasions.
Each layer begins with a tender vanilla sponge cake, baked to perfection and cooled completely before assembly. The buttercream, infused with real vanilla bean, is piped in elegant swirls between layers, while the chocolate ganache adds a luxurious contrast.
This method ensures every bite delivers a harmonious blend of sweetness and depth.
What sets this cake apart is the attention to detail—the crisp edges of the ganache, the smooth buttercream, and the even layers that make cutting and serving effortless.
The result is a cake that looks as stunning as it tastes, with each forkful revealing the perfect balance of textures and flavors.
Whether you’re a seasoned baker or tackling a new challenge, this recipe guides you through every step—from baking to decorating—with clear instructions and professional tips. The final product will leave guests in awe and your taste buds satisfied.
Ingredients for 10 cake
Gather these premium ingredients for a showstopping 10-layer cake with luxurious swirls and ganache.
| Ingredient | Amount | Notes |
|---|---|---|
| All-Purpose Flour 🌾 | 10 cups | Sifted for light texture, bleached preferred |
| Granulated Sugar 🍚 | 8 cups | Superfine preferred for smoothness |
| Unsalted Butter 🧈 | 4 cups | Cold, cubed, European-style preferred |
| Large Eggs 🥚 | 24 whole | Room temperature, separated |
| Vanilla Bean Paste 🌿 | 2 tbsp | High-quality, real vanilla bean |
| Baking Powder 🍞 | 1 tbsp | Fine grain, fresh |
| Salt 🧂 | ½ tsp | Fine sea salt |
| Heavy Cream 🥛 | 4 cups | Cold, 35% fat minimum |
| Vanilla Bean Extract 🌿 | 2 tbsp | Pure, real vanilla bean |
| Dark Chocolate Chips 🍫 | 2 cups | 70% cacao, high-quality |
| Heavy Whipping Cream 🥛 | 3 cups | 36% fat, chilled |
| Powdered Sugar 🍚 | 10 cups | Fine, sifted |
| Cocoa Powder 🍫 | ½ cup | Dutch-processed, unsweetened |
| Vanilla Bean Seeds 🌿 | 1 whole | Scraped from 1 bean |
The foundation begins with all-purpose flour—King Arthur or Gold Medal bleached works best for that tender crumb. European-style unsalted butter (like Plugrá or Land O’Lakes) is non-negotiable for rich flavor, and keep it cold when creaming. For the vanilla, Madagascar bourbon beans (like Nielsen-Massey) elevate the sponge beyond extract. Superfine sugar (like Domino) dissolves smoothly, but pulse regular granulated in a food processor if needed. The baking powder should be fresh—test by mixing with water; it should bubble immediately. Room-temperature eggs separate perfectly, and large eggs (50g+ each) yield the best structure. Prep all ingredients at room temp for consistent baking.
No vanilla bean paste? Pure vanilla extract plus scraped seeds works, though the flavor won’t be as complex. Heavy cream for the ganache must be 35% fat or higher—store-brand often falls short. For the buttercream, 36% whipping cream (like Schär or Organic Valley) whips stiffer. Dark chocolate chips (like Ghirardelli or Valrhona) melt smoothly; chop a 70% bar if chips aren’t available. Dutch-processed cocoa powder (like Callebaut or Hershey’s Special Dark) prevents bitterness. Powdered sugar should be sifted to avoid graininess—Domino or C&H brands are reliable. Short on time? Pre-made vanilla sponge layers (like Betty Crocker) can be used, but bake them 10°F hotter for structure.
Store baked sponge layers at room temp in an airtight container for up to 3 days, separated by parchment. Buttercream keeps 5 days refrigerated (re-whip before use) or 3 months frozen (thaw overnight). Ganache sets at room temp for 2 hours before slicing; refrigerate leftovers for up to 1 week. For layering efficiency, bake 2 batches of sponges the same day, cooling completely between. Assemble the cake within 4 hours of final bake to prevent drying. Decorate immediately—the ganache’s sheen fades after 6 hours exposed.
Why You’ll Love This Recipe
- No Fuss Mixing: I swear by the creamy butter-egg combo—it’s the kind of batter that comes together in one bowl with zero stress. No sifting, no overmixing, just fold in the vanilla paste and call it done.
- Vanilla Butter Bliss: That little squeeze of vanilla bean paste? It’s the secret weapon. Rich, floral, and just sweet enough to make every bite feel like a hug—no artificial junk, just real flavor.
- Birthday to Brunch: Slice it for a celebration or cube it into oatmeal for a cozy morning. The same simple cake adapts to any moment—no need for a separate recipe.
- Pantry-Friendly Magic: Four ingredients? That’s it. No weird substitutions, no last-minute grocery runs. If you’ve got flour, sugar, butter, and eggs, you’ve got cake—and leftovers that stay fresh for days.
Step-by-step instructions for a 10-Layer vanilla bean cake
Precision and patience create showstopping layers. Here’s how to build this masterpiece.
👨🍳 Step 1: Prepare Cake Batter and Bake Layers
Preheat your oven to 350°F and grease ten 3-inch round cake pans with the unsalted butter, then line the bottoms with parchment circles. In a stand mixer, cream together 2 cups granulated sugar and 1 cup unsalted butter on medium speed until light and fluffy (3-4 minutes). Add 6 large eggs one at a time, mixing well after each addition.
In a separate bowl, whisk together 1 cup all-purpose flour, 1 tbsp baking powder, and 0.1 tsp salt. Gradually add the dry mixture to the wet ingredients, alternating with ½ cup milk, beginning and ending with flour. Fold in 1 tbsp vanilla bean paste and the vanilla bean seeds scraped from the bean.
Divide the batter evenly among the prepared pans (about ½ cup per pan) and bake for 18-22 minutes until a toothpick inserted in the center comes out clean. Cool layers in pans for 10 minutes, then transfer to a wire rack to cool completely. I like to level the tops with a serrated knife for perfectly even layers.
🥘 Step 2: Make Vanilla Bean Buttercream
In a large mixing bowl, beat the 3 cups heavy whipping cream with the 10 cups powdered sugar and 2 tbsp vanilla bean extract on medium speed until light and fluffy (3-4 minutes). Add the 2 cups unsalted butter, softened, one tablespoon at a time, beating well after each addition until fully incorporated and smooth.
For the swirl effect, divide the buttercream into two bowls. To one portion, add 1 tbsp vanilla bean paste and mix well. To the other portion, add ½ cup cocoa powder and mix until smooth. I like to use a piping bag with a star tip for clean swirls between layers.
🍳 Step 3: Assemble the Cake Layers
Place the first cake layer on a cake stand or plate. Spread a thin layer of vanilla buttercream on top, then pipe a spiral of chocolate buttercream in the center. Place the second layer on top and repeat. Continue this process, alternating between vanilla and chocolate buttercream, until all layers are assembled.
For the final touch, cover the entire top and sides with vanilla buttercream. I use a bench scraper to create clean edges. Chill the cake in the refrigerator for 30 minutes before decorating to help the buttercream set slightly and make piping easier.
🔪 Step 4: Create Chocolate Ganache and Decorate
Heat 2 cups heavy cream in a saucepan until it just begins to simmer. Pour over the 2 cups dark chocolate chips in a heatproof bowl and let sit for 5 minutes. Stir until smooth and glossy, then let cool slightly until it thickens to a spreadable consistency.
Spread the ganache over the chilled cake, using an offset spatula to create smooth, even coverage. For extra flair, pipe rosettes or drizzle additional ganache around the edges. Let the ganache set at room temperature for 1 hour before slicing to ensure clean cuts and professional presentation.
⏰ Step 5: Rest and Serve
Once fully set, cover the cake and refrigerate for at least 2 hours before serving. This resting period allows the flavors to meld and the textures to settle. When ready to serve, slice with a hot, clean knife to achieve clean cuts through all layers.
The result should be a towering masterpiece with perfectly balanced vanilla and chocolate flavors in every bite. The contrast between the tender cake layers, rich buttercream swirls, and velvety ganache creates an unforgettable experience that’s worth every minute of effort.
Pro Tips For Making 10 Cake
- Weigh Your Butter: Use a kitchen scale for the butter—no eyeballing. That extra 10 grams of softened butter makes the cake denser than intended, and you’ll end up with a sad, heavy slice instead of the light crumb you’re after (yes, even if the recipe says “softened to room temp”).
- Scrape the Vanilla: Don’t just dump the paste—scrape out every last bit of those little seeds with a knife. I used to skip this, and the flavor was always just there, not everywhere. The seeds are where the magic hides.
- Mix Just Until Combined: Overmixing turns your cake into a tough, chewy brick. Stop mixing the moment the flour disappears—about 30 seconds after that. Your arms will thank you later, and so will your teeth.
- Rotate the Pan: Swap the cake pans halfway through baking. I learned this after one side of my cake came out golden while the other stayed pale. The oven’s hot spots are real, and rotating evens them out—no guesswork.
Best sauces and condiments for this 10 cake
Vanilla Bean Buttercream
This luxurious buttercream is the star of your cake, with its velvety texture and rich vanilla flavor. I use Madagascar bourbon vanilla bean paste (like Nielsen-Massey) for depth—it’s worth the splurge over extract.
For the perfect consistency, whip 3 cups heavy cream (36% fat) with 10 cups powdered sugar until light, then gradually add 2 cups softened European-style butter (like Plugrá) for a smooth, pipeable finish. 💛
Pro tip: Chill your mixing bowls and beaters for 15 minutes before whipping to prevent melting. If your buttercream gets too soft, pop it in the fridge for 10 minutes—never microwave, or it’ll seize.
For extra richness, fold in 1 tbsp whipped egg whites at the end for a lighter texture without sacrificing flavor.
Chocolate Ganache
The ganache adds a sophisticated contrast to the cake’s sweetness. I melt 2 cups dark chocolate chips (70% cacao, like Valrhona) with 2 cups heavy cream heated to 180°F—just until it begins to simmer.
Let it sit for 5 minutes before stirring to create a silky, glossy finish. For a smoother texture, strain through a fine-mesh sieve before spreading. 🍫
To prevent graininess, ensure your chocolate is high-quality—avoid store-brand chips. If your ganache sets too quickly, reheat it gently in 10-second bursts in the microwave. For a marbled effect, pipe dollops of white chocolate ganache (use white chocolate chips instead) onto the cake before the dark ganache sets.
Caramel Drizzle
For a glossy, sweet finish, make a simple caramel drizzle by cooking 1 cup granulated sugar in a saucepan over medium heat until it turns a deep amber color. Slowly whisk in ¼ cup heavy cream, then drizzle over the cake in zigzag patterns while it’s still warm.
Let it set for 30 minutes before serving. This adds a delicate crunch and balances the richness of the ganache. ✨
Short on time? Use store-bought salted caramel sauce (like Torani) and thin it with 1 tsp warm water for a quick drizzle. For a spiced twist, add ½ tsp cinnamon or a pinch of sea salt to the caramel before drizzling—it elevates the flavor profile instantly.
Citrus Curd Swirls
Brighten the cake with lemon or orange curd swirled into the buttercream. Cook 1 cup granulated sugar, ½ cup lemon juice, 3 large eggs, and ½ cup butter in a double boiler until thickened (about 10 minutes).
Strain and cool completely before mixing into 1 cup of the vanilla buttercream. Pipe this into the cake layers for a tangy surprise in every bite. 🍋
For a grapefruit twist, use ½ cup grapefruit juice and zest instead of lemon. If your curd is too runny, cook it 2-3 minutes longer—it should coat the back of a spoon.
Store unused curd in the fridge for up to 1 week or freeze for 3 months in an airtight container.
Berry Compote
Top your cake with a strawberry or raspberry compote for a fruity contrast. Simmer 2 cups mixed berries, ¼ cup sugar, and 1 tbsp lemon juice until thickened (about 10 minutes).
Strain seeds and spread over the ganache before it sets. For a stained-glass effect, layer compotes in contrasting colors (red and blackberry) between ganache layers. 🍓
No fresh berries? Use frozen berries (thawed) or berry jam (thinned with 1 tsp water). For a tropical vibe, swap berries for mango or passion fruit—simmer with 1 tsp ginger for extra zing. Keep compote refrigerated until ready to use to prevent mold growth.
Nutrition facts
Frequently asked questions
Can I make this 10-layer cake with fewer layers?
For a more manageable project, reduce to 4-6 layers using the same batter and frosting ratios. Simply adjust the cake pan size to 4-6 inch rounds and bake for 20-25 minutes per layer. The assembly technique remains identical—just scale down the buttercream and ganache quantities proportionally.
How do I prevent my cake layers from drying out?
Store baked sponge layers in an airtight container with parchment between them for up to 3 days at room temperature. For longer storage, freeze layers (unfrosted) for 1 month. Always bring layers to room temp before assembling. Pro tip: Brush warm layers with simple syrup (¼ cup sugar + ¼ cup water heated until dissolved) to maintain moisture.
What’s the best way to transport a finished cake?
Use a sturdy cake carrier with a removable base for easy transfer. Place the cake on a level surface and cover tightly with plastic wrap, then place the carrier lid on top. For long trips, keep it refrigerated (35-40°F) to prevent melting. If transporting at room temp, avoid direct sunlight and limit travel to 2 hours to maintain texture.
Can I substitute vanilla bean paste with something else?
Yes! Use 2 tbsp pure vanilla extract plus 1 tsp vanilla bean seeds scraped from a pod for similar flavor. For budget options, try 1 tbsp vanilla extract + ½ tsp almond extract. Avoid imitation vanilla—it lacks the depth needed for this recipe. The paste’s natural oils create that signature vanilla aroma.
Why did my ganache turn grainy?
Graininess usually means your chocolate wasn’t high-quality or the temperature wasn’t controlled. Always use 70% cacao dark chocolate chips (like Valrhona) and heat the cream to 180°F—not boiling. If it happens, reheat the ganache in 10-second microwave bursts while stirring until smooth. For prevention, strain through a fine-mesh sieve before spreading.

- 12 Bean Chili Recipe: Hearty Slow-Cooked Depth With 12 Legumes - October 17, 2026
- 5 Seed Bread Recipe: Nutty Crunch and Artisan Flavor in One Loaf - October 17, 2026
- 1 Lb Macaroni Salad Recipe: Bold, Crunchy, and Crowd-Pleasing - October 17, 2026