
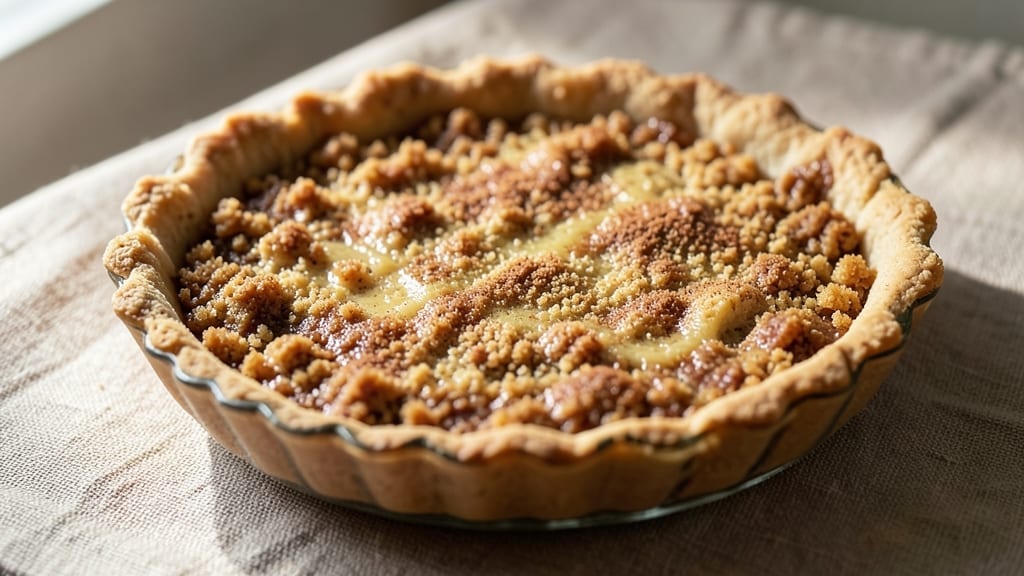
This 10-inch graham cracker pie crust recipe delivers the perfect foundation for pies, cheesecakes, or tarts—crispy yet sturdy enough to hold even the heaviest fillings. The secret lies in layering crushed graham crackers with melted butter and a touch of sugar, then baking until golden and set.
I developed this version after struggling with crumbly crusts that couldn’t handle cream cheese or custard fillings without collapsing.
The foolproof technique starts with evenly crushing graham crackers (not too fine, not too coarse) and mixing them with melted butter until the texture resembles wet sand. Pressing the mixture into a 10-inch pie dish ensures an even base, while a quick pre-bake prevents sogginess.
For extra flavor, a sprinkle of cinnamon or cocoa powder transforms this into a dessert crust worthy of any holiday table.
What sets this crust apart is its versatility—use it for classic pecan pie, rich chocolate mousse, or a creamy lemon tart. The lattice topping, when added, creates elegant patterns while keeping the center soft.
With 15 minutes of prep and 10 minutes of baking, you’ll have a crust that’s sturdy enough to impress yet simple enough for weeknight desserts.
Pro tip: Chill the crust for 30 minutes before adding filling to prevent melting. For a softer texture, reduce baking time slightly, while a longer bake yields a crispier edge. This is the crust I reach for whenever I need a reliable, crowd-pleasing base that never lets me down.
Ingredients for 10 inch graham cracker pie crust
Crispy yet sturdy—this crust needs just 11 simple ingredients for foolproof perfection.
| Ingredient | Amount | Notes |
|---|---|---|
| Graham Crackers 🍪 | 2 ½ cups | Crushed into fine crumbs (not powder) |
| Unsalted Butter 🧈 | ¾ cup | Melted, full-fat for richness |
| Granulated Sugar 🍚 | ¼ cup | Light brown preferred for caramel notes |
| Ground Cinnamon 🌿 | 1 tbsp | For warm spice depth (optional) |
| Vanilla Extract 🍯 | ½ tsp | Pure extract for authentic flavor |
| Pinch of Salt 🧂 | ⅛ tsp | Enhances all flavors |
| 10-Inch Pie Dish 🍰 | 1 whole | Metal or ceramic preferred |
| Plastic Wrap 📄 | 1 sheet | For chilling crust |
| Cocoa Powder 🍫 | 1 tbsp | For chocolate lattice option |
| Extra Graham Crackers 🍪 | ½ cup | Crushed for lattice topping |
| Aluminum Foil 📄 | 1 sheet | For pre-bake protection |
The graham crackers make all the difference here. Honey Maid or Nabisco work perfectly, but avoid the chocolate-flavored kind—they’ll throw off the balance. Look for the classic vanilla flavor, and crush them just until they resemble wet sand (not fine powder). The butter? Land O’Lakes or Plugrá are my go-tos—full-fat gives that rich, buttery flavor you can’t get with margarine. If you’re prepping ahead, store the crushed crackers in an airtight container with a paper towel to keep them dry.
No cinnamon on hand? Skip it or swap for nutmeg—it’s not dealbreaker, but it adds that cozy dessert vibe. The vanilla extract can be imitation, but pure extract makes a noticeable difference. For the lattice topping, I like to mix the extra crackers with a pinch of cocoa powder (if using) and a tiny bit of melted butter to bind them. If your pie dish is glass, line it with foil for even baking—especially important for heavy fillings like cheesecake. And trust me on the 30-minute chill—it’s what keeps the crust from melting into your filling.
This crust stays fresh for 5 days in the fridge if stored in an airtight container, but it’s best used within 24 hours for maximum crispiness. For longer storage, freeze the unbaked crust (wrapped tightly) for up to 3 months. When ready to use, thaw at room temperature for 10 minutes before adding filling. Pro tip: If you’re making a lattice, brush the baked crust with a thin layer of apricot jam before adding the topping—it keeps everything from sticking.
Why You’ll Love This Recipe
- No Crust Struggles: I’ve made pie crusts that crumble into dust or turn out greasy—this one never fails. Graham crackers handle the work for you, so you just pulse, press, and chill. The butter melts into that perfect balance of crispy edges and tender middle without a single roll-out disaster.
- Vanilla-Cinnamon Magic: That first bite? Warm, buttery graham flavor with a whisper of cinnamon and vanilla—it’s like dessert got a grown-up hug. Honestly, I’ve used this crust for cheesecake, fruit pies, and even a savory twist with goat cheese, and it always shines.
- Pie Pan Hack: A 10-inch crust fits my standard pie dish perfectly, but here’s the secret: it’s also my go-to for single servings. Split it into two mini crusts for trifles or hand pies—no extra work, just double the fun. (Yes, even on a Tuesday night.)
- Pantry Staple Power: Five ingredients, zero specialty items. The graham crackers add structure, the sugar keeps it sweet but not cloying, and the cinnamon-vanilla combo feels fancy without breaking the bank. I’ve made this with store-brand butter and still gotten rave reviews—proof it’s reliable.
Step-by-step instructions for buttery graham cracker crust
Here’s how to build a sturdy, flavorful crust that holds up to any filling.
Crush Graham Crackers to Perfect Texture
Place the 2.5 cups graham crackers in a large resealable plastic bag. Using a rolling pin or heavy skillet, crush them into fine crumbs—not powder. You want pieces that will hold together when mixed with butter but still create a delicate texture. I like to work in batches to avoid over-crushing, which can turn the crumbs into flour-like consistency.
Sift the crumbs through a fine-mesh sieve to remove any large pieces or stray bits of chocolate. This ensures an even, smooth base for your crust. Set aside the crumbs in a medium bowl—you’ll need all of them for the crust itself.
Mix Wet Ingredients for Binding
In a small microwave-safe bowl, melt the 0.75 cup unsalted butter in 30-second intervals, stirring between each interval until completely liquid. It should be smooth and glossy with no lumps remaining. Let it cool slightly—just until it’s warm to the touch but not hot.
In a separate small bowl, whisk together the 0.25 cup granulated sugar, 1 tbsp ground cinnamon, 0.5 tsp vanilla extract, and 0.125 tsp pinch of salt. This dry mixture will infuse the crust with warmth and depth. Pour the melted butter into the dry ingredients and stir until fully combined. The mixture should look like wet sand with a glossy sheen.
Combine Crumbs and Press into Pie Dish
Add the wet butter mixture to the bowl with the crushed graham crackers. Use a silicone spatula to gently fold everything together until just combined—you should see moist crumbs with no dry spots. Don’t overmix or the crust will become dense. The texture should resemble wet sand that holds together when pressed.
Transfer the mixture to the 10-inch pie dish and press it evenly into the bottom and up the sides, using your fingers or the back of a spoon. Press firmly but gently to create a solid base without compacting the crumbs too tightly. The crust should be about ¼-inch thick at the bottom and sides. Smooth the edges with your fingers for a clean finish.
Pre-Bake for Structure (Optional but Recommended)
Cover the pie dish with 1 sheet aluminum foil and place it in the freezer for 15 minutes to firm up. This chilling step prevents the crust from spreading too much during baking. Preheat your oven to 350°F and bake the crust for 10-12 minutes until the edges are lightly golden and the base feels set to the touch.
Remove the crust from the oven and let it cool for 5 minutes before adding your filling. This pre-baking creates a sturdy foundation that won’t sog from wet fillings. If making a lattice topping, proceed to the next step while the crust is still warm.
Create Chocolate Lattice Topping (Optional)
Crush the 0.5 cup extra graham crackers into fine crumbs, then mix them with the 1 tbsp cocoa powder in a small bowl. This creates a beautiful chocolate lattice that contrasts beautifully with the buttery base. Spread the remaining crust mixture evenly over the pre-baked crust, leaving a ½-inch border for the lattice.
Use a knife to cut the topping into strips, then weave them into a lattice pattern over the crust. Press lightly to adhere, then bake for an additional 5-7 minutes at 350°F until the lattice is set and slightly crisp. Let the crust cool completely before adding your filling—this prevents melting and ensures clean slices.
Pro Tips For Making 10 Inch Graham Cracker Pie Crust
- CHILL THE BUTTER FIRST: Unsalted butter straight from the fridge is stubborn—mix it with sugar and graham crumbs when it’s still cool but pliable (about 10 minutes out). I used to melt it first, and the crust ended up greasy instead of crisp. Cold butter creates pockets of steam that puff the crust during baking—no one wants a soggy bottom.
- PULVERIZE THE CRACKERS: Don’t just crush them—blitz graham crackers in a food processor until they’re fine, almost flour-like. I learned this after my first attempt left visible chunks that turned to mush. A few seconds extra here means a smooth, sturdy crust that holds up to fillings without crumbling.
- PRESS EVENLY, NO SKIPPING EDGES: Use a measuring cup or glass to press the mixture firmly into the pan, especially the edges. I once rushed this and got a crust that lifted in the middle—like a sad, uneven pancake. Press until the bottom is solid, then chill before adding filling to prevent collapse.
- SKIP THE VANILLA IF IT’S STRONG: Vanilla extract is potent—use just ½ teaspoon, not the full teaspoon some recipes suggest. I burned through a bottle once because I overdid it, and the crust tasted like a perfume counter. If your extract is aged (like 2+ years), cut it in half. Taste the mixture before baking—it’s the only way to know.
Make-ahead tips for leftovers
Prep Ahead Strategy
Assemble the crust mixture up to 24 hours in advance and store it in an airtight container at room temperature. The flavors deepen as the butter sets, and the texture becomes more cohesive. When ready to bake, simply press it into your pie dish and follow the pre-bake instructions.
This is my go-to method for holiday desserts when I know I’ll be busy later in the day. 📅
Freezer-Friendly Base
For long-term storage, press the unbaked crust into your pie dish and wrap it tightly with plastic wrap followed by aluminum foil. Freeze for up to 3 months. When ready to use, thaw in the fridge overnight.
This works especially well for cheesecakes or custard pies where a fully chilled crust is essential. Just pre-bake after thawing for 5-7 minutes at 350°F to restore crispness. ❄️
Filling Prep Timeline
If you’re making a pie with a custard or cream cheese filling, prepare the filling ingredients the day before and store them in the fridge. This allows the crust to chill completely while you mix the filling—no last-minute rushing.
For fruit pies, wash and chop ingredients ahead, then store them in a sealed container with a sprinkle of sugar to preserve freshness. 🍓
Lattice Assembly Shortcut
Make the lattice topping mixture in advance and store it in a small container in the fridge. When ready to assemble, simply press the pre-baked crust with the remaining crust mixture, then weave the lattice strips on top.
This saves time and keeps your workspace clean during the final assembly. The lattice stays fresh for 2 days if stored properly. ✨
Double-Crust Make-Ahead
For double-crust pies, prepare both crusts separately and freeze them individually. When ready to assemble, thaw one crust and use it as the bottom layer. After adding your filling, roll out the second crust and place it on top.
This method works perfectly for pecan or apple pies where the top crust needs to be flaky and golden. 🌟
Filling Temperature Tip
When adding warm fillings like pumpkin or apple sauce, let them cool to room temperature first. This prevents the crust from softening too quickly. For cold fillings like cheesecake batter, chill the crust for an additional 15 minutes in the freezer before adding the filling to maintain structure.
This is especially important for heavy fillings that require a firm base. 🧊
Nutrition facts
Frequently asked questions
Can I use this crust for cheesecake?
This crust is perfect for cheesecake because it’s sturdy enough to hold heavy, wet fillings. Just pre-bake it for 12-15 minutes at 350°F until fully set, then chill completely before adding your cheesecake batter. The extra butter and sugar create a buttery barrier that prevents sogginess.
Why is my crust crumbling instead of holding together?
Over-crushing the graham crackers turns them into flour, which won’t bind properly. Aim for a texture like wet sand—large enough to hold together but not powdery. Also, make sure your butter is only warm (not hot) when mixing to avoid melting the crackers prematurely.
Can I make this crust gluten-free?
Yes, but you’ll need gluten-free graham crackers. Look for certified brands that mimic the texture of traditional crackers. The recipe works the same way, but test the crust’s structure after pre-baking—gluten-free versions may need 1-2 extra minutes in the oven to firm up.
How do I prevent the crust from getting soggy with fruit fillings?
Pre-baking is key! Bake the crust for 10-12 minutes until golden, then let it cool completely. For extra protection, sprinkle the bottom with 1 tbsp cornstarch before adding your filling. This creates a barrier that absorbs moisture from juicy fruits like berries or peaches.
Can I use this crust for savory dishes?
While it’s designed for desserts, you can adapt it for savory pies by omitting the cinnamon and vanilla. Add 1 tsp dried herbs (like thyme or rosemary) and ½ tsp garlic powder instead. The buttery base pairs well with chicken pot pie fillings or savory quiches when baked with a 15-minute pre-bake.

- 12 Bean Chili Recipe: Hearty Slow-Cooked Depth With 12 Legumes - October 17, 2026
- 5 Seed Bread Recipe: Nutty Crunch and Artisan Flavor in One Loaf - October 17, 2026
- 1 Lb Macaroni Salad Recipe: Bold, Crunchy, and Crowd-Pleasing - October 17, 2026