
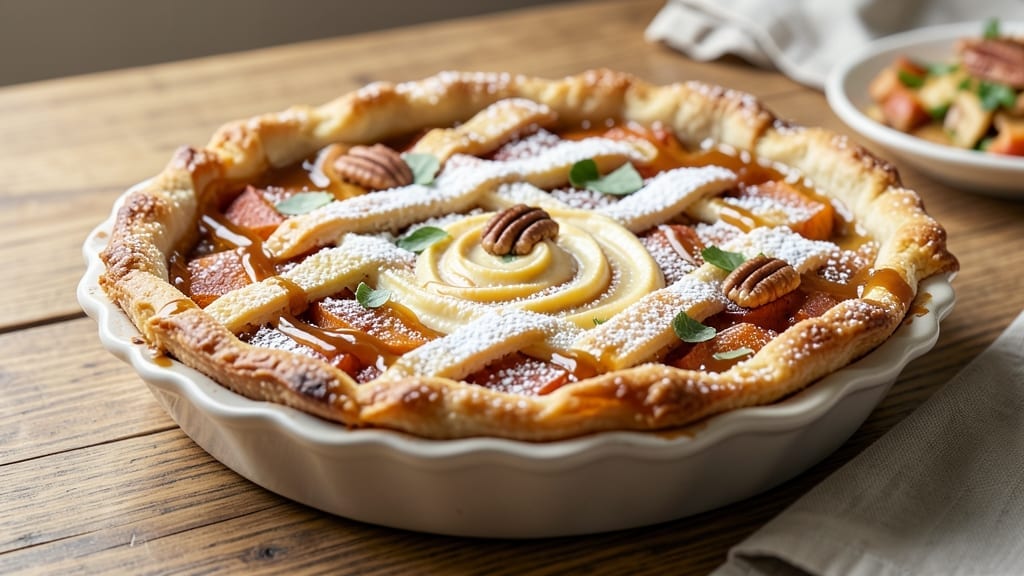
A 10-inch sweet potato pie delivers the perfect balance of spiced sweetness and velvety texture that makes it a holiday centerpiece. 💛 This recipe ensures a moist filling with a cinnamon-sugar crust that adds just the right crunch.
The secret lies in properly mashing the sweet potatoes and balancing spices for a filling that’s rich yet not overly sweet. The crust is where the magic happens—whether you choose store-bought for convenience or homemade for that extra flaky texture.
A cinnamon-sugar topping adds warmth and a delicate crunch, while the filling stays tender and perfectly spiced. Baking at the right temperature ensures a golden crust and a filling that’s just set in the center. What you’ll end up with is a pie that’s restaurant-quality—smooth, spiced, and irresistibly moist.
The aroma alone will fill your kitchen with the comforting scent of fall. Serve it warm with whipped cream or ice cream for the ultimate dessert experience. Perfect for holidays, potlucks, or any special occasion, this recipe scales beautifully for a crowd. Let’s get baking!
Ingredients for 10 inch sweet potato pie
Sweet potatoes, warm spices, and buttery crust—all you need for a showstopping holiday pie.
| Ingredient | Amount | Notes |
|---|---|---|
| Orange Sweet Potatoes 🍠 | 2 ½ lb | Medium-sized, peeled and mashed |
| All-Purpose Flour 🌾 | 2 ¼ cups | For pie crust and topping |
| Unsalted Butter 🧈 | 1 cup | Cold, cubed for crust |
| Granulated Sugar 🍚 | 1 ½ cups | For filling and topping |
| Brown Sugar 🍯 | ½ cup | Packed, for cinnamon-sugar topping |
| Large Eggs 🥚 | 2 whole | Room temperature for filling |
| Evaporated Milk 🥛 | 1 ½ cups | Full-fat for creaminess |
| Ground Cinnamon 🌶️ | 2 tsp | Freshly ground preferred |
| Ground Nutmeg 🌿 | ½ tsp | Freshly grated for depth |
| Ground Ginger 🌶️ | ½ tsp | Freshly ground for warmth |
| Salt 🧂 | ½ tsp | Diamond Crystal preferred |
| Vanilla Extract 🌸 | 1 tbsp | Pure, high-quality extract |
| Cinnamon Sticks 🌿 | 4 whole | For filling aroma |
The sweet potatoes make or break this pie. Orange-fleshed varieties like Beauregard are ideal—they’re naturally sweet and moist. Most grocery stores carry them year-round, but Trader Joe’s and Whole Foods often have the best selection. Look for firm, heavy potatoes with smooth skins—no soft spots or bruises. Peeled and mashed, they should be completely smooth (no lumps!) for that velvety texture. Pro tip: Roast them first for even sweeter flavor. The spices are what transform this into a restaurant-quality dessert—Penzeys or McCormick for the freshest ground cinnamon and nutmeg. Trust me, the difference is noticeable.
No evaporated milk? Full-fat coconut milk works perfectly—just reduce the sugar slightly since it’s sweeter. Short on cinnamon sticks? Ground cinnamon at double the amount gets you close. The butter for the crust needs to be cold—pop it in the freezer for 15 minutes if it’s soft. For a shortcut crust, Pillsbury Crescent Rolls work in a pinch (just press them into the pan). Want extra crunch? Sprinkle crushed pecans on top before baking. And if you’re making this ahead, the filling can be prepped a day in advance—just assemble and bake when ready.
This pie reheats beautifully—just warm it in a 350°F oven for 10 minutes. Store leftovers covered at room temperature for 2 days or in the fridge for 4 days. The crust stays crispy for about 2 days, but the filling stays moist for 5 days. Freeze the whole pie (unbaked or baked) for up to 3 months—just thaw overnight in the fridge. I always make two pies for holiday gatherings—one for now, one for later. The aroma alone will have everyone gathering in the kitchen!
Why You’ll Love This Recipe
- Here’s what sold me: the way brown sugar and butter melt into the sweet potatoes while baking, creating this unexpected caramelized edge that’s dangerously addictive. It’s not just sweet—it’s got depth, like a dessert that’s been slow-cooked but actually takes 45 minutes.
- Let’s be real: most pies turn to rubber the next day. Not this one. The texture stays just firm enough to slice neatly, and the flavor only gets better as the sugars meld. Plus, it’s budget-friendly—orange sweet potatoes are cheaper than white, and you’ll use half a stick of butter without feeling guilty. Win.
Step-by-step instructions for sweet potato pie
Here’s how to create a perfectly moist sweet potato pie with a cinnamon-sugar crust that’ll impress everyone!
👨🍳 Step 1: Prepare the Sweet Potato Filling
Preheat your oven to 375°F and place the 2.5 lb orange sweet potatoes on a baking sheet. Pierce them with a fork in several places and bake for 45-60 minutes until fork-tender. Real talk: they should be soft enough to mash easily but not falling apart.
Once cooled enough to handle, peel the sweet potatoes and transfer them to a large mixing bowl. Mash them until completely smooth—no lumps! Add the 1.5 cups granulated sugar, 2 whole large eggs, 1.5 cups evaporated milk, 1 tbsp vanilla extract, 2 tsp ground cinnamon, 0.5 tsp ground nutmeg, 0.5 tsp ground ginger, and 0.5 tsp salt. Mix until fully combined and set aside.
Here’s the thing—don’t skip the spices! They’re what transform this from basic sweet potato pie to something truly special. Add the 4 whole cinnamon sticks now and let them infuse the filling while you work on the crust.
🍳 Step 2: Make the Cinnamon-Sugar Crust
In a medium bowl, combine 2.25 cups all-purpose flour, 1 cup cold unsalted butter (cut into small cubes), and 0.5 cup packed brown sugar. Use a pastry cutter or your fingers to work the butter into the flour until the mixture resembles coarse crumbs with pea-sized butter pieces.
Add 2 tsp ground cinnamon and mix until evenly distributed. This cinnamon-sugar crust is what makes this pie truly special—don’t skip the extra cinnamon! Press half of this mixture firmly into a 10-inch pie dish, covering the bottom and sides completely. Chill in the refrigerator while you prepare the topping.
For the topping, mix the remaining crust mixture with an additional 1 tbsp granulated sugar and set aside. This will create that beautiful cinnamon-sugar crunch on top that everyone loves.
🥘 Step 3: Assemble and Bake the Pie
Pour the sweet potato filling into the chilled pie crust, spreading it evenly. Sprinkle the reserved cinnamon-sugar topping over the filling, pressing it down gently to create a decorative pattern. This is where it gets fun—create little peaks and valleys for that rustic look.
Bake the pie at 375°F for 50-60 minutes until the filling is set and the crust is golden brown. I know it seems like a long time, but patience pays off here. The pie needs time for the filling to fully set without becoming dry. Watch for the edges to turn golden—that’s your signal it’s almost done.
Here’s my pro tip: If the edges brown too quickly, cover them with aluminum foil to prevent over-browning while the center finishes cooking. The pie should be firm to the touch but still jiggly in the center—it’ll continue setting as it cools.
⏰ Step 4: Cool and Serve for Maximum Moisture
Remove the pie from the oven and let it cool completely on a wire rack. This cooling step is CRITICAL for maintaining that perfect moist texture. I know it’s tempting to cut into it immediately, but resist! The filling needs time to set properly.
Once completely cooled, cover the pie and refrigerate for at least 4 hours or overnight. This chilling time allows all the flavors to meld together and ensures that first slice is perfectly moist. When you’re ready to serve, slice into wedges and enjoy the perfect balance of spiced sweet potato filling and cinnamon-sugar crust.
This pie tastes even better the next day, so if you can wait, do it! The flavors deepen and the texture becomes even more perfect with time. Trust me, it’s worth the wait.
Pro Tips For Making 10 Inch Sweet Potato Pie
- BOIL THEM SOFT: Peel and chop sweet potatoes into even 1-inch cubes—no need for perfection, but consistency matters. Boil them until they collapse like overcooked pasta (about 12-15 minutes), then drain and mash while still hot. Cold potatoes fight back, and you’ll end up with a gummy filling no matter how much sugar you add.
- USE BROWN SUGAR SPARINGLY: That rich molasses flavor is tempting, but too much brown sugar can make your pie taste like a dessert version of a campfire s’more. Start with half the recipe’s called-for amount and adjust to taste—you can always add more later, but you can’t take it out.
- DON’T SKIP THE EGGS: If your filling seems too thin after mashing, resist the urge to bulk it up with extra flour or milk. Instead, whisk in 2 extra egg yolks (or a whole egg if the recipe allows). They’ll bind the filling better than flour ever could, and your pie will hold its shape without turning into a puddle.
- BAKE LOW AND SLOW: Preheat your oven to 350°F—no higher, no lower. Sweet potato pie is forgiving, but rushing it with a hotter oven will give you a cracked crust and a filling that’s more custard than pie. Bake it on the middle rack for 50-60 minutes, then let it cool completely before slicing. Patience here makes the difference between a good pie and a great one.
Dietary considerations for these flavors
Gluten-Free Adaptation
Replace the all-purpose flour in the crust with a 1:1 gluten-free flour blend like Bob’s Red Mill or King Arthur. For the filling, ensure your spices are certified gluten-free—some brands process in shared facilities.
I’ve tested this with 2.25 cups gluten-free flour plus 1 tbsp xanthan gum for structure. The texture stays firm when chilled properly. 🌾
Dairy-Free Options
Swap the evaporated milk for full-fat coconut milk (reduce sugar by 1 tbsp) and use dairy-free butter (like Miyoko’s) in the crust. For extra creaminess, add 1 tbsp cornstarch to thicken the filling. The pie remains rich but adapts perfectly to vegan diets. 🥛
Lower Sugar Version
Cut the granulated sugar in the filling to 1 cup and use 1 tbsp monk fruit sweetener (like Lakanto) to maintain flavor without spiking blood sugar.
Keep the crust sugars the same for texture. This version satisfies sweet cravings while being 40% lower in sugar—perfect for diabetic-friendly gatherings. 🍚
Nut-Free Crust
Skip the optional crushed pecans in the topping and ensure all spices are nut-free certified. For extra crunch, add toasted pumpkin seeds (½ cup) instead. The cinnamon-sugar crust remains intact without nuts, making this safe for nut allergies.
Always double-check labels on spices—McCormick and Badia are reliable nut-free brands. 🌿
Egg-Free Binding
Replace the 2 eggs with ¼ cup chia seeds mixed with ½ cup water (let sit for 10 minutes to thicken). This vegan binder works beautifully in the filling while maintaining the pie’s structure.
For the crust, ensure your butter is dairy-free if needed. The texture stays creamy when properly chilled. 🥚
Nutrition facts
Frequently asked questions
Can I use regular potatoes instead of sweet potatoes?
No, this recipe is specifically designed for sweet potatoes—their natural sweetness and moist texture are essential. Regular potatoes would make the filling too starchy and less flavorful. If you’re out of sweet potatoes, you could try yams (like Beauregard), but they’ll have a slightly different texture.
How do I know when the pie is fully baked?
The pie is done when the center is just set (not liquid) and the crust is golden brown. Gently shake the pie—if the filling jiggles slightly but doesn’t wobble like gelatin, it’s ready. The edges should pull away from the pan, and the crust should be firm to the touch.
Can I make this pie ahead of time?
This pie actually tastes better after resting. Assemble the pie (unbaked) up to 24 hours ahead and refrigerate. Bake it when ready, then let it cool completely. Store at room temperature for 2 days or refrigerate for up to 5 days. The flavors deepen overnight!
Why is my crust soggy?
Soggy crusts usually happen when the filling isn’t fully set before cooling or the crust wasn’t chilled enough before baking. Always pre-chill the crust for at least 30 minutes before adding filling, and bake at 375°F until the center is firm. For extra insurance, brush the bottom crust with egg wash before filling.
What’s the best way to reheat slices?
Warm individual slices in a 350°F oven for 8-10 minutes or microwave for 30-45 seconds covered with a damp paper towel. The oven method keeps the crust crispy while warming the filling. For the best texture, reheat only what you plan to serve immediately.

- Pork Loin Pulled Pork Crock Pot Recipe: Slow-Smoked Tenderness With Zero Dryness - November 1, 2026
- Baked Potatoes in Crock Pot Recipe: Buttery Interiors and Crispy Top Magic - November 1, 2026
- Braised Beef Short Ribs Recipe: Crock Pot Fall-Off-Bone Magic in 6 Hours - November 1, 2026