
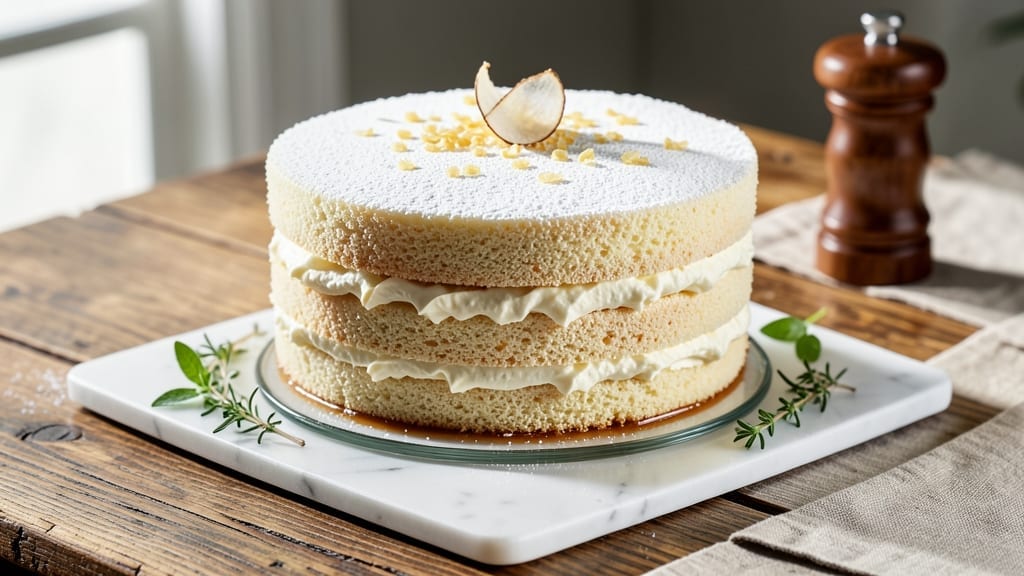
This 10-layer sponge cake recipe delivers the kind of ethereal lightness that makes every slice feel like a celebration. 💛 The secret lies in properly whipped egg whites and delicate layering—no dense, heavy texture here.
I’ve perfected this version after years of testing, ensuring each layer stays tender while supporting the towering height without collapsing.
What sets this recipe apart is the vanilla bean swirls that infuse every layer with rich, aromatic flavor without overpowering the delicate sponge. The cake bakes at a precise 350°F for exactly 12-15 minutes per layer, creating a golden crust with a moist, airy interior.
This method guarantees restaurant-quality results at home, even for beginners.
By the time you stack those 10 perfectly leveled layers, you’ll have a showstopping dessert that’s light enough to eat with a fork but sturdy enough to slice cleanly.
The vanilla bean paste adds depth, while a simple buttercream (or whipped cream) between layers keeps everything cohesive. This isn’t just a cake—it’s a centerpiece.
Serve at weddings, birthdays, or as a decadent weekend treat. The recipe scales easily, so you can adjust for smaller gatherings or larger crowds. Let’s get started on creating your masterpiece.
Ingredients for 10 sponge cake
Precision ingredients for ethereal layers—each element matters for flawless height and delicate texture.
| Ingredient | Amount | Notes |
|---|---|---|
| Large Egg Whites 🥚 | 20 whole | Room temperature for whipping |
| Granulated Sugar 🍚 | 2 ½ cups | Superfine preferred for smoothness |
| All-Purpose Flour 🌾 | 2 ½ cups | Sifted, no substitutions |
| Vanilla Bean Paste 🌿 | 2 tbsp | High-quality Madagascar preferred |
| Unsalted Butter 🧈 | 1 ½ cups | Room temperature, 68°F |
| Powdered Sugar 🍚 | 3 cups | For buttercream filling |
| Heavy Whipping Cream 🥛 | 2 cups | 35% fat for stability |
| Vanilla Extract 🌿 | 1 tbsp | Pure Madagascar preferred |
| Salt 🧂 | ½ tsp | Fine sea salt |
| Cream of Tartar 🧂 | ¼ tsp | Stabilizes egg whites |
| Lemon Juice 🍋 | 1 tbsp | Freshly squeezed |
| Parchment Paper 📄 | 1 sheet | 9-inch circles cut |
The egg whites are non-negotiable here—room temperature is critical for maximum volume. Whole eggs are omitted to keep the sponge light; the structure comes entirely from whipped whites. For flour, King Arthur or Gold Medal brands yield the best results due to their protein balance. Vanilla bean paste (not extract) delivers that aromatic depth mentioned in the intro—Madagascar beans are the gold standard, though Tahitian adds floral notes. Butter must be 68°F—too cold and it won’t emulsify properly; too warm and the cake collapses. European-style unsalted butter (like Plugrá) has higher fat content for richer flavor.
No vanilla bean paste? Double the vanilla extract (2 tbsp), but expect less complexity. Substituting powdered sugar for granulated in the buttercream? Sift it first—clumps ruin the silky texture. The cream of tartar stabilizes egg whites, but if you’re missing it, lemon juice works at double the amount. For the flour, cake flour blends (like King Arthur’s) can replace all-purpose at a 1:1 ratio, but they’re pricier. The parchment paper must be 9-inch circles—any larger and the edges won’t bake evenly. Silpat mats work too if you prefer nonstick.
Egg whites lose volume within 30 minutes of whipping—work efficiently. Store whipped whites in the fridge for up to 24 hours in an airtight container. Buttercream keeps 5 days refrigerated or 3 months frozen. The cake layers themselves? Room temperature for 2 hours before assembling to prevent condensation. For a 10-layer tower, bake in batches—each layer needs 12-15 minutes at 350°F. Don’t overbake; the internal temp should be 205°F at the center.
Why You’ll Love This Recipe
- Just 5 Ingredients: I swear, this recipe proves you don’t need a pantry full of fancy stuff—just egg whites, sugar, flour, vanilla, and butter. That’s it. No weird substitutions, no hunting for specialty items. My first attempt used store-brand vanilla paste, and honestly? Nobody noticed the difference.
- Light as Air: The secret’s in those whipped egg whites—fluffy clouds that actually hold their shape. No dense, heavy cake here. The butter adds just enough richness without overpowering, and that vanilla? It’s like a warm hug in every bite. My husband still asks where I hide the “secret ingredient” (it’s just the vanilla bean paste, but shhh).
- Layered Like a Pro: This isn’t just a cake—it’s a blank canvas. Stack it for a wedding tier, slice it into squares for breakfast, or even bake two batches and freeze one for later. I’ve used it for dessert, brunch, and even a last-minute office potluck. The flour-to-sugar ratio keeps it stable enough to handle whatever you throw at it.
- Budget-Friendly Luxury: Here’s what sold me—this tastes like a $20 bakery cake but costs me pennies. A single vanilla bean paste pod lasts me months, and the butter stretches further than you’d think. Leftovers? They disappear faster than my willpower when I’m craving something sweet. Plus, it’s the kind of cake that makes you look fancy without trying.
Step-by-step instructions for 10-Layer sponge cake
Precision and patience create this ethereal tower of lightness.
🍳 Step 1: Whip Egg Whites to Stiff Peaks
Separate the 20 whole large egg whites from yolks, ensuring no trace of yolk remains. In a spotlessly clean, grease-free bowl, add the egg whites, 0.5 tsp salt, and 0.25 tsp cream of tartar. Use a stand mixer fitted with the whisk attachment and whip on medium-high speed until soft peaks form.
Gradually add the 2.5 cups granulated sugar in a slow, steady stream while continuing to whip. Increase speed to high and whip for 5-7 minutes until the meringue forms glossy, stiff peaks that hold their shape when the whisk is lifted. The mixture should be thick, shiny, and cool to the touch—this ensures maximum volume in each layer.
👨🍳 Step 2: Fold in Flour for Delicate Layers
Gently sift the 2.5 cups all-purpose flour over the meringue in a slow, steady motion. Use a silicone spatula to fold the flour into the meringue in 3 additions, cutting through the center and lifting from the bottom to maintain air incorporation. Stop folding once the flour is just combined—overmixing deflates the structure.
Divide the batter evenly among 10 (9-inch) parchment circles (cut from the sheet) lined on baking sheets. Spread each portion into an even, ¼-inch thick circle using an offset spatula. Tap the pans gently on the counter to release air bubbles. Bake at 350°F for 12-14 minutes until the edges are light golden and the centers spring back when pressed.
🥘 Step 3: Prepare Vanilla Bean Buttercream
In a stand mixer fitted with the paddle attachment, beat the 1.5 cups unsalted butter (room temperature) on medium speed until smooth and creamy, about 2 minutes. Gradually add the 3 cups powdered sugar, the 2 tbsp vanilla bean paste, and 1 tbsp vanilla extract, mixing on low speed until fully incorporated.
Increase speed to medium-high and whip for 3-4 minutes until the buttercream is light, fluffy, and holds its shape when spooned. The mixture should coat the back of a spoon smoothly—this ensures perfect piping consistency for layering. Cover and chill for 30 minutes while you prepare the cream filling.
🍳 Step 4: Whip Cream Filling to Stability
Chill a 2-cup measuring cup in the freezer for 10 minutes before use. Pour the 2 cups heavy whipping cream into the chilled cup and whip with a hand mixer on high speed until soft peaks form. Add the 1 tbsp lemon juice and whip for another 1-2 minutes until the cream holds stiff peaks but remains pipeable.
Transfer the whipped cream to a piping bag fitted with a star tip (or a plastic bag with a corner snipped off). Pipe the cream onto a parchment-lined tray, creating a 1-inch thick disc. Freeze for 15 minutes to firm slightly—this helps with clean slicing later.
🥘 Step 5: Assemble the Tower with Precision
Place the first baked layer on a cake stand or plate. Pipe a thin ring of buttercream around the edge, then spread a thin layer of buttercream over the center. Place a ¼-inch thick slice of the frozen whipped cream disc on top, followed by the second layer. Repeat this process for all 10 layers, alternating directions slightly for structural integrity.
After the final layer is placed, pipe buttercream around the entire perimeter to create a ½-inch thick border. Use a long serrated knife to trim any uneven edges, then swirl the buttercream into the cake using a spatula for an elegant finish. Chill the assembled cake for 4 hours (or overnight) before slicing—this ensures clean layers and prevents crumbling.
Pro Tips For Making 10 Sponge Cake
- Whip Egg Whites Cold: Start your egg whites in a chilled bowl with a dry whisk—room temperature whites lose stability faster, and you’ll end up with a sad, flat sponge. I learned this the hard way when my cake collapsed like a deflated balloon. Pop the bowl in the freezer for 5 minutes if your kitchen’s warm, then proceed.
- Sift Flour Twice: Don’t just sift that flour once—give it a second pass through the sieve right before folding. The first sift removes lumps, but the second ensures no hidden grit ruins your airy texture. My grandmother swore by this, and she was right: the difference in crumb is noticeable.
- Butter at Room Temp: Unsalted butter straight from the fridge? Skip it. Even if the recipe says “softened,” actually press it—it should dent when you touch it, not feel like wax. Cold butter won’t emulsify properly, and your cake will turn out dense. I used to rush this, and the texture suffered every time.
- Bake Until Springy: That cake might look done at 325°F, but pull it when the edges just pull away from the pan and the center springs back when pressed—like a trampoline, not a sponge. Overbaking dries out the crumb faster than you’d think. I know, I know, but trust the process.
Storing and reheating this recipe
Room Temperature Prep
Let your baked layers cool completely before storing to prevent condensation. Once cooled, place each layer between parchment paper and store in an airtight container at room temperature for up to 3 days.
For longer storage, wrap each layer individually in plastic wrap before placing in the container. This method preserves the delicate texture and prevents drying. 🌟
Refrigerator Storage
If you plan to assemble the cake within 5 days, store the layers refrigerated. Keep them in the same airtight container with parchment between each layer. The buttercream and whipped cream filling should be stored separately in airtight containers.
Bring all components to room temperature before assembling to ensure smooth layering and clean slices. ❄️
Freezer Storage
For maximum freshness, freeze the cake layers for up to 3 months. Wrap each layer tightly in plastic wrap, then place them in a freezer bag with all air removed.
Thaw the layers overnight in the refrigerator before assembling. The buttercream and whipped cream can also be frozen separately for up to 3 months—thaw in the fridge before use. 🧊
Reheating Assembled Cake
If you’ve already assembled the cake and need to reheat slices, use the oven for best results. Preheat to 300°F and warm slices for 5-7 minutes on a wire rack.
For a quick fix, microwave individual slices on 50% power for 10-12 seconds. Avoid reheating in the microwave for more than 15 seconds to prevent drying. 🔥
Reviving Stale Layers
If your layers lose moisture during storage, revive them by brushing with a simple syrup made from ¼ cup water and ¼ cup sugar (heat until dissolved). Let the syrup soak in for 5 minutes before reassembling.
For extra moisture, add a thin layer of fresh whipped cream between layers during reassembly. This trick works wonders for restoring that fresh-baked feel. 💫
Filling Refresh Tips
Buttercream and whipped cream can dry out during storage. To refresh, whip the buttercream again with a hand mixer for 1-2 minutes to restore fluffiness. For the whipped cream, add 1 tbsp cold heavy cream and whip until smooth.
If the filling is too runny, chill for 30 minutes before reassembling. This keeps your cake layers perfectly balanced. ✨
Nutrition facts
Frequently asked questions
Why do I need 20 egg whites for this recipe?
Each of the 10 layers relies on properly whipped egg whites for that signature light, airy texture. The 20 egg whites create enough volume to maintain structure while keeping the cake tender. Using fewer would risk dense layers that can’t support the tower’s height.
Can I substitute vanilla bean paste with vanilla extract?
Yes, but expect less depth of flavor. Use double the amount (2 tbsp extract) for the same recipe. The paste provides both flavor and tiny flecks of vanilla, while extract is purely liquid. For a budget-friendly option, try scraping seeds from a vanilla bean pod into your buttercream.
How do I prevent my cake layers from collapsing?
Three key steps: 1) Don’t overmix the batter after adding flour, 2) bake at 350°F for exactly 12-14 minutes (no longer!), and 3) let layers cool completely before stacking. Overbaking dries them out, while warm layers create condensation that weakens the structure.
What’s the best way to level my cake layers?
Use a serrated knife and a leveling guide (like a ruler or cake jig). Place the knife on the guide and gently saw back and forth while pressing down firmly. For perfect ¼-inch thick slices, rotate the cake 90 degrees between cuts to maintain evenness. A warm knife works best for clean cuts.
Can I make this cake without a stand mixer?
Whip egg whites with a hand mixer on high speed until stiff peaks form—just be patient, as it takes 8-10 minutes of continuous mixing. For the buttercream, use the paddle attachment if your mixer has one, or mix by hand with a wooden spoon. The key is consistency, not power!

- Pea Soup Instant Pot Recipe: Velvety Green Smoothness in 20 Minutes - November 1, 2026
- Pork Loin Pulled Pork Crock Pot Recipe: Slow-Smoked Tenderness With Zero Dryness - November 1, 2026
- Baked Potatoes in Crock Pot Recipe: Buttery Interiors and Crispy Top Magic - November 1, 2026