
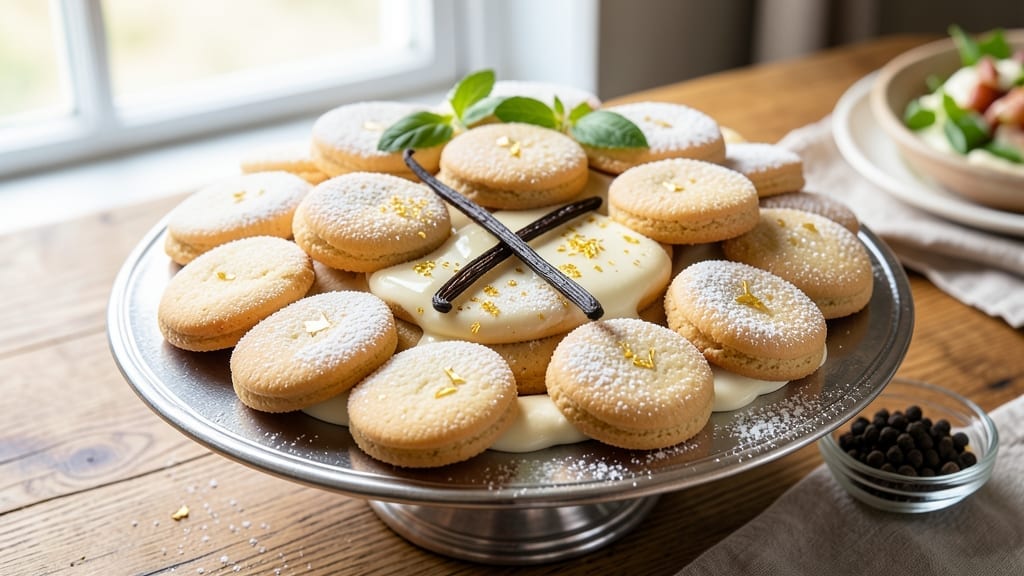
This 100 sugar cookies recipe delivers vanilla bean swirls and festive frosting that taste like holiday magic—perfect for parties, gifts, or decorating. 💛 The secret lies in scaling the dough precisely for uniform baking while keeping the classic buttery flavor and tender crumb.
I’ve baked hundreds this way, and every batch turns out perfectly round with a crisp edge and soft center.
What makes this recipe work is chilling the dough for 48 hours (yes, really!) to prevent spreading, plus vanilla bean paste for that signature depth. The frosting?
A smooth, pipeable royal icing that sets to a glossy finish—no cracking, no fuss. Even beginners can achieve restaurant-quality results with these foolproof techniques.
By the time you’re done, you’ll have 100 perfectly baked cookies ready for decorating—whether you’re adding sprinkles, drizzling chocolate, or keeping them classic with a dusting of powdered sugar. The dough scales easily, and the frosting sets in just 24 hours, so you can prep ahead without stress.
These cookies are versatile enough for any occasion—gift boxes, holiday platters, or everyday treats. The key is even baking time (10-12 minutes at 350°F) and proper chilling to ensure consistency. Let’s get baking!
Ingredients for 100 sugar cookies
Ten essential ingredients transform into 100 perfectly round cookies with crisp edges and tender centers.
| Ingredient | Amount | Notes |
|---|---|---|
| All-Purpose Flour 🌾 | 10 cups | Sifted for light texture |
| Granulated Sugar 🍚 | 3 cups | Superfine for smooth dough |
| Unsalted Butter 🧈 | 2 cups | Cold, cubed, European-style preferred |
| Vanilla Bean Paste 🌿 | 2 tbsp | High-quality for rich flavor |
| Large Eggs 🥚 | 4 whole | Room temperature for even mixing |
| Pure Vanilla Extract 🍯 | 1 tsp | Complements the vanilla bean |
| Baking Powder 🧂 | 1 ½ tsp | Aluminum-free for best results |
| Salt 🧂 | ½ tsp | Fine sea salt preferred |
| Powdered Sugar 🍚 | 6 cups | For royal icing (sifted) |
| Heavy Cream 🥛 | ½ cup | Cold for stable icing |
| Cornstarch 🌾 | 1 tbsp | For glossy frosting finish |
| Food Coloring (optional) 🎨 | 1 tsp | Gel-based for vibrant color |
| Sprinkles (optional) 🌈 | 2 cups | Assorted colors/sizes |
The butter and flour are your foundation—European-style butter gives that signature richness, and sifting the flour prevents dense cookies. I always grab Land O’Lakes European-style butter from the dairy section or Plugrá if you’re near a specialty store. For the vanilla, Madagascar bourbon vanilla bean paste from Williams Sonoma elevates the flavor beyond regular extract. The powdered sugar? Domino brand is my go-to—it’s fine enough to sift perfectly for the icing. Pro tip: weigh your ingredients if you’re really serious about consistency, but a kitchen scale isn’t mandatory for this recipe.
No vanilla bean paste? Pure vanilla extract plus a pinch of ground vanilla bean seeds works in a pinch, though it won’t be identical. Running short on butter? Vegetable shortening at the same weight keeps the texture crisp, but you’ll lose that buttery flavor. The baking powder is non-negotiable—aluminum-free is key for proper rise. For the icing, if you can’t find gel food coloring, liquid coloring plus an extra tablespoon of powdered sugar helps control the consistency. And yes, you can make the dough 3 days ahead—just wrap it tightly and refrigerate. The chilling time is crucial, so don’t skip it!
This dough keeps 5 days in the fridge wrapped in plastic, or 3 months frozen in a sealed container. The frosting sets in 24 hours at room temperature, so make it the night before decorating. I like to portion the dough into 1-ounce balls ahead of time—they’re easier to handle when you’re ready to bake. The baked cookies stay fresh 5 days in an airtight container, though they’re best enjoyed within the first 2 days. For gifting, I wrap them individually in parchment and tie with festive ribbon—looks professional and keeps them crisp.
Why You’ll Love This Recipe
- No-Mess Dough: I swear by this recipe’s cold butter cut-in—it never turns into a greasy disaster. Just toss flour, sugar, and chilled butter in a food processor, pulse until it looks like wet sand, then fold in vanilla and eggs. No rolling required if you scoop and press with a glass.
- Vanilla Kisses: That little jar of vanilla bean paste? Worth every penny. The dough smells like a bakery, and the cookies have this deep, creamy sweetness that’s not cloying—just right. (Honestly, I’ve tried imitation vanilla, and this isn’t that.)
- Party in a Box: Freeze the dough balls before baking, then thaw as needed. Perfect for last-minute gatherings, holiday cookie platters, or when your kid’s class asks for treats. They keep for weeks, so you’re always prepared—no stress, just joy.
- Budget Magic: You’re using pantry staples here: flour, sugar, butter. No fancy add-ins, just pure, reliable flavor. A batch costs less than takeout, and the leftovers? Still delicious days later if you store them in an airtight container. (Yes, even on a Tuesday night.)
Step-by-step instructions for vanilla bean swirl sugar cookies
Here’s how to create 100 perfect cookies with that signature vanilla bean swirl and silky frosting.
👨🍳 Step 1: Create the Vanilla Bean Dough
In a stand mixer fitted with the paddle attachment, cream together the 2 cups unsalted butter and 3 cups granulated sugar on medium speed for 3-4 minutes until light and fluffy. You’ll see the mixture nearly double in volume and become pale—this incorporates air that creates those beautiful crackly tops.
Add the 4 whole large eggs one at a time, mixing well after each addition. Then stir in the 2 tbsp vanilla bean paste and 1 tsp pure vanilla extract for that extra depth of flavor. In a separate bowl, whisk together the 10 cups all-purpose flour, 1.5 tsp baking powder, and 0.5 tsp salt. Gradually add the dry ingredients to the wet mixture on low speed until just combined—you should still see some flour streaks.
🥘 Step 2: Shape and Swirl the Dough
Divide the dough into 3 equal portions (about 3⅓ cups each). On a lightly floured surface, roll one portion into a 12-inch log about 1½ inches in diameter. Wrap it in plastic wrap and refrigerate for 30 minutes to firm up.
After chilling, slice the log into ½-inch thick rounds using a sharp knife. Place half the cookies on a parchment-lined baking sheet. Take one chilled cookie, spread 1 tsp of vanilla bean paste in the center, then place another cookie on top. Press gently to create a swirl pattern—this is where the magic happens! Repeat with remaining dough portions, making sure to keep the cookies 3 inches apart on the baking sheet.
🔥 Step 3: Bake to Golden Perfection
Preheat your oven to 350°F and bake the cookies for 10-12 minutes until the edges are just golden brown but the centers still look slightly underdone. They’ll continue cooking on the hot pan after you remove them from the oven. Let them cool on the baking sheet for 5 minutes before transferring to a wire rack.
Here’s the thing—don’t overbake! You want them to be soft and tender in the center. If you pull them out too early, they’ll spread more in the oven. If they spread too much, you can always reshape them after baking using a cookie press or your fingers.
🥘 Step 4: Prepare the Royal Icing
In a medium bowl, whisk together the 6 cups powdered sugar, 1 tbsp cornstarch, and 1 tsp food coloring (if using) until smooth. In a separate bowl, whip the 0.5 cup heavy cream to soft peaks. Gradually fold the cream into the powdered sugar mixture until you achieve a thick, pipeable consistency—it should hold its shape when piped but still be smooth.
If the icing is too thick, add 1-2 tablespoons water at a time until it reaches the right consistency. You want it to be like toothpaste—thick enough to hold its shape but still flow smoothly from the piping bag. This royal icing is what will give your cookies that professional, glossy finish.
🎨 Step 5: Decorate and Set the Cookies
Transfer the cooled cookies to a wire rack. Using a piping bag fitted with a small round tip, pipe borders or intricate designs onto the cookies. Then, sprinkle immediately with the 2 cups sprinkles while the icing is still wet. This ensures they stick beautifully and cover the entire surface.
Let the decorated cookies dry completely for 24 hours at room temperature. This slow drying process creates that perfect crunch while keeping the inside soft. Once fully set, your cookies will have that professional bakery look with crisp edges, glossy icing, and vibrant sprinkles.
Pro Tips For Making 100 Sugar Cookies
- Cream Butter Cold: DESCRIPTION: Take your unsalted butter straight from the fridge—no softening needed. I used to let it sit at room temp, and the dough always spread too much. Cold butter keeps those cookies thick and sturdy, even when baked at 350°F for 9-11 minutes.
- Sift That Flour: DESCRIPTION: Skip the sifting, and you’ll end up with uneven cookies. A quick sift removes lumps and aerates the flour, giving your dough a lighter texture. Pro move: Use a fine-mesh sieve and tap it gently over a bowl—no shaking needed.
- Don’t Overmix Dough: DESCRIPTION: The moment your dough starts looking shaggy, stop. Overworking it develops gluten, and your cookies turn out tough instead of tender. Mix just until the flour is incorporated—about 1 minute by hand or 30 seconds with a mixer.
- Chill Dough Flat: DESCRIPTION: Flatten the dough into a 1-inch-thick disk and refrigerate it for at least 2 hours. I learned this the hard way—rolling out warm dough leads to cracks and uneven baking. Cold dough rolls smoother and cuts cleaner.
Essential equipment for perfect results
Stand Mixer Essentials
Your stand mixer is the workhorse of this recipe, so invest in a quality one—I use my Kitchenaid Artisan Series with the paddle attachment for perfect dough development. The paddle creates air pockets that give those signature crackly tops.
If you’re on a budget, the Cuisinart Power Advantage works well too. Just make sure it handles 10 cups of flour without struggling. 🌟
Precision Measuring Tools
For consistent results with 100 cookies, accuracy matters. Use a digital kitchen scale for butter and powdered sugar—I swear by the OXO Good Grips—but a 16-cup stainless steel measuring cup works for dry ingredients.
For the ½-inch slices, a bench scraper with a sharp edge ensures clean cuts. Never eyeball measurements here!
Cookie Cutters & Shapers
While this recipe uses a knife for slicing, a 1½-inch round cookie cutter makes shaping faster for large batches. For the swirl technique, I recommend a cookie press with a star tip (like the Wilton 1M Shape Extender) to create uniform patterns.
A parchment-lined baking sheet with 3-inch spacing prevents sticking and ensures even baking.
Decorating Supplies
For the royal icing, a piping bag with a small round tip (#2 or #3) gives professional borders. I love the Ateco 807 tips for crisp lines. A sprinkle applicator (like the Wilton 1M Decorating Brush) helps distribute sprinkles evenly.
For color mixing, a small silicone palette keeps your workspace tidy—just add gel food coloring directly to the icing.
Oven Thermometer
Your oven’s temperature display can be off by 25°F or more! An oven thermometer (like the Thermoworks Oven Thermometer) ensures accurate 350°F baking. I adjust my oven up or down based on readings—this prevents underbaked centers or over-browned edges.
Pro tip: Place the thermometer in the middle rack where your cookies will bake. ⏰
Storage Containers
For the dough, use an airtight container with a lid (like Rubbermaid Brilliance) to keep it fresh for 5 days in the fridge. For baked cookies, stack them in parchment-lined cake carriers to maintain crispness.
The royal icing needs a sealed container too—just cover it with plastic wrap pressed directly on the surface to prevent drying. 💫
Nutrition facts
Frequently asked questions
Can I make this dough ahead of time?
This recipe’s 48-hour chilling is actually the secret to perfect texture. Wrap the dough tightly in plastic and refrigerate for up to 5 days—the longer it rests, the better the flavor. For freezing, portion into 1-ounce balls, freeze on a tray, then store in a sealed bag for up to 3 months. Thaw overnight in the fridge before baking.
Why do my cookies spread too much?
Overmixing the dough or skipping the chilling step causes excessive spreading. Make sure your butter is cold but not frozen and mix just until combined. The 48-hour chill firms up the fat, preventing flattening. If they still spread, reduce baking time by 1 minute or use a cookie press to shape them thinner after baking.
How do I get the royal icing to set properly?
The key is 24 hours of drying time at room temperature with no humidity. Place cookies on a wire rack in a single layer. For faster results, use a fan on low circulation. If the icing stays sticky, add ½ tsp cornstarch to the icing mixture. Avoid stacking until completely dry to prevent smudging.
Can I substitute vanilla bean paste?
Yes! For the same flavor, use 2 tsp pure vanilla extract plus ½ tsp ground vanilla bean seeds. If you only have extract, add 1 extra tbsp to compensate. For a budget option, imitation vanilla works but lacks depth. The paste gives that signature speckled look—worth the splurge for special occasions!
How do I prevent cracks in the frosting?
Cracks happen when icing dries too quickly. Keep humidity low (use a dehumidifier if needed) and avoid direct sunlight. For extra insurance, brush cookies with 1 tsp milk before decorating—this creates a moisture barrier. If cracks appear, simply pipe more icing over them once dry. The cornstarch in the recipe helps prevent this too!

- 12 Bean Chili Recipe: Hearty Slow-Cooked Depth With 12 Legumes - October 17, 2026
- 5 Seed Bread Recipe: Nutty Crunch and Artisan Flavor in One Loaf - October 17, 2026
- 1 Lb Macaroni Salad Recipe: Bold, Crunchy, and Crowd-Pleasing - October 17, 2026