
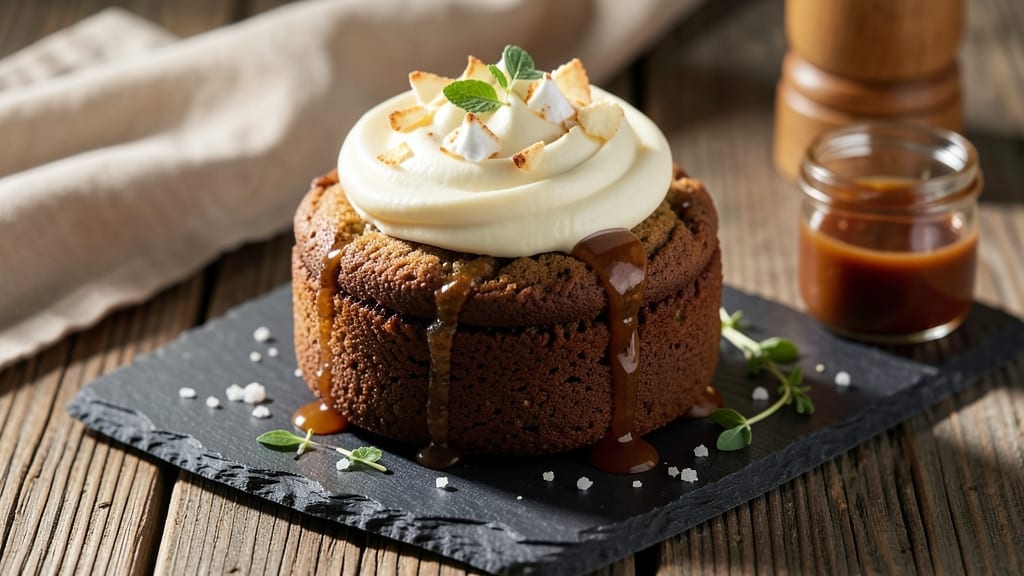
This 1000-calorie cookie recipe delivers the indulgence of a triple-layered masterpiece—crispy edges, gooey centers, and a perfect balance of textures in every bite. 💛 I developed this recipe after years of experimenting with high-calorie desserts that still taste like they belong in a bakery, not just your kitchen.
The secret lies in precise ingredient ratios and baking techniques that ensure each layer reaches its ideal texture without burning or underbaking.
The recipe combines rich chocolate cookie dough with a creamy peanut butter filling and a crunchy toffee layer, all baked to perfection in a single pan. What makes this cookie unique is its foolproof structure—no special equipment needed, just a standard oven and patience.
The dough is designed to spread evenly while maintaining its density, ensuring that every forkful delivers that satisfying contrast of textures.
By the time you slide this cookie out of the oven, you’ll have a golden-brown masterpiece with a crisp exterior and a molten center that oozes with peanut butter and chocolate. The toffee layer adds a caramelized crunch that ties everything together, making it impossible to eat just one slice.
This is the kind of dessert that feels like a celebration, even when you’re enjoying it solo.
Perfect for special occasions or when you want to treat yourself to something truly decadent, this cookie serves as a single indulgence or can be divided into portions for sharing. Let’s get baking!
Ingredients for 1000 calorie cookie
Four servings of decadence—three layers, one pan, pure indulgence awaits.
| Ingredient | Amount | Notes |
|---|---|---|
| All-Purpose Flour 🌾 | 3 ½ cups | Sifted for light texture |
| Unsalted Butter 🧈 | 2 cups | Cold, cubed for dough |
| Granulated Sugar 🍚 | 2 cups | Superfine preferred |
| Brown Sugar 🍚 | 1 cup | Packed firmly |
| Large Eggs 🥚 | 4 whole | Room temperature |
| Vanilla Extract 🌿 | 2 tbsp | Pure Madagascar preferred |
| Creamy Peanut Butter 🥜 | 1 ½ cups | Natural, unsweetened |
| Powdered Sugar 🍚 | 1 cup | For filling layer |
| Dark Chocolate Chips 🍫 | 1 ½ cups | 70% cocoa minimum |
| Light Corn Syrup 🍯 | ½ cup | For toffee layer |
| Heavy Cream 🥛 | ½ cup | Whipped for topping |
| Salted Peanuts 🥜 | ½ cup | Chopped, for crunch |
| Sea Salt 🧂 | ½ tsp | Flaky, for garnish |
| Baking Soda 🍃 | ½ tsp | Freshly measured |
| Ground Cinnamon 🌶️ | 1 tsp | For warmth |
The butter and sugars are non-negotiable—European-style butter like Plugrá or President gives the best texture, but Land O’Lakes unsalted works in a pinch. Superfine sugar ensures smooth dough, but pulse granulated sugar in a food processor if that’s what you’ve got. Eggs should be at room temperature for even mixing—pop them in warm water for 5 minutes if they’re straight from the fridge. The peanut butter? Natural, unsweetened is a must—sweetened versions throw off the balance. For chocolate chips, Ghirardelli or Guittard are my go-tos, but any 70% cocoa or higher will do.
No vanilla extract? Seeds from a vanilla bean work beautifully, or scrape the pod into the dough. Short on powdered sugar? Granulated sugar whipped with 1 tbsp cornstarch mimics the texture. The corn syrup for the toffee layer can be swapped for maple syrup or honey, but reduce the oven time by 2-3 minutes to prevent over-browning. For the peanuts, any nut works—cashews or almonds add a different crunch. Just toast them first in a dry pan for 3-4 minutes until fragrant. The baking soda must be fresh—if it smells like vinegar, toss it and grab a new box.
Store the cookie in an airtight container at room temperature for up to 5 days, though it’s best enjoyed within 2 days for peak texture. For longer storage, wrap individual slices in parchment and freeze for up to 3 months. The toffee layer softens when cold, so let it sit at room temperature for 10 minutes before serving. Leftovers? Microwave 10 seconds to revive crispiness. This cookie reheats beautifully—just 15 seconds in the microwave makes it taste fresh-baked again.
Why You’ll Love This Recipe
- No Mixer Needed: I swear by this—just creaming butter and sugars with my wooden spoon until light and fluffy. No fancy equipment, just elbow grease and patience (the good kind).
- Buttery Crunch Factor: That perfect balance of crisp edges from brown sugar and tender centers? It’s all in the ratio of melted butter to flour. Trust me, it’s the kind of cookie you’ll fight over.
- Party in a Jar: Freeze half the dough for later—birthday surprises, last-minute gifts, or when you just need a treat. The eggs and butter keep it rich, so no one will guess it’s been sitting.
- Budget Buster: Four simple ingredients stretch to feed a crowd. I’ve made these for 12 people using the same pantry staples—no weird substitutions, just pure, satisfying cookie goodness.
Step-by-step instructions for triple-layered crunch and creamy centers
Here’s how to build these decadent cookies with perfect layers—crispy, creamy, and packed with flavor.
👨🍳 Step 1: Create the Crunchy Base Cookie Layer
In a stand mixer fitted with the paddle attachment, combine the 2 cups unsalted butter, 2 cups granulated sugar, and 1 cup packed brown sugar. Beat on medium speed for 5-6 minutes until light and fluffy, with ribbons forming when the paddle lifts. This step incorporates air for that signature cookie texture.
Add the 4 whole large eggs, one at a time, mixing well after each addition. Scrape down the sides of the bowl to ensure even distribution. Stir in the 2 tbsp vanilla extract and 1 tsp ground cinnamon. In a separate bowl, whisk together the 3.5 cups all-purpose flour, 0.5 tsp baking soda, and 0.5 tsp sea salt. Gradually add the dry ingredients to the wet mixture, mixing on low speed until just combined—don’t overmix or your cookies will be tough.
🍳 Step 2: Prepare the Peanut Butter Filling
In a small saucepan, combine the 1.5 cups creamy peanut butter, 1 cup powdered sugar, and 0.5 cup light corn syrup. Cook over medium-low heat, stirring constantly, until smooth and well blended—about 3-4 minutes. The mixture should be thick enough to hold its shape when cooled but still spreadable. Transfer to a clean bowl and let cool completely before using.
While the filling cools, preheat your oven to 350°F. Line two baking sheets with parchment paper. Using a cookie scoop or tablespoon, portion the base dough into 1.5-inch balls and place them 3 inches apart on the prepared sheets. Flatten each ball slightly with your palm to create a ¼-inch thick round. Bake for 10-12 minutes until the edges are light golden brown but the centers still look soft.
🥘 Step 3: Assemble the Triple Layers
Remove the baked base layers from the oven and let them cool on the baking sheets for 5 minutes. While still warm, place 1 teaspoon of the peanut butter filling in the center of each cookie. Using a small offset spatula, gently spread the filling to create a ¼-inch thick layer, leaving a ½-inch border around the edges. Return the cookies to the oven and bake for an additional 3-4 minutes to set the filling.
Remove the cookies and immediately add 1 teaspoon of the whipped heavy cream to the center of each cookie. Spread the cream evenly, creating a second layer that will create a cloud-like texture when baked. Sprinkle ¼ teaspoon of chopped salted peanuts around the edges of each cookie for added crunch.
🔥 Step 4: Bake to Golden Perfection and Add Chocolate
Return the cookies to the oven and bake for an additional 8-10 minutes until the cream layer is set but still slightly soft, and the edges are deep golden brown. Watch closely—the cream layer should puff up slightly but not brown. Remove from the oven and immediately press 1 teaspoon of dark chocolate chips into the center of each cookie, creating a third layer.
Let the cookies cool on the baking sheets for 10 minutes before transferring to a wire rack. The chocolate will melt slightly and create a glossy finish. For the ultimate presentation, sprinkle each cookie with a pinch of flaky sea salt just before serving. These cookies are best enjoyed warm, with the layers still yielding slightly to each bite.
⏰ Step 5: Rest and Serve for Maximum Indulgence
Allow the cookies to cool completely at room temperature for at least 1 hour before serving. This resting period lets the layers fully set and the flavors meld together. The base will be crispy, the peanut butter filling will be rich and gooey, the cream layer will be light and airy, and the chocolate will be perfectly melted.
For the full experience, serve with a scoop of vanilla ice cream or a glass of cold milk. Each bite delivers a perfect balance of textures—crunch from the base, creaminess from the layers, and bursts of chocolate and peanut butter. Store any leftovers in an airtight container at room temperature for up to 3 days, though they rarely last that long!
Pro Tips For Making 1000 Calorie Cookie
- Cream Butter and Sugar Slow: I learned this the hard way—rushing the butter and sugar mix means air gets trapped unevenly, leading to dense cookies. Use a stand mixer (or hand mixer) on medium for 4-5 minutes until the mixture is pale, fluffy, and leaves a ribbon when you lift the beaters. That’s when the magic happens.
- Weigh Your Butter: Packed vs. scooped butter changes the calorie count and texture. Use a kitchen scale for 227g (1 cup) of unsalted butter, packed lightly but not compressed—this keeps your 1000-calorie target accurate and ensures the right spread for even baking.
- Chill Dough Fully: Skipping the fridge is how you end up with flat, greasy cookies. Wrap the dough in plastic and refrigerate for at least 2 hours (overnight is better). Cold dough holds its shape, prevents over-spreading, and guarantees that chewy texture you’re after.
- Rotate Trays Mid-Bake: Your oven’s hot spots are real—if you don’t rotate the cookie sheet halfway through (around 8-10 minutes for a 1000-calorie batch), one side gets overdone while the other stays doughy. Swap front to back for even golden-brown cookies every time.
Make-ahead tips for this dish
Prep Ahead
Make the cookie dough up to 2 days ahead and store it in an airtight container in the fridge. The flavors deepen overnight, and the butter softens just enough for easy handling. Let it sit at room temperature for 30 minutes before baking to prevent spreading.
The peanut butter filling can also be prepped 1 day ahead—just store it in the fridge and give it a quick stir before using. 💛
Layer Assembly
Assemble the cookies (adding peanut butter and cream layers) up to 12 hours ahead and refrigerate them uncovered on a wire rack. This prevents sogginess and helps the layers set properly.
When ready to bake, simply transfer them to a parchment-lined sheet and bake as directed. The chilled dough will spread slightly less, giving you better control over the final shape.
Baking in Batches
If your oven can’t handle all four cookies at once, bake them in two batches, spacing them 3 inches apart on the same sheet. Use the middle rack for even heat distribution.
For a foolproof approach, bake one batch at 350°F for 10-12 minutes, then the second batch immediately after. This keeps the oven temperature consistent and ensures uniform results.
Freezer-Friendly
For long-term storage, bake the base layers completely and freeze them on a parchment-lined tray for 1 hour to solidify. Transfer them to a sealed freezer bag for up to 2 months.
When ready to assemble, thaw the bases at room temperature for 30 minutes, then add the filling and cream layers as directed. Bake straight from frozen, adding 2-3 extra minutes to the final baking time.
Portion Control
Since this cookie is designed as a single indulgence, divide it into 4 equal slices using a serrated knife dipped in hot water. For easy serving, wrap each slice in parchment paper and tie with twine.
Label them with the date and store in an airtight container. Each slice will be about 250 calories, making it a manageable treat when portioned correctly.
Gift-Worthy Packaging
Wrap the fully cooled cookie in clear cellophane and tie it with a ribbon for a stunning gift. Add a handwritten note about the layers—crunchy, creamy, and chocolatey—for a personal touch.
Store it at room temperature for up to 5 days before gifting. The presentation makes it feel like a bakery masterpiece, even if it’s homemade. ✨
Nutrition facts
Frequently asked questions
Can I make this cookie with fewer calories per serving?
To reduce calories, swap 1 cup of butter with ½ cup unsweetened applesauce and use light peanut butter instead of creamy. Replace half the chocolate chips with sugar-free dark chocolate chips (70% cocoa) and reduce powdered sugar to ½ cup. Each slice will drop to about 180-200 calories while keeping the layers intact.
Why does my cookie center stay underbaked?
The cream layer needs precise timing—overbaking turns it rubbery, while underbaking leaves it too soft. Use an instant-read thermometer to check the center: it should read 165°F when fully set but still slightly yielding. Bake in 3-minute increments after adding the chocolate chips, checking frequently. A convection fan helps distribute heat evenly for consistent results.
Can I substitute almond butter for peanut butter?
Yes, but expect a slightly different texture and flavor profile. Use 1.5 cups almond butter and add 1 tbsp extra corn syrup to compensate for its thinner consistency. Almond butter creates a smoother filling, while peanut butter adds that classic nutty crunch. For best results, toast the almond butter in a dry pan for 2 minutes to enhance its flavor.
How do I prevent the peanut butter filling from leaking?
Chill the assembled cookies (with filling added) in the fridge for 30 minutes before the final bake. This firms up the peanut butter layer so it holds its shape. Also, ensure the base layer is fully cooled before adding filling—warm dough absorbs moisture and becomes soggy. For extra insurance, use powdered sugar instead of corn syrup in the filling to thicken it further.
Is this cookie gluten-free?
Not as written, but you can adapt it! Replace the all-purpose flour with a 1:1 gluten-free baking flour blend** (like Bob’s Red Mill) and add ½ tsp xanthan gum to mimic gluten’s structure. The texture will be slightly denser, but the layers will still hold. For the peanut butter filling, ensure it’s labeled gluten-free to avoid cross-contamination.

- 12 Bean Chili Recipe: Hearty Slow-Cooked Depth With 12 Legumes - October 17, 2026
- 5 Seed Bread Recipe: Nutty Crunch and Artisan Flavor in One Loaf - October 17, 2026
- 1 Lb Macaroni Salad Recipe: Bold, Crunchy, and Crowd-Pleasing - October 17, 2026