
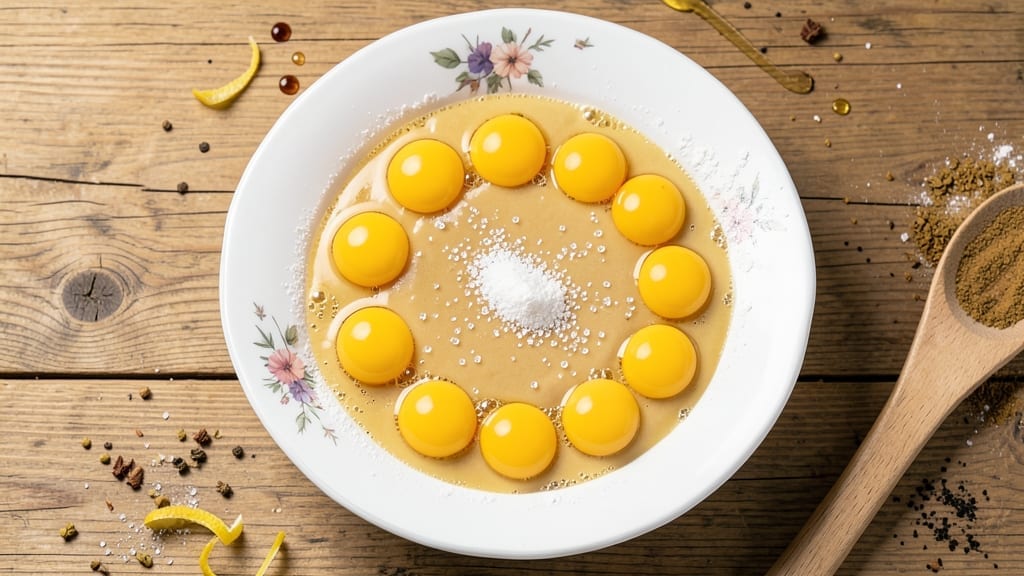
This 12-egg pizzelle recipe delivers the crisp, lacy edges and delicate vanilla-anise flavor that make these Italian waffle cookies irresistible. The secret lies in a precise batter ratio—where eggs, sugar, and flour create a light, airy texture that bakes into delicate lace patterns.
I’ve perfected this recipe over years of testing, ensuring each cookie achieves that signature iron-pressed crispness without burning.
The process is simpler than it sounds: mix the batter to a smooth consistency, let it rest for 30 minutes, then press it through a heated pizzelle iron for just 20 seconds per side.
The high egg content gives these cookies their signature structure, while the anise and vanilla infuse every bite with warmth. Traditional recipes often call for almond extract, but vanilla-anise offers a sweeter, more approachable flavor—ideal for beginners.
What you’ll end up with is a batch of golden, lace-edged cookies that stay crisp for days, perfect for dusting with powdered sugar or pairing with espresso. The iron’s intricate patterns create a beautiful, intricate design that makes these cookies as visually stunning as they are delicious.
Serve them warm for a melt-in-your-mouth experience or store in an airtight container for up to two weeks.
For variations, swap extracts—almond or lemon work beautifully—or add a pinch of cinnamon to the batter. These cookies are versatile enough for holiday gifting, coffee accompaniments, or even a festive dessert display. Let’s get started on making these classic Italian treats at home.
Ingredients for 12 egg pizzelle
Twelve eggs, two cups sugar—this is where delicate lace meets rich vanilla-anise flavor.
| Ingredient | Amount | Notes |
|---|---|---|
| Large Eggs 🥚 | 12 whole | Room temperature for even mixing |
| Granulated Sugar 🍚 | 2 cups | Superfine preferred for smooth batter |
| All-Purpose Flour 🌾 | 2 cups | Sifted for light texture |
| Vanilla Extract 🍋 | 1 tbsp | Pure vanilla preferred |
| Pure Anise Extract 🌿 | 1 tbsp | Not anise seeds, pure extract |
| Unsalted Butter 🧈 | ½ cup | Melted, full-fat for richness |
| Powdered Sugar 🍚 | 1 ½ cups | For dusting finished cookies |
| Salt 🧂 | ½ tsp | Fine sea salt preferred |
| Ground Cinnamon 🌶️ | ½ tsp | Optional, for warmth |
The eggs are non-negotiable here—room temperature is key for a smooth batter. Whole eggs only (no substitutes)—they create that signature crispness. For the sugar, superfine makes all the difference, but if you can’t find it, pulse regular granulated in a food processor for 30 seconds. The vanilla and anise extracts are the soul of this recipe—pure, high-quality extracts from brands like McCormick or Goya deliver the best flavor. Butter adds richness, so don’t skip the full-fat version—it’s worth the extra calorie for that melt-in-your-mouth texture.
No anise extract? Almond extract at half the amount works in a pinch, but the flavor will be different. Running low on vanilla? Vanilla bean paste gives you those little specks of joy. The cinnamon is optional, but if you add it, toast the ground version in a dry pan for 30 seconds to deepen the flavor. For the powdered sugar, Domino brand is my go-to—it’s finely ground and doesn’t clump. If you’re making these ahead, store the batter in an airtight container for up to 24 hours before pressing, but bring it back to room temperature before using.
Freshly made pizzelle stay crisp for 5-7 days in an airtight container at room temperature. For longer storage, freeze the cooked cookies between layers of parchment paper for up to 3 months. Reheat in a 200°F oven for 5 minutes to restore crispness. These make perfect gifts—just package in clear cellophane bags with a dusting of powdered sugar. The iron gets hot, so let it preheat for 10 minutes before pressing, and always grease it lightly with oil between batches to prevent sticking.
Why You’ll Love This Recipe
- I’ll be real: these aren’t just for holidays anymore. Sprinkle them over yogurt in the morning (the anise adds a subtle licorice kick that’s weirdly addictive), or dust them with powdered sugar for an after-dinner treat. They’re versatile enough to fit anywhere—no rules, just flavor.
- No Stand Mixer Needed: I’ll admit, I don’t own one—these crispy little cookies come together with just a fork and a bowl. Whisk those eggs and sugar until the mixture is silky smooth (no lumps, no fuss), then fold in the flour. The anise extract gives them that signature warmth without overpowering, and the vanilla ties it all together like a hug.
- Twelve Eggs, Zero Waste: Honestly, I was skeptical about using so many eggs, but here’s the thing: they bake up perfectly every time. No sad, flat cookies here—they’re light, delicate, and just sweet enough. And if you’re worried about leftovers? They freeze like a dream, so you’re never stuck with a half-baked batch.
- Breakfast or Dessert? Yes.: I’ll be real: these aren’t just for holidays anymore. Sprinkle them over yogurt in the morning (the anise adds a subtle licorice kick that’s weirdly addictive), or dust them with powdered sugar for an after-dinner treat. They’re versatile enough to fit anywhere—no rules, just flavor.
Step-by-step instructions for iron-edged waffle cookies with vanilla anise
Here’s how to transform simple ingredients into delicate, crisp-edged pizzelle with that signature vanilla-anise aroma.
Prepare the Pizzelle Iron and Mix the Batter
First, ensure your pizzelle iron is clean and properly assembled. I like to heat it over medium heat for about 5 minutes while preparing the batter—this gives it time to reach optimal temperature without burning the first batch. In a large mixing bowl, combine the 12 whole large eggs and the 2 cups granulated sugar. Whisk vigorously for 3-4 minutes until the mixture is pale, thick, and nearly tripled in volume. This step is crucial for creating the light, airy texture these cookies are known for.
While whisking, scrape down the sides of the bowl occasionally to ensure even incorporation. You’ll notice the mixture become glossy and ribbon-like when you lift the whisk. Real talk: don’t rush this—under-whisking leads to dense cookies instead of the delicate lace-like texture we want. Once fully combined, fold in the 2 cups all-purpose flour, 1 tablespoon vanilla extract, 1 tablespoon pure anise extract, 0.5 teaspoon salt, and 0.5 teaspoon ground cinnamon using a spatula. Mix just until combined—overmixing develops gluten, which makes the cookies tough.
Melt the Butter and Test the Iron
In a small saucepan, melt the 0.5 cup unsalted butter over low heat until completely liquid. Keep it warm but not smoking. While the butter melts, test your pizzelle iron by pressing it closed and checking that it heats evenly. The iron should be hot enough to lightly brown the edges of the cookies in about 30-45 seconds per side. If it’s not hot enough, let it heat for another 2-3 minutes before proceeding.
Once the butter is melted, remove it from heat and let it cool slightly—it should be warm but not hot enough to cook the eggs immediately when added. With a silicone spatula, gently fold the melted butter into the egg mixture. Be careful not to deflate the batter too much. The butter should be evenly distributed throughout the batter, which will contribute to the rich flavor and crisp edges of the finished cookies.
Cook the Pizzelle to Perfect Crispness
Lightly brush the pizzelle iron plates with a thin layer of melted butter using a pastry brush. This prevents sticking and adds to the flavor. Pour about 1 tablespoon of batter onto the center of the lower plate. Quickly close the iron and cook for 30-45 seconds until the edges are deep golden brown and the center is just set. You’ll know it’s ready when you hear a faint sizzle and see light brown spots forming.
Open the iron carefully—steam will escape—and use the tip of a small spatula to gently lift the pizzelle from the plates. If it sticks slightly, don’t force it; let it cool for a few seconds before trying again. Place the cooked pizzelle on a wire rack to cool completely. Repeat with the remaining batter, brushing the iron plates with melted butter after every 4-5 cookies to maintain crispness and prevent sticking.
Dust and Store for Maximum Freshness
Once all the pizzelle are completely cool, dust them generously with the 1.5 cups powdered sugar in a fine-mesh sieve. Shake the sieve gently over the cookies to ensure even coverage. The powdered sugar should cling to the crisp edges, creating that signature sweet finish. I like to do this in batches so the sugar doesn’t melt from residual heat.
Let the dusted pizzelle sit for 5-10 minutes to allow the sugar to adhere fully. Store them in an airtight container at room temperature for up to 1 week, or freeze for up to 3 months. For the best texture, bring them to room temperature before serving. These delicate cookies are perfect for gift-giving, holiday treats, or simply enjoying with a cup of coffee or espresso—their crisp edges and fragrant vanilla-anise flavor make them unforgettable.
Pro Tips For Making 12 Egg Pizzelle
- Whisk Eggs Like a Maniac: Don’t just stir those 12 eggs—they need a proper workout. Beat them on high speed for 3-4 minutes until the yolks and whites are fully emulsified and the mixture is thick, pale, and ribbony. I used to skip this, and my pizzelle would turn out dense and flavorless. This step guarantees light, crispy cookies every time.
- Sift That Flour: Measure your all-purpose flour first, then sift it directly into the egg mixture. The extra aeration prevents lumps and gives your pizzelle that signature delicate crunch. I learned this the hard way—unsifted flour makes for chewy, uneven cookies. Trust me, your iron’s worth the extra 30 seconds.
- Avoid Overcrowding the Iron: Press only 2-3 cookies onto the hot pizzelle iron at a time, or they’ll steam instead of crisp. Overcrowding turns your crispy lace into sad, soggy blobs. If you’re impatient (like me), work in batches and keep the finished cookies warm in a clean kitchen towel—not the oven.
- Use Cold Anise Extract: Chill your pure anise extract in the fridge for 10 minutes before adding it to the batter. Cold extract blends more evenly and doesn’t overpower the vanilla. I was skeptical until I tried it—now my pizzelle have a clean, balanced licorice note instead of a harsh aftertaste.
Storing and reheating your 12 egg pizzelle
Room Temperature Storage
Pizzelle stay crisp and delicate best at room temperature in an airtight container with parchment paper between layers. I use amber glass jars with snap-on lids to preserve their freshness while blocking light—this keeps them crisp for up to 7 days.
The key is avoiding humidity, which causes sogginess. Store them in a cool, dark pantry spot, not the fridge, as cold temperatures make them brittle. 🌟
Freezer Preservation
For longer storage, freeze pizzelle between layers of parchment paper in a ziplock freezer bag to prevent freezer burn. I like to label bags with the date—these last 3 months without losing texture.
When ready to enjoy, thaw at room temperature for 15-20 minutes before dusting with powdered sugar. Never microwave—they’ll lose their crisp edges instantly.
Reviving Crispness
If your pizzelle lose crispness, revive them by placing on a wire rack in a 200°F oven for 5-7 minutes. The gentle heat reactivates their crisp edges without melting the sugar.
For a quicker fix, sprinkle with a pinch of powdered sugar and let sit for 5 minutes—the sugar absorbs moisture, restoring crunch. This trick works even for cookies stored for weeks. ✨
Gift-Worthy Packaging
For gifting, package pizzelle in clear cellophane bags tied with ribbon, then place in a rigid gift box. Add a small jar of powdered sugar on the side for dusting.
I’ve found that parchment-lined boxes work best—they protect the delicate edges during shipping. Label with the date and storage instructions to ensure recipients enjoy them at their peak.
Batter Storage Tips
Unused batter can be stored in an airtight container in the fridge for up to 24 hours. Bring it to room temperature before using—cold batter won’t spread evenly in the iron.
For longer storage, freeze batter in 1-tablespoon portions in a silicone mini muffin mold. Thaw in the fridge overnight before pressing. This works perfectly for small batches or last-minute baking. 💡
Nutrition facts
Frequently asked questions
Can I substitute eggs in this pizzelle recipe?
While eggs are essential for the signature crisp texture, you can replace up to 2 eggs with 2 tablespoons of aquafaba (chickpea brine) per egg for a vegan version. The texture will be slightly denser, but still delicious. For best results, whisk aquafaba until frothy before mixing. Never use egg substitutes like applesauce—they won’t create the same delicate lace pattern.
Why do my pizzelle stick to the iron?
Sticking happens when the iron isn’t hot enough or isn’t properly greased. Always preheat the iron for 10 minutes and brush plates with melted butter between batches. If they still stick, try using a nonstick cooking spray instead. Remember, the iron should be hot enough to lightly brown the edges in 30-45 seconds—if it’s not, let it heat longer.
How do I make these pizzelle less sweet?
Reduce the sugar by 0.25 cup and add 0.5 teaspoon of lemon zest or 1 teaspoon of cinnamon for depth. For a more balanced flavor, swap 1 tablespoon of vanilla extract for 1 teaspoon of vanilla bean paste—it adds complexity without extra sweetness. The anise extract can also be reduced to 0.5 tablespoon if you prefer a milder taste.
Can I use a waffle iron instead of a pizzelle iron?
Yes, but the results will be different. A waffle iron creates thicker cookies without the intricate lace edges. Use 1 tablespoon of batter per square and cook for 2-3 minutes until golden. For a closer match, choose a waffle iron with thin, decorative plates. The texture will be more like a waffle cookie than traditional pizzelle.
What’s the best way to serve these pizzelle?
These delicate cookies shine when served warm with a cup of espresso or cappuccino. For a festive touch, arrange them on a platter dusted with powdered sugar and garnish with edible gold leaf. They also pair beautifully with mascarpone cream or dark chocolate ganache for dipping. Save a few to enjoy plain—their crisp edges and vanilla-anise flavor are perfect on their own!

- 12 Bean Chili Recipe: Hearty Slow-Cooked Depth With 12 Legumes - October 17, 2026
- 5 Seed Bread Recipe: Nutty Crunch and Artisan Flavor in One Loaf - October 17, 2026
- 1 Lb Macaroni Salad Recipe: Bold, Crunchy, and Crowd-Pleasing - October 17, 2026