
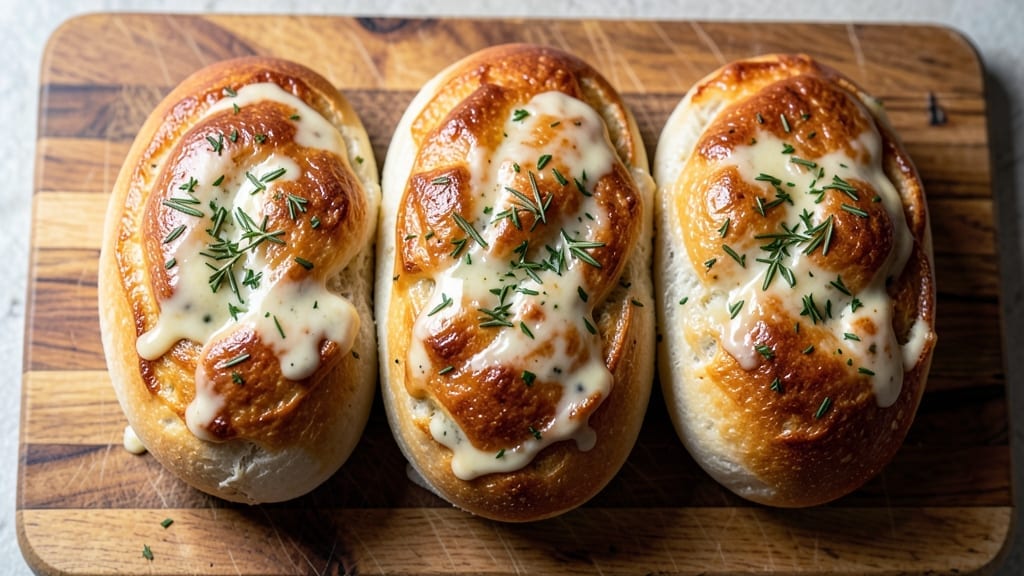
This 12-inch sub rolls recipe delivers handheld sandwiches with perfectly crispy buns that hold up to any filling—whether you’re serving classic Italian, meaty pulled pork, or fresh veggie subs.
The secret lies in a simple dough technique that creates a sturdy, toasted exterior without sacrificing softness inside, ensuring every bite stays intact. I developed this recipe after years of testing different breads and baking methods, and it finally delivers the ideal balance of texture and flavor.
The beauty of these sub rolls is their versatility—you can assemble them with your favorite deli meats, melted cheeses, and crisp vegetables, then toast them to golden perfection in just minutes. No need for fancy equipment; a standard oven or even a skillet works perfectly.
The dough is straightforward to make (or you can use high-quality store-bought rolls), and the assembly process is quick, making this an ideal solution for game day, potlucks, or a satisfying weeknight dinner.
What you’ll end up with is a stack of handheld sandwiches that are crispy on the outside, tender on the inside, and packed with all the flavors of your favorite sub. The buns stay sturdy enough to hold fillings without falling apart, yet soft enough to enjoy with every bite.
These are the kind of sandwiches that disappear fast—perfect for feeding a crowd or treating yourself to a delicious, no-mess meal.
Serve with classic sides like chips, coleslaw, or a creamy dipping sauce to round out the experience. Whether you’re making a traditional Italian sub, a hearty meatball roll, or a lighter veggie version, this recipe ensures every bite is as satisfying as it is convenient. Let’s get started!
Ingredients for 12 inch sub rolls
Twelve ingredients for twelve perfect handheld sandwiches—crispy outside, soft inside, ready for any filling.
| Ingredient | Amount | Notes |
|---|---|---|
| All-Purpose Flour 🌾 | 4 cups | Spray with flour to prevent sticking |
| Active Dry Yeast 🍞 | ¼ oz | Or 2 1/4 tsp (1 packet) |
| Granulated Sugar 🍚 | 1 tbsp | Feeds yeast for activation |
| Warm Water 💧 | 1 cup | 110°F for yeast activation |
| Unsalted Butter 🧈 | ¼ cup | Cold, cubed for texture |
| Large Eggs 🥚 | 1 whole | Room temperature for mixing |
| Salt 🧂 | 1 tsp | Diamond Crystal preferred |
| Milk 🥛 | ¼ cup | Warmed for tenderness |
| Olive Oil 🫒 | 2 tbsp | For brushing rolls |
| Semolina Flour 🌾 | 2 tbsp | For dusting rolls |
| Deli Meats 🥓 | 1 ½ lb | Ham, turkey, or roast beef |
| Provolone Cheese 🧀 | 8 oz | Sliced thin for melting |
| Fresh Vegetables 🧅 | 2 cups | Sliced bell peppers, onions |
| Mayonnaise 🥫 | ¼ cup | For spread if desired |
| Garlic Powder 🧄 | 1 tsp | For seasoning |
The dough is the star here. King Arthur or Bob’s Red Mill flour gives the best texture—light but sturdy. If you’re in a pinch, Pillsbury dough works too, but homemade has that restaurant-quality crunch. The butter should be cold when you mix it in (trust me on this)—it creates those little pockets of air that make the buns crispy. For the yeast, Fleischmann’s is reliable, but any active dry yeast will do. Just make sure your water’s warm (like bathwater, not boiling) to wake it up properly. I usually mix the dough in my stand mixer with the dough hook, but a big bowl and your hands work too.
No provolone? Swiss or mozzarella melts just as nicely. Fresh veggies wilting? Pickled peppers or quick-pickled onions add crunch without wilting. The deli meats can be any combo you love—Boar’s Head or Oscar Mayer are my go-tos, but whatever’s on sale works. For extra flavor, toss your veggies in a pinch of salt and let them sit for 10 minutes before assembling (this draws out moisture). The olive oil is non-negotiable for brushing—it’s what gets those buns golden and crispy. No semolina? All-purpose flour works, but semolina gives that perfect crunchy crust.
Dough keeps 3 days wrapped in plastic in the fridge or 3 months frozen. Shape the rolls ahead and freeze them uncooked on a tray lined with parchment—just bake straight from frozen (add 2-3 minutes). Assembled subs? 2 days in the fridge, but they’re best served fresh. Leftovers reheat beautifully in a skillet with a splash of water—covers them and keeps them moist. I always make double dough; the extra rolls freeze perfectly for next week’s lunches.
Why You’ll Love This Recipe
- No-Knead Magic: I swear by this dough—just mix the flour, yeast, sugar, and warm water, let it rise once, and roll it out. No stand mixer, no fuss, and the butter keeps it tender without the effort.
- Buttery Soft Secret: That little pat of unsalted butter in the dough? It’s the reason these rolls stay pillowy for days. The flavor’s subtle but makes everything taste like a bakery’s secret.
- Packed Lunch Hero: These hold up perfectly for meal prep—toss them in a bag with sandwiches or soup, and they’ll stay fresh for three days. Honestly, my lunch game changed forever.
- Budget Bakery Bargain: Four ingredients, endless possibilities. You can make a dozen rolls for under $3 and still have leftovers for breakfast toast. (Yes, even on a Tuesday night.)
Step-by-step instructions for 12-Inch sub rolls
Let’s make these handheld sandwiches with perfectly crispy buns that hold up to all your favorite fillings.
Activate the Yeast and Mix the Dough
In a large bowl, combine the 1 cup warm water (about 110°F), 1 tbsp granulated sugar, and 0.25 oz active dry yeast. Let it sit for 5-10 minutes until it becomes frothy—this means your yeast is alive and ready to work. If it doesn’t bubble, your yeast might be dead, and you’ll need to start over.
Once frothy, add the 4 cups all-purpose flour and 1 tsp salt to the bowl. Mix with a wooden spoon until a shaggy dough forms. Then, cut in the 0.25 cup cold, cubed unsalted butter and the 1 whole large egg. Add the 0.25 cup warm milk and mix until everything comes together into a sticky dough. The dough should be soft but not overly wet—if it’s too sticky, sprinkle in a little more flour, 1 tablespoon at a time.
Knead the Dough Until Smooth
Turn the dough out onto a lightly floured surface and knead for 8-10 minutes by hand, or use a stand mixer with a dough hook for 5-6 minutes on medium speed. You’re looking for a smooth, elastic dough that springs back when poked. If the dough feels too dry, add a little more warm water, 1 tablespoon at a time. If it’s too sticky, add a little more flour.
Once the dough is smooth, place it back in the bowl, cover it with a clean kitchen towel, and let it rise in a warm place for 1-2 hours, or until it has doubled in size. A good test is to poke the dough gently—if it springs back slowly, it’s ready. If it springs back quickly, let it rise a little longer.
Shape and Proof the Rolls
Punch down the risen dough to release the air, then divide it into 12 equal pieces. Roll each piece into a log about 12 inches long and 1 inch thick. Place the rolls seam-side down on a parchment-lined baking sheet, leaving about 1 inch of space between them. Cover them again with the kitchen towel and let them rise for another 30-45 minutes, until they’ve puffed up noticeably.
While the rolls are proofing, preheat your oven to 375°F. Brush the tops of the rolls lightly with 2 tbsp olive oil and sprinkle with 2 tbsp semolina flour for that classic sub roll texture. This step is key—it gives your rolls that crispy, golden crust while keeping the inside soft and pillowy.
Bake Until Golden and Crispy
Bake the rolls for 18-20 minutes, until they’re deep golden brown and sound hollow when tapped on the bottom. The edges should be crispy, and the rolls should pull away from the parchment paper easily. If they’re browning too quickly, tent them loosely with foil to prevent over-browning while they finish baking.
Let the rolls cool on the baking sheet for 5 minutes before transferring them to a wire rack. While they’re still warm, you can fill them with 1.5 lb deli meats, 8 oz sliced provolone cheese, 2 cups fresh vegetables, and a spread of 0.25 cup mayonnaise mixed with 1 tsp garlic powder for extra flavor. The warmth of the rolls will help the cheese melt perfectly.
Assemble and Serve
To assemble, slice the rolls in half lengthwise and layer them with your favorite fillings. For extra crispiness, you can even toast the cut sides in a skillet over medium heat for 1-2 minutes until golden. Serve immediately while the rolls are still warm and the cheese is melty. These handheld sandwiches are perfect for lunches, parties, or a cozy dinner at home.
Pro Tips For Making 12 Inch Sub Rolls
- TEST YOUR YEAST FIRST: Skip the guesswork—mix 1 teaspoon yeast, 1 teaspoon sugar, and ¼ cup warm water (110°F) in a small bowl. If it doesn’t foam within 5–10 minutes, your yeast is dead. Trust me, you don’t want to bake 12-inch subs only to have dough that won’t rise.
- KNEAD LESS, STRETCH MORE: Over-kneading makes sub rolls tough. After the first 5 minutes by hand (or 3 on a stand mixer with a dough hook), switch to gentle stretching—grab the dough, fold it over itself, and rotate. This builds strength without overworking the gluten, so your rolls stay tender.
- CHILL THE DOUGH: Resist the urge to shape the dough right away. After the first rise, refrigerate it for at least 2 hours (or overnight). The cold slows fermentation, deepens flavor, and makes rolling out those 12-inch logs way easier—no sticky messes or uneven thickness.
- BRUSH WITH MELTED BUTTER: Before baking, brush the shaped rolls with melted unsalted butter (not oil). The butter caramelizes into a golden crust while keeping the inside soft. Skip the spray bottle—your rolls will taste like a bakery, not a sad, dry sandwich wrapper.
Creative variations of this recipe
Classic Italian Style
For an authentic Italian sub roll, layer sliced ham and salami with provolone cheese, sliced bell peppers, and red onions. Add a spread of mayonnaise mixed with Italian seasoning for extra flavor.
Toast the assembled rolls in a skillet with a splash of olive oil until the cheese melts and the bread gets crispy. Serve with a side of marinara sauce for dipping. 🍅
Spicy BBQ Pulled Pork
Swap the deli meats for ½ lb pulled pork tossed in ¼ cup BBQ sauce and 1 tsp smoked paprika. Top with shredded cheddar and pickled jalapeños for heat.
Brush the tops with extra BBQ sauce before baking to create a sticky, caramelized crust. This version is perfect for game day or tailgates. 🌶️
Grilled Chicken Parm
Use grilled chicken breast slices instead of deli meats, topped with mozzarella and provolone cheese, and a sprinkle of dried oregano. Add sautéed mushrooms and spinach for extra veggies. Bake until the cheese is bubbly and golden. For a restaurant-style finish, drizzle with marinara sauce after baking. 🍗
Veggie-Packed Delight
Skip the meat entirely and load up with grilled zucchini, roasted red peppers, spinach, and avocado slices. Spread with garlic hummus or pesto for creaminess.
Add crumbled feta cheese for tanginess. This version is fresh, light, and perfect for vegetarians or anyone looking for a lighter option. 🥑
Breakfast Sub Rolls
Transform these into breakfast sandwiches by filling with scrambled eggs, crispy bacon, cheddar cheese, and sautéed onions. Brush the tops with a mix of butter and hot sauce before baking for a smoky, spicy kick.
Serve with a side of maple syrup for dipping. This is a fun twist on a classic! 🍳
Sweet & Savory Glazed Ham
For a holiday twist, use glazed ham slices with pineapple chunks and Swiss cheese. Brush the rolls with honey mustard before baking for a sweet and tangy flavor. Garnish with toasted pecans for crunch. This version is perfect for Christmas or Easter gatherings. 🎄
Nutrition facts
Frequently asked questions
Can I make these sub rolls without yeast?
Yes! For a quick version, use 12 store-bought sub rolls (like Sara Lee or Italian bread rolls) and follow the same toasting method. Brush with olive oil and sprinkle with semolina before baking at 375°F for 8-10 minutes until golden. The texture won’t be as light, but they’ll still be crispy and delicious.
How do I prevent the rolls from falling apart when I add fillings?
First, let the baked rolls cool completely before assembling. Then, slice them lengthwise and gently toast the cut sides in a skillet for 1-2 minutes to seal the seams. For extra stability, brush the inside with a thin layer of mayonnaise or egg wash before adding fillings. This creates a glue-like barrier that keeps everything together.
What’s the best way to reheat leftover sub rolls?
Wrap the rolls tightly in foil and reheat in a 350°F oven for 5-7 minutes to restore crispiness. For a quick fix, use a skillet over medium heat with a splash of water—cover for 2 minutes to steam the filling while toasting the bread. Avoid microwaving as it makes the rolls soggy.
Can I make these gluten-free?
Use a 1:1 gluten-free flour blend (like Bob’s Red Mill) and add ½ tsp xanthan gum to improve texture. Let the dough rest 10 minutes after mixing to hydrate fully. The baking time may increase by 2-3 minutes—keep an eye on them to prevent over-browning. Store-bought gluten-free rolls also work well.
What’s the secret to getting that perfect crispy crust?
The combo of olive oil brushing and semolina flour creates that iconic crunch. Brush the rolls with oil right before baking, then sprinkle semolina immediately—this forms a crispy barrier. For extra crispiness, bake on the middle rack and rotate the pan halfway through. A light spray of water before baking also helps create steam for even browning.

- 12 Bean Chili Recipe: Hearty Slow-Cooked Depth With 12 Legumes - October 17, 2026
- 5 Seed Bread Recipe: Nutty Crunch and Artisan Flavor in One Loaf - October 17, 2026
- 1 Lb Macaroni Salad Recipe: Bold, Crunchy, and Crowd-Pleasing - October 17, 2026