
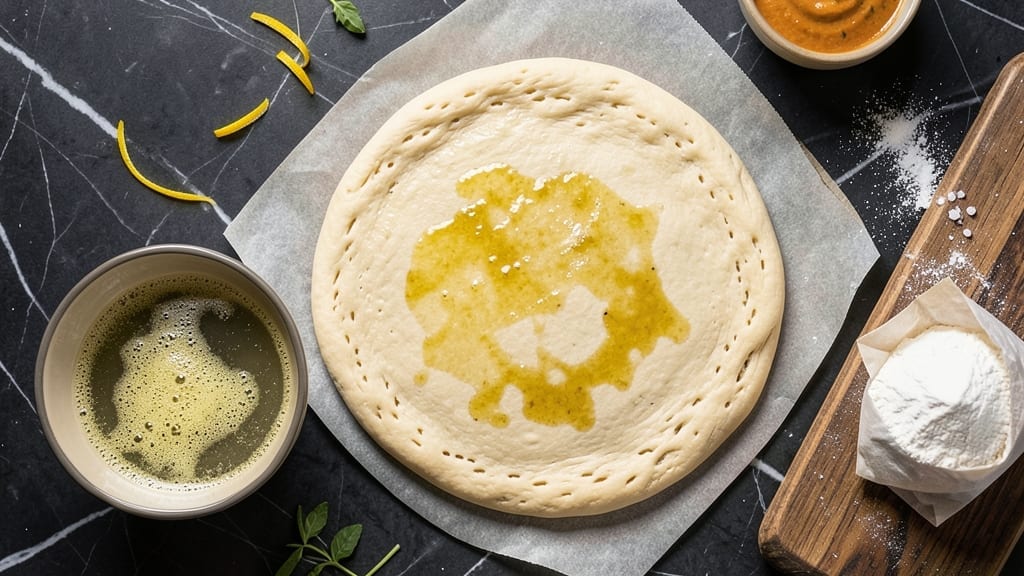
A 12-ounce pizza dough recipe that delivers restaurant-quality crust in just 15 minutes of active time—no kneading required. This no-fuss method transforms simple ingredients into a light, airy, and crispy base that holds sauce perfectly, whether you’re making Neapolitan-style pies or classic New York slices.
The secret lies in a high-hydration dough that develops flavor during a short rest, giving you a foolproof foundation for any pizza night.
What sets this dough apart is its versatility and speed. You’ll start with flour, yeast, water, and a touch of sugar—just five ingredients—then mix, rest for 10 minutes, and shape into a 12-ounce ball ready for topping.
No waiting hours for fermentation, no complicated techniques, and no guesswork. This recipe yields enough dough for one 12-inch pizza or two 8-inch personal pies, making it perfect for weeknight dinners or weekend gatherings.
The result is a crispy-edged, chewy-center crust with an open, airy texture that’s impossible to resist. The dough’s high hydration (70%) creates that signature Neapolitan-style flexibility, while the short rest ensures it’s ready when you are.
Whether you’re a beginner or a seasoned home cook, this method guarantees consistent, professional-quality dough every time—no experience required.
Pair it with your favorite sauce, cheese, and toppings for a complete meal. The dough keeps well in the fridge for up to 48 hours, so you can prep ahead and assemble pizzas whenever inspiration (or hunger) strikes.
Let’s get started with the simplest, most reliable pizza dough recipe you’ll ever make.
Ingredients for 12 oz pizza dough
Five simple ingredients transform into professional-quality pizza dough in minutes—no kneading needed.
| Ingredient | Amount | Notes |
|---|---|---|
| All-Purpose Flour 🌾 | 3 ½ cups | Bread flour for extra chewiness |
| Active Dry Yeast 🍞 | ¼ tsp | Or 1 packet instant yeast |
| Granulated Sugar 🍬 | ½ tsp | Feeds yeast for faster rise |
| Diamond Crystal Kosher Salt 🧂 | 1 tsp | Adjusts flavor perfectly |
| Extra-Virgin Olive Oil 🫒 | 1 tbsp | For dough elasticity |
| Warm Water 💧 | 1 ¼ cups | 105°F-110°F ideal |
| Semolina Flour 🌾 | ¼ cup | For dusting work surface |
The yeast is the workhorse here, so check the expiration date—old yeast won’t activate properly. King Arthur or Bob’s Red Mill brands are reliable for flour, but any all-purpose works. Warm water is critical: too hot kills yeast, too cold slows activation. Test it by dipping your finger in—it should feel like bathwater. For the olive oil, California avocado oil works too, but stick with extra-virgin for authentic flavor. Semolina is optional but gives that signature crust texture—regular flour works in a pinch.
No instant yeast? Active dry yeast needs 5 minutes soaking in warm water with sugar first. Running short on flour? Whole wheat flour at half the amount adds nutrition but makes the dough denser. The sugar can be swapped for honey or maple syrup, but it’ll brown faster. For a lower-carb option, replace 1 cup flour with almond flour (texture will differ). The dough’s hydration is key—don’t add extra water unless your kitchen is very dry. If the dough feels sticky but not wet, you’re golden.
Dough keeps 48 hours refrigerated in an airtight container, wrapped tightly in plastic. For longer storage, freeze shaped dough balls for 3 months—thaw at room temp before using. The yeast activates fastest at 70°F-75°F, so plan your prep during warmer parts of the day. Divide dough into 12-ounce portions immediately after mixing for perfect consistency. Use within 24 hours for best texture—beyond that, it’ll still work but loses crispiness.
Why You’ll Love This Recipe
- No-Fuss Mixing: I swear by the 5-minute prep—just flour, yeast, a pinch of sugar, and olive oil. No fancy tools, no waiting hours, and that first knead? Pure satisfaction when it comes together like butter.
- Golden Crust Magic: The kosher salt and olive oil work together to give you that perfect crispy-chewy edge. Honestly, it’s the kind of crust that makes you close your eyes and take a bite—no sauce even needed.
- Weeknight Wonder: Doubles as dinner or a snack, and the dough keeps for days in the fridge. Between us, I’ve used it for flatbreads, calzones, and even garlic knots—no waste, all flavor.
- Budget-Friendly Staple: Four ingredients, zero guilt. This dough costs pennies per serving, and the leftovers? I freeze them in balls for lazy days. (Yes, even on a Tuesday night.)
Step-by-step instructions for no-knead pizza dough
Here’s how to create a perfectly elastic, restaurant-quality crust with minimal effort.
Activate the Yeast with Warm Water
In a large mixing bowl, combine the 1.25 cups warm water (between 105°F-110°F) with the 0.5 tsp granulated sugar and 0.25 tsp active dry yeast. Stir gently with a wooden spoon and let sit for 5-7 minutes until you see frothy bubbles forming on the surface. This indicates the yeast is active and ready to work.
I always check the water temperature first—too hot kills the yeast, too cold makes it sluggish. If no bubbles form after 7 minutes, your yeast might be dead or the water wasn’t warm enough. Start over with fresh yeast and warmer water. The mixture should smell slightly sweet and yeasty, not sour or flat.
Mix the Dough Ingredients
Add the 3.5 cups all-purpose flour and 1 tsp diamond crystal kosher salt to the yeast mixture. Using a wooden spoon, stir until a shaggy mass forms—don’t worry if it looks dry at first. Then add the 1 tbsp extra-virgin olive oil and mix again until the dough begins to come together.
Here’s the thing—this dough doesn’t need kneading, but you do want to work it just enough to develop some gluten. After about 2 minutes of mixing, the dough should pull away from the sides of the bowl and form a slightly sticky ball. If it’s too dry and crumbly, add 1 tablespoon warm water at a time until it holds together when pressed.
Let the Dough Rest and Develop
Lightly coat your work surface with the 0.25 cup semolina flour and turn out the dough. Gently shape it into a rough ball (no need to be precise) and place it seam-side up in a lightly oiled bowl. Cover tightly with plastic wrap or a damp kitchen towel.
Let the dough rest at room temperature for 1 hour. This initial rest allows the gluten to relax and the yeast to hydrate properly. You’ll know it’s ready when the dough has nearly doubled in size and looks puffy around the edges. Don’t be tempted to rush this step—proper resting time ensures a light, airy crust.
Shape and Prepare for Topping
After the rest, turn the dough out onto a lightly floured surface and gently press it down to release any large air bubbles. Using your fingertips, stretch the dough outward from the center, rotating it 180 degrees every few seconds until you reach your desired thickness—about 1/8-inch for a classic Neapolitan-style crust.
I like to shape the dough directly on parchment paper at this stage so I can easily transfer it to the pizza peel later. If the dough resists stretching, let it rest for another 10 minutes covered with a towel. The goal is a smooth, even surface with no thick spots that would burn before the toppings cook.
Proof Before Baking
Place the shaped dough on a baking sheet or pizza stone and let it proof for 20-30 minutes until it rises noticeably and looks slightly puffy. You’ll see the edges start to pull away from the surface slightly—this indicates the yeast is actively working one final time.
Here’s where timing matters: the dough should be visibly puffy but not so expanded that it springs back when pressed. If it’s not rising enough, cover it and let it proof a few more minutes. Overproofed dough collapses when baked, so keep an eye on it. Once properly proofed, your dough is ready for toppings and baking.
Pro Tips For Making 12 Oz Pizza Dough
- WEIGH YOUR FLOUR: I learned this the hard way—using volume measurements for 12 oz of flour can throw off your dough’s texture. A kitchen scale guarantees consistency; 12 oz of all-purpose flour is about 340 grams, and even a tablespoon difference matters when you’re stretching that dough.
- DON’T SKIP THE WARM WATER: Active dry yeast needs warmth to activate, and lukewarm water (around 105–110°F) is non-negotiable. Cold water kills it; hot water cooks it. If you’re in a hurry, microwave a splash of water for 10 seconds to test—it should feel like a warm bath, not a sauna.
- SALT THE DOUGH FIRST: Diamond Crystal kosher salt is less dense, so if your recipe calls for 1 teaspoon, measure it carefully—it’s easy to overdo. Sprinkle it directly into the flour before adding liquid; this ensures even distribution and prevents clumpy dough that’s hard to knead.
- LET IT RISE UNTIL DOUBLED: Patience here makes all the difference. The dough should puff up to about 1.5 times its original size—no peeking or poking, or you’ll deflate it. Cover it loosely with a towel and give it 1–2 hours; if your kitchen’s cold, extend it to 2.5 hours. A slow rise = better flavor.
Pro cooking tips for this dish
High-Hydration Secrets
This dough’s magic comes from its 70% hydration—meaning 1.25 cups water for 3.5 cups flour. The extra water creates a stretchy, airy texture, but it requires gentle handling. I always use King Arthur bread flour for extra chewiness, though all-purpose works too.
The key is not to overwork the dough during mixing—just combine until it pulls away from the bowl. 💧
Yeast Activation Tricks
Your yeast is the foundation, so treat it right! Dissolve the 0.5 tsp sugar in the warm water (105°F-110°F) first—this jumpstarts fermentation. If bubbles don’t appear in 5-7 minutes, your yeast might be dead.
Pro tip: Store yeast in the fridge for freshness—it lasts 3-4 months this way. I also keep a small jar of Bob’s Red Mill yeast on hand for emergencies. 🍞
Resting Like a Pro
The 1-hour rest is non-negotiable—this builds flavor and gluten structure. Cover the dough with a damp towel to prevent drying. If your kitchen is cold (below 70°F), extend the rest to 90 minutes.
I test readiness by poking the dough: if it springs back slowly, it’s ready. Overproofed dough collapses when baked—trust your eyes, not the clock. ⏰
Stretching Without Tears
Stretching dough is intimidating, but here’s my method: Start with the center and gently pull outward, rotating 180 degrees every few seconds. Use semolina flour on your hands and surface—it prevents sticking and adds crispiness.
If the dough resists, let it rest 10 minutes covered. For even thickness, aim for 1/8-inch—thicker spots burn before toppings cook. 🌾
Proofing Perfection
The final 20-30 minute proof is where the dough transforms. Look for visible puffiness and edges pulling away slightly. If it springs back when pressed, it needs more time. I proof on parchment paper for easy transfer.
Overproofed dough collapses—when in doubt, err on the side of underproofing. A pizza peel helps with transfer, but a baking sheet works too. 🔥
Equipment Shortcuts
No fancy tools? No problem. A wooden spoon and large mixing bowl work perfectly. For stretching, use wet hands and a lightly floured surface. A pizza stone gives the best crust, but a preheated baking sheet (500°F) works in a pinch.
I keep a digital thermometer handy to monitor yeast water temperature—105°F-110°F is ideal. 🌡️
Nutrition facts
Frequently asked questions
Can I make this dough without a kitchen scale?
This recipe uses standard measuring cups and spoons. The 12-ounce yield comes from the 3.5 cups flour and 1.25 cups water ratio—no scale needed. For a quick check, 1 cup all-purpose flour weighs about 4.5 ounces, so 3.5 cups equals roughly 15.75 ounces of dough before baking.
What if my dough doesn’t rise after the 1-hour rest?
Check your yeast first—it may be old or inactive. Try mixing fresh 0.25 tsp yeast with 1 tbsp warm water and 0.5 tsp sugar in a separate bowl. If it bubbles within 5 minutes, your yeast is fine. If not, replace it. Also ensure your kitchen is warm (70°F+) and the dough is covered tightly to trap heat. Cold environments slow fermentation.
How do I adjust this for a thicker or thinner crust?
For a thicker crust, reduce water by 1-2 tablespoons (keep hydration at 65%). For thinner, add 1-2 tablespoons water (up to 75% hydration). The key is consistency—always measure flour by weight if possible. A 1/8-inch thickness works for most styles, but Neapolitan prefers 1/4-inch for chewiness.
Can I use this dough for deep-dish pizza?
This high-hydration dough is designed for thin-crust styles. For deep-dish, reduce water to 1 cup (50% hydration) and use bread flour for structure. The 12-ounce batch would make a 10-inch deep-dish pie instead. A longer proof (2 hours) and higher oven temp (475°F) work best for this style.
Why does my dough tear when stretching?
Overworking the dough or stretching too quickly causes tears. Let it rest 10 minutes covered if it resists, and use wet hands with semolina flour to prevent sticking. Start with the center and pull outward gently—think “stretching, not tearing.” If it still cracks, cover and rest another 15 minutes before trying again.

- 12 Bean Chili Recipe: Hearty Slow-Cooked Depth With 12 Legumes - October 17, 2026
- 5 Seed Bread Recipe: Nutty Crunch and Artisan Flavor in One Loaf - October 17, 2026
- 1 Lb Macaroni Salad Recipe: Bold, Crunchy, and Crowd-Pleasing - October 17, 2026