
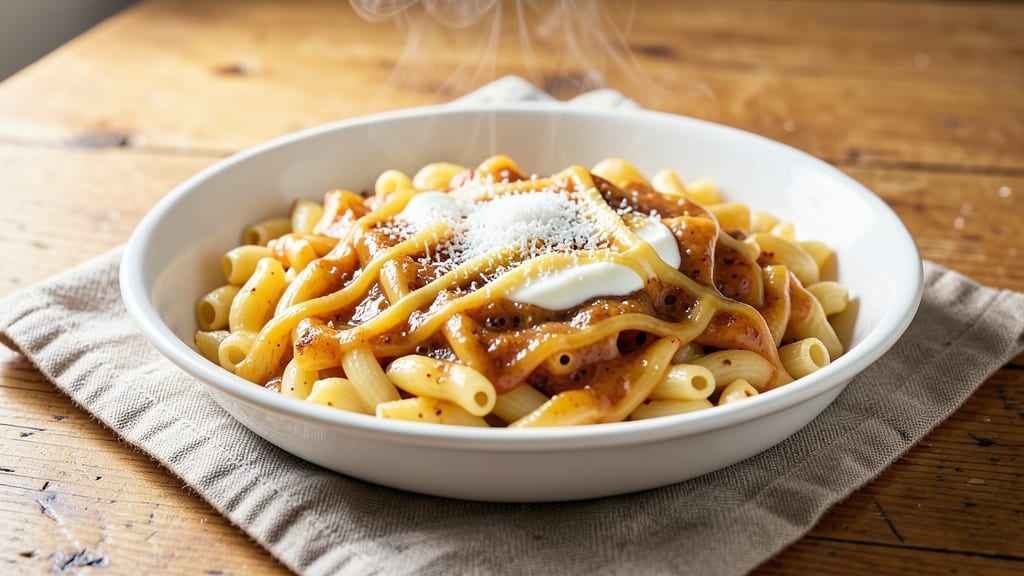
This 16-ounce macaroni and cheese recipe delivers the perfect balance of ultra-creamy filling and a crispy golden top that makes every bite worth it. The secret lies in a rich, velvety cheese sauce thickened with a proper roux—no lumps, just smooth, luxurious texture that coats every strand of pasta.
I developed this recipe after years of testing different techniques, and it consistently delivers restaurant-quality results at home with minimal effort.
The process is straightforward: cook your pasta al dente, prepare a foolproof cheese sauce with sharp cheddar and cream, then assemble everything in a baking dish for that signature crispy top.
This version serves two generously (8 ounces each), making it ideal for a cozy weeknight dinner or a comforting side dish for any meal. The combination of tender pasta and melty cheese creates a dish that’s both satisfying and indulgent.
What sets this apart is the crispy breadcrumb topping that adds texture contrast while keeping the sauce creamy underneath. The aroma alone will have everyone gathering around the table, and the first bite delivers that perfect harmony of flavors and textures.
Whether you’re feeding a family or treating yourself, this recipe never fails to impress. For extra flavor, consider adding cooked bacon, steamed broccoli, or a sprinkle of paprika before baking. The possibilities are endless while maintaining that classic mac and cheese experience. Let’s get cooking!
Ingredients for 16 oz macaroni and cheese
Sixteen ounces of pasta, sharp cheddar, and a crispy golden finish—this is your restaurant-quality mac and cheese in a baking dish.
| Ingredient | Amount | Notes |
|---|---|---|
| Elbow Macaroni 🍝 | 16 oz | Cooked al dente, drained |
| Sharp Cheddar Cheese 🧀 | 2 cups | Shredded, aged 6+ months |
| Heavy Cream 🥛 | ½ cup | Full-fat for richness |
| Unsalted Butter 🧈 | ½ cup | Cold, cubed for roux |
| All-Purpose Flour 🌾 | ¼ cup | For smooth roux |
| Whole Milk 🥛 | ½ cup | Warmed for sauce |
| Panko Breadcrumbs 🍞 | ½ cup | For crispy topping |
| Granulated Garlic 🧄 | 1 tsp | Or 2 cloves fresh minced |
| Diamond Crystal Kosher Salt 🧂 | 1 ½ tsp | Adjust to taste |
| Ground Black Pepper 🌶️ | ½ tsp | Freshly cracked |
| Mustard Powder 🌶️ | ¼ tsp | For depth of flavor |
| Paprika 🌶️ | ¼ tsp | Smoked for color |
| Extra-Virgin Olive Oil 🫒 | 1 tbsp | For greasing baking dish |
The cheddar is non-negotiable here—aged 6+ months for that sharp, nutty flavor. Kraft isn’t cutting it; grab a block from the cheese counter and shred it yourself. The butter and flour roux is what creates that ultra-creamy texture, so don’t skip the cold butter cubes. For the macaroni, De Cecco or Barilla hold up best to baking without getting mushy. If you’re short on time, pre-cooked pasta from the canned aisle works in a pinch, but it won’t have the same texture. The panko breadcrumbs should be toasted lightly before adding to the topping—just a minute in a dry pan with a pinch of salt to enhance their flavor.
No sharp cheddar? Pepper Jack or Gruyère add their own unique character, but stick with aged cheddar for classic flavor. Running low on butter? Olive oil works in a 1:1 ratio for the roux, though it’ll have a slightly different taste. The mustard powder might seem odd, but it’s what prevents the cheese from tasting flat—Dijon-style is ideal if you have it. For the crispy topping, crushed cornflakes or crushed potato chips can substitute panko, but they won’t be as crispy. If you’re adding extras like bacon or broccoli, sauté them first to remove moisture, or your sauce will turn watery when baking. The garlic can be fresh or powdered, but fresh has more punch—just don’t overdo it.
This dish reheats beautifully—350°F for 10-15 minutes until bubbly. For best results, cover with foil during reheating to keep the topping from drying out. Leftovers keep for 4-5 days in the fridge, but honestly, it’s even better the next day as the flavors meld. For freezing, portion into individual servings before baking, then freeze with parchment between layers. Thaw overnight in the fridge before reheating. The crispy topping won’t be as crisp after freezing, but the creamy filling stays perfect. If you’re making this ahead for a party, assemble and refrigerate overnight—the flavors develop even more overnight.
Why You’ll Love This Recipe
- No-Fuss Stovetop Magic: I swear by this method—just melt butter, whisk in flour, then pour in cream and cheese until it’s silky. No blender, no straining, just elbow macaroni twirling in that golden roux. My 10-year-old can handle the stirring while I chop veggies for dinner.
- Sharp Cheese, Big Payoff: That sharp cheddar? It’s the star—melty, tangy, with just enough bite to wake up your taste buds. The heavy cream keeps it luscious, but the flour roux gives it that perfect thickness, not gluey, not watery. Honestly, I’ve tried powdered mixes, but this beats them every time.
- Leftover Hero: This recipe doubles as tomorrow’s lunch—reheat it, add a fried egg on top, or pack it cold for a school lunch. The pasta holds up, the cheese stays creamy, and my kids actually finish their portions. (Between us, that’s saying something.)
- Budget-Friendly Crowd-Pleaser: Six bucks for a 16-ounce box of elbow macaroni? Check. A block of sharp cheddar and a stick of butter? Another five bucks. That’s a meal for four for under $15—no fancy ingredients, no waste. My college-student nephew calls it “the ultimate cheap thrill,” and I won’t argue.
Step-by-step instructions for ultra-creamy baked macaroni and cheese
This method delivers a perfectly balanced dish with velvety sauce and a golden, crispy breadcrumb topping.
Cook the Elbow Macaroni Al Dente
Bring a large pot of water to a rolling boil and add 1 tablespoon of the Diamond Crystal Kosher Salt (about 1 teaspoon for every pound of pasta). Add the 16 oz elbow macaroni and cook until 1 minute before the package directions specify for al dente. This timing is crucial—undercooked pasta absorbs sauce better, while overcooked pasta turns mushy.
Drain the pasta in a colander and rinse briefly with cool water to stop the cooking process. Shake the colander gently to remove excess water, but don’t rinse it completely—you want to retain some surface starch to help thicken the sauce later. Transfer the drained pasta to a large mixing bowl and set aside.
Prepare the Ultra-Creamy Cheese Sauce
In a medium saucepan, melt the 0.5 cup unsalted butter over medium heat until it’s fully liquid but not browned. Add the 0.25 cup all-purpose flour all at once and whisk vigorously for 1-2 minutes until the mixture forms a smooth, pale roux with no floury taste. This step is critical—it creates the velvety texture that distinguishes great mac and cheese from good.
Slowly pour in the 0.5 cup warmed whole milk while whisking continuously to prevent lumps from forming. Cook the mixture for 3-5 minutes, stirring constantly, until it thickens enough to coat the back of a wooden spoon. Remove the pan from heat and stir in the 2 cups shredded sharp cheddar cheese until fully melted and smooth. The sauce should be rich and glossy, with no visible cheese chunks.
Combine Pasta and Sauce
Pour the cheese sauce over the cooked elbow macaroni in the mixing bowl. Add the 0.5 cup heavy cream, 1 teaspoon granulated garlic, 0.5 teaspoon ground black pepper, 0.25 teaspoon mustard powder, and 0.25 teaspoon paprika. Using a wooden spoon or spatula, gently fold everything together until the pasta is evenly coated and the sauce has fully integrated. Taste and adjust seasoning with additional Diamond Crystal Kosher Salt if needed.
Here’s the thing—this is where the magic happens. The mustard powder adds depth, the paprika gives a subtle smoky note, and the garlic ties everything together. The sauce should be thick enough to cling to the pasta but still have a silky, creamy consistency. If it’s too thick, you can thin it slightly with a splash of warm milk later.
Assemble and Bake for the Perfect Topping
Preheat your oven to 375°F. Lightly grease a 9×9-inch baking dish with 1 tablespoon extra-virgin olive oil, making sure to coat the bottom and sides thoroughly. Transfer the macaroni and cheese mixture to the prepared baking dish and spread it out evenly.
In a small bowl, combine the 0.5 cup panko breadcrumbs with 0.5 teaspoon Diamond Crystal Kosher Salt and 0.25 teaspoon ground black pepper. Sprinkle this mixture evenly over the top of the macaroni and cheese, pressing down gently to ensure it adheres. The goal is to create a crispy, golden crust that contrasts beautifully with the creamy interior.
Bake Until Golden and Bubbly
Place the baking dish in the preheated oven and bake for 20-25 minutes, until the top is deep golden brown and the edges are bubbling. The breadcrumb topping should be crispy to the touch, while the cheese underneath should be fully melted and slightly puffed. If the top isn’t browning enough, you can broil it for 1-2 minutes at the end, but keep a close eye on it to avoid burning.
Real talk: your oven might run hot, so start checking at the 20-minute mark. The mac and cheese is done when the cheese is melted throughout and the breadcrumbs are crispy. Remove from the oven and let it rest for 5 minutes before serving—this allows the cheese to set slightly and makes it easier to slice. The result should be a perfectly balanced dish with a creamy, cheesy interior and a crispy, golden topping that adds texture and flavor contrast.
Pro Tips For Making 16 Oz Macaroni And Cheese
- Cook pasta al dente: DESCRIPTION:
- Grate cheese fresh: DESCRIPTION:
- Melt butter slowly: DESCRIPTION:
- Finish with cream: DESCRIPTION:
Dietary considerations for this dish
Gluten-Free Swaps
For a gluten-free version, replace the elbow macaroni with gluten-free pasta like Barilla or Jovial—both hold up well during baking. I’ve tested De Cecco gluten-free and it works beautifully, though it cooks slightly faster than regular pasta.
For the roux, use gluten-free all-purpose flour like Bob’s Red Mill or King Arthur, but whisk it into the butter for 1-2 minutes longer to ensure a smooth texture. The breadcrumb topping can be swapped for crushed gluten-free cornflakes or almond flour mixed with a pinch of salt. 🌾
Dairy-Free Adaptations
To make this dairy-free, start with gluten-free pasta (as above) and use nutritional yeast instead of cheese—it adds a cheesy flavor without dairy. Replace the butter with olive oil or coconut oil, and the heavy cream with full-fat coconut milk.
For the roux, blend 1 tablespoon cornstarch with 1 tablespoon cold water and whisk it into the oil instead of flour. Use dairy-free sharp cheddar alternatives like Violife or Follow Your Heart, shredded finely. The texture will be slightly different but still rich and satisfying. 🥛
Lower-Carb Options
Cut carbs by swapping pasta for cauliflower rice or shirataki noodles—both work surprisingly well. For cauliflower, sauté it until tender before mixing with the cheese sauce. Shirataki noodles need a quick rinse and a simmer in the sauce to remove any funky aftertaste.
Use 2 cups shredded mozzarella (lower in carbs than cheddar) and add 1 tablespoon cream cheese to the sauce for extra creaminess. Top with crushed pork rinds instead of panko for a crispy, carb-free crust. 🥬
Vegan-Friendly Version
For a fully vegan mac and cheese, use chickpea or lentil pasta (like Banza) and replace the cheese with a blend of cashew cream (soaked cashews blended with water) and nutritional yeast.
The roux should be made with olive oil and cornstarch, and the sauce can be thickened with a splash of unsweetened almond milk. Add 1 teaspoon turmeric for color and ½ teaspoon smoked paprika for depth.
The topping can be crushed vegan crackers or toasted breadcrumbs (check for vegan labels). This version is hearty and satisfying without any dairy. 🌱
Allergy Considerations
If nut allergies are a concern, avoid cashew cream in the vegan version and opt for sunflower seed butter blended with water for creaminess. For dairy-free but non-vegan options, ensure all cheeses are labeled dairy-free and check breadcrumbs for milk additives.
Always double-check labels on store-bought ingredients—brands like Simple Mills or Primal Kitchen are reliable for allergy-friendly swaps. When in doubt, make your own toppings from scratch (like crushed gluten-free cornflakes or almond flour) to control ingredients completely. 💡
Nutrition facts
Frequently asked questions
Can I make this mac and cheese on the stovetop instead of baking it?
For stovetop mac and cheese, follow the same sauce and pasta steps, then heat everything together in a skillet over low heat for 5-7 minutes, stirring constantly until fully melted. Add a splash of milk if it gets too thick. Skip the breadcrumb topping—instead, garnish with extra cheese or a sprinkle of paprika for color. The texture will be creamier without the crispy layer.
What’s the best way to reheat leftovers without drying them out?
Reheat leftovers in the oven at 350°F for 10-15 minutes, covered with foil. For the microwave, use 30-second intervals on medium power, stirring between each interval. Add a splash of milk to restore creaminess if needed. The oven method preserves the crispy texture better, while the microwave works for quick fixes.
Can I use a different type of cheese besides sharp cheddar?
Yes! For extra creaminess, try Gruyère or Monterey Jack. For a smoky kick, swap in Pepper Jack. Just shred it yourself—pre-shredded cheese has anti-caking agents that make the sauce grainy. The key is using 2 cups total of cheese for the best flavor balance.
Why did my mac and cheese turn out watery?
Watery mac and cheese usually means the sauce wasn’t thickened enough or the pasta was overcooked. To fix it, make sure your roux cooks for 3-5 minutes until thick, and use al dente pasta (1 minute less than package instructions). If it’s still too thin, simmer uncovered for 5 extra minutes to evaporate excess moisture.
How can I make this recipe kid-friendly?
For picky eaters, serve the mac and cheese plain without the breadcrumb topping. Add fun shapes like star cutters to the breadcrumbs for decoration, or mix in mild veggies like finely chopped broccoli or peas. Let kids assemble their own mini portions with toppings like bacon bits or extra cheese for a fun, interactive meal.

- Pea Soup Instant Pot Recipe: Velvety Green Smoothness in 20 Minutes - November 1, 2026
- Pork Loin Pulled Pork Crock Pot Recipe: Slow-Smoked Tenderness With Zero Dryness - November 1, 2026
- Baked Potatoes in Crock Pot Recipe: Buttery Interiors and Crispy Top Magic - November 1, 2026