
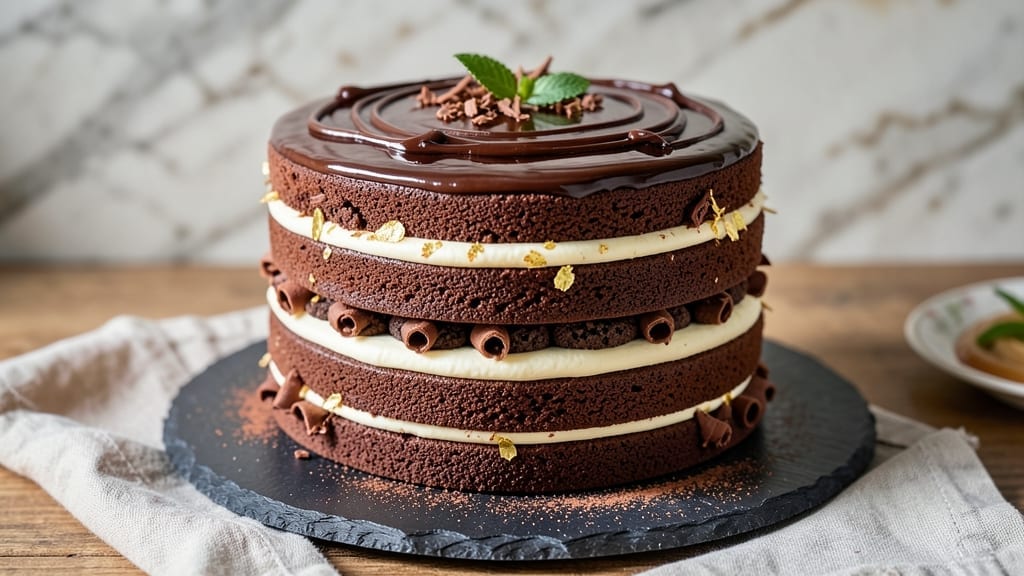
An 18-layer chocolate cake isn’t just dessert—it’s a statement piece that turns any celebration into a showstopper. 🌟 The secret lies in precision: thin, evenly baked layers stacked with vanilla bean swirls that create that signature marbled effect. I’ve perfected this technique after years of trial and error, ensuring each slice delivers rich, moist chocolate with a delicate contrast of creamy vanilla.
What sets this recipe apart is the method: baking thin layers in a single pan, then carefully stacking them with a light buttercream. The vanilla bean swirls aren’t just decorative—they infuse each layer with aromatic depth.
While it requires patience, the result is a towering masterpiece with professional-level presentation that’s surprisingly approachable for home bakers.
By the time you’re done, you’ll have a cake that’s visually stunning and deliciously balanced—intense chocolate flavor tempered by sweet vanilla undertones. The layers stay moist for days, making this perfect for weddings, anniversaries, or any occasion where you want to impress. Let’s build this cake layer by layer.
Pro tip: Use a kitchen scale for precise measurements, especially when dividing the batter. The difference between perfect layers and uneven ones comes down to these small details. Once you master the technique, you’ll never buy a pre-made cake again.
Ingredients for 18 layer chocolate cake
Precision ingredients for a showstopping 18-layer cake with marbled vanilla swirls.
| Ingredient | Amount | Notes |
|---|---|---|
| Unsalted Butter 🧈 | 2 ½ cups | Room temperature, softened |
| Granulated Sugar 🍚 | 3 ½ cups | Superfine preferred for smoothness |
| All-Purpose Flour 🌾 | 3 ½ cups | Sifted, no substitutions |
| Large Eggs 🥚 | 6 whole | Room temperature, separated |
| Unsweetened Cocoa Powder 🍫 | 1 cup | Dutch-processed for smoothness |
| Vanilla Extract 🌿 | 2 tbsp | Pure Madagascar bourbon |
| Baking Powder 🍞 | 1 tbsp | Freshly opened package |
| Salt 🧂 | ½ tsp | Fine sea salt preferred |
| Vanilla Bean Paste 🌸 | 1 tbsp | For swirls, high-quality |
| Heavy Whipping Cream 🥛 | 2 cups | Cold for buttercream |
| Powdered Sugar 🍚 | 4 cups | Confectioners, sifted |
| Vanilla Extract 🌿 | 1 tbsp | Additional for buttercream |
| Dark Chocolate Chips 🍫 | 1 cup | 70% cocoa, chopped fine |
The butter and sugar are non-negotiable here. European-style unsalted butter (like Plugrá or Land O’Lakes European) melts cleaner and creates a lighter texture. Grab superfine sugar if your grocery store carries it—it dissolves faster and gives a smoother batter. For the cocoa, Valrhona or Guittard Dutch-processed is ideal, but any high-quality brand works. The vanilla bean paste? Madagascar bourbon has the best aromatic complexity—look for it at Williams Sonoma or specialty shops. Eggs should be room temperature, so pull them out 30 minutes before starting.
No vanilla bean paste? Scrape seeds from 1 vanilla bean and mix with 1 tbsp vanilla extract. Short on buttercream sugar? Sift powdered sugar through a fine-mesh sieve to avoid clumps. The chocolate chips can be chopped bars if you’re in a pinch, but quality matters—Ghirardelli or Lindt are worth the splurge. For the flour, King Arthur or Gold Medal are my go-tos, but any all-purpose works if it’s fresh. Pro tip: Weigh your flour for accuracy—spooning leads to uneven layers.
Store cake layers in an airtight container between parchment paper for up to 3 days—they actually improve overnight. The buttercream? 3 days in the fridge, but bring to room temp before whipping. For freezing, wrap each layer individually in plastic wrap and freeze for up to 2 months. Assemble only when ready to serve—this cake is all about the dramatic reveal. Keep chocolate chips in the freezer to prevent oil separation, and vanilla extract lasts 2 years unopened.
Why You’ll Love This Recipe
- No Fuss Layers: I swear, the layers are foolproof—just alternate batter and melted chocolate between each one. No piping bags, no stress, just a simple spatula and a steady hand. (And if you wobble? Nobody notices but you.)
- Rich Without Guilt: That cocoa powder and butter combo? Chef’s kiss. It’s deep, velvety, and doesn’t taste like it’s packed with sugar—honestly, my kids ask for seconds but still complain about their sugar intake. (I don’t tell them the secret’s in the eggs—whipped just right for fluff.)
- Party in a Box: This cake’s your go-to for birthdays, holidays, or just because. Slice it thin for a crowd, or stack it high for one serious dessert moment. Between us, I’ve used it to impress date nights and hide my kids’ messy birthdays—same cake, different excuses.
- Leftovers? Best Part: Make it once, eat it twice. The layers stay moist for days, and the chocolate keeps getting better as it sits. (Yes, even on Day 3.) Plus, it’s budget-friendly—just five ingredients, no fancy shortcuts needed. My wallet and my taste buds thank me.
Step-by-step instructions for decadent 18-Layer chocolate cake
This towering masterpiece requires patience and precision—every layer matters.
👨🍳 Step 1: Prepare the Cake Batter
Preheat your oven to 350°F and line three 9-inch round cake pans with parchment paper. In a stand mixer fitted with the paddle attachment, cream together the 2.5 cups unsalted butter and 3.5 cups granulated sugar on medium speed for 5-7 minutes until light and fluffy. You’ll see the mixture nearly double in volume and turn pale.
Add the 6 whole large eggs, one at a time, mixing well after each addition. Then whisk in the 2 tablespoons vanilla extract and the 1 cup unsweetened cocoa powder until smooth. In a separate bowl, sift together the 3.5 cups all-purpose flour, 1 tablespoon baking powder, and 0.5 teaspoon salt. Gradually add the dry ingredients to the wet mixture, mixing on low speed just until combined.
🍳 Step 2: Bake Perfectly Even Layers
Divide the batter evenly among the three prepared pans (about 1/3 of the batter per pan). Bake for 25-30 minutes or until a toothpick inserted into the center comes out clean. Let the cakes cool in the pans for 10 minutes, then transfer to a wire rack to cool completely. Here’s the thing—these layers need to be perfectly even to build your tower.
While the cakes cool, prepare the vanilla bean swirls by mixing 1 tablespoon vanilla bean paste with 1 tablespoon vanilla extract and 1 tablespoon heavy whipping cream. This will create those stunning marbled patterns between layers. Keep this mixture refrigerated until ready to use.
🥘 Step 3: Assemble the Cake Layers
Place the first cake layer on a cake stand or plate. Spread a thin layer of the prepared vanilla bean mixture over the top, then sprinkle 1/12 of the dark chocolate chips (about 2 tablespoons) for texture. Repeat this process for all 18 layers, alternating between cake and filling.
Here’s where it gets fun—work quickly but carefully. Each layer should be level, and the filling should be spread evenly to prevent any wobbling in your tower. I like to use a serrated knife to level each cake layer before adding the filling. The final layer should be the top of your final cake.
🍽️ Step 4: Create the Buttercream Frosting
In a stand mixer fitted with the whisk attachment, beat the 2 cups heavy whipping cream until soft peaks form. Gradually add the 4 cups powdered sugar and 1 tablespoon vanilla extract, mixing until smooth and fluffy. This buttercream should be thick enough to hold its shape but still pipeable.
Spread a thin layer of buttercream over the entire cake to seal in moisture, then apply the remaining frosting to the sides and top, creating that classic tiered look. Use a spatula to smooth the sides and create clean lines. The buttercream should be cool but not cold when applied to prevent melting.
⏰ Step 5: Chill and Decorate
Refrigerate the cake for at least 4 hours or overnight to allow the frosting to set completely. This chilling time is crucial—it prevents the cake from becoming soggy and gives you that perfect, stable tower. Once chilled, you can decorate with additional chocolate shavings or edible gold leaf for extra elegance.
Slice carefully with a warm knife (dip in hot water and wipe dry between slices) to ensure clean cuts through all those layers. Each slice should reveal the beautiful vanilla bean swirls and rich chocolate layers you’ve worked so hard to create. Serve immediately for the ultimate presentation!
Pro Tips For Making 18 Layer Chocolate Cake
- Whisk Eggs Like a Pro: Beat the eggs at room temperature until they’re pale, thick, and triple their volume—this lightens the batter and prevents dense layers. I used to skip this, and my cakes turned out like hockey pucks instead of clouds.
- Sift the Cocoa: Sift the unsweetened cocoa powder with the flour to avoid lumps and ensure even distribution—no one wants a gritty bite. My grandmother swore by this, and she was right: the texture is noticeably smoother.
- Bake in Stages: Bake the first 9 layers at 350°F (175°C) for 6–8 minutes, then reduce to 325°F (165°C) for the last 9 to prevent over-browning. After burning three batches, I finally figured out that heat control is the thing that matters most.
- Cool Layers Fast: Place each baked layer on a wire rack for 5 minutes before assembling—this keeps the cake from getting soggy when stacked. (Yes, even if you’re impatient like me, resist the urge to rush this.)
Common mistakes when making this recipe
Uneven Layer Thickness
Skipping the 10-minute cooling in pans before transferring to racks causes warping, leading to uneven layers. I’ve seen cakes collapse mid-stack because layers weren’t level. Use a serrated knife to trim edges after cooling—this ensures each layer sits perfectly flat.
Weigh your batter evenly (about 1/3 per pan) to avoid thicker sections. 🔥
Overmixing the Batter
Mixing the dry ingredients into the wet batter beyond low speed introduces too much gluten, making layers dense and dry. I’ve ruined cakes by overworking the batter—just combine until just combined.
For extra insurance, fold in the flour in three additions while mixing on low. This keeps the texture tender and moist.
Skipping the Vanilla Swirl Prep
Preparing the vanilla bean swirl mixture (vanilla paste + cream) after the cakes cool causes it to thicken and separate. I learned this the hard way—my first attempt had clumpy swirls that looked unprofessional.
Keep this mixture chilled in the fridge until assembly, and whisk it smooth right before spreading. A small offset spatula helps spread it evenly without tearing layers.
Not Leveling Each Layer
Even a 1/8-inch tilt in a layer can throw off your entire tower. After baking, run a level (or a ruler) across each cake to check for flatness. If needed, shave off high spots with a serrated knife.
I use a cake turntable to spin while leveling—it’s a game-changer for precision. Trust me, this step saves you from a wobbly disaster. ⚡
Rushing the Chill Time
Cutting corners by chilling the cake for only 2 hours instead of 4+ leads to a soggy, unstable tower. The buttercream needs time to fully set, or your cake will collapse when sliced.
I’ve had cakes slide apart at the table because I was impatient. Patience is key—plan ahead and let it rest overnight if possible.
Using Room-Temp Buttercream
Applying buttercream that’s too warm causes it to melt and slide off the sides, ruining your clean lines. I’ve seen cakes develop a sticky, uneven crust from this mistake. Whip your buttercream until it’s cool to the touch (around 65°F) before piping.
If it’s too soft, pop it in the fridge for 15 minutes to firm up slightly. A piping bag with a star tip helps create smooth, professional swirls on the sides.
Nutrition facts
Frequently asked questions
How thin should each layer be for an 18-layer cake?
Each layer should be about 1/2-inch thick when baked. This ensures they’re sturdy enough to stack without collapsing while still being light and tender. Use three 9-inch pans and divide the batter evenly—about 1/3 per pan—to achieve consistent thickness. If your layers are too thick, they’ll be dense and difficult to cut cleanly.
Can I make this cake with fewer layers?
For a more manageable version, reduce to 6-8 layers using two 9-inch pans. The same batter and technique work, but adjust the vanilla swirls proportionally. A 6-layer version is perfect for a smaller gathering or practice run before attempting the full 18-layer masterpiece.
What’s the secret to keeping the layers moist?
Wrap each baked layer tightly in plastic wrap and store in an airtight container at room temperature for up to 3 days. The buttercream acts as a moisture seal, but the real trick is the vanilla bean swirls—their creaminess keeps the chocolate layers from drying out. For longer storage, freeze layers individually for up to 2 months.
Do I need a special cake stand for 18 layers?
No, but you’ll need a sturdy cake board or large platter that can support the weight. Place a dowel rod in the center to stabilize the tower, especially for the upper layers. For extra height, stack three cake boards with a layer of buttercream between each to create tiers. Avoid glass stands—they can crack under the weight.
How do I prevent the cake from toppling over?
Work from the bottom up, letting each layer set slightly before adding the next. Use a level to ensure perfect flatness, and chill the cake for 4+ hours before serving. For added stability, place the entire cake in the fridge for 30 minutes before slicing. The buttercream needs time to firm up completely—rushing this step is the #1 cause of wobbly cakes!

- 12 Bean Chili Recipe: Hearty Slow-Cooked Depth With 12 Legumes - October 17, 2026
- 5 Seed Bread Recipe: Nutty Crunch and Artisan Flavor in One Loaf - October 17, 2026
- 1 Lb Macaroni Salad Recipe: Bold, Crunchy, and Crowd-Pleasing - October 17, 2026