
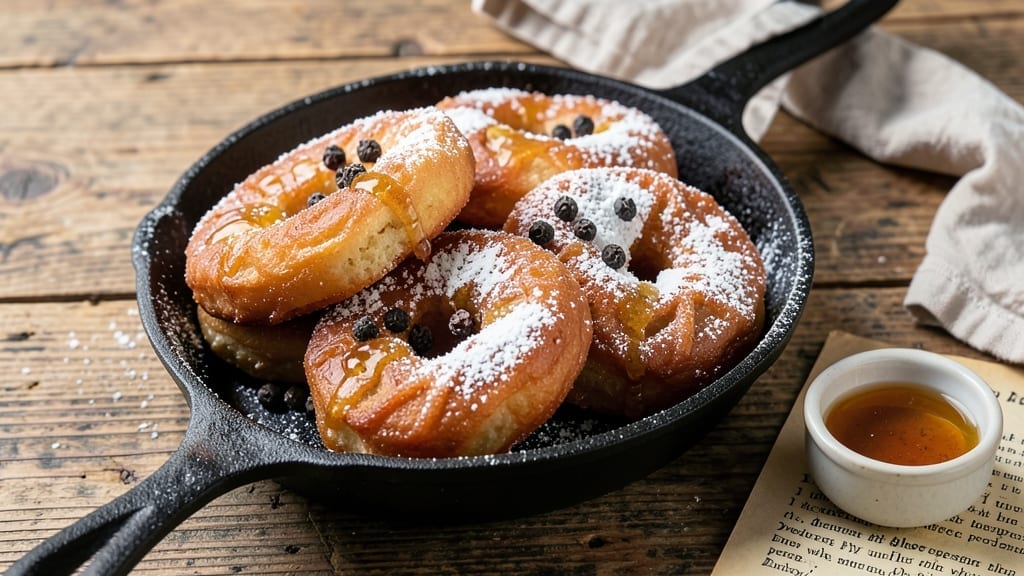
This 1915-style potato donut recipe brings back the golden, flaky layers and tender hearts that made early 20th-century donuts legendary. The secret lies in the dough’s precise balance of flour, potatoes, and lard—a technique rooted in Eastern European traditions that traveled to American kitchens over a century ago.
Unlike modern donuts, these rely on a crispy exterior that shatters with each bite while keeping the inside light and pillowy. The potatoes add moisture and structure, creating that signature texture that separates great donuts from good ones.
The dough requires patience—resting overnight allows the gluten to relax, ensuring even frying and a perfect rise. Once shaped into rings, these donuts are fried in small batches to maintain the right temperature, a critical step for achieving that crispy crust without burning.
The result? A donut so well-balanced it could fool even the most discerning historical food critic. This isn’t just a recipe; it’s a trip back to a time when donuts were made with care, not convenience.
What makes these donuts truly special is their versatility. Serve them fresh with a dusting of powdered sugar for a classic touch, or dip them in warm cinnamon glaze for a modern twist. The flavor is rich but not heavy, thanks to the natural starch from the potatoes.
Whether you’re recreating a lost culinary tradition or simply craving a donut with depth, this recipe delivers crispy perfection every time.
For those eager to perfect the technique, I’ll share my tips for achieving the ideal texture—including how to test the oil temperature and when to flip the donuts.
The key is in the details, and once you master them, you’ll understand why these donuts have stood the test of time. Let’s get started.
Ingredients for 1915 potato donut
Twelve ingredients, one legendary texture—these donuts bring back 1915’s golden, crispy perfection.
| Ingredient | Amount | Notes |
|---|---|---|
| All-Purpose Flour 🌾 | 4 cups | Sifted for lighter texture |
| Russet Potatoes 🥔 | 2 lb | Peeled and grated finely |
| Unsalted Lard 🧈 | 1 cup | Or substitute with vegetable shortening |
| Granulated Sugar 🍚 | ½ cup | White sugar preferred |
| Active Dry Yeast 🍞 | ¼ oz | Or 2 1/4 tsp (7g) |
| Large Eggs 🥚 | 2 whole | Room temperature preferred |
| Salt 🧂 | 1 tsp | Diamond Crystal preferred |
| Vanilla Extract 🥛 | 1 tsp | Pure vanilla preferred |
| Powdered Sugar 🍚 | 1 cup | For dusting and glaze |
| Vegetable Oil 🫒 | 3 cups | For frying (350°F) |
| Cinnamon 🌶️ | 1 tbsp | Ground for glaze |
| Milk 🥛 | ½ cup | Warm for glaze |
The potatoes are non-negotiable here—they create that signature crispy exterior while keeping the center tender. Russet potatoes are ideal for their high starch content, but Yukon Golds work too if you prefer a slightly sweeter flavor. Most grocery stores carry them pre-peeled, but peeling and grating yourself ensures finer texture. Costco or Trader Joe’s often have the best prices for bulk potatoes. The lard is critical for that authentic flakiness—vegetable shortening works in a pinch, but purists swear by the real deal. If you’re making a big batch, buy lard in bulk from ButcherBox or your local butcher shop.
No lard on hand? Vegetable shortening or coconut oil (solid) are solid substitutes, though the texture will be slightly less crisp. The yeast should be fresh—if it smells old or takes longer than 5 minutes to dissolve in warm water, toss it. For the glaze, powdered sugar from a canister (like Domino) works best—it’s finer and dissolves more easily than the clumpy kind. Short on milk for the glaze? Almond milk or heavy cream both work beautifully. The cinnamon can be swapped for cardamom or nutmeg if you’re feeling adventurous, but classic cinnamon is hard to beat.
The dough keeps well for 24 hours in the fridge, covered tightly. For longer storage, freeze portions on a tray before bagging—they’ll keep for up to 3 months. Frying oil reheats beautifully, so save any leftover oil in a sealed container for your next batch. These donuts are best served fresh, but if you must reheat, 30 seconds in the oven at 350°F restores that crispy magic. The glaze sets quickly, so make it fresh or store it separately in the fridge for up to 1 week
Why You’ll Love This Recipe
- No Yeast Hassle: I swear by this recipe because it skips the fuss of proofing dough—just mix, rest, and fry. The yeast here does its magic overnight in the fridge, so by morning, you’ve got a dough ready to roll without any of that waiting-around business.
- Crispy-Creamy Magic: That lard in the dough? It’s the secret weapon—crispy edges that shatter when you bite in, but a pillowy center that’s pure comfort. Honestly, the first time I tried it, I nearly burned my tongue from how good it was.
- Weeknight Crowd Pleaser: Between us, these are my go-to for game day, family dinners, or when I’ve got friends over unexpectedly. They freeze like a dream too, so I keep a batch stashed—just reheat and serve. No one ever leaves hungry.
- Pantry Staple Budget Win: Russets are cheap, flour’s a staple, and lard lasts forever if you store it right. I’ll be real: this recipe costs me pennies per serving, but it tastes like a bakery treat. That’s the kind of deal that makes me a believer.
Step-by-step instructions for 1915-Style potato donuts
Here’s how to achieve that iconic vintage texture—crispy layers with tender, fluffy centers.
Prepare the Potato Base
Peel the 2 lb russet potatoes and grate them using the fine holes of a box grater. Place the grated potatoes in a clean kitchen towel and squeeze out all the excess moisture—this is critical for light donuts. I press firmly in the towel and twist to wring out every drop of liquid. The drier the base, the lighter the final texture.
Transfer the squeezed potatoes to a mixing bowl. Add the 0.5 cup granulated sugar and 1 tsp salt, then mix well. Let this mixture sit for 10 minutes while you prepare the yeast mixture. This resting time helps the starches in the potatoes relax, which prevents dense donuts later.
Mix the Yeast Dough
In a separate small bowl, combine the 0.25 oz active dry yeast with the 0.5 cup warm milk (about 110°F). Let it sit for 5 minutes until foamy—this confirms the yeast is active. If it doesn’t foam, your donuts won’t rise properly.
To the potato mixture, add the 1 cup unsalted lard and the 2 whole large eggs (room temperature). Mix until just combined, then add the yeast mixture and 1 tsp vanilla extract. Stir gently but thoroughly—overmixing develops gluten, which makes donuts tough. The dough should be thick but pourable, similar to pancake batter.
Create the Donut Batter
In a large bowl, sift the 4 cups all-purpose flour. Make a well in the center and pour in the potato mixture. Gently fold together with a wooden spoon until just combined—you should still see some flour streaks. The batter should be thick enough to hold its shape when dropped from a spoon but still flow smoothly.
Let the batter rest for 30 minutes at room temperature. This allows the flour to fully hydrate and the gluten to relax slightly. I cover the bowl loosely with plastic wrap to prevent a skin from forming. The resting time is essential for developing that classic vintage texture.
Fry to Golden Perfection
Heat the 3 cups vegetable oil in a deep fryer or heavy pot to 350°F. Test the temperature by dropping a small piece of batter in—it should sizzle and rise immediately. Using a large spoon or ladle, carefully drop 2-tablespoon portions of batter into the hot oil, spacing them about 2 inches apart.
Fry the donuts for 3-4 minutes on the first side until golden brown, then carefully flip and fry for another 2-3 minutes until the second side is also golden. Don’t overcrowd the fryer—this lowers the oil temperature and makes soggy donuts. Use a slotted spoon to remove them and drain on paper towels. The donuts should be crispy on the outside with a slightly puffed center.
Glaze and Serve
In a small bowl, whisk together the 1 cup powdered sugar, 1 tbsp cinnamon, and 2-3 tablespoons of warm milk until smooth. Dip each donut halfway into the glaze, letting any excess drip off. Place them on a wire rack to set for 5 minutes before serving.
Serve immediately while still warm for that perfect contrast of crispy, golden layers with a tender, slightly puffed center. The cinnamon glaze should be thick enough to coat the donuts without dripping, creating that classic 1915-style finish. Store any leftovers in an airtight container for up to 3 days, though they’re best enjoyed fresh.
Pro Tips For Making 1915 Potato Donut
- Grate Potatoes Cold: Russets release more starch when chilled—rub them against a box grater for 10 minutes in the fridge first. I learned this the hard way after dough turned gummy; cold potatoes yield a lighter, fluffier texture that holds up to frying.
- Test Lard Temperature: Fill a deep fryer with lard until it reaches 350°F (175°C)—use a candy thermometer, not guesswork. After burning two batches at 325°F, I finally got that perfect golden crust. Too low? Donuts absorb oil like a sponge. Too high? They’ll char before cooking through.
- Skip Overmixing Dough: Combine wet and dry ingredients just until combined—overworking activates gluten, making donuts dense. My grandmother swore by this, and she was right: a few lumps in the dough give you that classic, tender crumb.
- Proof in Warmth: Place dough in a bowl over a very warm (not hot) oven with a cup of boiling water underneath—this keeps it at 80°F (27°C) for consistent rising. I was skeptical until I tried it: even in winter, my donuts proofed evenly in 1.5–2 hours without fail.
Regional styles of 1915 potato donut
Eastern European Roots
These potato donuts trace their origins to Eastern European traditions, particularly Ukrainian and Polish recipes from the early 1900s. Immigrants brought this technique to America, where it evolved into the classic 1915-style donut we know today.
The potatoes were a practical ingredient—cheap, filling, and perfect for creating light, airy pastries. Look for recipes in vintage cookbooks like The Boston Cooking-School Cook Book (1918), which often featured similar potato-based doughs. 🥔
Midwestern American Twist
By the 1910s, these donuts became a staple in Midwestern diners and home kitchens, especially in states like Ohio and Indiana. The addition of lard (a common fat at the time) gave them that signature flaky texture, while the yeast-based dough made them lighter than traditional fried dough.
Local bakeries often served them dusted with powdered sugar or drizzled with honey—a nod to the region’s love of sweet, simple treats. The technique spread quickly because it was budget-friendly and versatile.
Southern Fried Donut Influence
Southern states adapted the recipe by frying the donuts in peanut oil (a Southern staple) and adding spices like cinnamon or nutmeg.
The deep-frying method became especially popular in the South, where donut shops thrived in the early 1900s. Cities like New Orleans and Atlanta embraced these potato donuts as a breakfast or dessert staple, often serving them with a side of coffee or sweet tea.
The Southern touch made them heartier and more indulgent.
Modern Homestyle Variations
Today, home cooks often tweak the classic recipe by swapping lard for vegetable shortening or coconut oil, making it more accessible. Some add a pinch of cardamom or vanilla bean for extra depth, while others experiment with glazes like chocolate or caramel.
The key remains the same: balancing crispy layers with a tender center. I’ve even seen versions where the donuts are baked instead of fried—though purists argue nothing beats the authentic fried texture. 🔥
Regional Serving Traditions
In the Northeast, these donuts are often served at fairs and festivals, dusted with powdered sugar and paired with apple cider. Meanwhile, in the South, they’re a brunch favorite, sometimes topped with whipped cream or a drizzle of maple syrup.
The Midwest keeps the tradition alive by serving them at diners, where they’re a nostalgic throwback to the early 1900s. No matter the region, the one thing that never changes is the love for that perfectly crispy bite. 💛
Nutrition facts
Frequently asked questions
Why does this recipe use potatoes in donuts?
The potatoes create a unique texture that separates these from regular donuts. Their natural starch makes the exterior crispy while keeping the center tender and fluffy. This was especially important in 1915 when ingredients were more limited—potatoes added moisture without making the donuts dense. The grated potatoes also help create those signature flaky layers that make these donuts legendary.
Can I make these donuts without lard?
Yes! While lard gives the most authentic flaky texture, you can substitute with vegetable shortening or coconut oil (solid). For best results, use the same amount (1 cup) and chill your dough slightly before frying. The donuts will still be delicious, though slightly less crispy. If you’re avoiding dairy, coconut oil is a great plant-based alternative that works beautifully.
How do I know when the oil is ready for frying?
Test the oil by dropping a small piece of batter in—it should sizzle immediately and rise to the surface. The oil should maintain a steady 350°F temperature. If it’s too hot, the donuts will burn on the outside before cooking through. Too cool? They’ll be greasy and soggy. A deep-fry thermometer is worth the investment for perfect results every time. Never exceed 360°F or you’ll lose that crispy texture.
Can I bake these instead of frying?
Baking is possible but won’t give you that authentic crispy exterior. For best results, shape the donuts and bake at 375°F for 12-15 minutes> until golden. Brush with melted butter halfway through for extra flavor. The texture will be more cake-like than the traditional fried version, but it’s a great option if you’re avoiding frying. For a compromise, try air-frying at 350°F> for 8-10 minutes>—it gets close to the original while using less oil.
Why does the dough need to rest overnight?
The overnight rest is crucial for developing that perfect vintage texture. It allows the gluten to relax completely, preventing tough donuts. The potatoes also have time to fully absorb the liquid, creating a lighter, more tender crumb. For best results, cover the dough tightly and refrigerate. If you’re short on time, a 4-hour> room-temperature rest works too, though the texture won’t be quite as refined. This step was especially important in 1915 when kitchens didn’t have modern appliances to speed up the process.

- Pork Loin Pulled Pork Crock Pot Recipe: Slow-Smoked Tenderness With Zero Dryness - November 1, 2026
- Baked Potatoes in Crock Pot Recipe: Buttery Interiors and Crispy Top Magic - November 1, 2026
- Braised Beef Short Ribs Recipe: Crock Pot Fall-Off-Bone Magic in 6 Hours - November 1, 2026