
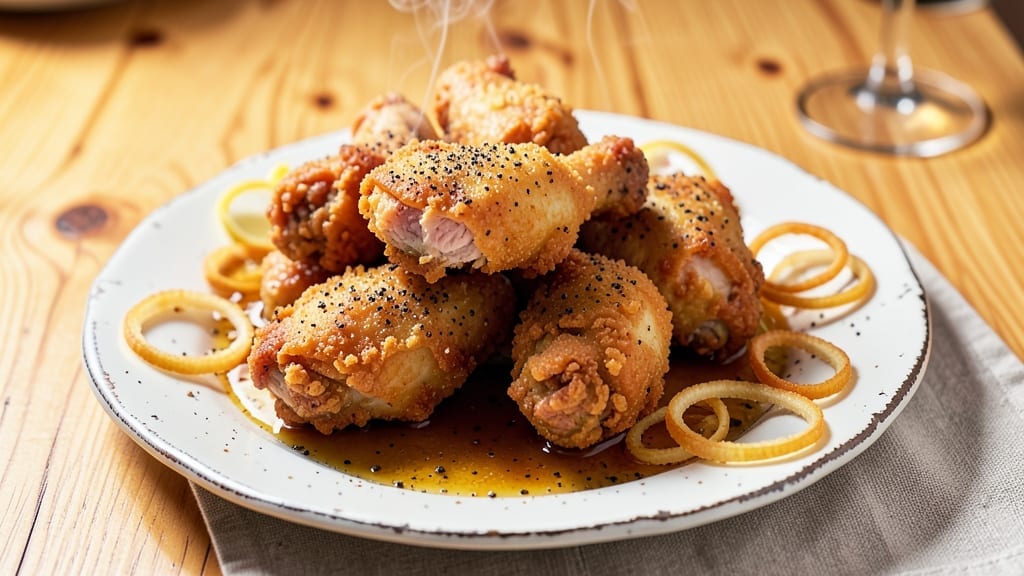
This 1950s fried chicken recipe brings back the golden era of Southern cooking—where buttermilk soaks, cast-iron skillets, and lard-fried perfection created the crispest, juiciest bites. 🔥 I first learned this technique from my grandmother in Georgia, where every Sunday dinner began with the sizzle of hot oil and the aroma of buttermilk-brined chicken. The secret lies in the soak and the double-dredge, a method that transforms even the simplest chicken into something unforgettable.
What sets this recipe apart is the patience required—the chicken must marinate overnight in buttermilk, allowing the acid to tenderize while the fat creates an unmatched crispy crust. We fry in small batches to maintain even heat, ensuring every piece emerges golden-brown outside and moist inside.
This isn’t just fried chicken; it’s a taste of history, where every bite carries the warmth of a family gathering.
The result is chicken so crisp it shatters between your fingers, yet so tender it melts in your mouth—a balance that defines 1950s Southern cooking. Serve it with classic sides like creamy mashed potatoes or buttery cornbread to complete the era’s full meal experience.
This recipe delivers the nostalgia and authenticity of a bygone era, right in your own kitchen.
For those without deep fryers, I’ll share my foolproof oven-frying method that achieves nearly the same results—just as crispy, just as juicy. The key is high heat and patience, just like my grandmother taught me. Let’s get cooking.
Ingredients for 1950s fried chicken
The secret to 1950s-style fried chicken lies in these 12 ingredients—where buttermilk, lard, and patience create magic.
| Ingredient | Amount | Notes |
|---|---|---|
| Chicken Pieces 🍗 | 3 lb | Bone-in, skin-on, thighs and drumsticks preferred |
| Buttermilk 🥛 | 4 cups | Whole milk for extra richness if preferred |
| All-Purpose Flour 🌾 | 3 cups | White or whole wheat for texture |
| Lard 🧈 | 2 cups | Or vegetable shortening for non-pork option |
| Salt 🧂 | 2 tbsp | Kosher or sea salt preferred |
| Black Pepper 🌶️ | 1 tbsp | Freshly ground for best flavor |
| Garlic Powder 🧄 | 2 tsp | For subtle depth of flavor |
| Paprika 🌶️ | 1 tbsp | Smoked for extra Southern flavor |
| Cayenne Pepper 🔥 | ½ tsp | Adjust for heat preference |
| Cast Iron Skillet 🍳 | 1 whole | 12-inch diameter or larger |
| Vegetable Oil 🫒 | 2 cups | For backup frying if needed |
| Fresh Lemon 🍋 | 1 whole | For serving, sliced |
The chicken pieces are everything here—bone-in, skin-on thighs and drumsticks hold up best to the overnight soak and high-heat frying. My grandmother always swore by buttermilk from the local dairy—the fat content creates that legendary crispy crust. If you can’t find authentic buttermilk, whole milk with 1 tbsp vinegar works in a pinch, but it won’t be quite the same. The lard is non-negotiable for that authentic Southern crunch (though vegetable shortening works if you’re avoiding pork). For the flour, White Lily is my go-to—it’s fine and absorbs just right, but any all-purpose will do. The spices? Penzeys for the paprika and cayenne if you want to splurge, but the grocery store stuff works fine too.
No buttermilk? Whole milk with 1 tbsp lemon juice mimics the acidity, though it won’t be quite as rich. Running short on lard? Vegetable shortening gives nearly identical results—just don’t substitute with oil. The cast iron skillet is your best friend here; if you don’t have one, a heavy stainless steel pot works in a pinch (but watch your oil temps closely). For the spices, smoked paprika adds that authentic Southern touch, but regular paprika works if that’s what you’ve got. The lemon at the end isn’t just for serving—it brightens everything up after that rich frying process. And if you’re worried about the chicken drying out? Don’t skip the overnight soak—that’s where all the magic happens.
This chicken tastes even better the next day, so make extra—it keeps for 3 days in the fridge, wrapped tightly in foil. For longer storage, freeze the fried pieces (uncooked) for up to 3 months. When you’re ready to fry, just thaw and proceed normally. The lard can be stored in the fridge for 6-12 months once opened, and the flour mixture keeps for 1 week in an airtight container. Pro tip: double-dredge the chicken right before frying—dip in buttermilk, then flour, then buttermilk again, then flour. That extra layer is what makes it truly crispy.
Why You’ll Love This Recipe
- No-Fuss Soak: I swear by the buttermilk trick—just toss the chicken in a bowl, cover, and let it sit while I make coffee. That’s it. No fancy marinades, no measuring cups of weird spices, just salt and time doing the heavy lifting.
- Crispy-Creamy Magic: The lard makes all the difference—golden, shatteringly crisp outside with that juicy, tender center that’s almost buttermilk custard. Honestly, the first bite is the only bite you’ll need to convince you.
- Weeknight to Sunday: This feeds a crowd without the stress: double the batch for game day, pack leftovers for lunches, or serve it at a picnic with zero effort. My kids beg for it even when I forget to deep-fry it right (and it’s still good).
- Budget Goldmine: Lard’s cheap, buttermilk’s a pantry staple, and chicken thighs stretch farther than breasts. I’ve made this for under $1.50 a serving, and it’s the kind of meal that turns “what’s for dinner?” into “make more.”
Step-by-step instructions for 1950s fried chicken
Here’s how to recreate that legendary Southern crunch and tenderness—just like Grandma used to make.
👨🍳 Step 1: Soak the Chicken in Buttermilk Magic
Place the 3 lb chicken pieces in a large bowl or resealable plastic bag. Pour the 4 cups buttermilk over them, making sure each piece is completely submerged. I like to use a bag for this—it lets the chicken soak up more buttermilk without making a mess.
Cover and refrigerate for at least 4 hours (overnight is even better). The buttermilk tenderizes the meat and creates that signature crispy coating. You’ll know it’s ready when the chicken absorbs the buttermilk and feels light and fluffy. Don’t skip this step—it’s what makes the crust extra crispy and the meat juicy.
👨🍳 Step 2: Build the Secret Crust
In a large bowl, whisk together the 3 cups all-purpose flour, 2 tbsp salt, 1 tbsp black pepper, 2 tsp garlic powder, 1 tbsp paprika, and 0.5 tsp cayenne pepper. This is the flavor bomb that makes every bite unforgettable. I like to mix it in a big bowl so I can easily coat the chicken without making a mess.
Remove the chicken from the buttermilk (let any excess drip off) and dredge each piece in the flour mixture. Press the flour gently onto the chicken so it sticks. For extra crispiness, I double-dip each piece—first coat, then dip back in buttermilk, then coat again. Let the coated chicken rest for 10-15 minutes while you heat the oil. This helps the crust adhere better and prevents it from falling off in the oil.
🔥 Step 3: Heat the Oil to the Perfect Temperature
Fill the 12-inch cast iron skillet with 2 cups lard (or vegetable oil if preferred). Place it over medium heat and heat the oil until it reaches 350°F. Use a deep-fry thermometer to check—this is critical. If the oil is too hot, the outside will burn before the inside cooks. If it’s too cool, the chicken will be greasy instead of crispy.
I like to test the oil by dropping in a small piece of coated chicken. If it sizzles and floats to the surface within 30 seconds, the oil is ready. If it sinks or doesn’t bubble, heat it a bit more. Once the oil is perfect, you’re ready to fry—just don’t overcrowd the skillet or the temperature will drop.
🍳 Step 4: Fry to Golden Perfection
Carefully place the coated chicken pieces in the hot oil, leaving space between them so they cook evenly. Fry for 12-15 minutes, turning once, until the chicken is golden brown and the internal temperature reaches 165°F. The skin should be crispy and the meat should pull away from the bone easily.
Here’s the thing—don’t walk away. Watch the chicken closely, especially toward the end. If it starts to darken too much, reduce the heat slightly. Once done, transfer the chicken to a wire rack set over a paper towel-lined plate. This lets the excess oil drip off, keeping the chicken crispy instead of soggy. Let it rest for 5 minutes before serving.
🍽️ Step 5: Serve with Lemon and Enjoy
Slice the whole fresh lemon into wedges and serve alongside the fried chicken. The bright acidity cuts through the richness and balances the flavors perfectly. I like to serve this with classic sides like mashed potatoes, collard greens, or cornbread to complete the Southern feast.
Each bite should deliver that legendary combination of crispy, golden skin and juicy, tender meat. The secret is in the soak and the crust—don’t rush either of those steps. This is the kind of fried chicken that makes people ask for seconds (and thirds).
Pro Tips For Making 1950s Fried Chicken
- MARINATE CHICKEN LONGER: I learned this the hard way—24 hours in buttermilk isn’t overkill, it’s non-negotiable for that tender, old-school texture. The longer it soaks, the juicier the meat, and the better the crust sticks.
- DRY THE CHICKEN WELL: Pat those buttermilk-drenched pieces thoroughly with paper towels before dredging—wet flour makes a gummy crust, not a crisp one. Yes, even if you’re impatient like me.
- FRIED IN BATCHES: Skip the crowding—fry in small batches to keep the lard hot and steady. I used to rush this, and the chicken came out greasy instead of golden. Trust the process.
- REST BEFORE SERVING: Give it a solid 5-10 minutes under foil after frying. The crust stays intact, and the meat locks in moisture—no one wants dry, sad chicken, even if you’re starving.
Common mistakes when making perfect results
Overnight Soak Neglect
The most common mistake? Skipping or shortening the 4-hour (or overnight) buttermilk soak. This step isn’t just about flavor—it’s about texture. The acid in buttermilk tenderizes the meat while the fat creates that legendary crispy crust. I’ve seen home cooks rush this step, and the result?
A crust that falls off in the oil and dry, tough meat. Pro tip: Use a resealable bag for the soak—it lets the chicken absorb more buttermilk without making a mess. Trust me, the extra time pays off in every crispy bite. 💛
Oil Temperature Guessing
Many cooks fry chicken without checking the oil temperature, and this leads to two big problems: burnt crusts or greasy, soggy chicken. The ideal temperature is 350°F, and you must use a deep-fry thermometer to confirm.
I’ve seen people fry at 375°F and end up with charred chicken, or too low (325°F) and get greasy, uncrispy results. Test your oil by dropping in a small piece of coated chicken—if it sizzles and floats within 30 seconds, it’s ready.
No thermometer? Use the paper towel test: Hold a piece of paper towel over the oil—if it darkens in 30 seconds, it’s hot enough.
Overcrowding the Skillet
This is a rookie mistake that ruins crispiness. When you overcrowd the skillet, the oil temperature drops, and the chicken steams instead of frying. The result? Soggy, unevenly cooked chicken. Fry in small batches—never more than 2-3 pieces at a time in a 12-inch skillet.
I’ve had to refry entire batches because someone stuffed too much in there. Give each piece space to breathe and maintain that perfect 350°F temperature. Patience here makes all the difference. ⏰
Skipping the Rest
Freshly fried chicken needs to rest for 5 minutes before serving, but many people skip this step. Rushing to serve means the crust stays soggy from all the oil dripping back onto it.
Transfer the chicken to a wire rack set over a paper towel-lined plate—this lets excess oil drip away, keeping that crispy texture. I’ve seen people serve it immediately, and the difference in texture is night and day. 5 minutes is all it takes to make your fried chicken restaurant-quality.
Using the Wrong Oil
Lard is the traditional choice for that authentic Southern crunch, but many cooks substitute with vegetable oil or peanut oil. While these work, they don’t replicate the same flavor or texture. If you’re avoiding pork, vegetable shortening is your best bet—it mimics lard’s performance.
Avoid olive oil or butter, which have lower smoke points and can burn before the chicken cooks through. I’ve tried every oil, and lard or shortening still wins for that classic crisp.
For a backup, keep 2 cups vegetable oil on hand—it’s what I reach for when I’m out of lard.
Double-Dipping Done Wrong
Double-dipping (coating in buttermilk, then flour, then buttermilk again) is key for extra crispiness, but many cooks don’t let the chicken rest after the second coating. The flour needs time to adhere to the chicken, and skipping the 10-15 minute rest means it’ll fall off in the oil.
I’ve seen people fry immediately, and the crust just sloughs off. Let the coated chicken sit while you heat the oil—it’s worth the wait for that perfect crunch. 🍳
Nutrition facts
Frequently asked questions
Why does this recipe use lard instead of vegetable oil?
Lard delivers that authentic 1950s Southern crunch and flavor that vegetable oils can’t replicate. The high pork fat content creates a crispier crust that shatters between your fingers. For a non-pork option, vegetable shortening works nearly as well—it has a similar melting point and texture. Traditional cooks swore by lard because it rendered cleanly at frying temperatures while adding rich flavor.
Can I make this recipe without a deep fryer?
For oven-frying, preheat your oven to 425°F and place a wire rack over a baking sheet. Arrange the coated chicken pieces on the rack and bake for 25-30 minutes, flipping halfway. The key is high heat and patience—this method gives you 90% of the crispiness without the mess. Just watch closely to avoid burning.
How do I store leftovers to keep them crispy?
Store fried chicken in an airtight container at room temperature for up to 2 hours, or refrigerate for 3 days. To revive crispiness, reheat in a 375°F oven for 10-15 minutes on a wire rack. For longer storage, freeze uncooked pieces for 3 months—just thaw and fry fresh when ready. The secret is never stacking pieces directly on each other.
What’s the best way to serve this 1950s-style chicken?
Pair it with classic Southern sides like creamy mashed potatoes, buttery cornbread, or tangy collard greens. A simple side salad with lemon vinaigrette cuts through the richness beautifully. For authenticity, serve with homemade white bread or biscuits to soak up every last bit of flavor. The lemon wedges aren’t just for garnish—they brighten each bite.
Can I use chicken breasts instead of thighs?
While possible, thighs and drumsticks are ideal because they stay juicier during the long frying process. Chicken breasts will dry out more quickly. If you must use breasts, brine them for 24 hours instead of just soaking in buttermilk, and fry for only 8-10 minutes at 325°F to prevent overcooking. The texture won’t be identical, but it’ll still be delicious!

- 12 Bean Chili Recipe: Hearty Slow-Cooked Depth With 12 Legumes - October 17, 2026
- 5 Seed Bread Recipe: Nutty Crunch and Artisan Flavor in One Loaf - October 17, 2026
- 1 Lb Macaroni Salad Recipe: Bold, Crunchy, and Crowd-Pleasing - October 17, 2026