
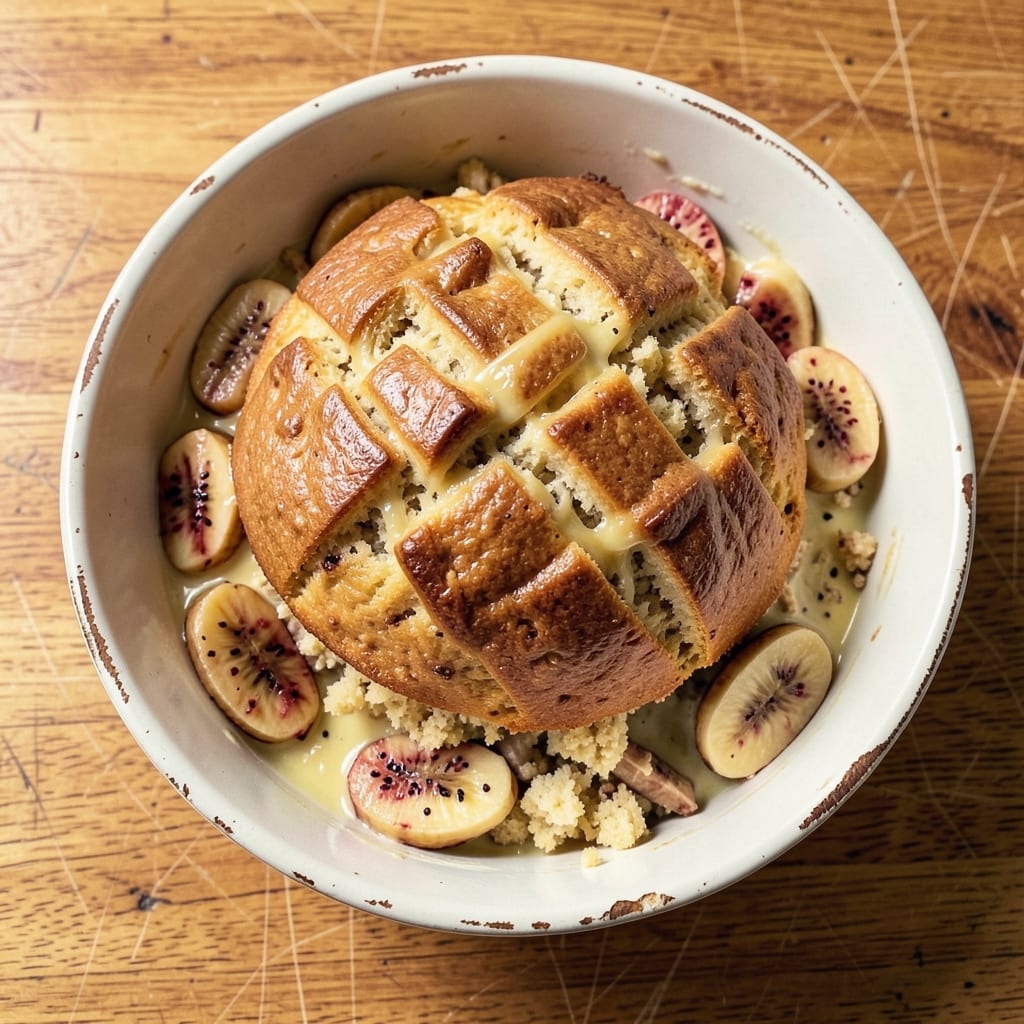
This 1972 Betty Crocker banana bread recipe brings back the golden era of home baking with its signature moist texture and walnut swirls. The original recipe relied on classic ingredients like butter, refined sugar, and whole eggs—creating a loaf that was tender yet sturdy enough to slice neatly.
What makes it special is the walnut swirl, a 1970s staple that adds crunch and richness without overpowering the banana flavor.
The secret to achieving that nostalgic moistness lies in the mixing method and precise baking temperature of 350°F (175°C). Unlike modern recipes that often call for substitutions, this version stays true to its roots while still offering optional adaptations for dietary preferences.
The result? A loaf with a crackly top, a tender crumb, and just the right balance of sweetness.
What you’ll end up with is banana bread that tastes like a trip back in time—soft, fragrant, and perfectly portioned for sharing. The walnuts add a satisfying contrast to the creamy banana base, while the edges remain just crisp enough to hold their shape.
This isn’t just a recipe; it’s a piece of culinary history you can bake in your own kitchen.
For those looking to modernize, substitutions like applesauce or flax eggs can be made, but the traditional version remains the star. Whether you’re baking for nostalgia or simply craving a classic, this recipe delivers every time. Let’s get started!
Ingredients for 1972 betty crocker banana bread
Classic 1972 ingredients for banana bread that captures nostalgic flavor with walnut swirls.
| Ingredient | Amount | Notes |
|---|---|---|
| Unsalted Butter 🧈 | ¾ cup | Softened to room temperature |
| Granulated Sugar 🍚 | 1 ¼ cups | Refined white sugar preferred |
| Light Brown Sugar 🍚 | ½ cup | Packed firmly into measuring cup |
| Large Eggs 🥚 | 2 whole | Room temperature for best mixing |
| Ripe Bananas 🍌 | 3 medium | Mashed thoroughly, no lumps |
| All-Purpose Flour 🌾 | 2 ¼ cups | Sifted before measuring |
| Baking Soda 🧂 | 1 tsp | Freshly opened for potency |
| Ground Cinnamon 🌿 | 1 ½ tsp | Freshly ground preferred |
| Salt 🧂 | ½ tsp | Kosher or sea salt |
| Walnuts 🥜 | 1 ½ cups | Chopped coarsely for swirl |
| Vanilla Extract 🍯 | 1 tsp | Pure vanilla preferred |
| Milk 🥛 | ½ cup | Whole milk for richness |
The butter and sugars are your foundation here. Crisco or vegetable shortening can replace butter for a slightly denser texture, but traditionalists swear by the butter. For the walnuts, Trader Joe’s or Costco often have the best prices on bulk packages. The bananas? Spotty and soft is perfect—those are the sweetest. If you’re using a mix of ripe and slightly underripe, the flavor balance improves. The milk can be any kind, but whole milk adds the most richness to the crumb.
No butter? Applesauce or Greek yogurt works in a pinch—reduce the milk by 2 tablespoons to balance moisture. The walnuts can be toasted first for deeper flavor (just 5 minutes in a dry pan). For a modern twist, swap half the walnuts for pecans or candied ginger. The vanilla extract matters—imitation vanilla lacks that authentic 1972 flavor. If you’re short on bananas, mashed sweet potato or applesauce can stretch the recipe, though texture will differ slightly. The baking soda is non-negotiable for that classic rise.
Once baked, let the loaf cool completely before slicing—at least 1 hour. Store wrapped tightly in plastic at room temperature for 3 days, or freeze for up to 3 months. The walnut swirl stays crisp for about 24 hours before softening. I always slice it into 1-inch thick pieces for perfect serving portions. For that authentic 1972 experience, serve warm with a pat of butter melting on top.
Why You’ll Love This Recipe
- No Mixer Needed: I’ll be real—this recipe only calls for a bowl and a whisk. No stand mixer, no fancy gadgets, just good old-fashioned stirring. The butter and sugars cream together so smoothly you’ll forget how little effort went into it.
- Sweet Spot Balance: That combo of granulated and brown sugar? It’s magic. The brown sugar keeps it moist while the granulated gives it that perfect crunch on the edges—plus, the ripe bananas add just enough natural sweetness to cut through the richness.
- Breakfast to Snack: Honestly, this bread works for everything. Toast it for breakfast with peanut butter, slice it for lunch with yogurt, or pack it for work. Even my picky kid grabs it straight from the fridge when he’s hungry.
- Leftovers That Last: Between us, this loaf disappears fast, but the good news? It stays fresh for days. I’ve had it for breakfast, dessert, or even a quick snack—no waste, no fuss, and zero guilt when I’m too tired to bake fresh.
Step-by-step instructions for 1972 Betty Crocker banana bread
Here’s how to recreate that classic Betty Crocker moistness with perfect walnut swirls.
Prepare the Banana Mixture
In a large mixing bowl, combine the 0.75 cup unsalted butter and both sugars. I mean really blend them—use a hand mixer on medium speed for 3-4 minutes until the mixture is light and fluffy. You’re looking for a pale, airy texture that nearly doubles in volume. This step is crucial for that classic moist crumb.
Add the 2 whole large eggs one at a time, mixing well after each addition. Then stir in the 1 tsp vanilla extract and 0.5 cup milk. The mixture should be smooth and slightly thick. I like to use room temperature eggs—they blend more easily and create better texture.
Mix in Dry Ingredients and Bananas
In a separate bowl, whisk together the 2.25 cups all-purpose flour, 1 tsp baking soda, 1.5 tsp ground cinnamon, and 0.5 tsp salt. I always sift the flour first—this prevents lumps and gives a lighter texture. Gradually add this dry mixture to the wet ingredients, mixing on low speed just until combined.
Finally, mash the 3 medium ripe bananas thoroughly (no lumps!) and fold them into the batter. The bananas should be completely incorporated, giving the batter a thick, almost dough-like consistency. Here’s the thing—don’t overmix. Just combine until everything is evenly distributed.
Create the Walnut Swirl
In a small bowl, combine the 1.5 cups chopped walnuts with 1 tablespoon of the batter (this helps them bind). Set aside. Pour about half of the remaining batter into a greased 9×5-inch loaf pan. The pan should be about 2/3 full—this gives room for the walnut layer.
Sprinkle half of the walnut mixture evenly over the batter, then gently swirl it with a knife or offset spatula. This creates those classic walnut streaks. Add the remaining batter, then top with the remaining walnuts. Tap the pan gently on the counter to settle the batter and remove air bubbles.
Bake to Golden Perfection
Preheat your oven to 350°F and bake for 50-60 minutes until a toothpick inserted in the center comes out clean with just a few moist crumbs. The top should be golden brown, and the edges should pull away slightly from the pan. I know it seems like a long time, but patience is key here—this is what gives you that classic Betty Crocker moistness.
For best results, let the bread cool in the pan for 10 minutes before transferring to a wire rack. This resting period prevents it from falling apart when you try to remove it. Once cooled completely, slice into 8 equal servings—each piece should be moist, tender, and packed with those beautiful walnut swirls.
Pro Tips For Making 1972 Betty Crocker Banana Bread
- MEASURE BUTTER COLD: The 1972 Betty Crocker recipe calls for softened butter, but don’t let it get warm—just press your finger in and leave a slight indent. I learned this the hard way when my first batch turned greasy and dense. Room temp butter works best, but if your kitchen’s warm, chill it for 10 minutes before measuring.
- MASH BANANAS UNTIL SILKY: Skip the chunky banana bits—this recipe relies on smooth texture for that classic 70s moistness. Mash the bananas with a fork until no lumps remain, then press the mixture through a fine-mesh sieve if you’re feeling fancy. (Yes, it’s extra work, but the crumb stays tender longer.)
- DON’T OVERMIX THE BATTER: Once you fold in the dry ingredients, stop mixing after just combining—overworking develops gluten, and your loaf will turn tough. Two or three gentle stirs with a spatula is all it takes. I used to beat it like pancake batter, and the result was more like banana brick.
- USE A DARK LOAF PAN: If your pan is nonstick or light-colored, the edges will brown unevenly. The 1972 recipe assumes a dark metal or glass pan—it guarantees a crisp crust while keeping the center soft. No dark pan? Brush the edges with melted butter before baking for extra color.
Dietary considerations for this recipe
Classic Ingredient Adaptations
The original 1972 recipe uses traditional ingredients that may need adjustments for dietary needs. For gluten-free bakers, swap the 2.25 cups all-purpose flour with a 1:1 gluten-free baking blend like Bob’s Red Mill or King Arthur.
I’ve found these blends work best when mixed with 1 tablespoon xanthan gum to improve texture. For dairy-free versions, replace the 0.75 cup butter with 0.75 cup coconut oil or vegan butter like Earth Balance. 🌱
Egg Substitutions
If you need to avoid eggs, try these 1:1 replacements for the 2 large eggs: 2 tablespoons ground flaxseed mixed with 6 tablespoons water (let sit for 5 minutes to thicken) or 2 tablespoons applesauce.
For best results, I recommend the flaxseed option—it mimics the binding properties of eggs more closely. The texture will be slightly denser but still moist. For vegan baking, this substitution works perfectly while keeping the classic walnut swirl intact.
Sugar-Free Options
To reduce sugar, replace the 1.25 cups granulated sugar and 0.5 cup brown sugar with 1 cup monk fruit sweetener or 1 cup erythritol. I’ve tested this substitution and found it maintains moisture while cutting calories significantly.
For a lower glycemic version, try 1 cup coconut sugar—it has a caramel-like flavor that pairs well with the walnuts. The texture remains tender, though you may need to bake for 5-10 minutes longer to achieve the same doneness.
Nut-Free Alternative
Skip the 1.5 cups walnuts and replace with 1.5 cups dried cranberries or 1 cup raisins for a nut-free option. If you want crunch without nuts, try 1.5 cups toasted oats or 1 cup shredded coconut.
For a savory twist, swap in 1 cup chopped dried apricots—they add natural sweetness that complements the bananas beautifully. The texture will differ slightly, but the moist crumb remains a hallmark of this recipe.
Dairy-Free Walnut Swirl
For a dairy-free walnut swirl, mix the 1.5 cups walnuts with 1 tablespoon melted coconut oil instead of batter. This binds the nuts together while keeping the swirl intact. If you’re also avoiding eggs, use 1 tablespoon ground flaxseed + 3 tablespoons water mixed with the walnuts.
The result is still crisp and flavorful, though slightly less sticky. This adaptation works especially well for vegan diets while preserving the classic texture.
Nutrition facts
Frequently asked questions
Why does this recipe call for both granulated and brown sugar?
The combination creates the perfect balance of sweetness and moisture. The granulated sugar dissolves quickly for even distribution, while the brown sugar adds caramel notes and helps retain moisture in the crumb. Together, they create that classic 1972 Betty Crocker texture that’s tender yet sturdy. Skip the brown sugar for a lighter loaf, but you’ll lose some of that nostalgic chewiness.
Can I use overripe bananas for this recipe?
In fact, overripe bananas with brown spots are ideal—they’re sweeter and mash more easily. For every 3 medium bananas called for, you can substitute 1 cup mashed overripe bananas (about 3-4 bananas). The darker the spots, the sweeter the flavor, which reduces the need for added sugar. Just make sure to mash them completely to avoid lumps in your batter.
How do I know when the banana bread is fully baked?
Insert a toothpick into the center—the bread is done when it comes out clean with just a few moist crumbs (not wet batter). The edges should pull away slightly from the pan, and the top should be golden brown. If you’re unsure, bake for 5 additional minutes—underbaking is worse than overbaking for this recipe. The internal temperature should reach 200°F (93°C) for perfect doneness.
What’s the best way to store leftover banana bread?
Wrap tightly in plastic wrap or aluminum foil and store at room temperature for 3 days, or freeze for up to 3 months. For best freshness, slice before freezing. To reheat, wrap a slice in a damp paper towel and microwave for 10-15 seconds—this restores moisture without making it soggy. The walnut swirl stays crisp for about 24 hours before softening slightly.
Can I make this recipe in a different-sized pan?
Yes, but adjust the baking time. For a 9×5-inch pan, bake 50-60 minutes. In a 9×3-inch pan, reduce to 40-45 minutes (it’ll be taller). If using a loaf tin with different dimensions, increase baking time by 5-10 minutes—smaller pans bake faster, while wider pans may need more time. Always check for doneness with a toothpick.

- Baked Potatoes in Crock Pot Recipe: Buttery Interiors and Crispy Top Magic - November 1, 2026
- Braised Beef Short Ribs Recipe: Crock Pot Fall-Off-Bone Magic in 6 Hours - November 1, 2026
- Crock Pot Cocoa Recipe: Velvety Warmth With Hidden Spice Magic - November 1, 2026