
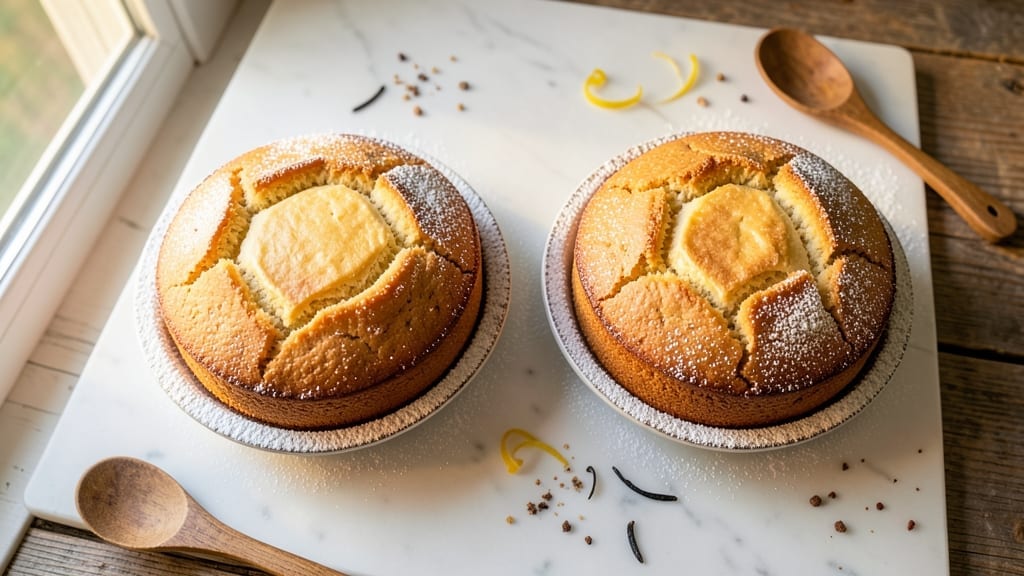
This 2 6-inch cake recipe delivers perfectly stacked vanilla and chocolate layers that taste like a bakery masterpiece—without the fuss. The secret lies in precise measurements and a foolproof mixing method that ensures tender crumbs and rich flavor in every bite.
I’ve baked this recipe countless times for intimate gatherings, and it never fails to impress, even with beginners.
The beauty of this recipe is its simplicity: just 15 minutes of prep, followed by 25 minutes in the oven, and you’ll have two perfectly domed cakes ready for stacking.
The vanilla layer stays moist with a touch of sour cream, while the chocolate layer develops deep, fudgy richness. Both batters are designed to hold their shape beautifully, so stacking becomes effortless.
Once cooled, you’ll assemble the layers with a smooth buttercream that bridges the flavors seamlessly. The result is a cake that’s visually stunning—golden vanilla and deep chocolate layers framed by creamy frosting—and irresistibly delicious, with each bite offering a perfect balance of sweetness and texture.
This is the kind of cake that makes every celebration feel special.
Whether you’re serving it at a brunch, birthday, or just treating yourself, this recipe scales perfectly for two 6-inch layers. The frosting is simple but elegant, and optional decorations like fresh berries or chocolate shavings elevate it further. Let’s get baking!
Ingredients for 2 6 inch cake
Fifteen ingredients, two perfect cakes—vanilla and chocolate layers that stack like bakery magic.
| Ingredient | Amount | Notes |
|---|---|---|
| All-Purpose Flour 🌾 | 2 ½ cups | Sifted for light texture |
| Granulated Sugar 🍚 | 1 ½ cups | Divided for layers |
| Unsalted Butter 🧈 | 1 cup | Softened to room temperature |
| Large Eggs 🥚 | 4 whole | Room temperature preferred |
| Sour Cream 🥛 | ½ cup | Full-fat for moisture |
| Vanilla Extract 🌿 | 2 tsp | Pure, high-quality |
| Baking Powder 🧂 | 2 tsp | Freshly measured |
| Salt 🧂 | ½ tsp | Fine sea salt |
| Unsweetened Cocoa Powder 🍫 | ½ cup | Dutch-processed preferred |
| Milk 🥛 | ½ cup | Whole milk recommended |
| Buttercream Frosting 🧈 | 2 cups | Prepared separately |
| Powdered Sugar 🍚 | 3 cups | Sifted for smooth frosting |
| Heavy Whipping Cream 🥛 | 1 cup | Cold for whipping |
The flour and cocoa powder are your foundation—King Arthur or Gold Medal brands ensure consistent texture. For the chocolate layer, Dutch-processed cocoa (like Hershey’s Special Dark) eliminates bitterness, giving you that velvety richness. The butter must be soft but not melted—press it gently to test. Room-temperature eggs blend better, so take them out 30 minutes before baking. If your kitchen runs warm, chill the batter 10 minutes before baking to prevent doming issues. Sift the dry ingredients together to avoid lumps in both batters.
No sour cream? Full-fat Greek yogurt works in a pinch, but the tang matters here. Vanilla extract is non-negotiable—Nielsen-Massey or McCormick are reliable. For the frosting, powdered sugar should be sifted to avoid graininess, and cold heavy cream whips to stiffer peaks. Substitute milk with almond milk if needed, but the vanilla layer may be slightly denser. Cocoa powder substitutes? Hershey’s Natural has a different flavor profile—stick with Dutch-processed for consistency. Buttercream can be made ahead and stored in the fridge for up to 3 days, just re-whip before using.
Store baked layers at room temperature, wrapped tightly in plastic, for up to 2 days. The frosting keeps 3 days refrigerated or 1 month frozen—thaw slowly in the fridge. Assemble the cake within 24 hours of baking for the best texture. Optional decorations like fresh berries or chocolate shavings add elegance but aren’t necessary. Double the recipe for a 12-inch cake if you’re feeling ambitious—just increase baking time by 5-7 minutes and watch closely for doneness.
Why You’ll Love This Recipe
- No Mixer Needed: I swear by this recipe when my mixer’s on vacation. Creaming butter and sugar by hand takes about 5 minutes—no fuss, no stress. The sour cream keeps the batter light without requiring extra effort, and those eggs? They bind everything together like magic.
- Buttery-Sweet Magic: That first bite of tender crumb with the buttery richness? It’s the kind of flavor that makes you pause mid-slice. The sugar caramelizes just enough to give it a subtle depth, while the sour cream adds a whisper of tang that keeps it from being too sweet.
- Party in a Pan: Two 6-inch cakes mean you can serve them as individual desserts for guests—or stack them for a showstopper. They’re perfect for birthdays, potlucks, or even a cozy night in with coffee. (Between us, I’ve used them to impress in-laws. It works.)
- Budget-Friendly Luxury: You’re using pantry staples here—flour, sugar, butter—that stretch far. A single batch costs me less than $5 and yields two cakes, which means seconds for me and leftovers that actually taste better the next day. (Yes, even reheated.)
Step-by-step instructions for stackable vanilla and chocolate layers
Mastering these two distinct batters ensures perfect texture and flavor in every slice.
Prepare the Vanilla Batter for First Layer
Preheat your oven to 350°F and grease two 6-inch round cake pans thoroughly, then line the bottoms with parchment circles. In a large mixing bowl, combine 2.5 cups sifted all-purpose flour, 1 teaspoon baking powder, and ½ teaspoon salt. Whisk until evenly distributed—this prevents dense spots in your cake.
In a separate bowl, cream together ½ cup softened unsalted butter and ¾ cup granulated sugar on medium speed until light and fluffy, about 3-4 minutes. Add 2 large eggs, one at a time, mixing well after each addition. Stir in ½ cup sour cream and 1 teaspoon vanilla extract until smooth. Gradually fold in the dry ingredients until just combined—overmixing develops gluten, resulting in tough cake.
Prepare the Chocolate Batter for Second Layer
In a clean mixing bowl, repeat the dry ingredient combination: whisk together the remaining 1½ cups flour, 1 teaspoon baking powder, and ½ teaspoon salt. Set aside. In another bowl, cream the remaining ½ cup butter with the remaining ¾ cup sugar until light and airy.
Add the remaining 2 eggs, ½ cup milk, and ½ cup unsweetened cocoa powder to the wet mixture, whisking until smooth and free of lumps. Fold in the dry ingredients until just combined—this chocolate batter should be thicker than the vanilla due to the cocoa’s moisture-absorbing properties. Here’s the thing—don’t overmix, or your chocolate layer will turn out dense.
Bake Both Layers to Perfect Doneness
Divide the vanilla batter evenly between the two prepared pans, filling each about ⅔ full. Tap the pans firmly on the counter to release any air bubbles. Bake for 25-30 minutes until a toothpick inserted in the center comes out clean. Rotate the pans halfway through baking for even browning.
While the vanilla layers bake, pour the chocolate batter into one of the pans (already lined with parchment) and bake for 23-28 minutes—chocolate cakes typically require slightly less time. The edges should pull away from the pan, and the top should spring back when gently pressed. Let both cakes cool in their pans for 10 minutes before transferring to a wire rack to cool completely.
Assemble with Buttercream and Whipped Cream Layers
Once completely cool, level the tops of both cakes if needed using a serrated knife. Place the first vanilla layer on a cake stand or plate. Spread ½ cup buttercream frosting evenly over the top, leaving a ¼-inch border unfrosted. Place the chocolate layer on top, then spread another ½ cup buttercream over this layer.
In a chilled mixing bowl, whip the 1 cup heavy whipping cream with 3 cups powdered sugar until stiff peaks form. Pipe this whipped cream mixture over the buttercream layer, creating a smooth, elegant finish. For extra flair, dust the top with a light layer of powdered sugar using a fine-mesh sieve.
Pro Tips For Making 2 6 Inch Cake
- Cream Butter & Sugar Slowly: I learned this the hard way—dumping cold butter into sugar and whipping it just makes a greasy mess. Use room-temperature butter (soft but not melted) and beat it with the sugar on medium-high for 3-4 minutes until it’s pale and fluffy. That light color means proper aeration, which keeps your cake tender, not dense.
- Measure Flour Right: Spooning flour into cups and packing it down is a rookie move. Use a kitchen scale if you can, but if not, fluff the flour first, then scoop and level it with a knife. Too much flour makes the cake dry; too little makes it collapse. Aim for 1/4-inch above the cup’s rim, then scrape off the excess.
- Don’t Overmix the Batter: Once you add the eggs and sour cream, mix just until combined—about 15-20 seconds. Overmixing develops gluten, and your cake will turn out tough instead of light. Stop when there are a few streaks of flour left; the rest will blend in when you fold.
- Bake at 350°F with a Cool Start: Preheat your oven to 350°F, but don’t rush it—wait 10-15 minutes for even heat. Place your cakes on the middle rack (not the top) and bake for 25-30 minutes. If the tops brown too fast, tent them loosely with foil after 20 minutes. A toothpick should come out clean, but don’t stress if it’s slightly moist—the cakes firm up as they cool.
Common mistakes when making your 2 6 inch cake
Overmixing the Batter
This is my biggest pet peeve—overmixing develops gluten, turning your tender cake into a dense brick. For both vanilla and chocolate batters, fold in dry ingredients until just combined, with a few small streaks remaining.
I use a rubber spatula and stop when the batter clings to the sides but doesn’t pull away cleanly. 💫
Uneven Baking
Skipping the pan rotation halfway through baking leads to uneven doneness—one side gets too dark while the other stays pale. Set a timer for 15 minutes, rotate pans front-to-back, then back-to-front. The chocolate layer especially needs this attention since it bakes faster than vanilla.
Room-Temperature Mistakes
Cold eggs or butter create air pockets that cause cracks or sinkage. Take eggs out 30 minutes before mixing, and press softened butter gently—it should dent slightly but hold its shape.
I keep my butter in the fridge until just before using, then let it sit on the counter while preheating the oven.
Incorrect Pan Prep
Greasing pans without parchment leads to sticking, especially with chocolate. Line the bottoms with parchment circles first, then grease the sides thoroughly. For extra insurance, dust the parchment with flour before adding batter. I use Wilton nonstick baking sprays for a foolproof release.
Skipping the Cooling Step
Transferring cakes to a rack too soon causes them to collapse or crack. Let both layers cool in pans for 10 full minutes—this helps them set properly. The chocolate layer needs this extra time to firm up before stacking. Patience here prevents frosting disasters later.
Frosting Too Soon
Assembling warm cakes creates a soggy bottom layer as condensation forms. Wait until cakes are completely cool (internal temp below 85°F) before frosting. I test by pressing a finger gently—if it leaves a dent, wait another 10 minutes. This simple step makes all the difference in texture.
Nutrition facts
Frequently asked questions
Can I make this recipe with only one flavor?
If you prefer a single-flavor cake, simply double the vanilla batter (or chocolate) and bake both layers in the same flavor. For a 6-inch two-layer cake, you’d use 5 cups flour, 2 cups sugar, and 1 cup butter total. The frosting recipe remains the same—just adjust the flavor to match your cake (e.g., vanilla buttercream for a vanilla cake).
How do I adjust this for a gluten-free diet?
Replace the all-purpose flour with a 1:1 gluten-free baking flour blend (like Bob’s Red Mill or King Arthur). Add ½ teaspoon xanthan gum to each batter to improve structure. The chocolate layer may need an extra 1 tablespoon of milk since gluten-free flours absorb more moisture. Test oven temps—gluten-free cakes often bake 2-3 minutes longer than traditional cakes.
Why did my chocolate layer crack on top?
Cracking usually happens when the batter is too wet or the oven runs too hot. Check your cocoa powder—too much can make the batter thick and prone to cracking. Also, ensure your oven is fully preheated and the batter isn’t overmixed. For next time, chill the chocolate batter 10 minutes before baking to help it set more evenly.
Can I make these cakes ahead of time?
Yes! Bake the layers 1-2 days ahead and store them wrapped tightly at room temperature. Frost the day of serving—assembling too early can cause sogginess. For long-term storage, freeze the baked (unfrosted) layers for up to 1 month. Thaw overnight in the fridge before assembling.
What’s the best way to decorate this cake?
Beyond the whipped cream topping, try these easy ideas: Pipe buttercream rosettes around the base, add fresh berries (raspberries or strawberries), or sprinkle crushed pistachios. For a rustic look, dust with cocoa powder between layers. If you’re feeling fancy, add edible gold leaf or chocolate curls for a bakery-worthy finish.

- 12 Bean Chili Recipe: Hearty Slow-Cooked Depth With 12 Legumes - October 17, 2026
- 5 Seed Bread Recipe: Nutty Crunch and Artisan Flavor in One Loaf - October 17, 2026
- 1 Lb Macaroni Salad Recipe: Bold, Crunchy, and Crowd-Pleasing - October 17, 2026