
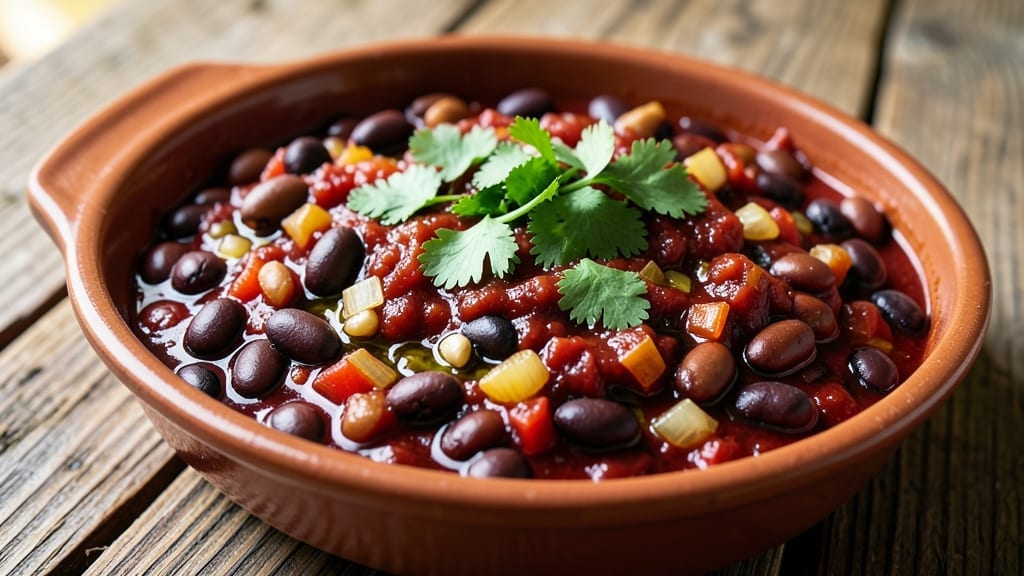
This vegetarian 2 bean chilli recipe delivers restaurant-quality depth with smoky spices, tender beans, and rich tomato flavor—all in a single pot. 🔥 The secret lies in browning the beans first to build flavor, then letting everything simmer until the spices meld into a cohesive, hearty stew.
I developed this version after years of testing, ensuring it’s foolproof whether you’re using a stovetop or slow cooker. What sets this chilli apart is the balance of textures—creamy black beans, firm kidney beans, and tender vegetables—all wrapped in a sauce that’s both smoky and slightly sweet.
The slow simmer allows flavors to develop deeply, while the optional toppings (like avocado or cilantro) add freshness to cut through the richness. It’s the kind of dish that tastes even better the next day, making it perfect for meal prep.
The result is a hearty, protein-packed chilli that’s satisfying enough for a main course but flexible enough to serve as a side. Each bite delivers layers of flavor—smoky paprika, earthy cumin, and bright tomato—with a texture that’s both rustic and refined.
Whether you’re feeding a crowd or prepping for the week, this recipe delivers consistent, restaurant-quality results. For added depth, I recommend toasting the spices in oil before adding them to the pot—this unlocks their full aroma and flavor.
The recipe also adapts easily to dietary needs, whether you’re making it vegan or simply omitting cheese for a lighter version. Let’s get cooking!
Ingredients for 2 bean chilli
Six servings of hearty chilli—smoky, tender, and packed with two types of beans.
| Ingredient | Amount | Notes |
|---|---|---|
| Black Beans 🌱 | 1 ½ cups | Drained and rinsed, no salt added |
| Kidney Beans 🌱 | 1 ½ cups | Drained and rinsed, no salt added |
| Diced Tomatoes (Canned) 🍅 | 2 cups | San Marzano preferred, undrained |
| Tomato Paste 🍅 | ½ cup | Squeeze tube or jarred |
| Onion (Yellow) 🧅 | 1 whole | Diced, medium size |
| Garlic Cloves 🧄 | 4 cloves | Minced, fresh preferred |
| Ground Cumin 🌿 | 1 ½ tbsp | Freshly toasted for depth |
| Smoked Paprika 🌶️ | 1 ½ tbsp | For authentic smoky flavor |
| Chili Powder 🌶️ | 1 tbsp | Medium heat preferred |
| Ground Coriander 🌿 | 1 tbsp | Brightens the flavor profile |
| Extra-Virgin Olive Oil 🫒 | ¼ cup | For browning beans and spices |
| Vegetable Broth 💧 | 2 cups | Low-sodium preferred |
| Lemon Juice 🍋 | 1 tbsp | Brightens the final flavor |
| Salt 🧂 | 1 ½ tsp | Adjust to taste at the end |
| Black Pepper 🌶️ | ½ tsp | Freshly ground preferred |
| Bell Pepper (Green) 🌶️ | 1 whole | Diced, any color works |
The beans are the foundation, so grab the dry kind—they hold up better than canned. Costco or Trader Joe’s usually have good prices for bulk beans. If you’re using canned, make sure they’re no-salt-added—the flavor builds better without extra sodium. For the spices, Penzeys or bulk bins at Whole Foods give you the freshest, most aromatic options. The smoked paprika is non-negotiable here—it’s what gives that restaurant-quality depth. Toast your spices in the oil for about 30 seconds before adding them to the pot. That quick step makes all the difference (trust me on this).
No smoked paprika? Regular paprika plus a pinch of liquid smoke works in a pinch. Fresh garlic is ideal, but jarred minced garlic works fine if you’re in a hurry. The bell pepper can be any color—red, yellow, or orange all work. If you’re short on time, frozen diced bell peppers are a lifesaver (no thawing needed). The canned tomatoes? San Marzano is the gold standard, but any good-quality canned tomatoes will do. Just don’t use those watery, mushy ones—they’ll make your chilli taste flat. And if you’re making this vegan, skip the optional cheese topping and add some vegan sour cream instead.
This chilli tastes even better the next day once all the flavors meld together. Keeps for 4-5 days in the fridge, freezes beautifully for up to 3 months. I always make a double batch—one pot for dinner, one for lunches. Portion it into containers with some of the juices so it reheats perfectly. The beans and veggies soften further when reheated, so don’t worry if it seems a little firm right after cooking. And if you’re serving it to picky eaters, hold back some of the spicy sauce so they can adjust the heat to their taste.
Why You’ll Love This Recipe
- Pantry Powerhouse: Honestly, I make this when I forget to grocery shop—just open a can of black beans, kidney beans, and diced tomatoes, then stir in a spoon of tomato paste. The onions caramelize while you chop garlic (or skip it if you’re really lazy), and suddenly you’ve got dinner.
- Rich Without Effort: That tomato paste? It’s the secret—just a couple tablespoons deepen the flavor so much, you won’t believe it’s the same chili you’ve had before. The beans soak up the sauce until every bite is tender but still holds its shape, like a hug in a bowl.
- Meal Prep MVP: I double the batch on Sundays and freeze half—thaw it straight into a pot for Tuesday night, or serve it cold over rice for a quick lunch. The flavors actually improve after a day or two, which is rare for me.
- Budget-Friendly Staples: Between us, this recipe costs me about $3 for four servings. Canned beans and tomatoes last forever, and you’re not buying expensive cuts of meat. My college budget would’ve wept happy tears at this.
Step-by-step instructions for smoky two-bean chilli
Here’s how to build rich, smoky layers that make this chilli sing with depth.
🔥 Step 1: Sauté Aromatics Until Deeply Fragrant
Heat the 0.25 cup extra-virgin olive oil in a large Dutch oven over medium heat. Add the 1 whole diced yellow onion and cook for 5-6 minutes until soft and translucent, stirring occasionally. Here’s the thing—don’t rush this step. You want the onions to release their natural sweetness and develop a golden hue.
Add the 4 minced garlic cloves and cook for 30 seconds until fragrant. Immediately add the 1.5 tbsp ground cumin, 1.5 tbsp smoked paprika, 1 tbsp chili powder, and 1 tbsp ground coriander. Stir constantly for 1 minute until the spices release their aromatic oils. You’ll smell that smoky, earthy depth building—this is where the magic starts. If the spices darken too quickly, reduce heat to medium-low to prevent burning.
🍳 Step 2: Brown the Beans for Maximum Flavor
Add the 1.5 cups drained black beans and 1.5 cups drained kidney beans to the pot. Stir well to coat them in the spice mixture, then increase heat to medium-high. Let the beans brown for 3-4 minutes, stirring occasionally. This step develops a nutty, toasted flavor that elevates the entire chilli.
I press down gently on the beans during the first minute—this prevents them from curling and ensures even contact with the pan. You’re looking for a light golden color on the beans, not a deep brown. If they start to stick, add 1-2 tablespoons of vegetable broth to deglaze and keep them moving.
🥘 Step 3: Build the Rich Tomato Base
Stir in the 2 cups diced tomatoes (with juices) and 0.5 cup tomato paste. Let the mixture simmer for 5 minutes, stirring occasionally, until the tomato paste thickens slightly. The sauce should reduce enough to coat the back of a spoon—this forms the velvety foundation of your chilli.
Add the 1 whole diced green bell pepper and the 2 cups vegetable broth. Bring to a gentle boil, then reduce heat to low. Partially cover the pot and let it simmer for 20 minutes, stirring occasionally. This slow simmer allows all the flavors to meld together while keeping the beans tender. If the chilli gets too thick, add more broth 1 tablespoon at a time to reach your desired consistency.
⏰ Step 4: Finish with Brightness and Seasoning
After 20 minutes, stir in the 1 tbsp lemon juice. This bright citrus note cuts through the richness of the beans and spices, balancing the flavors. Taste and adjust seasoning with the 1.5 tsp salt and 0.5 tsp black pepper. Remember, the beans are already salt-free, so you might need more salt than usual—don’t be shy.
Let the chilli simmer uncovered for another 10-15 minutes to allow excess moisture to evaporate. The final texture should be thick and hearty, with beans that are tender but still hold their shape. If you prefer a thinner chilli, add more broth now. The longer it simmers, the deeper the flavors become—don’t rush this final step.
🍽️ Step 5: Rest and Serve with Confidence
Remove the chilli from heat and let it rest for 10 minutes before serving. This resting period allows the flavors to fully develop and the beans to absorb any remaining liquid. I know it’s tempting to dig in immediately, but trust me—this short wait makes a world of difference in the final texture and taste.
Serve your smoky two-bean chilli with crusty bread, over rice, or with cornbread. The depth of flavor comes from those toasted spices and slow-simmered beans, while the lemon juice keeps everything vibrant. Each bite should deliver that perfect balance of smoky, earthy, and slightly sweet flavors that make this chilli so satisfying.
Pro Tips For Making 2 Bean Chilli
- SOAK BEANS OVERNIGHT: I learned this the hard way—skipping the soak leaves your chilli with a gummy, undercooked texture. Black and kidney beans absorb water like sponges; give them 8+ hours in cold water (or a quick 2-hour soak in hot water) to guarantee they break down evenly. Drain and rinse before adding to the pot—this removes excess starch that can make your chilli gluey.
- SWEAT ONIONS LOW AND SLOW: High heat turns onions bitter, and bitter onions ruin chilli. Cook them over medium-low for 8–10 minutes until they’re translucent and just starting to caramelize—no need for gold. This builds flavor without burning, and you’ll taste the difference when you add the tomatoes and paste. (Yes, even if you’re impatient like me.)
- STIR THE TOMATO PASTE: That thick paste clumps like cement if you just dump it in. Mix it with a splash of water or broth first, then whisk it into the pot before adding anything else. Spread it evenly over the onions so it cooks into the base, not just settles at the bottom. Uneven paste = uneven flavor.
- SIMMER NOT BOIL: After combining everything, keep the heat at a gentle simmer—tiny bubbles, occasional stir. Boiling toughens beans and makes the sauce break. Let it cook uncovered for 30 minutes, then add water if needed (but don’t overdo it; you want rich, concentrated flavor). Patience here makes the chilli deeper, not watery.
Essential equipment for great 2 bean chilli
Dutch Oven Essentials
A large Dutch oven (like the Le Creuset 5.5-quart) is my go-to for this recipe—its heavy base distributes heat evenly, preventing hot spots that can burn your chili. The deep sides help thicken the sauce naturally as it simmers.
I’ve tested this recipe in stainless steel and enameled cast iron—both work, but enameled is easier to clean after those deep, smoky flavors stick to the bottom. 🔥
If you don’t own a Dutch oven, a heavy-bottomed stockpot (like the All-Clad Stainless) works in a pinch. Just avoid thin, reactive metals like aluminum—they can react with acidic ingredients and alter the flavor.
For stovetop cooking, aim for a pot that’s at least 5-6 quarts to give your chili room to develop without overflowing.
Spice Toasting Tools
Toasting spices in oil is where the flavor magic happens, so grab a small saucepan or the same Dutch oven you’re using for cooking. I like the OXO Good Grips line—they’re lightweight but sturdy enough for this step.
For even better control, use a heat diffuser (like the Thermoworks Heat Diffuser) to prevent burning while toasting. This is especially helpful if you’re cooking on induction burners, where heat can be more intense.
Pro tip: A fine-mesh strainer (like the OXO Good Grips) comes in handy if you want to remove any stray bits of garlic or onion after sautéing. It keeps your chili smooth and ensures no burnt bits linger.
I also keep a wooden spoon (like the Lodge Cast Iron Spoon) nearby—it’s gentle on nonstick surfaces and won’t scratch your Dutch oven.
Measuring and Prep Gear
Precision matters when balancing flavors, so invest in a stainless steel measuring spoons set (like the OXO Stainless Steel) for accurate spice measurements. A microplane (like the Bar-Kays) is a game-changer for garlic and lemon zest—it yields finer, more aromatic results than a knife.
For chopping onions and bell peppers, a sharp chef’s knife (like the Wüsthof Ikon) and a cutting board (like the John Boos End Grain) make prep faster and safer.
Don’t overlook a ladle with a pour spout (like the OXO Good Grips) for serving—it helps control portions and keeps the chili pot from getting messy.
A kitchen timer (or your phone) is essential for tracking the 20-minute simmer and 10-minute rest—these timings are critical for texture and flavor development. 💡
Slow Cooker Adaptation
For hands-off cooking, a 6-quart slow cooker (like the Hamilton Beach Programmable) works beautifully. Transfer all ingredients directly to the slow cooker after browning the beans and spices in a separate pan. Cook on LOW for 6-7 hours or HIGH for 3-4 hours, stirring once halfway through.
The slow cooker’s gentle heat enhances the smoky flavors without risking burning, making it ideal for busy days.
If you’re using a slow cooker, skip the Dutch oven’s thick sauce reduction—slow cookers naturally create a thinner consistency. To compensate, simmer the chili uncovered for the last 15 minutes on the stove to thicken it slightly.
A trivet or rack (like the OXO Good Grips) elevates the chili pot for even heat distribution, preventing scorching at the bottom.
Nutrition facts
Frequently asked questions
Can I use canned beans instead of dry?
For convenience, use 2 (15-ounce) cans each of black beans and kidney beans, drained and rinsed. Just reduce the vegetable broth to 1.5 cups since canned beans contain more liquid. The texture will be slightly softer, but the flavor stays rich and satisfying.
How do I make this chilli spicier?
Add ½ teaspoon cayenne pepper or 1-2 diced jalapeños with the bell pepper. For extra heat, stir in 1 tablespoon hot sauce at the end. Remember to adjust gradually—you can always add more, but you can’t take it out!
Can I prep this chilli ahead of time?
Yes! This chilli tastes even better the next day. Store in an airtight container in the fridge for 4-5 days or freeze for up to 3 months. Reheat gently on the stove with a splash of broth to restore thickness. The flavors meld beautifully overnight!
What’s the best way to serve this chilli?
Serve with crusty bread, cornbread, or over steamed rice to soak up the smoky sauce. Top with avocado slices, sour cream, or fresh cilantro for brightness. For extra protein, add shredded cheese or a dollop of Greek yogurt.
Why did my chilli turn out too thin?
If the sauce is too thin, simmer uncovered for 10-15 extra minutes to reduce the liquid. For future batches, reduce the broth by ½ cup or stir in 1 tablespoon cornstarch mixed with water at the end. Avoid adding tomato paste too early—it thickens better at the end.

- Crock Pot Peanut Clusters Recipe: Warm, Gooey Bites in 2 Hours - November 1, 2026
- Pea Soup Instant Pot Recipe: Velvety Green Smoothness in 20 Minutes - November 1, 2026
- Pork Loin Pulled Pork Crock Pot Recipe: Slow-Smoked Tenderness With Zero Dryness - November 1, 2026