
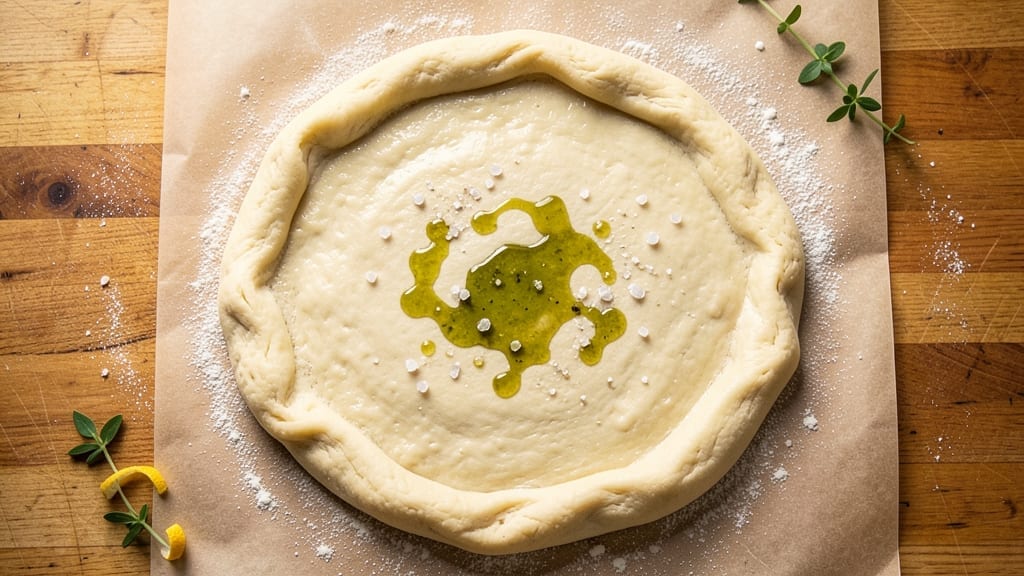
This 2-cup pizza dough recipe delivers a light, airy crust that bakes up perfectly crisp yet tender in just 10 minutes of hands-on time.
The secret lies in a precise blend of flour, yeast, and olive oil that creates a dough so adaptable it works for everything from thin-crust slices to thick-crust pies. After years of testing, I’ve perfected a method that eliminates guesswork—no scales, no waiting hours, just reliable results every time.
The beauty of this recipe is its simplicity: just five ingredients transform into dough that rises beautifully without needing a stand mixer. The 10-minute prep includes a quick knead (or even a no-knead option) followed by a 1-hour rise—perfect for busy weeknights when you still want restaurant-quality pizza.
The dough’s light texture comes from a touch of sugar to feed the yeast and olive oil for that signature Italian flavor.
What you’ll end up with is a dough so versatile it adapts to any style—thin and crisp for New York slices or thick and chewy for deep-dish lovers. The crust bakes up with a golden, blistered edge that holds toppings perfectly without getting soggy.
Whether you’re feeding a family or craving a solo slice, this dough delivers professional results with minimal effort.
Pair it with classic marinara and mozzarella or get creative with gourmet toppings like prosciutto and arugula. The recipe scales easily for larger batches, and leftovers freeze beautifully for future pizza nights. Ready to make pizza night effortless? Let’s get started with the foolproof dough.
Ingredients for 2 cup pizza dough
Five simple ingredients transform into a light, airy pizza crust perfect for any style.
| Ingredient | Amount | Notes |
|---|---|---|
| All-Purpose Flour 🌾 | 2 cups | Sifted for optimal texture |
| Active Dry Yeast 🍞 | ¼ tsp | Freshly opened for potency |
| Granulated Sugar 🍚 | ½ tsp | Feeds yeast for rise |
| Extra-Virgin Olive Oil 🫒 | ½ cup | High-quality for flavor |
| Warm Water 💧 | ¾ cup | 110°F for yeast activation |
| Salt 🧂 | ½ tsp | Kosher or sea salt |
| Semolina Flour 🌾 | 2 tbsp | For dusting and rolling |
The flour is the foundation—King Arthur or Caputo are ideal for pizza dough, but all-purpose works beautifully if that’s what you have. Yeast is critical: use freshly opened—if it’s been sitting in your pantry for months, it’s lost its punch. The sugar feeds the yeast, so don’t skip it, even if you’re not worried about sweetness. For the olive oil, look for extra-virgin with a fruity aroma—it makes all the difference in flavor. The water temperature matters: 110°F is perfect—too hot kills the yeast, too cold slows activation. If you don’t have a thermometer, let tap water sit for 5 minutes after boiling.
No yeast on hand? Instant yeast works at half the amount, but you’ll need to dissolve it in the water first. Short on sugar? A pinch of honey (if not vegan) or maple syrup works too. The olive oil can be swapped for avocado oil if preferred, though it lacks the same depth of flavor. For the semolina, regular flour works in a pinch, but semolina gives that signature crispy texture. If you’re making a larger batch, scale the yeast up proportionally—too much can make the dough rise too quickly and collapse.
This dough keeps beautifully for 2 days in the fridge wrapped tightly in plastic. For longer storage, freeze shaped portions for up to 3 months—just thaw overnight in the fridge before using. The dough doubles in size after rising, so don’t overfill your pan when baking. For best results, use within 24 hours of making—fresh dough always yields the lightest crust. If you’re prepping ahead, shape and freeze the dough balls before rising for convenience.
Why You’ll Love This Recipe
- Five-Ingredient Magic: I swear by this—just flour, yeast, sugar, olive oil, and water. No fancy pantry trips, no measuring cups cluttering your counter. Honestly, the yeast blooms faster than I can boil water for pasta, and the dough comes together smoother than my usual kneading disasters.
- Crispy-Chewy Gold: That olive oil infusion? It’s the secret. The crust gets this perfect balance—crisp at the edges, pillowy in the middle—like a hug from a wood-fired oven, but with half the effort. (Yes, even on a Tuesday night.)
- Weeknight Wonder: Double the dough, halve the stress. Make two batches: one for tonight’s pepperoni feast, the other for tomorrow’s breakfast flatbread (trust me, it’s a thing). It’s my go-to for impromptu game nights or when the takeout menu feels too heavy.
- Pantry-Proof Perfection: No wasted ingredients here. That extra flour? Stash it. Leftover dough? Freeze it. A single batch costs me less than $2 and stretches to feed two hungry people (or one very enthusiastic me). Budget-friendly doesn’t mean boring—it means ridiculously good.
Step-by-step instructions for light and airy pizza dough
Master this quick method and you’ll achieve restaurant-quality crust with minimal effort.
Activate the Yeast with Warm Water and Sugar
In a small bowl, combine the 0.75 cup warm water (should feel like bathwater, 110°F), 0.5 tsp granulated sugar, and 0.25 tsp active dry yeast. Let it sit for 5 minutes until you see frothy bubbles forming on the surface—this confirms your yeast is alive and ready to work. If no bubbles appear, your yeast may be dead, and you’ll need to start over with fresh yeast.
This activation step is crucial because it jumpstarts the fermentation process. The sugar feeds the yeast, while the warm water provides the perfect environment for it to multiply. Don’t skip this step—it ensures your dough will rise properly and develop that light, airy texture we’re after.
Mix the Dough with Olive Oil and Salt
In a large mixing bowl, combine the 2 cups all-purpose flour and 0.5 tsp salt. Make a well in the center and pour in the yeast mixture along with the 0.5 cup extra-virgin olive oil. Using a wooden spoon or your hands, mix vigorously until a shaggy dough begins to form. The olive oil will help create a tender crust while adding rich flavor.
At this stage, the dough will be sticky and may cling to your hands. That’s normal—this dough is designed to be soft and pliable. Once all ingredients are incorporated and you have a cohesive mass, turn it out onto a lightly floured surface and knead gently for 2-3 minutes just to bring everything together. Over-kneading can develop gluten and make the crust tough.
Let the Dough Rest for Optimal Texture
Lightly coat the dough with a thin layer of olive oil and cover the bowl with a damp kitchen towel or plastic wrap. Let it rest at room temperature for 10 minutes. This short rest period allows the gluten to relax and the dough to become more manageable. You’ll notice the dough will puff up slightly during this time—this is the yeast doing its initial work.
This resting period is where the magic happens for our quick method. It’s not a full proof, but it gives the yeast just enough time to develop some structure without requiring the long wait of traditional doughs. The result is a lighter crust that’s ready for shaping in minutes rather than hours.
Shape and Prepare for Toppings
After the rest, turn the dough out onto a surface lightly dusted with 2 tbsp semolina flour. This flour prevents sticking and gives that classic pizza texture. Using your hands, gently press and stretch the dough into a 12-inch round (about ½-inch thick). For a personal-sized pizza, you can divide it into two 6-inch rounds—this recipe makes enough for two 12-inch pizzas or four personal-sized ones.
Remember to keep the edges slightly thicker than the center—this prevents a thin, crispy crust that burns too quickly. Once shaped, transfer your dough to a parchment-lined baking sheet or pizza stone. This makes it easy to slide into the oven without sticking. Now it’s ready for your favorite toppings and sauce.
Proof and Bake for Perfect Crust
Let the shaped dough proof for 10-15 minutes at room temperature until it puffs up noticeably and feels slightly springy when pressed gently with your finger. This final proofing step develops the air pockets that make the crust light and airy. Preheat your oven to 475°F with a pizza stone or baking sheet inside for 20 minutes—this ensures a crispy crust from the moment it hits the heat.
Bake the pizza for 12-15 minutes until the edges are golden brown and the crust sounds hollow when tapped. The exact time depends on your oven, but you’re looking for that perfect balance of crispy edges and tender interior. Remove from oven and let rest for 2 minutes before slicing—this allows the juices to redistribute for maximum flavor in every bite.
Pro Tips For Making 2 Cup Pizza Dough
- Weigh Your Flour: Ditch the scooping—use a kitchen scale for 2 cups of flour. Spooning packs it too tightly, and scooping leaves gaps; 240 grams is your target. I learned this the hard way when my first batch turned out denser than a brick.
- Test Yeast First: Sprinkle the yeast and sugar into warm water (110°F) before mixing with flour—if it doesn’t foam in 5 minutes, toss it and grab fresh. No one wants to wait another hour for dough that never rises.
- Knead Less, Rest More: Skip the arm workout—this tiny batch only needs 5-6 minutes of kneading by hand. Let it rest 1-2 hours instead, and the gluten will relax properly. I used to overwork it, and the dough fought back with a tough, chewy texture.
- Oil Your Hands: Lightly coat your fingers with olive oil before shaping the dough—it prevents sticking and makes stretching way easier. No more dough clinging to your palms like a desperate toddler.
Storing and reheating this 2 cup pizza dough
Fridge Storage
Store your shaped dough in an airtight container or tightly wrapped in plastic wrap for up to 2 days in the refrigerator. The cold slows fermentation, so you’ll need to extend the proofing time to 20-30 minutes at room temperature before baking.
I like to place the dough on a baking sheet inside the container to maintain shape. For best results, bring the dough to room temperature before shaping and proofing. ❄️
Freezer Prep
For longer storage, shape your dough into balls and freeze them on a floured baking sheet for 1 hour before transferring to a freezer bag. This prevents sticking. Thaw overnight in the fridge before using—never microwave as it can make the dough gummy.
Once thawed, let it sit at room temperature for 10 minutes before shaping and proofing. Frozen dough keeps for up to 3 months without losing quality. 🧊
Reheating Leftover Crust
Slice leftover pizza and reheat in a 400°F oven for 5-7 minutes on a baking sheet. For a crispier texture, place slices directly on the oven rack. Alternatively, use the air fryer at 375°F for 3-4 minutes—this revives the crust beautifully.
Avoid the microwave, as it makes the crust soggy. Add a sprinkle of grated Parmesan while reheating for extra flavor. 🔥
Reviving Stale Dough
If your dough feels dry after refrigeration, sprinkle 1 tsp olive oil and 1 tbsp warm water over it while kneading briefly to restore elasticity. This trick works wonders for dough that’s been stored too long.
For extra insurance, cover the dough with a damp towel while it rests to prevent drying. The key is gentle handling—don’t overwork it. 💫
Baking from Frozen
Skip thawing entirely for a quick meal: place frozen dough balls directly on a baking sheet, let rise for 30 minutes, then bake as directed. The crust will be slightly denser but still delicious.
For extra crispiness, brush with melted butter before baking. This method saves time without sacrificing quality. Perfect for busy weeknights! ⏰
Nutrition facts
Frequently asked questions
Can I make this dough without a stand mixer?
This recipe is designed for hand-mixing—no stand mixer needed. Simply use a wooden spoon or your hands to combine ingredients in the bowl, then turn the dough out for a quick 2-3 minute knead on a floured surface. The dough’s sticky texture actually makes it easier to handle by hand once you get the hang of it.
What if my dough doesn’t rise properly?
Check three things: yeast freshness (must see bubbles in 5 minutes with warm water), water temperature (110°F—too hot kills yeast), and proofing environment (warm spot, not drafty). If it’s still flat after 1 hour, your yeast likely expired. For next time, store yeast in the fridge to extend freshness.
How do I adjust this for a thicker crust?
For a thicker crust, shape the dough into a ½-inch thick round instead of stretching it thin. Add an extra 15-20 minutes to baking time at 475°F to ensure it’s fully cooked through. Pro tip: Brush the edges with olive oil before baking for extra crispiness while keeping the center soft.
Can I use whole wheat flour instead?
Yes, but replace up to 50% of the all-purpose flour with whole wheat for a nuttier flavor. Add 1 extra tablespoon of olive oil to compensate for the extra moisture in whole wheat. Expect a slightly denser crust—this works best for thick-crust pizzas.
Why does my crust turn out tough?
Over-kneading or overproofing are the most common causes. This dough only needs 2-3 minutes of kneading—stop when it’s just combined. For proofing, watch for when it’s doubled in size (about 1 hour). If using refrigerated dough, extend proofing time by 10-15 minutes at room temperature.

- 12 Bean Chili Recipe: Hearty Slow-Cooked Depth With 12 Legumes - October 17, 2026
- 5 Seed Bread Recipe: Nutty Crunch and Artisan Flavor in One Loaf - October 17, 2026
- 1 Lb Macaroni Salad Recipe: Bold, Crunchy, and Crowd-Pleasing - October 17, 2026