
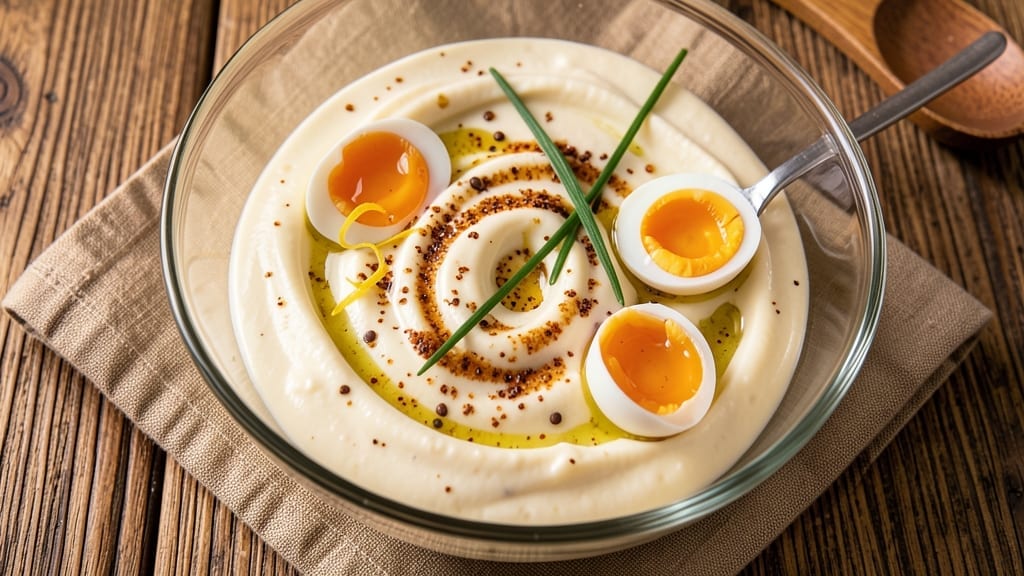
This 2-egg mayonnaise recipe delivers the ultra-smooth, velvety texture of restaurant-quality mayo without the fuss of traditional methods. The secret lies in precise ratios and a foolproof emulsion technique that transforms simple ingredients into a stable, creamy sauce you’ll never want to buy again.
My version uses just two eggs—no shortcuts—because quality matters when you’re making something this essential.
The magic happens in the slow, steady incorporation of oil while whisking vigorously, creating a stable emulsion that won’t break. With a perfect balance of Dijon mustard for structure and white vinegar for tang, this recipe delivers mayo that stays smooth for days.
The key is patience—rushing this step is what causes most homemade mayo failures, but once mastered, you’ll achieve professional results every time.
What you’ll end up with is ultra-smooth mayonnaise with a rich, creamy texture that clings beautifully to sandwiches, salads, and fried foods. The flavor is perfectly balanced—tangy without being harsh, rich without being greasy—and it stays fresh in the refrigerator for up to two weeks when stored properly.
This isn’t just mayo; it’s a game-changer for home cooking.
The best part? This recipe scales effortlessly—double it for parties or keep a jar in your fridge for everyday use. Whether you’re dressing up a classic tuna salad or adding richness to grilled meats, this mayonnaise will elevate every dish. Let’s get started on making your perfect batch.
Ingredients for 2 egg mayonnaise
Seven simple ingredients transform into ultra-smooth mayonnaise—restaurant quality at home.
| Ingredient | Amount | Notes |
|---|---|---|
| Large Egg Yolks 🥚 | 2 whole | Fresh, room temperature preferred |
| Dijon Mustard 🌶️ | 1 tbsp | High-quality, smooth texture |
| White Vinegar 🍋 | 1 tsp | Distilled, not apple cider |
| Diamond Crystal Kosher Salt 🧂 | ¼ tsp | Fine grain preferred |
| Freshly Ground Black Pepper 🌶️ | ¼ tsp | Cracked peppercorns preferred |
| Light Tasting Olive Oil 🫒 | 1 cup | Extra-light, not extra-virgin |
| Ice Water 💧 | 1 tbsp | Chilled, for stabilization |
The eggs are non-negotiable—fresh, room-temperature yolks make all the difference. Trader Joe’s or Whole Foods sell the best quality, but any grocery store’s fresh eggs work. For Dijon mustard, Maille or Bonne Maman deliver that perfect balance of tang and structure. If you’re using pre-ground black pepper, freshly crack your own for that bright, fresh flavor. The olive oil? Light tasting is key—extra-virgin can overpower the delicate emulsion. I always grab a bottle of California Light Olive Oil from the bulk section at Costco—it’s affordable and consistent.
No Dijon? Substitute regular mustard at double the amount, but you’ll lose that signature depth. Short on vinegar? Lemon juice works in a pinch, but the flavor profile shifts slightly. The ice water is your secret weapon—add it drop by drop to stabilize the emulsion if it starts breaking. For the oil, any neutral oil works (avocado, grapeseed), but olive oil gives that authentic taste. Want to make it ahead? Double the recipe and store in a clean jar—it keeps for 2 weeks in the fridge.
This mayo thrives in the fridge, so transfer to an airtight container immediately after making. The flavor actually improves over 2-3 days as the ingredients meld. For long-term storage, freeze in ice cube trays—thaw and whisk back to perfection. Pro tip: Add a pinch of salt if storing longer than a week to prevent flavor dulling. Trust me, you’ll want to make this every two weeks—it’s that good.
Why You’ll Love This Recipe
- No Fuss, No Mess: I swear by this method—just yolks, mustard, and slow drizzles of vinegar. No blender, no stress, and zero risk of that dreaded mayo break. Honestly, it’s the only way I’ll ever make it again.
- Tangy, Rich, Perfect: That Dijon mustard adds depth, while the vinegar cuts through the richness just enough to keep it bright. The salt and pepper? They’re the secret—don’t skip the fresh grind, or you’ll miss out on that little pop of flavor.
- Sandwich Hero: Between us, this mayo is my go-to for burgers, tacos, or even a simple grilled cheese. It’s the kind of thing that turns a basic meal into something you’ll actually look forward to. (Yes, even on a Tuesday night.)
- Budget-Friendly Staple: Two eggs, a pinch of salt, and a splash of vinegar—that’s it. No fancy ingredients, no wasted money. Plus, it keeps for days in the fridge, so I’m always ready for last-minute guests or lazy lunches. My wallet (and my taste buds) thank me.
Step-by-step instructions for whipped creamy mayonnaise
Here’s the foolproof method to create velvety, ultra-smooth mayonnaise every time.
Prepare the Base Mixture
In a medium heatproof bowl, whisk together the 2 whole Large Egg Yolks, 1 tbsp Dijon Mustard, 1 tsp White Vinegar, 0.25 tsp Diamond Crystal Kosher Salt, and 0.25 tsp Freshly Ground Black Pepper until completely smooth. The Dijon mustard acts as an emulsifier, helping the oil blend seamlessly with the yolks. I like to whisk vigorously for about 30 seconds until the mixture is homogeneous and pale yellow—this ensures no lumps remain that could disrupt the emulsion later.
Place the bowl over a pot of barely simmering water (double boiler method) and whisk constantly for 2-3 minutes until the mixture reaches 100°F. This gentle warming helps prevent the eggs from scrambling when we add the hot oil later. You’ll know it’s ready when the mixture thickens slightly and leaves a visible trail in the bowl when the whisk is lifted.
Gradually Incorporate the Olive Oil
Remove the bowl from the heat and let it cool slightly for 30 seconds. Begin adding the 1 cup Light Tasting Olive Oil very, very slowly—just 1 teaspoon at a time—while whisking continuously. This gradual approach is absolutely critical. The oil should be absorbed into the yolk mixture before adding more, creating tiny, stable droplets that won’t separate. I use a fine-mesh strainer over the bowl to control the flow and maintain precision.
After adding about ¼ cup of oil, you’ll notice the mixture begin to thicken and turn creamy. This is your signal to maintain a steady pace—neither too fast nor too slow. The whisking should be vigorous but controlled. If the mixture suddenly curdles or looks broken, stop immediately, add 1 tbsp Ice Water, and whisk until smooth before continuing. This technique, called “rescuing,” saves many a failed batch.
Finish and Stabilize the Emulsion
Continue adding the oil in 1-teaspoon increments, whisking constantly, until all 1 cup Light Tasting Olive Oil is incorporated. The mayonnaise should now be thick, glossy, and perfectly smooth—like liquid silk. If it’s too thick for your liking, thin it slightly with 1-2 teaspoons of the reserved ice water. The water helps balance the emulsion and prevents it from becoming too dense.
Transfer the mayonnaise to a clean jar or airtight container and let it rest at room temperature for 10 minutes. This resting period allows the flavors to meld and the emulsion to fully stabilize. The mayonnaise should hold its shape when spooned—if it separates slightly, simply whisk it again until smooth. Once stabilized, it will keep in the refrigerator for up to 1 week, maintaining its perfect texture and rich flavor.
Pro Tips For Making 2 Egg Mayonnaise
- Whisk Slow and Steady: I used to rush the emulsification like I was in a race, and half the time, my mayo curdled. Instead, add the oil in a thin, steady stream—about 1 teaspoon per second—while whisking like your life depends on it. The goal isn’t speed; it’s patience. If you dump too much oil at once, the yolks won’t bind properly, and you’ll be starting over.
- Use Cold Yolks: Pull your eggs straight from the fridge and let them sit for 5 minutes—just enough to soften the shells—but don’t warm them up. Cold yolks emulsify better and hold their shape longer. I learned this the hard way after making mayo with room-temperature eggs that turned into a sad, runny mess in the heat of summer.
- Salt the Vinegar First: Mix your white vinegar and Dijon mustard before adding it to the yolks, and dissolve a pinch of kosher salt in it. This pre-seasoning cuts down on the sharpness later and ensures even flavor distribution. I skipped this once and ended up with a mayo that tasted like vinegar had taken over—no fun.
- Keep a Dry Bowl Ready: Have an empty, dry bowl nearby because if your mayo breaks, you’ll need to salvage it fast. Add a splash of warm water (not hot) to the broken mixture and whisk vigorously—this resets the emulsion. I’ve wasted more mayo than I’d like to admit by panicking instead of acting quickly. Stay calm, and you’ll save it.
Common mistakes when making this recipe
Adding Oil Too Fast
This is the #1 reason homemade mayo fails—rushing the oil addition causes the emulsion to break. I’ve ruined more batches than I’d admit by pouring oil too quickly. The key is patience: add oil 1 teaspoon at a time, whisking constantly until fully incorporated before adding more.
If you see curdling, stop immediately and add 1 tbsp ice water to reset the emulsion. Even if it looks hopeless, whisking vigorously for 30 seconds often brings it back to smooth perfection. 💫
Using Cold Eggs
Cold eggs from the fridge can cause the mayo to separate because their proteins react differently when cold. Always use room-temperature eggs—let them sit for 10-15 minutes before starting. If you’re in a hurry, place the eggs in warm water for 2 minutes to gently raise their temperature.
Trust me, this small step makes a huge difference in texture and stability.
Skipping the Mustard
Dijon mustard isn’t just for flavor—it’s the emulsifier that binds oil and yolks. If you omit it or use a weak substitute, your mayo will likely break. For best results, use 1 tbsp high-quality Dijon (like Maille).
If you’re out, double the amount of regular mustard, but expect slightly less stability. The mustard also adds that signature tang, so don’t skip it unless you’re making a completely different condiment!
Overwhisking or Underwhisking
Both extremes can ruin your mayo. Overwhisking incorporates too much air, making it light and fluffy but unstable. Underwhisking leaves oil droplets unincorporated, leading to separation.
The goal is steady, vigorous whisking—enough to create a thick ribbon when you lift the whisk, but not so much that it becomes frothy. If you’re using a hand mixer, pulse on low speed to avoid overworking the mixture.
Ignoring the Temperature
Adding cold oil to warm yolks (or vice versa) disrupts the emulsion. Always use room-temperature oil and yolks. If your kitchen is cold, warm the oil slightly by placing the bottle in warm water for 2-3 minutes before adding.
The ideal temperature for both ingredients is around 70°F—this ensures a smooth, stable emulsion every time. A quick check: if the oil feels cool to the touch, let it sit for another minute.
Not Rescuing a Broken Batch
Even experienced cooks break mayo sometimes. The fix is simple: add 1 tbsp ice water, whisk vigorously for 30 seconds, then resume adding oil drop by drop. The water helps re-stabilize the emulsion by diluting the broken particles.
If the batch is severely curdled, start over—sometimes a fresh batch is worth the extra effort. Remember, even pros have to troubleshoot, and this trick saves more batches than you’d think! 🔥
Nutrition facts
Frequently asked questions
Can I use just egg yolks instead of whole eggs?
Yes, but the texture will be slightly less stable. This recipe uses whole eggs for better structure and flavor balance. For yolks-only mayo, reduce the oil slightly (3/4 cup) and add 1 extra tsp vinegar to compensate for the missing whites. The emulsion will still work, but it may thin out faster.
Why did my mayo turn yellow instead of white?
That’s completely normal! Fresh egg yolks naturally have a golden hue. The final color depends on the eggs’ freshness and the oil used. Light olive oil will give a pale yellow, while darker oils create a richer tone. If you prefer a whiter mayo, use avocado or grapeseed oil instead.
How do I make this recipe with a hand mixer?
Use the same ratios, but add oil very slowly (1 tsp at a time) while mixing on low speed. Never let the mixer run dry – keep a steady stream of oil flowing. Stop mixing immediately if it curdles, add 1 tbsp ice water, then resume on low. The key is patience – hand mixers can overwork the emulsion if you rush.
Can I make this mayo without mustard?
Technically yes, but it’s risky. Mustard acts as both emulsifier and flavor enhancer. For a mustard-free version, replace it with 1 tsp cornstarch (to help stabilize) and add 1 extra tsp vinegar for acidity. The texture may be slightly less stable, but it will still work for most recipes. The flavor will be more neutral though.
What’s the best way to store homemade mayo?
Transfer to a clean, airtight glass jar and refrigerate immediately. It stays fresh for 1-2 weeks in the fridge. For longer storage, freeze in 1-tbsp portions – thaw overnight in the fridge and whisk before using. The oil solidifies slightly when frozen, but the emulsion remains intact.

- Baked Potatoes in Crock Pot Recipe: Buttery Interiors and Crispy Top Magic - November 1, 2026
- Braised Beef Short Ribs Recipe: Crock Pot Fall-Off-Bone Magic in 6 Hours - November 1, 2026
- Crock Pot Cocoa Recipe: Velvety Warmth With Hidden Spice Magic - November 1, 2026