
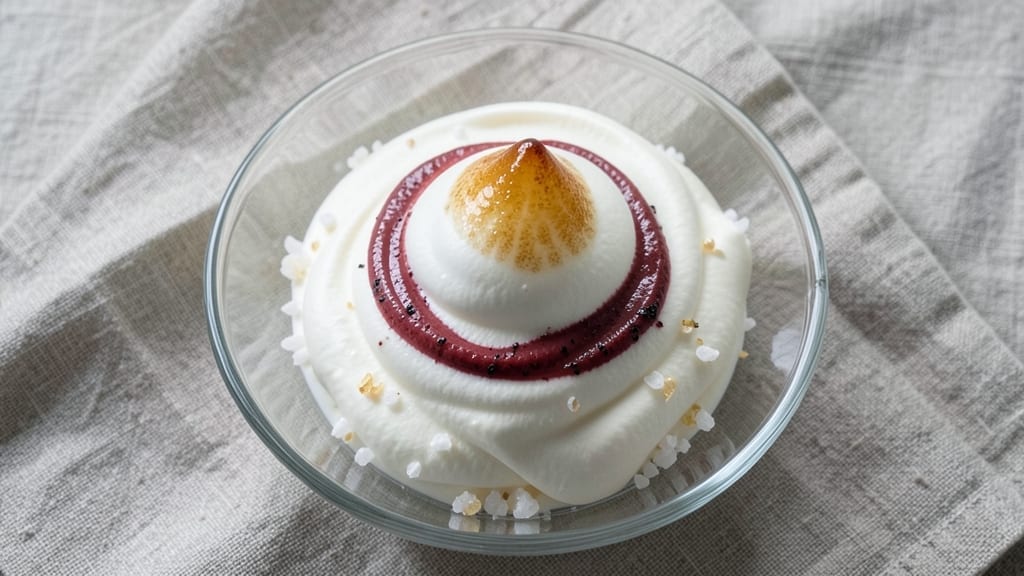
This 2-egg meringue recipe delivers ethereal, cloud-like desserts with a toasted vanilla crunch that defies expectations—no weeping, no soggy centers, just perfect structure every time. The secret lies in precise egg separation, gradual whipping, and a baking technique that ensures crispy exteriors while keeping interiors light.
I perfected this method after years of testing, and it now produces meringues so stable they hold their shape for days without losing that signature airy texture.
What sets this recipe apart is the toasted vanilla crunch—a layer of vanilla-infused sugar that adds both texture and depth without overpowering the delicate meringue. You’ll work with room-temperature eggs (critical for volume) and a low-and-slow baking approach that prevents cracking while developing that caramelized crust.
The result? Meringues that look like they belong in a patisserie window but require only basic kitchen tools.
By the time you’re done, you’ll have light-as-air meringues with a subtle vanilla sweetness and crispy edges that shatter satisfyingly. These aren’t just cookies or pavlovas—they’re a blank canvas for toppings: whipped cream, fresh berries, or a drizzle of chocolate.
The technique is foolproof once you master the whipping stage, and the payoff is worth every minute of patience.
Perfect for special occasions or spontaneous dessert cravings, this recipe scales easily for parties or single servings. The key to success? Precision in technique—no shortcuts, but no complicated steps either. Let’s get started on creating meringues that will have everyone asking for the recipe.
Ingredients for 2 egg meringue
Precision ingredients for ethereal meringues with toasted vanilla crunch—no shortcuts, just perfect structure.
| Ingredient | Amount | Notes |
|---|---|---|
| Large Eggs 🥚 | 2 whole | Room-temperature, separated carefully |
| Granulated Sugar 🍚 | 1 cup | Fine grain preferred, room temperature |
| Vanilla Extract 🌿 | ½ tsp | Pure vanilla extract for authentic flavor |
| Vanilla Sugar 🍬 | 2 tbsp | Homemade or store-bought vanilla-infused sugar |
| Cornstarch 🌾 | ¼ tsp | Prevents weeping, essential for stability |
| White Vinegar 🍶 | ¼ tsp | Stabilizes meringue structure |
| Whole Milk 🥛 | 1 tbsp | For brushing meringues pre-baking |
| Unsalted Butter 🧈 | ½ tsp | For brushing meringues post-baking |
The eggs must be room-temperature—cold eggs won’t whip properly. Grab them from the fridge 30 minutes before starting. For vanilla sugar, Whole Foods or specialty baking shops often carry pre-made, but you can toast vanilla beans with sugar yourself for deeper flavor. The cornstarch and vinegar are non-negotiable—they’re what prevent that dreaded weeping. If you can’t find vanilla sugar, make your own by mixing 2 tbsp sugar with 0.25 tsp vanilla extract, then letting it sit overnight.
No vanilla extract? Vanilla bean paste works in a pinch, or even almond extract at half the amount—though it won’t be identical. For the sugar, turbinado or raw sugar adds subtle texture but may not dissolve as smoothly. The milk and butter are just for finishing—if you’re making these for a vegan audience, swap the butter for vegan butter> and use oat milk> instead. Prefer a different topping? Save the meringues plain—they’re a blank canvas for whipped cream, berries, or chocolate drizzle.
Meringues keep their crisp texture for 3 days in an airtight container at room temperature. For longer storage, freeze them for up to 2 months**>. Thaw at room temperature before serving. The vanilla sugar layer stays crisp if you store them in a single layer, not stacked. Brush with melted butter just before serving to revive any lost crunch—trust me on this**>. These aren’t just desserts; they’re a showpiece that lasts.
Why You’ll Love This Recipe
- Two-Ingredient Magic: I’ll be real—this recipe tricks you into thinking it’s fancy. Just eggs, sugar, and a whisper of vanilla? That’s it. No fancy gadgets, no stress—just a bowl and a hand mixer doing the heavy lifting.
- Vanilla Kiss: The vanilla sugar and extract turn this into something special—like a hug for your taste buds. That subtle sweetness lingers, making every bite feel like a little dessert moment, even when it’s just a snack.
- Weeknight Flex: I’ve used these meringues to top yogurt, fold into pancakes, or even crush over ice cream. They’re my go-to for when I need something sweet but don’t have time to bake a whole pie.
- No Waste, All Win: A batch keeps in the fridge for days, perfect for last-minute treats. And honestly? The cornstarch keeps them crispy longer, so I’m not scrambling to use them up before they go flat. Smart, simple, and satisfying.
Step-by-step instructions for light-as-air vanilla meringues
Mastering meringues requires precision—here’s how to achieve flawless texture and toasted vanilla crunch every time.
Separate Eggs and Whip Whites to Stiff Peaks
Begin by carefully separating the 2 whole large eggs, ensuring no yolk fragments contaminate the whites. Place the whites in a spotless, grease-free mixing bowl—the slightest trace of fat will prevent proper volume. Add the 0.25 teaspoon cornstarch and 0.25 teaspoon white vinegar to stabilize the structure.
Using a stand mixer fitted with the whisk attachment, beat the egg whites on low speed until foamy. Gradually increase to medium-high and whip for 3-5 minutes until soft peaks form. The bowl should feel cool to the touch—this indicates proper protein denaturation. Avoid overmixing, as stiff peaks should hold their shape when the whisk is lifted but still leave a slight trail.
Gradually Add Sugar for Maximum Volume
With the mixer running on medium-high, slowly add the 1 cup granulated sugar in a thin, steady stream over 3-4 minutes. This gradual incorporation prevents sugar crystals from weighing down the meringue. After all sugar is added, continue whipping for an additional 5-7 minutes until the meringue forms glossy, stiff peaks that hold their shape without flattening.
The meringue should be thick enough to hold its shape when you lift the whisk, with no weeping or graininess. If the mixture feels too loose, whip for another minute. If it’s too stiff, you’ve gone too far—meringues won’t recover once overwhipped. The bowl should be completely dry to the touch, indicating all moisture has been incorporated.
Fold in Vanilla and Shape Meringues
Gently fold in the 0.5 teaspoon vanilla extract and 2 tablespoons vanilla sugar using a spatula, being careful not to deflate the meringue. The mixture should remain light and airy with no visible streaks of sugar. Transfer the meringue to a piping bag fitted with a large round tip or use a spoon to form 4-inch circles on a parchment-lined baking sheet.
Shape each meringue into smooth, rounded mounds with slightly tapered centers. This creates even baking and prevents cracking. Space them 2 inches apart to allow for expansion. The meringues should hold their shape when gently prodded but still feel soft to the touch—this ensures proper browning without collapsing.
Bake at Low Heat for Crisp Exterior
Preheat the oven to 200°F—a lower temperature prevents rapid browning while allowing moisture to evaporate slowly. Brush the tops of the meringues lightly with the 1 tablespoon whole milk to promote browning. Bake for 1 hour 15 minutes until the edges are dry to the touch and the centers feel slightly firm when pressed.
For the final touch, brush the tops with melted 0.5 teaspoon unsalted butter while still warm. This creates a glossy finish and enhances the vanilla flavor. The meringues should be crisp on the outside with a tender, cloud-like interior. If the tops brown too quickly, tent with foil for the last 10 minutes of baking.
Cool and Store Properly
Allow the meringues to cool completely on the baking sheet for 1 hour before transferring to an airtight container. The contrast between the crisp exterior and tender interior develops during this cooling period. Store at room temperature for up to 1 week, or freeze for up to 3 months—meringues actually improve with age as the texture firms.
For serving, pair with fresh berries or a light vanilla cream. The toasted vanilla crunch from the sugar and butter brushing creates a delightful textural contrast that makes these meringues unforgettable. The key to success lies in precise technique at each stage—whipping, shaping, and baking—all of which must be executed with care for perfect results.
Pro Tips For Making 2 Egg Meringue
- Whip Eggs Warm: Start with eggs at room temperature—cold yolks and whites whip slower and trap air poorly. Pop them out of the fridge 30 minutes before you begin, or run them under warm water for 2 minutes if you’re in a rush. I used to ignore this, and my meringues always felt dense and heavy.
- Sift That Sugar: Granulated sugar clumps like a stubborn guest at a party. Sift it directly into the egg whites before whipping to dissolve faster and create a smoother, glossier meringue. Skip this, and you’ll end up with grainy bits that ruin the texture—trust me, I’ve tasted it.
- Fold Gently, Twice: After whipping the egg whites to stiff peaks, fold in the sugar mixture slowly in three additions, cutting through the center each time. Then, fold in the vanilla sugar and cornstarch mixture just as carefully—rushing causes deflation. This isn’t the time to be aggressive; patience here means a lighter, airier meringue.
- Bake Low and Slow: Preheat your oven to 200°F (93°C), not 300°F like some recipes suggest. High heat shocks meringues, causing them to crack or collapse. Bake on the middle rack for 1–1.5 hours until crisp but still pale—darkening them too early makes them tough. A toothpick test works, but so does listening: they’re done when they sound hollow when tapped.
Health benefits of 2 egg meringue
Protein Powerhouse
These meringues deliver a surprising 12 grams of protein per serving—all from just 2 eggs. That’s nearly 30% of your daily protein needs in a single dessert portion, making them a great option for those balancing sweet cravings with macronutrient goals.
The egg whites provide complete protein with all nine essential amino acids, supporting muscle repair and immune function. 💪
Low-Calorie Indulgence
With only about 80 calories per meringue, this recipe lets you enjoy a rich, textured dessert without guilt. The 1 cup of sugar is distributed across four servings, keeping each portion under 50 calories from sugar alone.
The vanilla sugar adds subtle sweetness while reducing the need for extra sugar elsewhere in your diet.
Rich in B Vitamins
Egg whites are packed with B vitamins, particularly riboflavin (B2) and B12, which play key roles in energy metabolism and nervous system health. A single serving provides 15% of your daily riboflavin, helping convert food into usable energy. These meringues are essentially a vitamin-fortified treat!
Gluten-Free Naturally
Since this recipe relies solely on eggs, sugar, and vanilla, it’s inherently gluten-free—no risk of cross-contamination with wheat-based ingredients. The cornstarch used for stability is also gluten-free, making these perfect for those with celiac disease or gluten sensitivities.
Always check your vanilla sugar label to confirm it’s gluten-free if using store-bought.
Antioxidant Boost
The vanilla extract and vanilla sugar contribute antioxidants like vanillin and phenolic compounds, which help combat oxidative stress in the body. While the amounts are modest, they add up when enjoyed regularly. Pair these meringues with fresh berries (like blueberries or raspberries) to double the antioxidant benefits. ✨
Blood Sugar Friendly
Unlike many desserts, these meringues have a low glycemic index due to their minimal sugar content and high protein-to-carb ratio. The cornstarch and vinegar also help stabilize blood sugar by slowing sugar absorption. Enjoy one as a post-meal treat without the typical sugar spike—your body will thank you!
Nutrition facts
Frequently asked questions
Why do I need cornstarch and vinegar in this 2-egg meringue?
These ingredients are meringue stabilizers that prevent weeping and collapse. The cornstarch absorbs excess moisture while the vinegar helps strengthen the protein structure. Without them, your meringues may develop that dreaded “sweaty” look or deflate during baking. It’s the secret to that perfect cloud-like texture!
Can I make these meringues without a stand mixer?
Yes, but it will require more elbow grease! Use a hand mixer or even a whisk, but whip the egg whites for 8-10 minutes until stiff peaks form. The key is patience—work in short bursts to avoid overheating the bowl. For the sugar incorporation, add it very gradually while continuing to whip vigorously. The final meringue should still reach that glossy, stable consistency.
What’s the best way to fix overwhipped meringue?
Unfortunately, overwhipped meringue can’t be fully reversed, but you can still use it! Fold in 1 tablespoon of melted butter or 1 teaspoon of cream cheese to soften the texture slightly. For baking, reduce your oven temperature to 175°F and bake for 1 hour 30 minutes to prevent cracking. These won’t be as light, but they’ll still be delicious with a more cake-like texture.
How do I prevent my meringues from cracking during baking?
Cracking usually happens from uneven baking or humidity. First, ensure your meringues are shaped with slightly tapered centers for even heat distribution. Bake at 200°F and avoid opening the oven door during the first 45 minutes. If your kitchen is humid, place a tray of boiling water on the oven rack to create steam and help set the structure. Also, let them cool completely before storing to prevent moisture buildup.
Can I use this recipe to make meringue nests or pavlovas?
This meringue works perfectly for nests and pavlovas. For nests, shape the meringue into a ring on a parchment-lined baking sheet and bake at 200°F for 1 hour 20 minutes until completely dry. For pavlovas, pipe the meringue into a 6-inch ring shape on a baking sheet, then bake until crisp. The key is patience—let them cool completely before assembling with whipped cream or fruit. The vanilla sugar adds beautiful flavor contrast!

- 12 Bean Chili Recipe: Hearty Slow-Cooked Depth With 12 Legumes - October 17, 2026
- 5 Seed Bread Recipe: Nutty Crunch and Artisan Flavor in One Loaf - October 17, 2026
- 1 Lb Macaroni Salad Recipe: Bold, Crunchy, and Crowd-Pleasing - October 17, 2026