
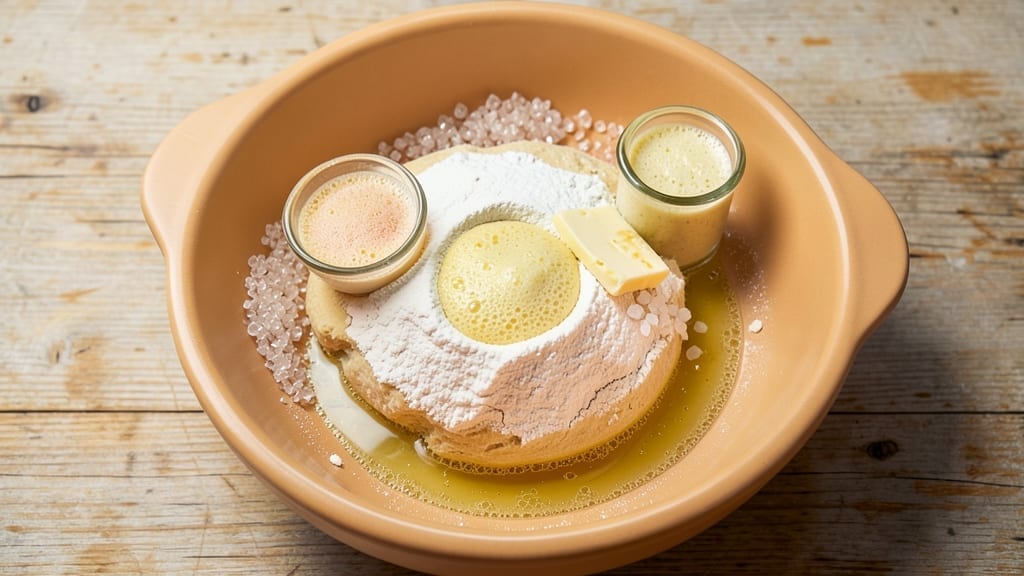
A 2-hour yeast bread recipe that delivers a perfectly golden crust and airy, tender crumb is exactly what you need for a satisfying homemade loaf without the long wait. I developed this method after years of testing—balancing yeast activation, proper kneading, and controlled proofing to ensure consistent results every time.
The secret lies in the timing: a 1-hour dough prep followed by a 1-hour rise and bake, giving you fresh bread without sacrificing flavor or texture.
This recipe starts with warm water and active dry yeast to kickstart fermentation, creating a light, airy crumb that’s impossible to resist. The dough comes together quickly with simple ingredients—flour, salt, sugar, and butter—while the kneading step develops gluten for that signature chewy texture.
Proofing at room temperature ensures even rising, and baking at 375°F guarantees a crisp, golden crust that locks in freshness.
By the time you pull it from the oven, you’ll have a loaf with a crisp exterior and a soft, pillowy interior, perfect for sandwiches, toast, or serving alongside soups.
The aroma alone will fill your kitchen with warmth, and the texture—tender yet sturdy—makes it worth every minute of the process. Trust me, this is the kind of bread that turns a simple meal into something special.
For extra flavor, consider adding garlic powder or fresh herbs to the dough before shaping. Just remember: proper yeast activation and proofing are non-negotiable for that perfect rise. Let’s get started—your kitchen is about to smell like a bakery!
Ingredients for 2 hour bread recipe with yeast
Simple ingredients that transform into a golden, airy loaf in just two hours.
| Ingredient | Amount | Notes |
|---|---|---|
| Active Dry Yeast 🍞 | 2 ¼ tsp | Ensure yeast is fresh and active |
| Warm Water 💧 | 1 cup | 110°F for optimal yeast activation |
| All-Purpose Flour 🌾 | 4 cups | Spooned and leveled for accuracy |
| Granulated Sugar 🍚 | 1 tbsp | Feeds yeast for better rise |
| Salt 🧂 | 1 ½ tsp | Diamond Crystal preferred |
| Unsalted Butter 🧈 | ½ cup | Cold, cubed for even distribution |
| Large Eggs 🥚 | 1 whole | Room temperature for easy mixing |
| Olive Oil 🫒 | 1 tbsp | Extra-virgin for richness |
| Garlic Powder 🧄 | 1 tsp | Optional for extra flavor |
| Fresh Rosemary 🌿 | ½ tsp | Chopped finely for aroma |
The yeast is the heart of this recipe—King Arthur or Bob’s Red Mill are my go-tos for reliable activation. Warm water needs to be 110°F (like a warm bath), not boiling, or you’ll kill the yeast. For flour, King Arthur or Bread Flour gives the best texture, but all-purpose works fine. The butter should be cold so it distributes evenly in the dough. I always grab the Land O’Lakes unsalted butter from the grocery store—it’s consistent and melts beautifully. If you’re adding garlic powder or rosemary, Penzeys has the best quality, but regular grocery store brands work too.
No yeast? Instant yeast works 1:1, but active dry is better for this recipe. Short on butter? Olive oil or coconut oil keeps things vegan-friendly. The egg adds structure—aquafaba (chickpea brine) works at 3 tbsp if you’re avoiding eggs. Fresh rosemary is ideal, but dried at one-third the amount works in a pinch. The olive oil matters here—California Avocado or Bertolli brands have great flavor. For extra flavor, a pinch of onion powder or dried thyme blends beautifully.
Dough keeps best in the fridge for 24 hours wrapped tightly in plastic. For longer storage, freeze shaped loaves for up to 3 months—thaw at room temp before baking. The butter in the dough means it’s best baked fresh, but you can reheat slices in a 350°F oven for 5 minutes to restore crispness. I always make a double batch—one for today, one for tomorrow’s sandwiches.
Why You’ll Love This Recipe
- No-Fuss Mixing: Mixing this dough is ridiculously simple—just bloom the yeast in warm water with a pinch of sugar, then toss in flour and salt until it comes together. No stand mixer, no fancy techniques, just your hands (or a spoon) and five minutes of work.
- Golden Crust Magic: That crispy, caramelized crust? It’s all thanks to the yeast’s slow rise and the sugar’s caramelization. Toast it lightly for extra crunch, or leave it soft—either way, it’s dangerously addictive.
- Weeknight Wonder: I keep this dough in my fridge for days, pulling it out whenever I need a quick sandwich or toast. No last-minute scrambling—just shape, bake, and serve. (Yes, even on a Tuesday night.)
- Budget-Friendly Staple: Four ingredients, zero specialty items, and enough loaves to feed the family for days. The yeast makes it light, the flour keeps it affordable, and the leftovers? Perfect for lunchboxes or toast in the morning.
Step-by-step instructions for 2-Hour yeast bread mastery
Here’s how to craft a bread with a golden crust and airy crumb in just two hours.
Activate the Yeast for Maximum Rise
In a small bowl, combine the 1 cup warm water (around 110°F) with the 1 tablespoon granulated sugar and 2.25 teaspoons active dry yeast. Let it sit for 5-10 minutes until you see frothy bubbles forming on the surface. This confirms your yeast is alive and ready to work.
If you don’t see bubbles after 10 minutes, your yeast might be dead—start over with fresh yeast. The sugar helps activate the yeast faster, while the warm water creates the perfect environment for it to multiply. Stir gently once during this time to help distribute the yeast evenly.
Mix the Dough with Wet and Dry Ingredients
In the bowl of a stand mixer fitted with the dough hook attachment, combine the 4 cups all-purpose flour, 1.5 teaspoons salt, 1 teaspoon garlic powder, and 0.5 teaspoon finely chopped fresh rosemary. Mix on low speed for 30 seconds to aerate the flour.
Add the yeast mixture, 1 whole large egg, and 1 tablespoon olive oil to the bowl. Mix on low speed until the ingredients come together, then increase to medium speed for 3-4 minutes until the dough begins to pull away from the sides of the bowl and forms a shaggy mass. The dough should be slightly sticky but not wet.
Knead the Dough for Optimal Texture
Switch to medium-high speed and knead the dough for 5-7 minutes until it becomes smooth, elastic, and springs back slowly when poked. The dough should feel like a soft, slightly tacky ball that doesn’t stick to your fingers.
If the dough feels too sticky, add 1 tablespoon flour at a time until it reaches the right consistency. The butter should be cold and cubed—add it now and knead for another 2-3 minutes until fully incorporated. The butter will create pockets in the dough, contributing to that tender, flaky crumb we’re after.
Let the Dough Rise for Maximum Flavor
Lightly grease a large bowl with olive oil, place the dough inside, and cover it with a damp kitchen towel. Let it rise in a warm place (like the top of your oven with the light on) for 45-60 minutes, or until it has nearly doubled in size. You’ll know it’s ready when the dough feels light and springs back slowly when poked gently.
Here’s the thing—don’t rush this step. A proper rise develops the gluten structure and allows the yeast to create those tiny air pockets that make bread light and airy. If your kitchen is cold, place the bowl near a warm spot like a sunny windowsill or a lightly heated oven.
Shape and Proof the Dough for Perfect Structure
Punch down the risen dough to release the air, then turn it out onto a lightly floured surface. Gently shape it into a loaf by folding the edges toward the center and rolling it into a smooth, taut rectangle. Roll it up tightly from the long side to form a log, tucking the seam underneath.
Place the shaped dough seam-side down into a greased 9×5-inch loaf pan. Cover it again with the damp towel and let it rise for another 30-45 minutes, until it has risen about halfway up the sides of the pan. This final proofing ensures the bread will have a good oven spring and that beautiful domed shape.
Bake to Golden Perfection
Preheat your oven to 375°F. When the oven is fully heated, place the loaf pan on the middle rack. Bake for 30-35 minutes, until the bread is golden brown and sounds hollow when tapped on the bottom. The internal temperature should reach 190-200°F.
For extra browning, brush the top with a little olive oil or melted butter during the last 5 minutes of baking. This creates that beautiful golden crust we all love. Let the bread cool in the pan for 10 minutes, then transfer it to a wire rack to cool completely before slicing.
Pro Tips For Making 2 Hour Bread Recipe With Yeast
- Dissolve Yeast First: I learned this the hard way—skipping this step means you’re basically gambling with your dough. Sprinkle the yeast and sugar into the warm water (110°F) and let it sit for 5 minutes until it looks fizzy and bubbly. No bubbles? Toss it and start fresh—dead yeast ruins everything.
- Use a Kitchen Scale: Measuring flour by scooping from the jar is how you end up with a dense, brick-like loaf. Weigh it instead—this recipe needs about 3 cups (360g) of all-purpose flour. The difference in texture is night and day, and you’ll never go back.
- Don’t Over-Knead: This isn’t a marathon, it’s a sprint. Knead just until the dough pulls away from the bowl and feels smooth (about 5-7 minutes by hand). Overwork it, and you’ll activate too much gluten, turning your bread into chewy rubber. Stop when it’s just there.
- Let the Dough Rise Twice: The first rise (45-60 minutes) is obvious, but the second—after shaping—is where magic happens. Place the dough in a greased bowl, cover it, and let it rise for another 30-45 minutes. This ensures a light, airy crumb. Skimp here, and your bread will taste flat and heavy.
Essential equipment for perfect results
Stand Mixer Essentials
Your stand mixer with dough hook attachment is the workhorse of this recipe—I swear by my KitchenAid Artisan Series for its power and durability. The dough hook kneads evenly without overworking the gluten, which is key for that perfect airy crumb.
If you don’t have a mixer, a wooden spoon and strong arms work too, but expect to spend 10-15 extra minutes kneading by hand. 💪
Measuring Tools
Precision matters with yeast bread, so invest in a digital kitchen scale for accurate measurements—especially flour. My OXO Good Grips scale is a game-changer for consistent results. For volume measurements, use a stainless steel measuring cup (not plastic) to avoid moisture absorption.
The Diamond Crystal salt measurement in the recipe is critical—use a 1/4 tsp measure for exactness.
Proofing Containers
A large mixing bowl with a damp kitchen towel is perfect for the first rise, but for the second proof, I recommend a greased 9×5-inch loaf pan—it helps shape the bread and creates that classic bakery look.
If you’re free-form shaping, use a parchment-lined baking sheet for easy transfer. Pro tip: Place your proofing bowl near a warm spot—like the top of your turned-off oven with the light on—to speed up fermentation.
Baking Gear
Your oven thermometer is non-negotiable—ovens run hot or cold, and 375°F isn’t always accurate. I use a Thermoworks Oven Thermometer to ensure perfect baking. For brushing the crust, keep olive oil in a small bowl with a pastry brush nearby.
A wire cooling rack prevents soggy bottoms, and a sharp serrated knife makes clean slices. Trust me, these small tools make all the difference. ✨
Optional Extras
For flavor variations, keep garlic powder, fresh rosemary, and dried herbs in small jars near your baking station. A microplane comes in handy for zesting citrus or grating fresh ginger if you’re experimenting.
If you’re making a double batch, grab an extra loaf pan—I keep two 9×5-inch pans on hand for efficiency. And don’t forget a spray bottle for lightly misting dough if it gets too dry during shaping.
Nutrition facts
Frequently asked questions
Why does my yeast dough take longer than 2 hours?
Cold environments slow yeast activity. If your kitchen is below 70°F, place the dough bowl near a warm spot (like a turned-on oven light) to speed up rising. Also, check your yeast—old or inactive yeast needs more time to activate. The 1-hour prep + 1-hour rise/bake timeline assumes room temperature conditions.
Can I make this bread without a stand mixer?
Knead by hand on a lightly floured surface for 10-15 minutes until the dough springs back when poked. Use the “windowpane test”—stretch a small piece of dough thin enough to see light through it. The gluten development is what gives bread its structure, so don’t skip this step even without a mixer.
What if my dough doesn’t rise at all?
First check your yeast—it may be expired. Test it by mixing 1 tsp yeast + 1 tsp sugar + 1/4 cup warm water and waiting 5 minutes for bubbles. If no bubbles form, replace the yeast. Also verify your water temperature (110°F) and ensure your dough is in a warm place. Cold or drafty areas prevent proper fermentation.
How do I know when the bread is fully baked?
Look for three signs: golden brown crust, a hollow sound when tapped on the bottom, and an internal temperature of 190-200°F. The crust should pull away from the pan edges slightly. If unsure, bake 5 more minutes—underbaked bread continues cooking after removal and can become gummy.
Can I add seeds or nuts to this recipe?
Yes! Add 1/4 cup seeds (sunflower, pumpkin) or chopped nuts (walnuts, pecans) during the final kneading. For best results, toast the seeds/nuts first to enhance flavor. Fold them gently into the shaped dough before the final proof. Just reduce flour by 1 tablespoon to maintain dough consistency.

- 12 Bean Chili Recipe: Hearty Slow-Cooked Depth With 12 Legumes - October 17, 2026
- 5 Seed Bread Recipe: Nutty Crunch and Artisan Flavor in One Loaf - October 17, 2026
- 1 Lb Macaroni Salad Recipe: Bold, Crunchy, and Crowd-Pleasing - October 17, 2026