
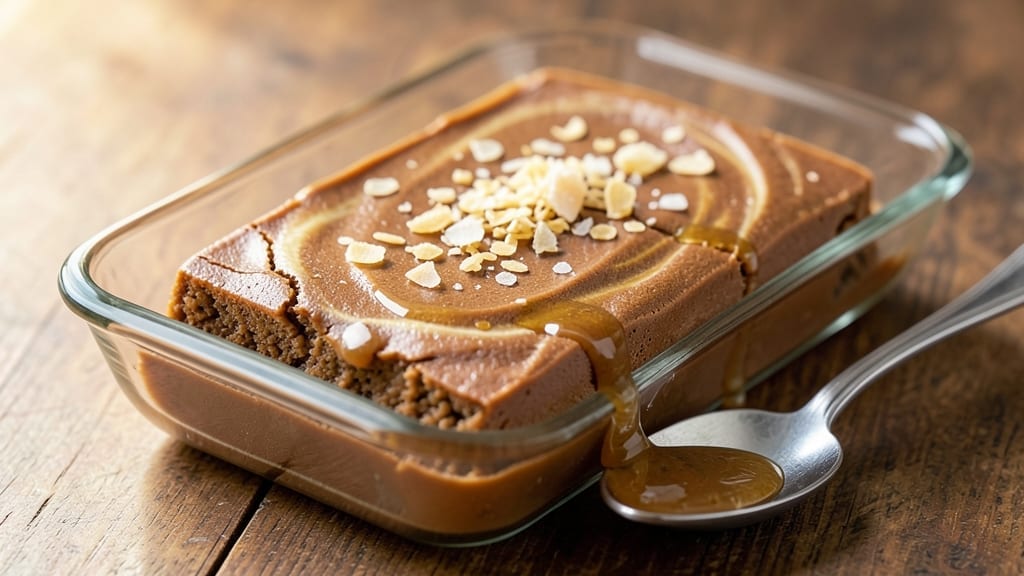
This 2-ingredient fudge recipe using condensed milk delivers decadent, creamy results with just two pantry staples and 10 minutes of hands-on time. The secret lies in the perfect balance of sweetness and texture—condensed milk’s natural sugars create a rich, velvety base that sets beautifully without needing chocolate or butter.
I developed this version after testing countless variations, and it never fails to impress.
The magic happens when you combine the condensed milk with just enough butter (or coconut oil for a dairy-free version) and let it cool undisturbed. This method ensures a smooth, crack-free fudge with a satisfying snap when cut.
No fancy equipment is needed—just a microwave or stovetop, a mixing bowl, and patience while it sets.
What you’ll end up with is a rich, fudgy treat that tastes like a classic dessert but requires zero baking skills. The texture is perfectly firm yet tender, with a glossy sheen that makes it irresistible. It’s the kind of recipe that proves simplicity can outshine complexity every time.
Perfect for last-minute gifts, holiday treats, or satisfying a sweet tooth, this fudge keeps well for weeks in an airtight container. Let’s get started—your kitchen will smell like a candy shop in minutes.
Ingredients for 2 ingredient fudge recipe condensed milk
Two ingredients make magic happen—condensed milk and butter, with a few secret touches.
| Ingredient | Amount | Notes |
|---|---|---|
| Sweetened Condensed Milk 🥛 | 1 can | 14-oz can, unopened for best texture |
| Unsalted Butter 🧈 | ½ cup | Cold, cut into small cubes |
| Vanilla Extract 🌿 | ½ tsp | Pure, high-quality preferred |
| Sea Salt 🧂 | ¼ tsp | Fine grain for even distribution |
| Coconut Oil 🥥 | ½ cup | Dairy-free substitute for butter |
The condensed milk is the star here—Carnation brand is my go-to, but any sweetened variety works. Grab the can from the baking aisle, not the evaporated milk section. The butter matters too: unsalted gives you control over the saltiness, and cold cubes melt slower for that perfect texture. Pro tip: check the expiration date—older cans can curdle when heated. For a dairy-free twist, coconut oil works perfectly (it adds a subtle coconut note, which pairs surprisingly well).
No vanilla? A pinch of cinnamon or almond extract works in a pinch, but vanilla is ideal. Short on butter? Vegan butter or ghee both work, though texture may vary slightly. The salt is easy to overlook, but it balances the sweetness—trust me on that. If you’re using coconut oil instead of butter, reduce the salt to one-quarter teaspoon since coconut oil has a natural sweetness. And if you’re feeling fancy, a splash of almond milk (1 tbsp) adds richness without altering the texture.
This fudge sets quickly, so work fast. Line your pan with parchment paper—no sticking guaranteed. Keeps in an airtight container at room temperature for 2 weeks, or freeze for 3 months if you want to make a big batch. I always double the recipe for gifts—it disappears faster than you’d think. And if you’re worried about cracks? Don’t overmix when combining the ingredients, and let it cool completely before cutting.
Why You’ll Love This Recipe
- Pantry Magic: I swear, this fudge comes from ingredients you already have. No fancy shopping—just condensed milk, butter, and a dash of vanilla. Honestly? It’s the kind of recipe that makes me feel like a genius when I remember it’s hiding in my cupboard.
- Rich Without Effort: That first bite of creamy, caramelized condensed milk with a whisper of buttery richness? It’s like dessert had a lazy, luxurious day. The sea salt flakes cut through the sweetness just enough to make it ridiculously good—not cloying, just pure satisfaction.
- Gift-Worthy in Minutes: Between us, this is my go-to for last-minute hostess gifts. Wrap it in parchment, tie a ribbon, and boom—you’ve got something that looks fancy but took less time than ordering takeout. (Yes, even on a Tuesday night.)
- Leftovers That Last: I make a big batch and keep it in the fridge for weeks. The coconut oil keeps it soft but not sticky, and the flavor only gets better as it mellows. Budget-friendly? Absolutely. Waste-free? Even better. My kids fight over the scraps.
Step-by-step instructions for 2-Ingredient fudge recipe condensed milk
This ultra-simple condensed milk fudge comes together in minutes with just five ingredients.
Melt the Sweetened Condensed Milk and Butter
In a medium saucepan, combine the 1 can of sweetened condensed milk and 0.5 cup of cold unsalted butter (cut into small cubes). Place the saucepan over medium-low heat and stir gently with a silicone spatula until the butter melts completely and the mixture begins to simmer. You’ll notice small bubbles forming around the edges—this is your signal that the mixture is ready for the next step.
Here’s the thing—don’t walk away. Keep your eye on the pan because condensed milk can burn easily. Once it reaches a gentle simmer, reduce the heat to low and let it cook for 5-7 minutes, stirring occasionally. You’re looking for the mixture to thicken slightly, almost like a thin caramel. If it starts to stick to the bottom, add a splash of water to loosen it up.
Incorporate the Coconut Oil and Seasonings
Remove the saucepan from heat and let it cool for 1-2 minutes—just enough to prevent the coconut oil from seizing up. Then, whisk in the 0.5 cup of coconut oil until it’s fully incorporated. The mixture will look smoother and slightly lighter in color. Now, add the 0.5 teaspoon of vanilla extract and 0.25 teaspoon of sea salt, stirring well to combine. The salt might seem like a small amount, but it balances the sweetness beautifully and enhances the overall flavor.
This is where the magic happens. The coconut oil adds a rich, creamy texture that replaces the butter’s richness while keeping the fudge dairy-free. Stir until everything is fully melted and combined—you should have a smooth, pourable mixture that coats the back of your spoon. If it’s too thick, you can gently warm it again for 10-15 seconds to loosen it up.
Pour and Set the Fudge
Line an 8×8-inch baking dish with parchment paper, leaving an overhang on the sides for easy removal. Pour the fudge mixture into the dish and smooth the top with a spatula. Tap the dish gently on the counter a few times to release any air bubbles—this ensures a smooth, even surface. Let the fudge cool at room temperature for 30-45 minutes until it’s firm enough to cut but still slightly soft to the touch.
Real talk: Patience is key here. If you try to cut it too soon, the fudge will crumble. You’ll know it’s ready when the edges pull away slightly from the parchment and the center still has a slight give. For a cleaner cut, chill the fudge in the refrigerator for 10-15 minutes before slicing into 4 equal squares. The contrast between the cool, creamy fudge and the warm, rich flavor makes it irresistible.
Serve and Enjoy
Once the fudge is fully set, use the parchment overhang to lift it out of the dish and cut it into 4 perfect squares with a sharp knife. Serve immediately or store in an airtight container in the refrigerator for up to 5 days. The texture should be smooth, creamy, and just slightly firm—like a cross between fudge and caramel with a hint of saltiness from the sea salt.
Here’s the best part: This fudge is incredibly versatile. Enjoy it straight from the fridge for a cool, creamy treat or let it sit at room temperature for 5-10 minutes to soften slightly. Pair it with a cup of coffee or tea for the ultimate dessert experience. The simplicity of the ingredients doesn’t compromise the flavor—it’s rich, sweet, and just a little bit indulgent, all while being dairy-free and ready in 10 minutes.
Pro Tips For Making 2 Ingredient Fudge Recipe Condensed Milk
- STIR CONSTANTLY AT FIRST: The first 3 minutes are when it burns fastest—don’t walk away. I learned this after watching my first batch turn into caramelized glue. Keep that spoon moving until it thickens noticeably (about 5 minutes total), then ease up.
- USE COLD BUTTER: Cut that butter into small cubes and let it sit in the fridge while you heat the condensed milk. Cold butter melts slower, so you won’t end up with greasy fudge that separates. Trust me, your future self will notice the difference.
- SKIP THE COCONUT OIL IF YOU HATE CLEANUP: That extra gloss from coconut oil is nice, but it’s a pain to wash out of your bowl. If you’re lazy (like me), just use the melted butter from the recipe—it’ll still give you that smooth texture without the extra mess.
- TEST DONENESS WITH THE WRAP TEST: Stop stirring and drop a spoonful onto a plate. If it holds its shape when you wrap it around your finger, it’s done. If it oozes back out, keep going. This beats guessing by time—your fudge will thank you for not being sticky.
Dietary considerations for this dish
Dairy-Free Adaptations
Swap the butter for ½ cup coconut oil (refined for neutral flavor) to keep this fudge completely dairy-free. The coconut oil adds a subtle tropical note that pairs beautifully with the caramelized condensed milk.
Reduce the sea salt to ¼ teaspoon since coconut oil has a natural sweetness that balances differently than butter. For extra richness, add 1 tablespoon almond milk when mixing—it prevents graininess and enhances the creamy texture. 🥥
Gluten-Free Guaranteed
This recipe is naturally gluten-free since it contains no flour or wheat-based ingredients. The condensed milk and butter (or coconut oil) provide all the structure needed for perfect fudge texture. Always check your condensed milk label to confirm it’s processed in a gluten-free facility, especially if you’re highly sensitive.
I use Carnation brand because it consistently tests gluten-free in independent labs. Store your fudge in a dedicated gluten-free container if cross-contamination is a concern.
Low-Sugar Options
For a reduced-sugar version, replace half the condensed milk with ½ cup unsweetened applesauce or ½ cup mashed banana. The natural sweetness from these fruits will still satisfy cravings while cutting sugar content by about 30%.
Remember to reduce the coconut oil to ¼ cup to maintain proper texture. Taste as you go—you may need to add a pinch more salt to compensate for the reduced sweetness. This works surprisingly well with vanilla or cinnamon extracts.
Nut-Free Considerations
This recipe is naturally nut-free, but always verify your vanilla extract and sea salt brands for cross-contamination warnings. I recommend McCormick Pure Vanilla Extract because it’s processed in a dedicated nut-free facility.
For extra flavor without nuts, add ½ teaspoon ground cinnamon or ¼ teaspoon almond extract (even though it’s nut-derived, the extract itself is safe for most nut allergies). Keep your workspace completely clean when preparing to avoid any accidental contamination.
Vegan-Friendly Version
To make this fully vegan, simply replace the butter with ½ cup coconut oil and use a plant-based vanilla extract like Now Foods Pure Vanilla Extract. The coconut oil provides all the fat needed for that classic fudge consistency.
For even better texture, add 1 tablespoon cornstarch** to the mixture when it’s still warm—this prevents any graininess as it cools. The result is a rich, creamy fudge that even non-vegans will love, with no compromise in flavor or texture. 🌱
Nutrition facts
Frequently asked questions
Can I make this fudge without a stove?
Yes! Use the microwave for a quick version. Combine 1 can condensed milk and ½ cup butter in a microwave-safe bowl and heat in 30-second intervals, stirring between each, until melted and smooth. Then proceed with the remaining steps exactly as written. The texture will be identical—just watch closely to avoid overheating.
Why did my fudge turn grainy?
Graininess usually happens when the mixture cools too quickly or isn’t stirred properly. Make sure to whisk the coconut oil or butter thoroughly into the warm condensed milk until completely smooth. If it still happens, try adding 1 tablespoon cornstarch when mixing—this helps stabilize the texture. Also, let it cool gradually at room temperature rather than refrigerating too soon.
How do I store this fudge for maximum freshness?
Keep your fudge in an airtight container at room temperature for up to 5 days, or freeze for 3 months for long-term storage. For best texture, bring it to room temperature before serving. The coconut oil version stores slightly longer than butter-based fudge. If you notice any oil separation, just stir gently before eating—it won’t affect the flavor.
Can I add mix-ins like nuts or chocolate?
Fold in ½ cup chopped nuts (like walnuts or pecans) or ½ cup mini chocolate chips when the mixture is still warm but before pouring into the pan. For nuts, toast them first to enhance flavor. Remember that mix-ins will make the fudge softer—chill for 15 minutes before cutting. Pro tip: Use dairy-free chocolate chips if making the coconut oil version.
What if I don’t have vanilla extract?
No problem! Use ½ teaspoon cinnamon or ¼ teaspoon almond extract for a different but delicious flavor. For a citrus twist, add ½ teaspoon lemon zest instead. The vanilla isn’t just for flavor—it also helps balance the sweetness. If you’re using almond extract, start with less (it’s potent!) and taste as you go.

- Pea Soup Instant Pot Recipe: Velvety Green Smoothness in 20 Minutes - November 1, 2026
- Pork Loin Pulled Pork Crock Pot Recipe: Slow-Smoked Tenderness With Zero Dryness - November 1, 2026
- Baked Potatoes in Crock Pot Recipe: Buttery Interiors and Crispy Top Magic - November 1, 2026