
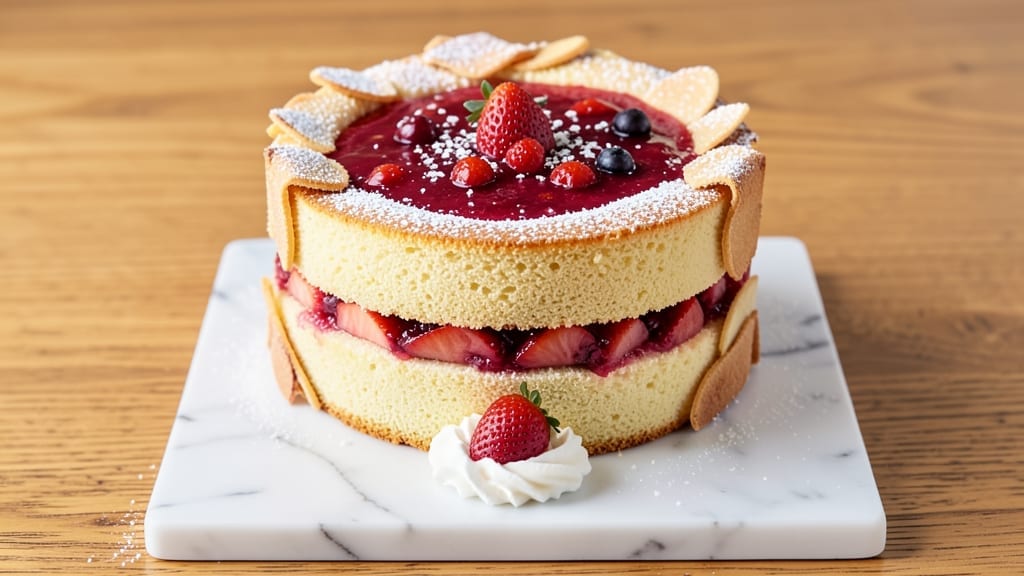
This 2-layer strawberry cake recipe delivers the perfect balance of moist vanilla layers and luscious strawberry filling that tastes like summer in every bite.
The secret lies in using fresh strawberries (or frozen, if needed) blended into a smooth, jam-like consistency that keeps the cake layers juicy without making them soggy. I’ve baked this cake countless times for birthdays and celebrations, and it never fails to impress—whether you’re a beginner or a seasoned baker.
The cake itself is tender and fluffy, thanks to a simple vanilla batter with just the right amount of butter and sugar for that classic richness.
What sets this apart is the strawberry filling, which is cooked down with a touch of sugar and lemon juice to intensify the flavor while maintaining that signature fruit-forward taste.
The filling is spread between layers and swirled into the frosting for a marbled effect that looks as good as it tastes.
By the time you’re done, you’ll have a cake with golden layers, a glossy white frosting swirled with pink strawberry accents, and a texture that’s perfectly balanced—moist but not dense, sweet but not cloying.
The strawberries shine through in every slice, making this the ideal dessert for any occasion. The best part? It comes together in just under an hour, with most of that time spent cooling and assembling.
Serve it at room temperature with fresh berries on top or a scoop of vanilla ice cream for an extra touch of indulgence. This cake is foolproof, elegant, and packed with that nostalgic flavor of homemade strawberry dessert. Let’s get baking!
Ingredients for 2 layer strawberry cake
Fresh strawberries and buttery vanilla create this perfect summer cake—juicy layers and glossy swirls.
| Ingredient | Amount | Notes |
|---|---|---|
| All-Purpose Flour 🌾 | 2 ½ cups | Sifted for light texture |
| Granulated Sugar 🍚 | 2 cups | Divided for cake and filling |
| Unsalted Butter 🧈 | 1 cup | Room temperature, full-fat |
| Large Eggs 🥚 | 4 whole | Room temperature, separated |
| Milk 🥛 | 1 cup | Whole milk preferred |
| Vanilla Extract 🌸 | 2 tsp | Pure extract, not imitation |
| Baking Powder 🧂 | 2 tsp | Freshly opened |
| Salt 🧂 | ½ tsp | Fine sea salt |
| Fresh Strawberries 🍓 | 2 lbs | Hull and wash thoroughly |
| Lemon Juice 🍋 | 2 tbsp | Freshly squeezed |
| Powdered Sugar 🍚 | 3 cups | For frosting and filling |
| Heavy Whipping Cream 🥛 | 1 ½ cups | Cold for frosting |
| Strawberry Jam 🍓 | ½ cup | Optional for extra flavor |
Strawberries are the star here, so don’t skimp. Local farmers markets often have the sweetest, most flavorful berries—look for ones that are firm but yield slightly to pressure. If fresh aren’t in season, frozen strawberries work perfectly (no need to thaw). For the butter, I always recommend Land O’Lakes or Plugrá—they’re reliable and rich. Room temperature is key: if your butter feels like it’s from the fridge, let it sit out for 30 minutes before measuring. The flour should be sifted right before mixing to avoid dense layers.
No fresh strawberries? Strawberry puree from a jar (like Bonne Maman) works in a pinch, but you’ll lose some brightness. The jam is optional but adds that extra layer of strawberry flavor—Smash or Bonne Maman are my go-tos. For the milk, whole milk gives the best texture, but 2% works fine if that’s what you’ve got. If you’re watching sugar, you can reduce the granulated sugar in the cake by 2 tablespoons and add an extra 2 tablespoons of applesauce to the batter. The baking powder needs to be fresh—if it’s been sitting in your pantry for months, it’s time for a new box.
This cake keeps beautifully—3 days at room temperature covered loosely with plastic wrap, or up to 5 days in the fridge. For longer storage, wrap tightly and freeze for up to 3 months. The frosting is best made the day of serving, but you can prep it ahead and chill until ready. To assemble, let the cake cool completely between layers. I always make a double batch of filling—half goes between the layers, and the rest gets swirled into the frosting for that gorgeous pink marbling you see in the pictures.
Why You’ll Love This Recipe
- No Mixer Needed: I swear by this recipe when my mixer’s on the fritz—just a bowl, a whisk, and elbow grease. The butter gets creamed with sugar until it’s light and fluffy (no electric help required), and the eggs fold in smoother than I ever thought possible.
- Strawberry Magic: That first layer of vanilla cake is rich but not heavy, and the strawberry filling? It’s not just jam—it’s a bright, tangy-sweet balance that makes every bite feel like summer. Honestly, the moment the strawberries hit the warm cake, I forget it’s a recipe.
- Birthday to Brunch: This cake is my go-to for celebrations, but it also saves me on lazy Saturdays. Slice it for a crowd, or wrap leftovers in foil for a picnic—same cake, endless uses. (Yes, even on a Tuesday night.)
- Pantry Staple Power: Five ingredients, zero specialty items. The flour, sugar, and butter I already have, and the eggs? Always in the fridge. It’s the kind of recipe that turns a “what’s for dessert?” panic into a “done in 45 minutes” win. Budget-friendly and foolproof.
Step-by-step instructions for 2 layer strawberry cake
Here’s how to create a lusciously moist cake with vibrant strawberry layers and velvety vanilla swirls.
Prepare the Strawberry Filling and Prep Ingredients
Start by making the strawberry filling – this is what makes the cake truly special. In a medium bowl, combine the 2 lbs of fresh strawberries, 2 tbsp of lemon juice, and 1 cup of powdered sugar. Mash the strawberries with a fork until you have a chunky puree with some whole berries remaining. This mixture should be sweet-tart and juicy, with just enough texture to hold its shape between cake layers.
While the filling sits, prepare your mixing bowls. Sift the 2.5 cups of all-purpose flour with the 2 tsp of baking powder and 0.5 tsp of salt into a medium bowl. Set aside – we’ll use this for both cake layers. In a separate bowl, beat the 1 cup of unsalted butter and 1 cup of granulated sugar together until light and fluffy, about 3-4 minutes. This creaming process incorporates air that will make your cake tender and moist.
Bake the First Strawberry Layer
Divide the granulated sugar between your two cake layers – use 1 cup for the first layer and save the remaining 1 cup for the second. In a large mixing bowl, combine the creamed butter and sugar with the 4 whole large eggs (separated – save the yolks for later). Add the milk and 1 tsp of vanilla extract, mixing until just combined. Gradually add about half of the flour mixture, mixing on low speed until incorporated.
Pour the batter into a greased and floured 9-inch round cake pan. Bake at 350°F for 25-30 minutes, until a toothpick inserted in the center comes out clean. Let the cake cool in the pan for 10 minutes before transferring to a wire rack to cool completely. This first layer will be the base for your strawberry filling – make sure it’s fully cooled before adding the filling to prevent sogginess.
Assemble with Strawberry Filling and Vanilla Swirl
Once both layers are completely cooled, it’s time to assemble the cake. Spread the strawberry filling evenly over the first layer, leaving about ½-inch border uncovered. This will prevent the filling from oozing out the sides when sliced. For the vanilla swirl, beat the reserved egg yolks with the remaining 1 tsp of vanilla extract and 1 cup of powdered sugar until smooth. Spread this mixture over the strawberry layer.
Place the second cake layer on top and gently press down. The key here is to work quickly – you want the layers to come together while the filling is still slightly soft. Wrap the assembled cake in plastic wrap and refrigerate for at least 2 hours, or preferably overnight. This chilling time allows all the flavors to meld together and makes slicing clean layers much easier.
Create the Cream Cheese Frosting
For the frosting, beat the 1.5 cups of cold heavy whipping cream until soft peaks form. In a separate bowl, mix the remaining 2 cups of granulated sugar with the 0.5 cup of strawberry jam until smooth. Gradually fold this sugar mixture into the whipped cream until fully combined. The frosting should be thick enough to hold its shape but still spreadable – if it’s too thick, beat in a few more drops of milk.
Spread the frosting evenly over the chilled cake, using a spatula to create smooth sides. For extra decoration, you can pipe additional frosting around the edges or create simple swirls on top. The frosting should be cool but not melted – if it starts to soften in warm temperatures, return the cake to the refrigerator for 15-20 minutes before serving to maintain its perfect consistency.
Pro Tips For Making 2 Layer Strawberry Cake
- Cream Butter Properly: Use a wooden spoon or your hands to mix softened butter and sugar until it’s pale and fluffy—about 3-4 minutes. I learned this the hard way: rushing it leaves pockets of unmelted butter, and your cake will turn out dense instead of light.
- Weigh Your Flour: Spoon flour into your measuring cup, then level it off with a knife—don’t scoop directly from the bag. Packed flour adds too much, and your cake will be dry and crumbly. (Yes, even if you’re impatient like me.)
- Bake at 325°F: Strawberry cake needs a slow bake—325°F is the sweet spot for even cooking without burning the top while the center sets. I used to crank it to 350°F and ended up with a cracked crust and underbaked middle every time.
- Chill the Batter: Let your strawberry layer batter rest for 15-20 minutes before baking. This helps the flavor develop and prevents sinking. Sounds weird, but it works—your cake will be taller and more stable.
Wine and beer pairings for this 2 layer strawberry cake
Sweet White Wine
For this strawberry cake, I always reach for a crisp Sauvignon Blanc—its bright acidity and citrus notes cut through the richness of the frosting while complementing the strawberries.
Look for a New Zealand Sauvignon Blanc like Oyster Bay or Cloudy Bay, which have those signature zesty flavors that make every bite feel refreshing. Serve it slightly chilled (45-50°F) to enhance the wine’s vibrancy. 🍷
Rosé for Balance
A dry Provence-style rosé is another fantastic pairing, especially if your cake leans slightly tart from the lemon juice. The delicate floral and berry notes in a wine like Whispering Angel or Château d’Esclans mirror the strawberry’s natural sweetness without overpowering it.
The light body of rosé won’t compete with the cake’s texture, making each slice feel elegant and balanced.
Fruity Sparkling Wine
If you want to elevate the dessert experience, a Prosecco or Cava adds a festive touch. The bubbles cleanse your palate between bites, and the light sweetness in a La Marca Prosecco or Freixenet Cordon Negro enhances the strawberry’s flavor.
Serve it well-chilled (38-42°F) to keep the bubbles lively and the cake’s frosting from melting too quickly.
Light Beer Pairings
For a non-alcoholic option, a wheat beer like Blue Moon or Hoegaarden works surprisingly well. The citrusy notes and light effervescence complement the cake’s strawberry filling without overpowering it.
If you prefer something darker, a Belgian witbier like Stella Artois adds a subtle spice that pairs beautifully with the vanilla layers. 🍺
Creamy Dessert Wine
If you’re serving the cake at a dinner party, a Moscato d’Asti or Riesling adds a luxurious touch. The slight sweetness in a Château Ste. Michelle Riesling enhances the strawberry’s natural sugars, while the acidity keeps the cake from feeling too heavy.
Save this pairing for special occasions—it’s a crowd-pleaser that feels indulgent yet refreshing.
Nutrition facts
Frequently asked questions
Can I use frozen strawberries instead of fresh?
Yes! Frozen strawberries work perfectly and save money during off-season. Simply thaw them first, drain any excess liquid, then blend with sugar and lemon juice just like fresh berries. The texture will be slightly softer but still delicious between layers. For extra flavor, add 1 tsp of vanilla extract to the filling.
How do I prevent the cake layers from getting soggy?
Let each cake layer cool completely before adding filling—this prevents moisture transfer. Also, chill the assembled cake for at least 2 hours before frosting. For extra insurance, brush the cooled layers lightly with simple syrup (equal parts sugar and water) before adding filling. This creates a moisture barrier while keeping the cake tender.
Can I make this cake without a stand mixer?
Use a hand mixer or even a sturdy whisk. For the butter and sugar, beat vigorously by hand for 5-7 minutes until light and fluffy. For the frosting, use a whisk to fold the sugar mixture into the whipped cream. The key is patience—just mix longer than you think you need to. The cake will still turn out perfectly moist.
What’s the best way to store leftovers?
Wrap the cake tightly in plastic wrap and store at room temperature for 2-3 days. For longer storage, refrigerate for up to 5 days. To refresh, let it sit at room temperature for 30 minutes before serving. For freezing, wrap each layer separately and freeze for up to 3 months. Thaw overnight in the fridge before assembling and frosting.
How do I make this cake gluten-free?
Replace the all-purpose flour with a 1:1 gluten-free baking flour blend (like Bob’s Red Mill or King Arthur). Add ½ tsp xanthan gum to the dry ingredients to improve texture. Reduce the milk by 2 tbsp to account for moisture differences in GF flours. The cake will still be moist but may have slightly denser layers. Chill longer (3 hours) before slicing for cleaner cuts.

- 12 Bean Chili Recipe: Hearty Slow-Cooked Depth With 12 Legumes - October 17, 2026
- 5 Seed Bread Recipe: Nutty Crunch and Artisan Flavor in One Loaf - October 17, 2026
- 1 Lb Macaroni Salad Recipe: Bold, Crunchy, and Crowd-Pleasing - October 17, 2026