
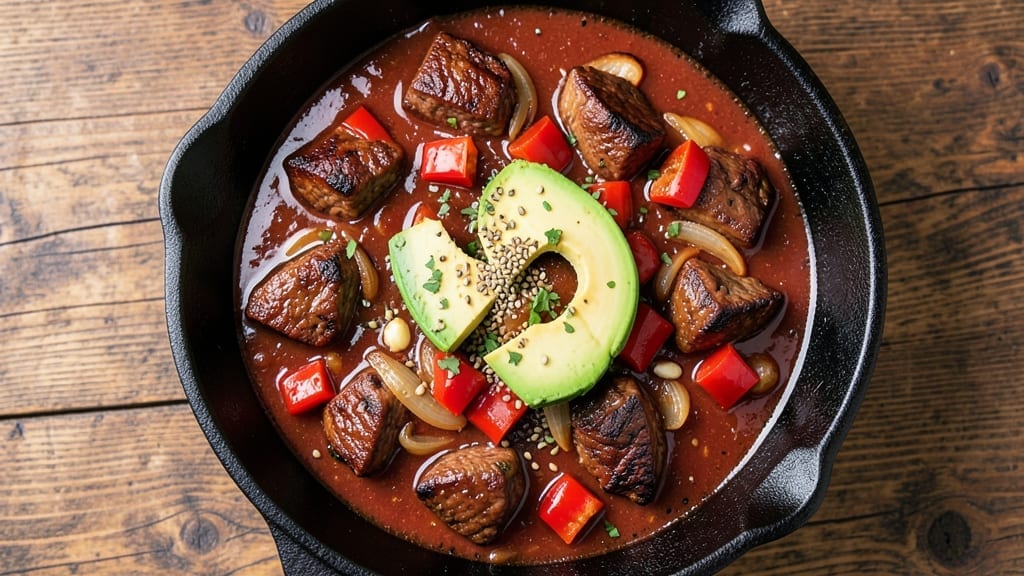
A 2 lb beef chili recipe delivers that deep, smoky flavor you crave without the mess of multiple pots. The secret lies in browning the beef properly—this step unlocks layers of richness that store-bought mixes can’t replicate.
I’ve perfected this technique over years of testing, and it never fails to impress, even picky eaters.
This recipe transforms tough cuts of beef into tender, flavorful chunks through slow simmering, while aromatic spices and tomatoes create a thick, hearty sauce. The key is patience: letting the chili develop its complex flavors over 1.5 hours on low heat.
No fancy equipment needed—just a sturdy pot and basic pantry staples.
By the end, you’ll have a deeply flavorful chili with perfectly tender beef, a thick broth, and just the right balance of heat and smokiness. The aroma alone will have everyone gathering around the table. Serve it with cornbread or crusty rolls to soak up every last drop.
This chili reheats beautifully, making it ideal for meal prep or feeding a crowd. The instructions are straightforward, but the results are anything but basic—this is the kind of chili that makes you want to make it again and again.
Ingredients for 2 lb beef chili
Sixteen ingredients transform tough beef into deeply flavorful chili through slow simmering and aromatic spices.
| Ingredient | Amount | Notes |
|---|---|---|
| Chuck Roast 🥩 | 2 lb | Cut into 1-inch cubes, trimmed of fat |
| Yellow Onion 🧅 | 1 whole | Diced, medium-sized |
| Bell Pepper 🌶️ | 1 whole | Red or green, diced |
| Garlic Cloves 🧄 | 4 cloves | Minced, fresh preferred |
| Canned Tomato Sauce 🍅 | 1 can | 28 oz, San Marzano preferred |
| Tomato Paste 🍅 | 2 tbsp | Squeeze tube or canned |
| Beef Broth 💧 | 2 cups | Low-sodium, homemade or store-bought |
| Dark Brown Sugar 🍯 | 1 tbsp | For subtle caramel notes |
| Chili Powder 🌶️ | 2 tbsp | Smoked or mild variety |
| Ground Cumin 🌿 | 1 tbsp | Toasted for depth |
| Paprika 🌶️ | 1 tbsp | Smoked for authentic flavor |
| Dried Oregano 🍃 | 1 tsp | Mexican oregano preferred |
| Black Peppercorns 🌶️ | ½ tsp | Freshly cracked |
| Bay Leaves 🌿 | 2 whole | Removed before serving |
| Liquid Smoke 🔥 | ½ tsp | Optional, for extra smokiness |
| Kosher Salt 🧂 | 1 ½ tsp | Diamond Crystal preferred |
| Extra-Virgin Olive Oil 🫒 | 1 tbsp | For searing beef |
The chuck roast is non-negotiable—its marbling and collagen break down beautifully during the long simmer, creating a rich, tender texture. Look for well-marbled cuts at your local butcher or the meat department of Whole Foods or Costco. If pre-cubed beef is more convenient, opt for the 1-inch size to ensure even cooking. The key to unlocking flavor is browning the beef thoroughly in a heavy pot—don’t rush this step. A cast-iron Dutch oven works best, but any sturdy pot will do. For spices, Penzeys Spices or bulk bins at natural grocery stores offer the freshest options, but store-bought brands like McCormick work in a pinch.
No smoked paprika? Substitute with an extra 1/2 tsp of regular paprika plus a pinch of liquid smoke for depth. Mexican oregano is ideal, but Italian oregano at half the amount will work. Short on beef broth? Chicken or vegetable broth with an extra splash of Worcestershire sauce adds umami. The tomato sauce can be swapped for crushed tomatoes if preferred, though paste provides better thickening. For a vegetarian twist, replace the beef with extra-firm tofu or lentils, though the texture will differ. Always toast your spices—especially cumin—in a dry pan for 30 seconds before adding to the pot to enhance their aroma.
This chili tastes even better the next day as flavors meld. Store leftovers in an airtight container in the fridge for up to 5 days, or freeze for 3 months in portion-sized containers. For meal prep, double the recipe and freeze half immediately. When reheating, add a splash of broth or water to prevent drying. The liquid smoke, if used, intensifies over time, so start with half the amount if you’re unsure about the heat level. Always remove bay leaves before serving—no one wants a surprise bite of tough herb.
Why You’ll Love This Recipe
- One-Pot Magic: I swear by this—just toss everything into a Dutch oven, let it simmer, and walk away. The chuck roast practically melts down into tender, shreddable beef while the onions and peppers soften into the sauce. No chopping small, no stirring every two minutes—just set it and forget it.
- Deep, Smoky Richness: That canned tomato sauce might seem basic, but when it reduces with garlic and a pinch of cumin, it becomes the soul of this chili. The chuck roast adds this incredible depth—like a slow-cooked hug in a bowl. Honestly, the first time I made it, I thought, “Wait, this is actually restaurant-quality?”
- Weeknight to Potluck Hero: Make a double batch on Sunday, and you’ve got lunch for Tuesday, dinner for Thursday, and leftovers that still taste amazing reheated. Or bring it to a BBQ—it’s hearty enough to feed a crowd but simple enough that no one will ask, “What’s in it?” (Spoiler: It’s all the good stuff.)
- Budget-Friendly Powerhouse: Two pounds of chuck roast stretches for days, and the rest of the ingredients? Pantry staples. I’ve fed my whole family (plus a couple of hungry friends) for under $15. Plus, the longer it sits, the better it gets—so it’s basically free money in flavor. (Yes, even on a Tuesday night.)
Step-by-step instructions for deep, smoky beef chili
This method delivers rich, smoky depth with perfectly tender beef every time.
Sear the Chuck Roast for Maximum Flavor
Heat a Dutch oven over medium-high heat until hot. Add the 1 tablespoon extra-virgin olive oil and swirl to coat the bottom. Working in batches to avoid crowding, add the 2 lb chuck roast cut into 1-inch cubes and sear for 3-4 minutes per side until deeply browned. This step develops the Maillard reaction, creating complex flavors that form the foundation of your chili.
As you sear, resist the urge to stir constantly—let each piece develop a rich crust. If the pan gets too crowded, reduce heat slightly to prevent steaming. Once all beef is browned, transfer it to a plate and set aside. The rendered fat in the pot will become the flavor base for your chili.
Build the Aromatic Base with Onions, Peppers, and Spices
In the same Dutch oven, add the 1 whole yellow onion and 1 whole bell pepper cut into ½-inch dice. Cook for 5-6 minutes until softened and slightly caramelized. Add the 4 cloves minced garlic and cook for an additional 30 seconds until fragrant—this prevents the garlic from burning.
Stir in the 2 tablespoons chili powder, 1 tablespoon ground cumin, 1 tablespoon paprika, 1 teaspoon dried oregano, ½ teaspoon freshly cracked black peppercorns, and 1½ teaspoons kosher salt. Cook for 1 minute to toast the spices, which deepens their flavors. If using, add the ½ teaspoon liquid smoke now and stir well to distribute evenly.
Develop the Tomato and Broth Foundation
Pour in the 2 tablespoons tomato paste and stir to create a smooth paste on the bottom of the pot. This helps build a rich, thick base. Add the 1 can canned tomato sauce and 2 cups beef broth, scraping up any browned bits from the bottom with a wooden spoon. Bring to a gentle simmer, then return the seared beef to the pot.
Add the 2 whole bay leaves and 1 tablespoon dark brown sugar, which adds subtle caramel notes. The sugar also helps balance the acidity of the tomatoes. Stir once to combine, then cover the pot and let it simmer gently for 1 hour 30 minutes on low heat. This long cook time ensures the beef becomes fork-tender while allowing flavors to meld.
Finish and Adjust for Perfect Texture
After simmering, remove the 2 bay leaves and discard them. Taste the chili and adjust seasoning if needed—add more salt if it tastes bland, or a pinch of sugar if it’s too acidic. The chili should have a thick, hearty consistency, but if it’s too thick, stir in 2-4 tablespoons water to reach your desired texture.
For best results, let the chili rest for 10-15 minutes before serving. This allows the flavors to settle and the texture to thicken slightly. Serve hot with toppings like shredded cheese, sour cream, or fresh cilantro to complement the deep, smoky flavors.
Pro Tips For Making 2 Lb Beef Chili
- SEAR THE ROAST FIRST: Chuck roast won’t brown properly if you toss it straight into the pot—it’ll just stew. Hit it with a hot skillet (or Dutch oven) for 3-4 minutes per side until deep brown, even if it’s not fully cooked through. That crust? It’s what carries flavor through the whole dish.
- CHOP ONIONS SMALLER THAN YOU THINK: I used to cut them into big chunks, thinking they’d melt down. Wrong. Dice onions into ¼-inch pieces—they’ll dissolve into the sauce instead of sitting as mushy bits. Same goes for bell peppers: a fine dice means even distribution, not chewy surprises.
- SIMMER LOW AND SLOW: After adding the tomato sauce, resist the urge to crank the heat. A gentle simmer (barely bubbling) for 2+ hours lets the chuck roast break down into tender shreds without turning to mush. Walk away—this isn’t a race.
- SALT THE TOMATO SAUCE: Canned tomato sauce is often bland, and you’ll regret not salting it early. Stir in ½ teaspoon salt per can before adding other ingredients—it balances acidity and lets flavors meld better. (Yes, even if the label says “low sodium.”)
Essential equipment for perfect results
Sturdy Dutch Oven
A 5-7 quart Dutch oven is my go-to for this chili—it holds enough liquid to prevent sticking while providing even heat distribution. I swear by the Lodge 5.5 Quart Cast Iron Dutch Oven for its durability and heat retention.
If you don’t own cast iron, a heavy-bottomed stainless steel pot like All-Clad works perfectly. Just avoid thin aluminum—it won’t handle the long simmer without warping. 🔥
Wooden Spoon
Never use metal utensils when stirring chili—it scratches the pot and releases harmful ions. A heat-resistant wooden spoon (like OXO Good Grips) is essential for scraping up flavorful browned bits from the bottom.
I keep one dedicated to chili-making in my kitchen. For extra durability, soak it in warm, soapy water after each use to prevent cracking.
Meat Thermometer
While chili doesn’t require precise doneness like steak, a meat thermometer helps track beef tenderness. Aim for 195°F internal temperature—this ensures the chuck roast breaks down into tender, melt-in-your-mouth pieces.
I recommend the Thermoworks Smoke for its accuracy and durability. If you don’t have one, test with a fork: the beef should shred easily after 1.5 hours of simmering.
Fine-Mesh Strainer
A fine-mesh strainer (like the OXO Good Grips) comes in handy if you want to remove excess fat after cooking. Skim off any congealed fat from the surface before serving—it’s delicious but can be greasy.
For a quicker method, chill the chili in the fridge for 1 hour, then scoop off the hardened fat layer. This step elevates the chili’s texture without sacrificing flavor. ✨
Instant-Read Thermometer
An instant-read thermometer (like the Thermapen One) is worth the investment for checking broth temperature during simmering. Maintain a gentle 190-200°F range to prevent boiling, which can make the chili watery.
If your pot lacks a lid thermometer, use the back of your hand to gauge heat—it should feel warm but not scorching. Pro tip: Place the thermometer in the broth, not touching the pot, for accurate readings.
Optional: Immersion Blender
For a smoother chili texture, an immersion blender (like the Hamilton Beach) lets you blend directly in the pot without transferring liquids. Pulse 2-3 times for a slightly thicker consistency, but leave some chunks for texture.
Avoid over-blending—this turns chili into soup! If you prefer chunky chili, skip this step entirely. The immersion blender also works wonders for quick adjustments mid-cook. 💡
Nutrition facts
Frequently asked questions
Can I use ground beef instead of chuck roast?
Yes, but the texture will differ. Ground beef cooks much faster (30 minutes instead of 1.5 hours) and creates a softer, more saucy chili. For best results, use 80/20 ground chuck and brown it thoroughly in batches to develop deep flavor. The fat content is crucial for richness.
How do I make this chili less spicy?
Reduce the chili powder to 1 tablespoon and omit the liquid smoke. For milder heat, add 1 extra cup of beef broth to dilute the spices. If already cooked, stir in 1-2 tablespoons sour cream or a pinch of sugar to balance the heat. The dark brown sugar in the recipe already helps soften spice intensity.
Can I make this chili in a slow cooker?
Brown the beef first in a skillet, then transfer everything to the slow cooker. Cook on low for 6-7 hours or high for 3-4 hours. The slow cooker method is perfect for hands-off prep. Just add 1/2 cup extra broth to prevent drying, as slow cookers evaporate more liquid.
Why does my chili taste bland?
Most likely, the beef wasn’t browned enough or spices weren’t toasted. Always sear beef until deeply browned, and toast spices in the pot for 1 minute before adding liquids. For extra depth, add 1 teaspoon Worcestershire sauce or 1/2 teaspoon smoked paprika at the end. Taste as you go—adjust salt in 1/2 teaspoon increments.
What’s the best way to reheat leftovers?
Reheat gently on the stovetop over medium-low heat for 10-15 minutes, stirring occasionally. Avoid microwaving as it can make the chili watery. For best texture, add 2-3 tablespoons beef broth before reheating. Leftovers actually improve in flavor—this chili tastes even better the next day!

- Baked Potatoes in Crock Pot Recipe: Buttery Interiors and Crispy Top Magic - November 1, 2026
- Braised Beef Short Ribs Recipe: Crock Pot Fall-Off-Bone Magic in 6 Hours - November 1, 2026
- Crock Pot Cocoa Recipe: Velvety Warmth With Hidden Spice Magic - November 1, 2026