
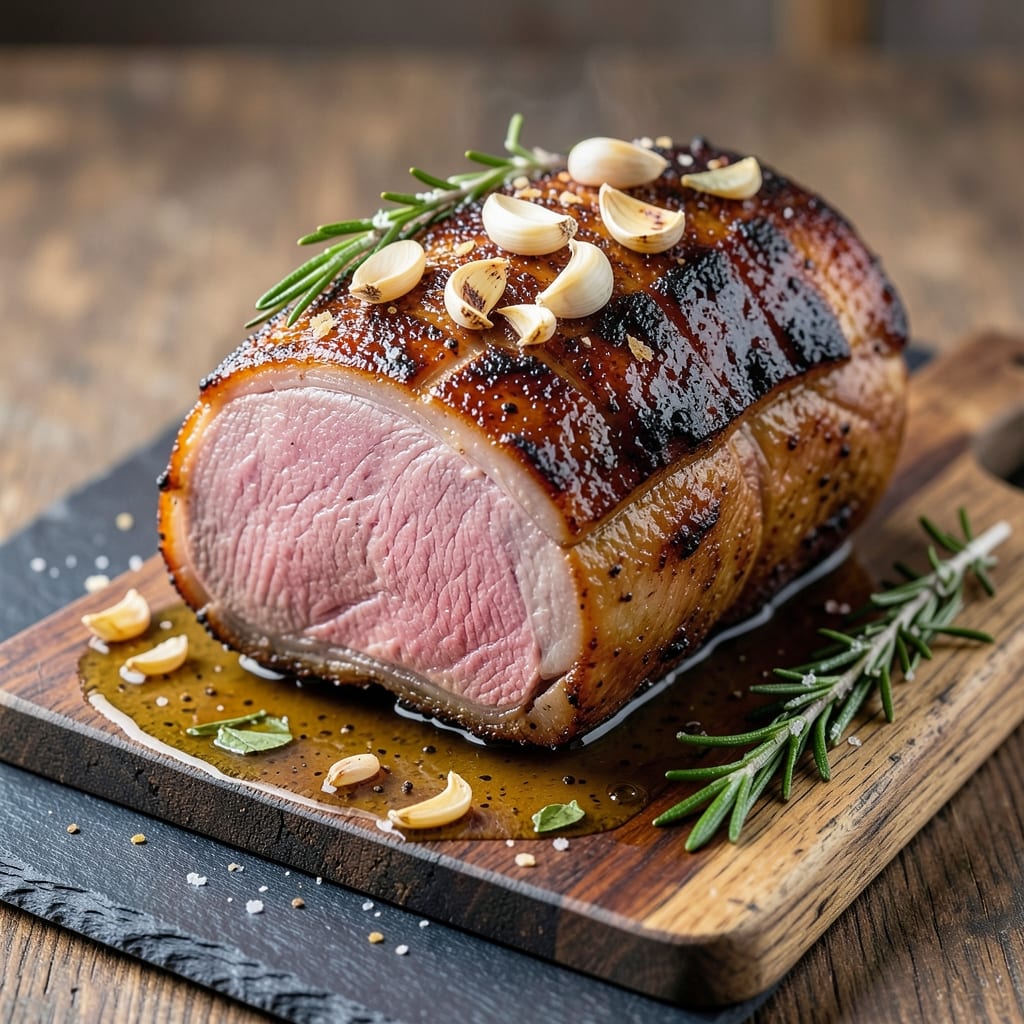
A 2-rib standing rib roast delivers the ultimate showstopper dinner—crispy bark that shatters with every bite and a juicy pink core that melts in your mouth. This recipe transforms a simple cut of beef into a restaurant-worthy centerpiece with a foolproof method for achieving perfect doneness every time.
The secret lies in proper trimming, high-heat searing, and precise temperature control.
What sets this apart is the balance between crust and tenderness. You’ll start with a dry-brine overnight for deep flavor penetration, then create that coveted caramelized bark through careful searing.
A meat thermometer becomes your best friend, ensuring you hit that 125°F internal temperature—rare enough to please even the most discerning palates. The resting time is just as critical as the cooking.
By the time you slice into this roast, you’ll have a crispy exterior that gives way to tender, flavorful meat with just a hint of pink in the center.
The aroma alone will have everyone gathering at the table, and the first bite will confirm why this cut deserves its reputation. This is the kind of meal that elevates ordinary weeknights into special occasions.
Perfect for holiday gatherings or impressing guests, this recipe scales beautifully and pairs well with classic sides like roasted vegetables, creamy mashed potatoes, or a bold red wine reduction. The technique is straightforward, but the results are undeniably professional. Let’s get started on creating your most impressive roast yet.
Ingredients for 2 rib standing rib roast
Six ingredients transform a simple roast into a restaurant-quality masterpiece—crispy bark with juicy pink perfection inside.
| Ingredient | Amount | Notes |
|---|---|---|
| 2-Rib Standing Rib Roast 🥩 | 5 lb | Bone-in, center-cut, dry-brined overnight |
| Kosher Salt 🧂 | 1 ½ tbsp | Diamond Crystal preferred, coarse grain |
| Freshly Ground Black Pepper 🌶️ | 1 ½ tbsp | Cracked peppercorns, not pre-ground |
| Extra-Virgin Olive Oil 🫒 | ½ cup | High smoke point, fruity variety |
| Garlic Cloves 🧄 | 6 cloves | Smash flat with side of knife |
| Fresh Rosemary 🌿 | 1 sprig | Heavy stems, leaves only |
| Fresh Thyme 🌿 | 1 sprig | Leaves only, stems removed |
| Unsalted Butter 🧈 | ½ cup | Cold, cubed, for basting |
| Yellow Onion 🧅 | 1 whole | Sliced into wedges for garnish |
| Red Wine 🍷 | ½ cup | Bold, dry variety like Cabernet |
| Beef Bone Broth 💧 | 1 cup | Homemade or high-quality store-bought |
| Balsamic Vinegar 🍶 | 1 tbsp | Aged, for finishing drizzle |
| Meat Thermometer 🌡️ | 1 whole | Instant-read, probe-style preferred |
The rib roast is non-negotiable here—5 pounds gives you generous portions for six. Look for a center-cut with good marbling at Costco or your butcher shop. The bone-in version holds up better during searing, and the fat cap renders into flavorful drippings. If your roast has a thick fat cap, trim it to about ¼-inch for even cooking. Fresh herbs matter too: rosemary and thyme from the grocery store’s produce section should smell vibrant, not wilted. For the dry brine, use Diamond Crystal kosher salt—it dissolves slower, creating deeper flavor penetration.
No red wine? Beef broth plus a splash of balsamic works beautifully. The butter for basting must be cold and cubed—room-temperature butter burns. Fresh herbs can be swapped for dried at one-third the amount, but the texture and aroma won’t be the same. For extra flavor depth, add 1 tsp of smoked paprika to the dry brine. The bone broth should be homemade if possible—store-bought versions often contain additives that can alter the roast’s flavor. If you’re short on time, Whole Foods 365 brand is a solid backup. The meat thermometer is your best friend—instant-read types give you real-time accuracy during the critical sear.
This roast tastes even better the next day, so plan ahead. After cooking, let it rest for 20-30 minutes before slicing—this ensures juices redistribute. Store leftovers in the fridge for 3-4 days or freeze for up to 3 months. For reheating, use low heat in a skillet with a splash of beef broth to restore moisture. The crust will soften slightly, but the meat remains tender. Garnish with sliced onions and a drizzle of balsamic before serving for that restaurant touch. The roast slices beautifully against the grain—practice your angle for perfect presentation.
Why You’ll Love This Recipe
- Minimal Prep, Maximum Impact: I swear by this roast—just salt, pepper, and olive oil, then let the oven do the work. No fancy marinades, no last-minute chopping. Honestly, the hardest part is waiting for it to cook.
- Garlic-Kissed Perfection: That crispy skin and tender meat? The secret’s in the garlic cloves tucked under the fat cap. It caramelizes into something so rich, I’ll take it over any fancy seasoning blend.
- Weeknight Wonder: Between us, this is my go-to for dinner parties and lazy Sundays. Slice it thin for sandwiches, cube it for salads—it’s the one roast that works for everything.
- Leftovers That Don’t Suck: I make this bigger than I need to because the reheated slices? Still juicy, still flavorful. Freeze half for when I’m too tired to cook—no sad, dry meat here.
Step-by-step instructions for juicy pink rib roast with crispy bark
Here’s how to transform a simple rib roast into a showstopping centerpiece with perfect texture contrast.
Preheat and Prepare the Roast for Maximum Flavor
Preheat your oven to 450°F with a rack positioned in the lower third. This high initial temperature creates that coveted crispy bark while locking in juices. While the oven heats, pat the 5 lb 2-rib standing rib roast completely dry with paper towels—this is non-negotiable for crispy skin. The dry-brine overnight has already done half the work, but thorough drying ensures maximum surface area for browning.
In a small bowl, combine the 1.5 tbsp kosher salt and 1.5 tbsp freshly ground black pepper. Rub this generously over all surfaces of the roast, pressing firmly so the seasoning adheres. The coarse salt will create those beautiful crusty crystals while the pepper adds depth of flavor. Let the seasoned roast sit at room temperature for 30 minutes while you prepare the aromatics.
Build Flavor Layers with Herbs and Garlic
In a small skillet over medium heat, warm the 0.5 cup extra-virgin olive oil until shimmering. Add the 6 smashed garlic cloves, leaves from 1 sprig rosemary, and leaves from 1 sprig thyme, stirring for 30 seconds until fragrant. Remove from heat and let cool slightly—this infused oil will become your basting liquid.
Use a pastry brush to coat the roast thoroughly with the garlic-herb oil. This step creates a flavorful barrier that prevents the roast from drying out while adding aromatic depth. I like to work in sections, making sure every crevice gets coated. The oil will help create that beautiful bark while infusing the meat with herbaceous notes.
Sear for Perfect Crisp and Start the Roast
Place the roast fat-side up on a rack in a roasting pan. Insert the meat thermometer into the thickest part of the roast, avoiding bone. Place the roasting pan on the middle rack of your 450°F oven and roast for 20 minutes. This initial high heat creates that coveted crust while jumpstarting the cooking process.
After 20 minutes, rotate the roast 180 degrees for even browning. Check the internal temperature—it should be around 135°F. If the bark isn’t deep brown yet, return it to the oven for 5-10 more minutes. The key is getting that dark, crispy exterior while keeping the interior juicy. Don’t be tempted to open the oven door during this phase—every time you do, you lose valuable heat and steam.
Develop Rich Sauce and Finish the Roast
Reduce oven temperature to 325°F once the roast reaches 135°F internally. Remove the roast and add 0.5 cup cubed unsalted butter, 0.5 cup red wine, and 1 cup beef bone broth to the roasting pan. Scrape up all the browned bits from the bottom with a wooden spoon—this is where all the flavor hides.
Return the roast to the oven and continue cooking until the internal temperature reaches 125°F for medium-rare (about 1.5-2 hours total, depending on your roast’s size). The wine and broth will create a luxurious pan sauce that complements the roast beautifully. For that final touch, remove the roast and add 1 tbsp balsamic vinegar to the sauce, simmering for 2 minutes to reduce slightly.
Rest and Slice for Ultimate Juiciness
Transfer the roast to a cutting board and let it rest for 20-30 minutes before slicing. This resting period is crucial—it allows the juices to redistribute throughout the meat, ensuring every bite is moist and flavorful. While it rests, tent loosely with foil to keep it warm. The internal temperature will rise about 5°F during resting, so your final temperature will be around 130°F.
Slice the roast against the grain into 1-inch thick slices. The pink center should be vibrant and juicy, surrounded by that beautiful crispy bark. Spoon the reduced sauce over the top and garnish with sliced yellow onion wedges for freshness. Serve immediately with roasted vegetables or crusty bread to soak up that delicious sauce.
Pro Tips For Making 2 Rib Standing Rib Roast
- CRANK THE HEAT FIRST: Sear that roast over screaming-hot dry heat for 5-7 minutes per side—no rushing. I used to walk away too soon, and the crust never got that deep, caramelized grip. A cast-iron skillet or heavy stainless steel pan is your best friend here; it’ll hold the heat like a champ.
- SALT THE GARLIC: Toss those smashed garlic cloves in a pinch of kosher salt before crushing them into the oil. It keeps them from burning and adds a subtle, even flavor instead of just a few punchy cloves. (Yes, even if you’re impatient like me—just do it while the roast rests.)
- SKIP THE CROWDED PAN: If your roast is too big for the pan, work in batches—salt and sear the first side completely, then flip and repeat. Trying to cram it all in just leads to steaming, not searing. Trust me, the extra 10 minutes saves you from a soggy crust.
- REST UNDER FOIL: Tent that roast with foil for the first 10 minutes of resting—it traps the juices while keeping the crust intact. I learned this the hard way when a well-meaning guest cut into it too soon, and half the flavor walked out the door. (Your future self will thank you.)
Perfect pairings for 2 rib standing rib roast
Wine Pairings
For this rich, beefy roast, I reach for bold reds that can stand up to its depth. A Cabernet Sauvignon from Napa Valley—like Caymus Vineyards—complements the roast’s herbaceous notes and crispy bark beautifully. The wine’s dark fruit flavors and tannins mirror the roast’s caramelized crust. 🍷
If you prefer something slightly lighter, a Syrah/Shiraz from Australia or Washington State works wonderfully. The peppery notes in the wine enhance the roast’s black pepper seasoning, creating a perfect harmony. For a more affordable option, Louis M. Martini Cabernet Sauvignon delivers excellent value without sacrificing quality.
Beer Pairings
A malty Belgian Dubbel like Westmalle Trappist brings caramel and spice notes that pair surprisingly well with the roast’s rich flavors. The beer’s slight sweetness balances the roast’s savory depth. For a more approachable option, try a German Dunkel—its roasted malt character complements the crispy bark beautifully. 🍺
If you’re serving this roast at a casual gathering, a dark amber ale with chocolate and coffee undertones works perfectly. I recommend Guinness Foreign Extra Stout for its creamy texture and deep flavor that stands up to the roast’s richness.
Side Dish Harmony
Roasted root vegetables like carrots, parsnips, and beets roasted with thyme and olive oil provide earthy contrast to the roast’s richness. Their natural sweetness balances the beef’s savory depth. For a more elegant touch, serve with creamy mashed potatoes infused with roasted garlic and chives. 🥔
A simple arugula salad with lemon vinaigrette cuts through the richness beautifully. The peppery bite of arugula provides a refreshing contrast to the roast’s bold flavors. For a heartier option, consider wild mushroom risotto with truffle oil—it elevates the meal to restaurant-quality sophistication.
Sauce Enhancements
The pan sauce from the roasting pan deserves special attention. Deglaze it with red wine and reduce until syrupy, then finish with a pat of cold butter for a luxurious finish.
For extra depth, stir in 1 tsp of Dijon mustard before serving. This adds a subtle tang that brightens the sauce’s richness.
For a quick garnish, whisk together 2 tbsp crème fraîche with 1 tsp chopped fresh chives and drizzle over each serving. The cool creaminess contrasts perfectly with the warm, crispy roast. A sprinkle of flaky sea salt** right before serving enhances all the flavors.
Nutrition facts
Frequently asked questions
What’s the difference between a 2-rib and prime rib roast?
A 2-rib standing rib roast includes the two ribs closest to the spine (hence “2-rib”) and maintains the rib bones, giving it a distinctive shape and flavor. Prime rib typically refers to a larger cut that includes more ribs (often 6-8) and comes from the primal rib section. The 2-rib version is more compact, making it ideal for smaller gatherings or when you want a more elegant presentation.
How do I know when my roast is done without overcooking?
Use a meat thermometer to check the internal temperature—125°F for medium-rare (the target for juicy pink perfection). The thermometer should read the thickest part of the roast, avoiding bone. Remember, the temperature will rise 5°F during resting, so pull it out when it hits 125°F. Never guess by time or color—this is the only reliable method.
Can I cook a 2-rib roast in a slow cooker?
While possible, it’s not ideal for achieving that crispy bark. Slow cookers work best for tender cuts like chuck roast, not the premium rib roast. For perfect results, stick with the oven method—high heat for searing followed by controlled finishing. If you’re short on time, consider a reverse sear: cook low and slow to 110°F first, then finish with a quick sear in a hot pan.
How far ahead can I prep the roast?
You can prep everything 1 day ahead! Dry-brine the roast overnight, and store all seasonings and aromatics in the fridge. On cooking day, just let the roast sit at room temperature for 30 minutes before cooking. The dry brine does most of the flavor work in advance, making your cooking day much easier. This is especially helpful for holiday meals.
What if my roast doesn’t have a fat cap?
No fat cap? No problem! Simply increase the olive oil to 0.75 cup and brush it on generously during searing. The extra fat will help create that crispy bark while compensating for the missing natural fat. You can also add 2 tbsp of butter to the roasting pan during the finishing stage for extra richness. The flavor won’t suffer at all.

- 12 Bean Chili Recipe: Hearty Slow-Cooked Depth With 12 Legumes - October 17, 2026
- 5 Seed Bread Recipe: Nutty Crunch and Artisan Flavor in One Loaf - October 17, 2026
- 1 Lb Macaroni Salad Recipe: Bold, Crunchy, and Crowd-Pleasing - October 17, 2026