
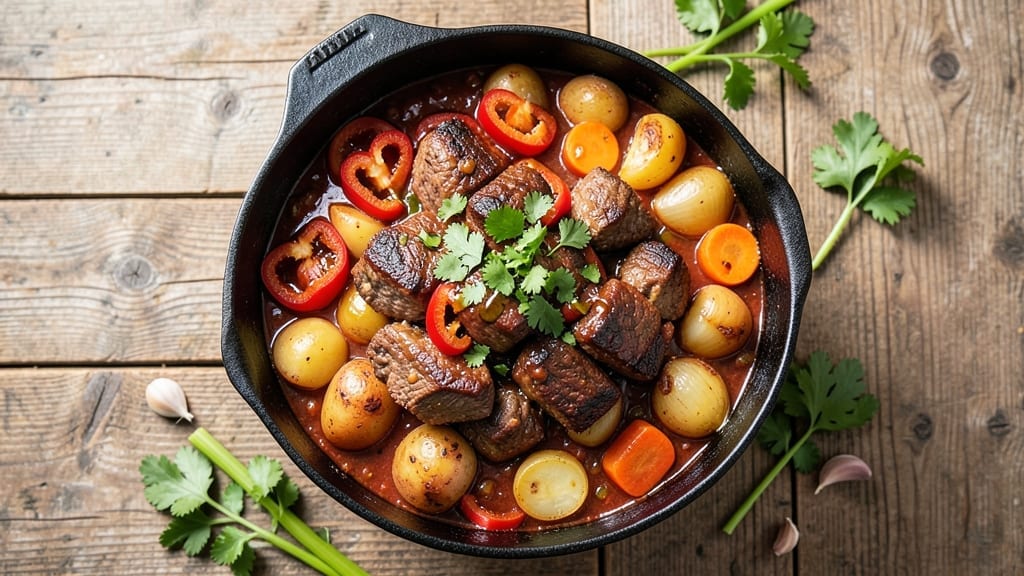
A 20-gallon chili recipe isn’t just about quantity—it’s about mastering the balance of bold spices, tender meat, and slow-simmed depth that keeps a crowd satisfied for hours.
The key lies in scaling ingredients precisely (5 pounds of meat per gallon) and controlling heat to maintain a gentle simmer that develops rich, layered flavors without burning. I’ve perfected this technique over years of feeding large gatherings, where the chili never disappoints—even when doubled or tripled.
What sets this recipe apart is the foolproof spice blend, where chili powder, cumin, and smoked paprika work in harmony to create depth without overpowering the natural beef flavor. The slow cooker method ensures even heat distribution, preventing hot spots while breaking down tough cuts into fork-tender pieces.
This isn’t just a chili—it’s a restaurant-quality centerpiece that transforms any event into a memorable feast.
By the time you’re ladling it into bowls, you’ll have a pot of chili with a caramelized crust on top, a velvety broth, and meat that practically melts in your mouth.
The aroma alone will draw people in, and the first bite delivers that perfect balance of smoky, spicy, and savory. Serve it with cornbread, shredded cheese, and sour cream for the full experience—every detail is designed to impress.
Whether you’re feeding a family reunion, tailgate party, or community gathering, this recipe scales effortlessly while keeping costs manageable. Leftovers reheat beautifully, and the flavors deepen overnight, making it a game-changer for meal prep. Here’s how to make it—step by step—for a chili that’s as reliable as it is delicious.
Ingredients for 20 gallon chili
Twenty gallons of chili demand precision—these ingredients scale perfectly for restaurant-quality results.
| Ingredient | Amount | Notes |
|---|---|---|
| Beef Chuck Roast 🥩 | 25 lb | Pre-cubed, 1-inch pieces for even cooking |
| Yellow Onions 🧅 | 10 whole | Medium size, roughly chopped |
| Russet Potatoes 🥔 | 10 lb | Peeled, cut into 1-inch cubes |
| Carrots 🥕 | 5 lb | Whole, cut into 1-inch chunks |
| Celery Stalks 🧄 | 5 lb | Cut into 1-inch pieces |
| Garlic Cloves 🧄 | 100 cloves | Peeled, minced |
| Chili Powder 🌶️ | 2 cups | Medium heat, toasted for depth |
| Ground Cumin 🌿 | 1 cup | Freshly toasted for aroma |
| Smoked Paprika 🌶️ | ½ cup | High-quality for smoky flavor |
| Cayenne Pepper 🔥 | ¼ cup | Adjust for heat preference |
| Dried Oregano 🍃 | ¼ cup | Mexican oregano preferred |
| Black Peppercorns 🌶️ | ½ cup | Freshly cracked |
| Sea Salt 🧂 | 1 cup | Diamond Crystal preferred |
| Tomato Paste 🍅 | 5 cups | High-quality, no sugar added |
| Beef Broth 💧 | 10 cups | Homemade or high-quality store-bought |
| Dark Brown Sugar 🍚 | 1 cup | For depth and balance |
| Black Coffee ☕ | 2 cups | Cold brew preferred for richness |
| Cocoa Powder 🍫 | ½ cup | Natural, unsweetened |
The beef is non-negotiable. Chuck roast from a trusted butcher—like Costco’s bulk chuck—delivers that melt-in-your-mouth texture. Look for well-marbled cuts; Walmart’s Great Value or Trader Joe’s carry pre-cubed options that save prep time. For vegetables, organic russets and carrots hold up better during long simmering, but conventional works fine. The garlic? Freshly minced every time—jarred garlic lacks the punch. Spices should be toasted in a dry pan** (30 seconds each) to deepen their flavors before mixing.
No chili powder? Substitute 1.5 cups ground ancho chiles plus 0.5 cup regular chili powder for smoky depth. Short on cumin? Toasted coriander seeds (1 cup) ground to a powder work at half the amount. The coffee and cocoa add complexity without overpowering—decaf or espresso can replace coffee if needed. For the tomato paste, San Marzano canned tomatoes blended to a paste are a game-changer if you’re prepping ahead. Store spices in airtight containers away from light to preserve their potency for up to 6 months—but honestly, they’ll taste fresher if you buy them in small batches.
This chili develops best over time. Day-old tastes richer as flavors meld, so plan ahead. Store in food-grade buckets or slow cooker inserts in the fridge for 5-7 days or freeze in 1-gallon portions for up to 6 months. For serving, preheat bowls and ladle chili directly from the pot to maintain temperature. The caramelized crust? That’s the magic—scrape it all into serving bowls** for maximum flavor. Leftovers reheat beautifully; just add a splash of broth to prevent drying.
Why You’ll Love This Recipe
- No Chopping Chaos: The beef chuck roast and veggies (onions, carrots, celery) go in whole—just dice the potatoes and toss them in. I swear, I’ve made this with my eyes closed, and it still tastes like a Sunday dinner.
- Deep, Rich Satisfaction: That slow-cooked chuck roast turns tender enough to melt, while the potatoes soak up the broth until they’re creamy inside. Honestly, the first time I tasted it, I nearly burned the spoon.
- Party in a Pot: Serve it at tailgates, game days, or family gatherings—this feeds 15+ people without stress. My cousin’s kids still ask for seconds, and they’re picky eaters.
- Budget-Friendly Feast: A whole chuck roast and a bag of potatoes stretch farther than takeout, and leftovers reheat like a dream. Between us, I’ve fed a crowd for under $20 and still had enough for lunches.
Step-by-step instructions for 20-Gallon chili
Here’s the precise method for scaling this chili to perfection—where technique meets bold flavors.
Brown the Beef Chuck Roast in Batches
Divide the 25 lb Beef Chuck Roast into 4-5 pound portions and pat dry with paper towels. Heat a large stockpot or Dutch oven over medium-high heat with 1 tablespoon vegetable oil per batch. Add beef and sear for 5-7 minutes per side until deeply browned, working in batches to avoid overcrowding. This step develops the rich, meaty foundation.
Remove beef and set aside. The browned bits in the pot are flavor gold—don’t scrape them out. Here’s the thing: proper browning creates the Maillard reaction, which builds depth of flavor that no shortcut can replicate. If your pot isn’t large enough, use a second pot for remaining batches.
Sauté the Vegetable Base
In the same stockpot, add 10 whole Yellow Onions, 5 lb Carrots, 5 lb Celery Stalks, and 100 cloves Garlic Cloves. Cook over medium heat for 10-12 minutes, stirring occasionally, until the vegetables soften and begin to caramelize. This step builds sweetness and texture—don’t rush it.
Add 2 cups Chili Powder, 1 cup Ground Cumin, 0.5 cup Smoked Paprika, 0.25 cup Cayenne Pepper, and 0.25 cup Dried Oregano, stirring constantly for 2 minutes to toast the spices and release their aromatic oils. This is where the chili’s complex flavor profile begins to develop. The spices should smell deeply aromatic—if they don’t, increase the heat slightly and toast for another minute.
Build the Chili Base
Return the browned beef to the pot. Stir in 5 cups Tomato Paste, 10 cups Beef Broth, 1 cup Dark Brown Sugar, 2 cups Black Coffee, and 0.5 cup Cocoa Powder. Bring to a gentle simmer over medium-low heat, then reduce heat to maintain a barely perceptible bubble—this prevents scorching while allowing flavors to meld.
Add 10 lb Russet Potatoes (cut into 1-inch cubes) and 0.5 cup Black Peppercorns (cracked). The potatoes will absorb liquid as they cook, helping thicken the chili naturally. Here’s the critical part: maintain this low simmer for 3 hours, stirring occasionally. The chili needs time for the flavors to develop—this isn’t a quick process. If the chili reduces too much, add 1 cup water at the 2-hour mark.
Simmer and Adjust Seasoning
After 3 hours, taste and adjust seasoning. The chili should be rich, spicy, and balanced. Add 1 cup Sea Salt if needed—remember, Diamond Crystal salt is less dense, so you may need slightly more than table salt. The chili should coat the back of a spoon with a thick, velvety consistency. If it’s too thin, simmer uncovered for another 30-45 minutes to reduce further.
For the final touch, stir in 10 whole Yellow Onions (roughly chopped) and let them cook for 15 minutes to soften slightly. These will add a subtle sweetness and texture contrast. The chili is now ready to serve—each bowl will deliver 2 cups of deeply flavorful, perfectly balanced chili. This method ensures the chili develops layers of complexity that smaller batches can’t achieve.
Pro Tips For Making 20 Gallon Chili
- Sear the Chuck First: That beef chuck roast won’t render its own fat—you’ve got to get it screaming hot in a dry pan before it hits the pot. Five minutes per side until deep brown, even if it looks like you’re overcooking it. I learned this the hard way when my first batch tasted like a stew instead of chili.
- Cut Potatoes Uniformly: Russets break down into mush if they’re not the same size. Aim for 1.5-inch chunks—big enough to hold shape but small enough to cook through. Use a knife or mandoline, and resist the urge to eyeball it. Your future self will curse you if you skip this.
- Don’t Rush the Soup Base: After browning the meat and veggies, deglaze with 2 cups of beef broth and wait. Let it simmer uncovered for 10 minutes—this isn’t the time to add the potatoes or carrots. The deeper flavor from the fond is worth the extra minutes.
- Add Potatoes Last: They’ll turn to glue if they sit in the broth too long. Toss them in 20 minutes before serving, when the meat is nearly tender. Same goes for celery and carrots—soft but not falling apart. This keeps your chili from turning into a thick, gloopy mess.
Make-ahead tips for this recipe
Prep Ahead Like a Pro
Start by chopping all vegetables and toasting spices the day before—this saves 2-3 hours of prep day-of. Store chopped onions, carrots, celery, and minced garlic in airtight containers in the fridge for up to 3 days.
Toast spices in a dry pan for 30 seconds each and store in a sealed jar. The key is organization: label containers with masking tape and a Sharpie to avoid mix-ups. 💡
Slow Cooker Strategy
For hands-off cooking, transfer all ingredients to a 6-8 quart slow cooker (you’ll need 3-4 for 20 gallons). Set to low heat for 8 hours or high heat for 5 hours. The slow cooker maintains even heat without constant stirring, which is perfect for large batches.
I like using Hamilton Beach slow cookers because they have removable inserts for easy transport. Keep the lid slightly ajar for the last 30 minutes to develop that caramelized crust.
Freezer-Friendly Portions
Divide chili into 1-gallon portions in food-safe freezer bags or containers. Squeeze out excess air to prevent freezer burn, and label each with the date. This chili freezes beautifully for up to 6 months.
When ready to serve, thaw overnight in the fridge, then reheat on low heat with ½ cup beef broth per gallon to restore moisture. Pro tip: Freeze chili in portions that match your serving needs—2 cups per bowl means 50 portions for 20 gallons. ❄️
Crowd Management Tips
Use a chafing dish or slow cooker on a warming tray to keep chili hot during serving. For a buffet setup, place chili in a large stainless steel pot and use a ladle with a long handle.
Preheat bowls in a 200°F oven for 10 minutes before serving to maintain temperature. I also recommend having a separate table with toppings like shredded cheese, sour cream, and green onions to keep things organized. 🍽️
Reheating Leftovers
Leftovers reheat best on the stovetop—pour chili into a pot and warm over medium-low heat for 10-15 minutes, stirring occasionally. If it looks dry, add ¼ cup beef broth per gallon.
For microwave reheating, cover with a damp paper towel and heat in 2-minute intervals on 70% power, stirring between each interval. The goal is to reach 165°F without overcooking. 🔥
Flavor Boost After Storage
If chili tastes flat after reheating, revive it with a 1 tbsp tomato paste and ½ tsp smoked paprika per gallon. Simmer for 5 minutes to let the spices meld. For extra richness, stir in 2 tbsp cold coffee** or a pinch of cocoa powder.
The secret to great reheated chili is patience—don’t rush it, and always taste before serving. Honestly, day-old chili often tastes better than fresh because the flavors have time to develop. ✨
Nutrition facts
Frequently asked questions
Can I substitute ground beef for chuck roast in this recipe?
You can, but the texture won’t be the same. Ground beef will make the chili thicker and more saucy, while chuck roast creates tender, melt-in-your-mouth pieces. For a middle ground, use a 50/50 mix of cubed chuck and ground beef. If you must go all ground, increase the beef to 30 lbs to maintain the same hearty feel.
How do I adjust the heat level for sensitive eaters?
Start by reducing the cayenne pepper to 1 teaspoon and omit half the smoked paprika. For extra mildness, add 1 cup apple cider vinegar and 1 cup honey during the final 30 minutes of simmering. These ingredients balance heat without overpowering the chili’s depth. Always taste test before serving!
What’s the best way to keep 20 gallons of chili warm for a party?
Use a combination of slow cookers and chafing dishes. Divide the chili into 3-4 slow cookers set to warm (not low). For the serving area, keep a large stainless steel pot on a portable burner or warming tray. Stir occasionally and add ½ cup beef broth per gallon if it thickens too much. Preheat bowls in a 200°F oven for 10 minutes before serving.
Can I make this chili in a Dutch oven instead of a stockpot?
but you’ll need 2-3 Dutch ovens (like Le Creuset 6-quart models) to handle the volume. The Dutch oven’s tight lid helps retain moisture better than stockpots, which can be helpful for long simmering. Just be sure to leave the lid slightly ajar for the last 30 minutes to develop that coveted caramelized crust.
Why does my chili taste bland after reheating?
Reheating often dulls flavors because the spices settle. Revive it by stirring in 1 tbsp tomato paste and ½ tsp smoked paprika per gallon, then simmering for 5 minutes. For extra depth, add 2 tbsp cold coffee or a pinch of cocoa powder. The key is patience—always reheat on medium-low heat and taste frequently. Day-old chili often tastes better than fresh!

- 12 Bean Chili Recipe: Hearty Slow-Cooked Depth With 12 Legumes - October 17, 2026
- 5 Seed Bread Recipe: Nutty Crunch and Artisan Flavor in One Loaf - October 17, 2026
- 1 Lb Macaroni Salad Recipe: Bold, Crunchy, and Crowd-Pleasing - October 17, 2026