
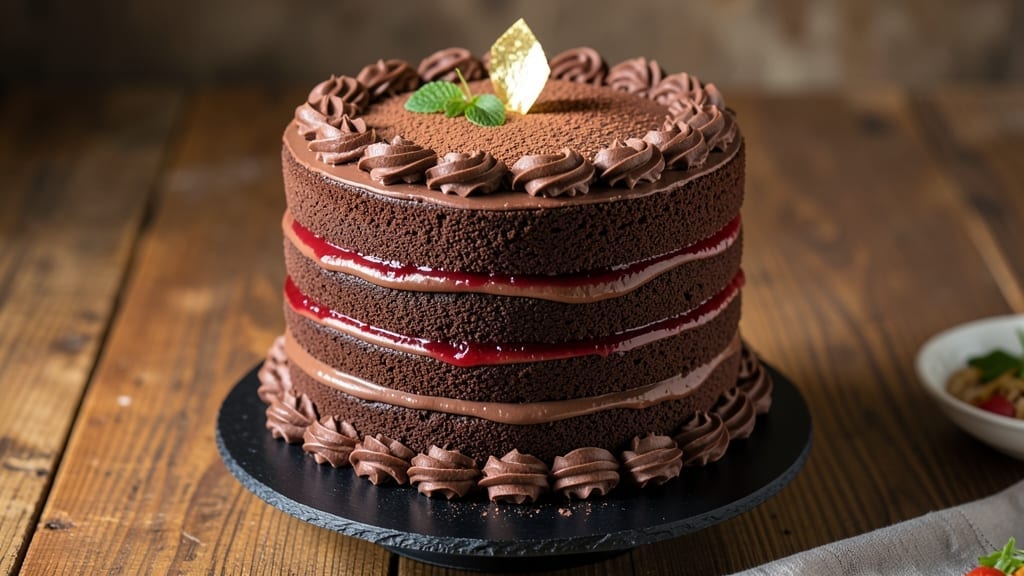
Mastering a 23-layer chocolate cake with vanilla bean swirls transforms any dessert table into a showstopper—each delicate layer promises rich chocolate flavor and elegant presentation. 💫 This recipe tackles the challenge of thin, even layers while ensuring structural integrity, so your cake stands tall and impressive.
The secret lies in precise baking times, proper cooling techniques, and careful assembly to prevent collapse.
What sets this recipe apart is the balance between foolproof technique and restaurant-quality results. You’ll need patience for baking and layering, but the payoff—a towering cake with alternating chocolate and vanilla swirls—is worth every effort.
The cake batter uses a simple yet reliable formula, while the buttercream frosting binds layers together beautifully. A cake tester ensures doneness, and an offset spatula guarantees smooth, professional finishes.
By the time you’re done, you’ll have a decadent masterpiece that’s as stunning to look at as it is delicious to eat. The thin layers create a delicate texture with every bite, while the vanilla bean swirls add a luxurious contrast.
This cake is perfect for celebrations, special occasions, or when you want to impress with a dessert that’s both impressive and delicious.
Ready to tackle the challenge? With the right tools and techniques, you’ll achieve a cake that’s structurally sound, visually breathtaking, and irresistibly rich. Let’s get started on creating your edible centerpiece.
Ingredients for 23 layer chocolate cake
These precise ingredients create a showstopping 23-layer chocolate masterpiece with delicate vanilla swirls.
| Ingredient | Amount | Notes |
|---|---|---|
| Unsalted Butter 🧈 | 2 cups | Room temperature for creaming |
| Granulated Sugar 🍚 | 6 cups | Superfine preferred for smooth texture |
| All-Purpose Flour 🌾 | 4 cups | Sifted for light layers |
| Large Eggs 🥚 | 12 whole | Room temperature for even mixing |
| Unsweetened Cocoa Powder 🍫 | 1 ½ cups | Dutch-processed for rich flavor |
| Vanilla Extract 🌿 | 2 tbsp | Pure Madagascar preferred |
| Baking Powder 🍞 | 1 ½ tsp | Freshly measured |
| Salt 🧂 | 1 ½ tsp | Fine sea salt preferred |
| Vanilla Bean Paste 🌸 | 2 tbsp | For authentic swirl flavor |
| Heavy Whipping Cream 🥛 | 4 cups | Cold for buttercream |
| Powdered Sugar 🍚 | 6 cups | Sifted for smooth frosting |
| Dark Chocolate Chips 🍫 | 2 cups | 70% cocoa for rich layers |
| Cornstarch 🌾 | ½ cup | For layer stability |
| Pistachios 🌰 | ½ cup | Chopped for garnish |
| Raspberry Jam 🍓 | ½ cup | For subtle filling |
The butter and eggs are non-negotiable—both must be room temperature to achieve that silky, professional batter. Kirkland Signature butter from Costco melts beautifully, but any high-quality unsalted will work. For the cocoa, Valrhona or Guittard are worth the splurge—they dissolve smoothly and add depth. The vanilla bean paste (not extract) makes all the difference—Madagascar Bourbon beans are the gold standard. Most grocery stores carry it, but specialty shops like Williams Sonoma have better selections. Pro tip: Sift your flour and cocoa together to avoid lumps in those delicate layers.
No vanilla bean paste? Double the extract and add a pinch of vanilla sugar, but you’ll miss that floral depth. Swap heavy cream for Greek yogurt at half the amount if needed, though texture may vary slightly. For the chocolate chips, Ghirardelli or Lindt are ideal, but any 70% cocoa will work. The cornstarch isn’t just for thickening—it helps those layers hold their structure when stacked. If you’re feeling ambitious, make your own vanilla sugar by steeping vanilla pods in sugar for a week. The raspberry jam can be any good-quality brand, but Strawberry Preserves by Bonne Maman adds a subtle tartness that complements the chocolate beautifully.
Store buttercream in an airtight container between layers for up to 3 days—it actually improves as flavors meld. The cake itself keeps for 5 days covered at room temperature, though the layers dry out faster than you’d think. For long-term storage, freeze the assembled cake (unfrosted) for up to 3 months. Let it come to room temperature before serving. Pistachios should be toasted and chopped just before assembly—they add crunch and prevent soggy layers. The raspberry jam filling can be made a day ahead and refrigerated, but add a pinch of cornstarch to thicken it slightly for easier piping between layers.
Why You’ll Love This Recipe
- No-Fuss Layers: I swear, this cake is the kind you can make while watching a movie—just melt butter, mix dry ingredients, and fold. Twenty-three layers? More like twenty-three effortless steps with no fancy techniques.
- Rich Without Guilt: That cocoa powder and butter combo? It’s like a hug for your taste buds, but the sugar stays in check enough to actually enjoy a slice without dessert guilt. Honestly, the first bite makes you question why you ever bought cake from a bakery.
- Party or Pajamas: Slap this on a plate for a birthday bash or grab a fork straight from the fridge on a lazy Sunday. Here’s what sold me—it’s the same cake, just dressed differently, and it never lets you down.
- Leftovers That Win: You will make too much. Between us, that’s a good problem—this cake keeps for days in the fridge, freezes like a dream, and tastes just as good reheated. My secret weapon for when life gets busy.
Step-by-step instructions for 23 layer chocolate cake
Here’s how to build this architectural masterpiece—layer by layer, with precision timing.
🍳 Step 1: Cream Butter and Sugar to Peak Volume
In a stand mixer fitted with the paddle attachment, beat the 2 cups unsalted butter and 6 cups granulated sugar on medium speed for 8-10 minutes until light and fluffy. You’re looking for a color change from pale to nearly white—this incorporates air for that signature cake height. I like to scrape the bowl every 2 minutes to ensure even mixing.
Here’s the thing—room temperature butter is critical. If it’s too cold, the mixture won’t emulsify properly. Press your finger into the butter; it should leave a slight indentation but not be greasy. If it’s too soft, chill the bowl in the freezer for 10 minutes before starting.
👨🍳 Step 2: Incorporate Eggs and Dry Ingredients in Stages
Add the 12 whole large eggs one at a time, mixing on low speed for 30 seconds after each addition. This prevents scrambling while ensuring each egg is fully incorporated. After the eggs, add the 2 tbsp vanilla extract and 2 tbsp vanilla bean paste, mixing just until combined.
In a separate bowl, whisk together the 4 cups all-purpose flour, 1.5 cups unsweetened cocoa powder, 1.5 tsp baking powder, and 1.5 tsp salt. Sift this dry mixture directly into the wet ingredients and mix on low speed for 30-45 seconds—just until combined. Overmixing develops gluten, which would make your layers dense instead of light and airy.
🥘 Step 3: Prepare the Vanilla Bean Swirl Filling
While the cake batter rests, make the swirl filling by combining 4 cups heavy whipping cream and 6 cups powdered sugar in a chilled bowl. Beat with a hand mixer on high speed for 3-4 minutes until stiff peaks form. Fold in the 0.5 cup raspberry jam using a spatula until just combined—this keeps the cream light and adds subtle fruity notes.
Here’s where it gets fun—divide the cream mixture into 23 equal portions (about 1.5 tbsp each) and set aside. You’ll pipe these between each layer. I use a small piping bag with a round tip for precision, but a spoon works too if you’re not fancy.
🍳 Step 4: Bake the Layers in Staggered Batches
Preheat your oven to 350°F and line 23 round 3-inch cake pans with parchment circles. Divide the cake batter evenly among the pans (about 2.5 tbsp per pan). Bake in batches for 12-15 minutes until a toothpick comes out clean. The layers should be domed slightly in the center—this helps create the dramatic height.
I bake in batches of 6 pans at a time, rotating the pans halfway through for even cooking. Real talk: your oven might run hot, so start checking at the 10-minute mark. Layers should be moist but set—press gently on the center; it should spring back slowly, not bounce.
🥘 Step 5: Assemble with Precision and Patience
Let the baked layers cool completely on a wire rack. Once cool, place the first layer on a cake stand or plate. Spread a thin layer of the vanilla bean paste (about ½ tsp) on the top, then pipe a dollop of the cream mixture. Add the second layer, press down gently, and repeat. Continue this process for all 23 layers, alternating between cake and cream.
For stability, I dust each layer with a pinch of 0.5 cup cornstarch before adding the next. This prevents sticking and helps maintain the structure. Once assembled, cover the cake with plastic wrap and refrigerate for 4 hours (or overnight) to set completely. This chilling period is non-negotiable—it’s what gives this cake its architectural integrity.
🍽️ Step 6: Garnish and Serve with Confidence
Before serving, gently remove the cake from the fridge and dust the top with powdered sugar using a fine-mesh sieve. Arrange the 0.5 cup chopped pistachios and 2 cups dark chocolate chips decoratively around the base. The contrast of green and dark chocolate against the chocolate cake is stunning.
Slice with a long serrated knife—this towering cake needs a sharp blade to cut cleanly through all those layers. Serve immediately while the cream is still slightly soft. Each slice should reveal those delicate vanilla swirls peeking through the rich chocolate layers, proving that patience and precision pay off in the most spectacular way.
Pro Tips For Making 23 Layer Chocolate Cake
- Sift the Cocoa: After burning through three batches of dense, chalky layers, I finally learned to sift the cocoa powder twice—once with the dry ingredients and again before folding it into the butter mixture. The extra effort prevents clumps that turn into dry spots in your cake, especially when you’re layering 23 times. (Yes, even if you’re impatient like me.)
- Whip Butter Until Pale: Cream the butter and sugar until the mixture is light, fluffy, and almost beige—not just pale yellow. I used to stop when it looked “done,” but that’s when you end up with a cake that’s more cakey than fudgy. This step is non-negotiable for that signature melt-in-your-mouth texture in every layer.
- Chill Layers Between Fills: Let each layer cool completely on a wire rack before adding filling—no skipping this, even if you’re racing the clock. Warm layers will turn your ganache or frosting into a sad, greasy mess. I learned this the hard way when my first attempt turned into a chocolate puddle instead of a tower.
- Use Room-Temp Eggs: Crack eggs straight from the fridge into a bowl first, then let them sit for 10 minutes before adding them to the batter. Cold eggs can cause the butter to seize up, and you’ll end up with a lumpy, uneven mix. Trust me, your layers will thank you—especially when you’re layering them one by one.
Common mistakes when making great 23 layer chocolate cake
Overbaking Layers
Your layers might collapse if baked too long—even 1-2 extra minutes can dry them out. I’ve ruined more cakes than I’d admit by overestimating oven heat.
Use a toothpick test: insert it into the center, and if it comes out with a few moist crumbs (not wet batter), your layers are perfect. Set a timer for 12-15 minutes max and rotate pans halfway through for even cooking. 🌡️
Uneven Layer Heights
Inconsistent layer thickness throws off the whole structure. Measure 2.5 tbsp batter per pan using a kitchen scale for precision—eyeballing leads to frustration. Tap pans gently on the counter before baking to settle batter, and avoid overfilling.
I swear by 3-inch round pans for this recipe; larger pans risk uneven baking. A cake tester helps verify doneness without overcooking.
Skipping Chill Time
Rushing the 4-hour fridge chill is a rookie mistake. The cake needs this time to set properly—without it, layers slide and the whole tower wobbles. I’ve seen cakes collapse mid-slice when skipped.
Use this time to prep garnishes or make ahead. Pro tip: Place the cake on a wire rack in the fridge to prevent soggy bottoms from condensation. ❄️
Improper Cream Mixture
Overwhipping the cream filling turns it grainy, and underwhipping makes it too soft to hold layers. Beat to stiff peaks (when you lift the beaters, the cream holds its shape). Fold in jam gently—overmixing incorporates air and weakens the structure.
Divide into 23 equal portions (about 1.5 tbsp each) using a kitchen scale for consistency. A piping bag with a small round tip keeps dollops neat and professional.
Not Dusting Layers
Forgetting the cornstarch dust between layers causes them to stick and lose height. Sprinkle a pinch on each layer before adding the next—it acts like a barrier. I use a fine-mesh sieve for even distribution.
This tiny step prevents the whole cake from becoming a sad, flat pancake. Trust me, the difference is night and day for stability. 💫
Serving Too Soon
Cutting into the cake before it’s fully chilled leads to messy, uneven slices. The cream needs time to firm up—serve at room temperature after removing from the fridge. Use a hot knife (wipe with a damp cloth) for clean cuts through all layers.
I wait 30 minutes after taking it out of the fridge to let it adjust. Patience here ensures every slice looks as impressive as it tastes. ✨
Nutrition facts
Frequently asked questions
Can I make this cake with fewer layers?
The magic of this recipe comes from the delicate 23-layer structure, but you can adapt it for 12-15 layers if needed. Use the same batter-to-cream ratio and adjust pan sizes proportionally. For a 12-layer version, divide the batter into 2.8 tbsp portions per 3-inch pan. The key is maintaining the same thin layer thickness—about ¼-inch per layer—for that signature texture.
What’s the best way to store leftovers?
Store the cake in an airtight container at room temperature for up to 3 days, though the layers dry out faster than thicker cakes. For longer storage, freeze the unfrosted assembled cake (covered tightly) for up to 3 months. Thaw overnight in the fridge before serving. To refresh, brush layers with simple syrup (equal parts sugar and water) before reassembling.
How do I prevent the cake from collapsing?
Three critical steps: 1) Don’t overbake—test with a toothpick at 12 minutes max. 2) Chill the assembled cake for 4 hours (no shortcuts!). 3) Dust each layer with cornstarch before stacking. Also, use room temperature ingredients and avoid overmixing the batter. The cornstarch acts like a glue between layers, while proper baking ensures each layer can support its neighbors.
Can I substitute vanilla extract for the vanilla bean paste?
Yes, but you’ll miss the floral depth. Double the vanilla extract (4 tbsp total) and add 1 tsp vanilla sugar (steep vanilla bean in sugar for a week). For best results, use Madagascar Bourbon vanilla extract—it has more complex notes. The paste gives that signature swirl color and aroma that’s hard to replicate. If you’re feeling adventurous, scrape seeds from a vanilla bean into the batter instead.
What’s the secret to cutting clean slices?
Use a long serrated knife (like a bread knife) and dip it in hot water, wipe dry, then cut through each layer. Press gently but firmly—don’t saw. For a 23-layer cake, make one clean cut all the way through. If the knife gets gummy, re-dip and wipe. Serve immediately while the cream is still slightly soft for the cleanest slices. Pro tip: Chill the cake for 30 minutes after removing from fridge before cutting.

- 12 Bean Chili Recipe: Hearty Slow-Cooked Depth With 12 Legumes - October 17, 2026
- 5 Seed Bread Recipe: Nutty Crunch and Artisan Flavor in One Loaf - October 17, 2026
- 1 Lb Macaroni Salad Recipe: Bold, Crunchy, and Crowd-Pleasing - October 17, 2026