
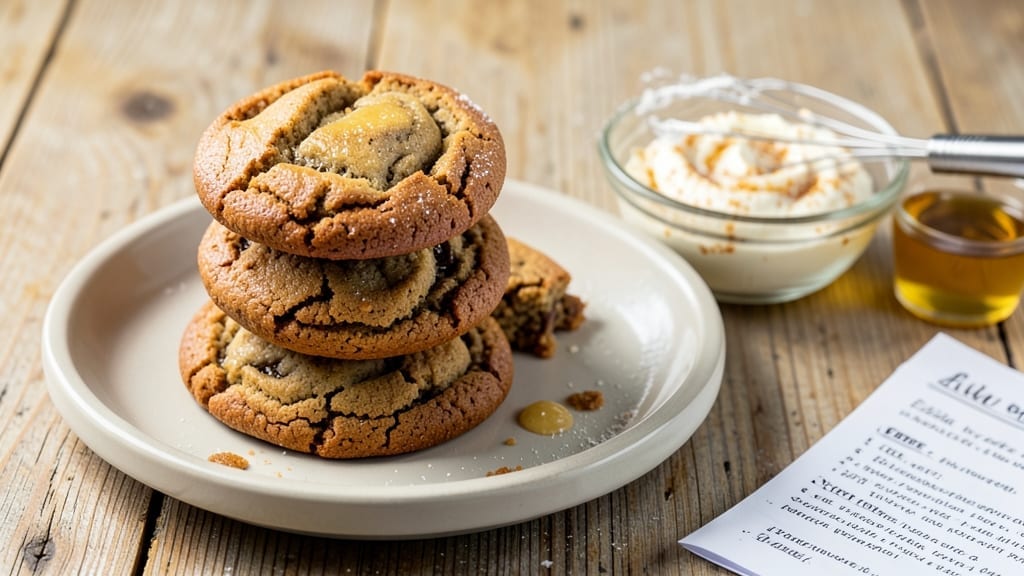
This 24-hour cookie recipe transforms ordinary cookies into buttery, crisp-edged wonders with soft, gooey centers—all thanks to a slow-chill process that deepens flavor and texture. The secret lies in letting the dough rest overnight, where the flour hydrates fully and the butter develops rich, caramelized notes.
I’ve perfected this method over years of baking, and it consistently delivers cookies that rival bakery-quality treats without the fuss.
The 24-hour magic happens during the dough’s rest, where cold temperatures allow the flour to absorb moisture evenly, preventing tough cookies. This slow fermentation also enhances the butter’s flavor, creating a deeper, nuttier taste that’s impossible to achieve with quick chilling.
The result? Crispy edges that shatter with every bite and centers that stay tender for days. It’s a foolproof technique that even beginner bakers can master.
By morning, your dough will be ready for baking, yielding cookies with a perfect balance of textures—crunchy exteriors and pillowy interiors. The aroma alone will fill your kitchen with warmth, while the taste delivers that buttery, slightly sweet satisfaction that makes these cookies irresistible.
Whether you’re baking for a holiday gathering or treating yourself, this method guarantees a batch that’s worth the wait.
Best of all, the 24-hour prep means you can set everything up the night before and wake up to freshly baked cookies with minimal effort. No rushing, no stress—just pure, delicious results. Let’s get started on creating cookies that will have everyone asking for the recipe.
Ingredients for 24 hour cookie
Cold butter, two sugars, and the magic of overnight resting create bakery-style cookies with crisp edges and gooey centers.
| Ingredient | Amount | Notes |
|---|---|---|
| Unsalted Butter 🧈 | 1 cup | Cold, cubed for dough development |
| Granulated Sugar 🍚 | ¾ cup | White or light brown preferred |
| Packed Brown Sugar 🍚 | ½ cup | For caramelized depth |
| Large Eggs 🥚 | 2 whole | Room temperature for even mixing |
| Vanilla Extract 🌿 | 2 tsp | Pure, high-quality vanilla |
| All-Purpose Flour 🌾 | 2 ½ cups | Sifted for light texture |
| Baking Soda 🧂 | ½ tsp | Freshly opened |
| Diamond Crystal Kosher Salt 🧂 | ½ tsp | Adjust to taste |
| Ground Cinnamon 🌶️ | 1 tsp | Freshly ground preferred |
| Pure Vanilla Bean Paste 🌿 | 1 tsp | For extra vanilla flavor |
| Flaky Sea Salt 🧂 | 1 tbsp | For finishing cookies |
| Granulated White Sugar 🍚 | ¼ cup | For sprinkling before baking |
The butter is non-negotiable here—use unsalted and let it sit out just until soft before creaming. Plugrá or Land O’Lakes are my go-tos for consistent results. Brown sugar adds that deep caramelized flavor, but don’t pack it too tightly—lightly spoon it for accurate measurement. For vanilla, McCormick pure extract is my secret weapon, but any good-quality brand works. The flour needs to be sifted—no lumps—or your cookies will turn out dense. And trust me, sifting is worth the extra 30 seconds of effort.
No vanilla extract? Vanilla bean paste (like Madagascar Bourbon) works perfectly—just use the same amount. Short on brown sugar? Substitute white sugar plus 1/2 tsp molasses for that molasses-like depth. The baking soda must be fresh—old baking soda loses its lift. For the sea salt, Maldon is ideal, but any flaky salt will do. Prefer a different texture? Swap the sprinkled sugar for crushed nuts or sprinkles—just keep the same 1/4 cup total for balance. And if you’re baking at high altitude, reduce the baking soda by 1/4 tsp to prevent spreading.
Once mixed, the dough needs 24 hours in the fridge—no shortcuts. Portion it into 1.5 oz balls (about 2 tbsp each) and store in an airtight container. The dough keeps for up to 48 hours, so double batches are perfect for holiday baking. When ready to bake, let the dough sit at room temperature for 15 minutes before shaping. These cookies freeze beautifully too—bake first, then freeze on a tray before transferring to a bag for up to 3 months.
Why You’ll Love This Recipe
- No-Fuss Mixing: I swear by this—just cream butter and sugars until light, crack in eggs, add vanilla, and fold. No measuring cups, no stress, no mess. The dough comes together in minutes, and honestly? That’s half the battle.
- Buttery Vanilla Bliss: That perfect balance of brown and white sugar? It’s what makes these chewy yet tender. The eggs bind everything just right, and the vanilla? It’s not overpowering—just enough to make every bite feel like a hug.
- Holiday or Snack Attack: Between us, these are my go-to for cookie swaps, potlucks, or when I just need something sweet. They freeze like a dream, so I bake a batch and pull them out whenever. (Yes, even on a Tuesday night.)
- Dollar Stretch Magic: Butter, sugar, eggs—these are pantry staples that won’t break the bank. A single batch makes 30 cookies, and they keep for days. That’s right: one recipe, endless treats without the grocery guilt.
Step-by-step instructions for 24-Hour cookie magic
Here’s how to transform simple ingredients into cookies with crispy edges and gooey centers—no fancy tricks, just patience.
Cream the Butter and Sugars for Maximum Flavor
In a stand mixer fitted with the paddle attachment, beat the 1 cup unsalted butter (cold, cubed) with the 0.75 cup granulated sugar and 0.5 cup packed brown sugar on medium speed for 3-4 minutes. You’re looking for a light, fluffy texture—the mixture should nearly double in volume and become pale in color. This creaming process incorporates air, which creates those beautiful crackly tops and helps the cookies spread just right.
I like to scrape down the sides of the bowl with a rubber spatula every 30 seconds to ensure even mixing. The butter should be fully incorporated, with no visible lumps, and the sugars should be completely dissolved. This step is where the foundation of your cookies is built—don’t rush it. The cold butter will also help create that signature crunchy exterior after the 24-hour chill.
Add Eggs and Vanilla for Richness
Add the 2 whole large eggs (room temperature) one at a time, mixing on low speed for 30 seconds after each addition until fully combined. Then add the 2 tsp vanilla extract and 1 tsp pure vanilla bean paste, mixing for another 10 seconds. The vanilla bean paste adds an extra layer of depth that regular extract can’t match—it’s worth the small splurge.
The mixture might look slightly curdled after adding the eggs, but don’t worry. Once you incorporate the dry ingredients, everything will come together smoothly. Here’s the thing—room temperature eggs mix more evenly and create a lighter dough. If your eggs are straight from the fridge, let them sit in warm water for 5 minutes before using.
Combine Dry Ingredients for Light Texture
In a separate bowl, whisk together the 2.5 cups all-purpose flour, 0.5 tsp baking soda, 0.5 tsp diamond crystal kosher salt, and 1 tsp ground cinnamon. Sift the mixture directly into the wet ingredients and mix on low speed for 30-45 seconds until just combined—you should still see a few flour streaks. Over-mixing develops gluten, which can make your cookies tough instead of tender.
This is where the magic of the 24-hour process begins. The flour needs time to fully hydrate and develop the perfect texture. Once the dry ingredients are incorporated, remove the bowl from the mixer and fold in the 1 tbsp flaky sea salt by hand using a silicone spatula. The flaky salt will add a delightful contrast to each bite—don’t skip this step.
Chill the Dough for 24 Hours (The Secret Weapon)
Cover the dough bowl tightly with plastic wrap and refrigerate for 24 hours. This isn’t just a waiting game—it’s where the texture transformation happens. The cold temperature allows the flour to fully hydrate, the butter to solidify, and the flavors to meld together. The result? Cookies with crispy edges and soft, gooey centers that hold their shape perfectly.
I know it seems weird to wait this long, but trust me—this is the moment that matters. After 24 hours, the dough will be firm and easy to handle. If you’re short on time, you can chill it for at least 12 hours, but 24 hours gives you the best results. Pro tip: Place the dough on the middle rack of your fridge where the temperature is most consistent.
Bake to Golden Perfection with Sugar Sprinkle
Preheat your oven to 350°F and line two baking sheets with parchment paper. Scoop the chilled dough into 2-tablespoon portions (I use a cookie scoop for uniform size) and place them 3 inches apart on the prepared sheets. Sprinkle each cookie with a pinch of the 0.25 cup granulated white sugar—this creates those beautiful caramelized spots on top.
Bake for 11-13 minutes until the edges are golden brown but the centers still look slightly underdone. They’ll continue cooking on the hot pan after you remove them from the oven. Let them cool on the baking sheet for 5 minutes before transferring to a wire rack. The contrast of crispy edges and soft centers is what makes these cookies extraordinary—enjoy them warm for the ultimate experience!
Pro Tips For Making 24 Hour Cookie
- Cream Butter Cold: Take your butter straight from the fridge—no softening needed. I used to let it sit out, and the cookies always spread too much. Cold butter stays firm, giving you thicker, chewier cookies that hold their shape.
- Pack the Sugar: Use a kitchen scale for your brown sugar—pack it tightly into the measuring cup. Loose brown sugar means less moisture, and your cookies will turn out dry. Tap the cup firmly on the counter to settle it.
- Room Eggs First: Let your eggs sit out for 30 minutes before mixing—room temp eggs blend smoother and don’t curdle. Cold eggs can make your dough look weird, and nobody wants lumpy cookies.
- Chill the Dough: Divide and refrigerate your dough for at least 24 hours—yes, even if you’re impatient. This relaxes the gluten, prevents excessive spreading, and deepens the flavor. I know, I know, but trust the process.
Essential equipment for 24 hour cookie
Stand Mixer Essentials
Your KitchenAid stand mixer with the paddle attachment is non-negotiable for this recipe. The paddle creates air pockets that give these cookies their signature crackly tops. I use my 5-quart model—it handles the butter and sugars beautifully without overheating.
For budget-friendly alternatives, the Cuisinart Power Advantage works well too, though it lacks the iconic red bowl. 🌟
Dough Chilling Tools
An airtight container is critical for the 24-hour chill. I swear by Glasslock 32-ounce containers—they stack neatly in the fridge and prevent freezer burn if you extend storage. For portioning, a cookie scoop (preferably 2-tablespoon size) ensures uniform cookies.
If you don’t have one, a large spoon works in a pinch—just weigh portions to 1.5 oz for consistency.
Baking Sheet Upgrades
Heavy-duty baking sheets prevent warping at 350°F. My go-to is Nordic Ware Half-Sheet Pans—they distribute heat evenly and last forever. Line them with parchment paper (I use If You Care brand) to prevent sticking. For extra insurance, I place a second sheet on the lower rack to catch any stray crumbs or sugar. 🔥
Temperature Control
A digital thermometer (like Thermoworks Thermapen) ensures your oven is truly 350°F—many home ovens run 25°F hot or cold. For even baking, rotate sheets midway through the 11-13 minute bake.
If your oven has hot spots, use the middle rack for consistent results. Pro tip: Place a pizza stone on the lower rack 15 minutes before baking to improve heat distribution.
Finishing Touches
Maldon flaky sea salt and Domino granulated sugar are my finishing staples. Sprinkle sugar immediately before baking—it caramelizes beautifully on the hot dough. For a professional touch, use a fine-mesh sieve to dust sugar evenly. Store leftover cookies in an airtight container with a paper towel to maintain crispiness for up to 5 days. 💫
Nutrition facts
Frequently asked questions
Why does the dough need to chill for 24 hours?
The 24-hour chill is what transforms good cookies into extraordinary ones! Cold temperatures allow the flour to fully hydrate, preventing tough cookies. It also lets the butter solidify, creating crispy edges and soft centers. Plus, flavors meld together for deeper, richer taste—something you can’t achieve with quick chilling.
Can I make these cookies without a stand mixer?
Use a hand mixer or even a sturdy whisk. Cream the butter and sugars by hand for 5-7 minutes until light and fluffy. The key is patience—keep mixing until the mixture nearly doubles in volume. For best results, work in a cool kitchen to help the butter firm up properly.
What if I don’t have flaky sea salt?
Regular table salt works in a pinch, but it won’t give that same gourmet finish. If you have kosher salt, use 1.5 teaspoons (about the same volume as 1 tablespoon flaky salt). For extra flavor, sprinkle a tiny pinch of cinnamon or vanilla sugar on top before baking. The texture contrast is what makes flaky salt special, though!
How do I store these cookies to keep them crispy?
Store them in an airtight container with a paper towel to absorb moisture. They’ll stay fresh for 5 days at room temperature. For longer storage, freeze baked cookies (not dough) on a tray first, then transfer to a freezer bag. Reheat in a 350°F oven for 2-3 minutes to restore crispiness.
Can I add chocolate chips or nuts to this recipe?
Yes! Fold in 1 cup chocolate chips or 1 cup chopped walnuts after mixing the dry ingredients. For best results, use enjoy life chocolate chips (dairy-free) or toasted pecans. Keep portions to 1 cup total to maintain the perfect texture balance. Mix gently to avoid over-developing gluten.

- Baked Potatoes in Crock Pot Recipe: Buttery Interiors and Crispy Top Magic - November 1, 2026
- Braised Beef Short Ribs Recipe: Crock Pot Fall-Off-Bone Magic in 6 Hours - November 1, 2026
- Crock Pot Cocoa Recipe: Velvety Warmth With Hidden Spice Magic - November 1, 2026