
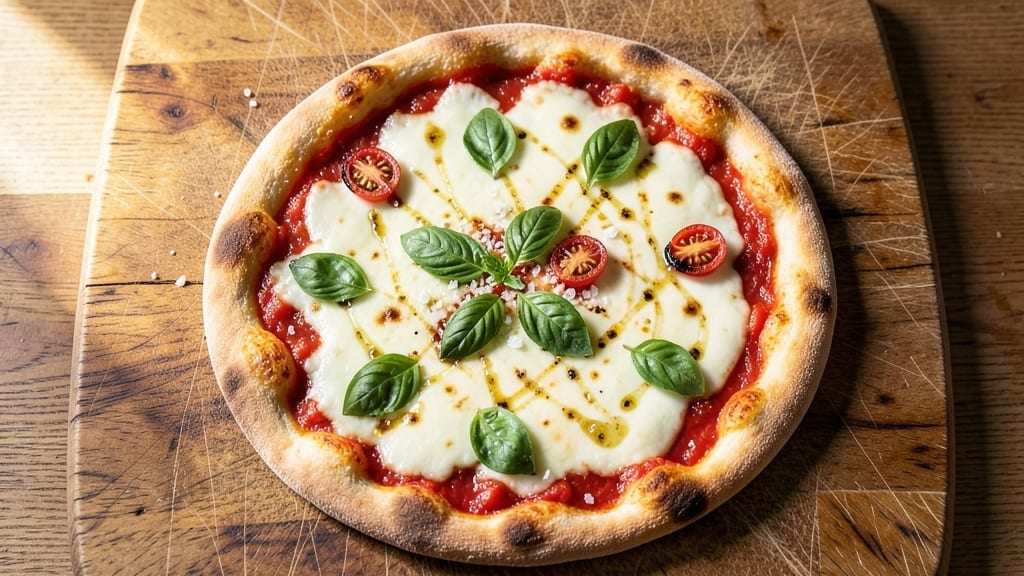
A 24-hour pizza recipe transforms ordinary dough into a masterpiece of flavor and texture—all through the magic of slow fermentation. The key lies in letting the dough rest for an entire day, which develops complex, deep flavors and creates that signature airy, chewy crust.
This isn’t just pizza; it’s a labor of love that rewards patience with restaurant-quality results at home.
The process begins with a high-hydration dough that’s allowed to ferment at room temperature, developing gluten and flavor gradually. Unlike quick recipes, this method ensures a crispy yet tender crust with an open crumb structure—no kneading required.
The long fermentation also makes the dough easier to handle, so shaping becomes effortless, even for beginners.
By the time you bake, your pizza will boast a golden, blistered crust with a crispy bottom and a light, airy interior. The slow fermentation enhances the sauce and toppings, too, letting their flavors meld into something richer and more nuanced.
This is the kind of pizza that makes you pause mid-bite, savoring every layer of texture and taste.
Perfect for special occasions or when you want to impress, this recipe turns a simple meal into an experience. The best part? The prep work is mostly hands-off, so you can focus on the fun part—topping and baking. Let’s get started on creating your next pizza masterpiece.
Ingredients for 24 hour pizza
High-hydration dough, bold flavors, and patience—this is your 24-hour pizza masterpiece.
| Ingredient | Amount | Notes |
|---|---|---|
| All-Purpose Flour 🌾 | 3 ½ cups | High-protein for chewy crust |
| Instant-Release Yeast 🍞 | ½ tsp | Active dry works too |
| Granulated Sugar 🍚 | ½ tsp | Feeds yeast for fermentation |
| Salt 🧂 | 1 ½ tsp | Kosher or sea salt preferred |
| Extra-Virgin Olive Oil 🫒 | ½ cup | High quality for flavor |
| Warm Water 💧 | 1 ½ cups | 105-110°F for yeast activation |
| San Marzano Tomato Sauce 🍅 | 1 ½ cups | Canned or homemade preferred |
| Fresh Mozzarella Cheese 🧀 | 1 ½ cups | Shredded, low-moisture works |
| Fresh Basil Leaves 🌿 | ¼ cup | Packed, stems removed |
| Garlic Cloves 🧄 | 4 cloves | Minced for sauce |
| Dried Oregano 🍃 | 1 tsp | Italian or Mediterranean blend |
| Ground Black Pepper 🌶️ | ½ tsp | Freshly ground preferred |
| Cornmeal 🌽 | ¼ cup | For dusting pizza peel |
The flour is non-negotiable here. King Arthur or Caputo Tipo 00 are my go-tos for that signature Neapolitan-style crust, but King Arthur all-purpose works in a pinch. Look for high-protein content—at least 11-12%—for that perfect chewy texture. The yeast? Fresh is ideal (like the kind at Whole Foods), but active dry from the grocery store works too. Just make sure it’s not expired. The olive oil matters for flavor—California extra-virgin has the best balance of fruitiness and mildness. And that warm water? 105-110°F is perfect—too hot and you’ll kill the yeast, too cold and it won’t activate properly.
No San Marzano tomatoes? Any good-quality canned tomatoes will do—just look for crushed or diced without added salt. Fresh mozzarella is ideal (that milky, soft kind), but low-moisture shredded from a block works too—just squeeze out excess moisture. Short on basil? Dried oregano at half the amount gets you close, but fresh basil is worth hunting down at the farmers market. The garlic can be pre-minced from a jar (the good stuff, not that dusty kind), but fresh minced has more punch. And if you’re feeling fancy, add a pinch of red pepper flakes to the sauce for a little kick.
This dough is a hands-off project—once it’s mixed, you can walk away for 24 hours. Store it in a lightly oiled bowl covered with a damp towel or plastic wrap in a warm spot (70-75°F is ideal). The sauce and toppings can be prepped ahead too—just keep them separate until baking day. The dough keeps in the fridge for up to 48 hours if you need to pause, but room temp is best for that perfect rise. And if you’re making more than one pizza? Double the dough—it’s worth it.
Why You’ll Love This Recipe
- No-Knead Magic: I swear by this dough—just mix the flour, yeast, sugar, and olive oil, let it rest overnight, and wake up to something actually worth the effort. No punchy arms, no failed rolls, just a smooth, airy base that’s foolproof.
- Olive Oil Umami Bomb: That extra-virgin olive oil in the dough? It’s the secret. The crust gets this golden, crispy edge with a just-right chew, and every bite carries a subtle richness that makes store-bought crusts feel sad by comparison.
- Leftovers That Don’t Suck: Slice it, freeze it, reheat it—this pizza stays fresh for days. I’ve pulled it straight from the freezer, popped it in the oven, and it’s still crispy enough to hold a slice with one hand. (Yes, even on a Tuesday night.)
- Budget Stretch Star: Five ingredients, zero waste. The dough’s so forgiving that I’ve doubled it for dinner and lunch the next day, and the olive oil’s the only splurge—worth it for that flavor. My wallet and my taste buds high-five every time.
Step-by-step instructions for slow-fermented pizza crust
Let’s create a pizza with a flavor-packed crust that develops depth over 24 hours.
Mix the Dough and Begin Fermentation
In a large bowl, combine the 3.5 cups All-Purpose Flour, 0.5 tsp Instant-Release Yeast, 0.5 tsp Granulated Sugar, and 1.5 tsp Salt. Mix gently with a wooden spoon until just combined, making sure the yeast and sugar are fully incorporated into the flour.
Next, add the 0.5 cup Extra-Virgin Olive Oil and 1.5 cups Warm Water (about 105-110°F). Using your hands or a dough whisk, mix until a shaggy dough forms. The dough will be sticky—this is normal. Knead for 5-7 minutes by hand or 3-4 minutes with a stand mixer until smooth and elastic. The dough should pull away from the sides of the bowl cleanly.
Transfer the dough to a lightly oiled bowl, cover with plastic wrap or a damp towel, and let it rest at room temperature for 1 hour. After this initial rest, refrigerate the dough for 24 hours. This slow fermentation develops complex flavors and improves texture. The dough will rise slightly but won’t double—this is expected with cold fermentation.
Prepare the Tomato Sauce and Toppings
While the dough ferments, prepare the tomato sauce. In a small saucepan, combine the 1.5 cups San Marzano Tomato Sauce with the 4 cloves Garlic Cloves (minced), 1 tsp Dried Oregano, and 0.5 tsp Ground Black Pepper. Simmer over medium-low heat for 10-12 minutes until the sauce thickens slightly and the flavors meld. Taste and adjust seasoning if needed.
Shred the 1.5 cups Fresh Mozzarella Cheese using your hands or a cheese grater. For the fresh basil, stack the 0.25 cup Fresh Basil Leaves, roll them tightly, and slice into thin ribbons. Set both aside until ready to assemble the pizza.
Shape and Assemble the Pizza
After the 24-hour fermentation, remove the dough from the refrigerator. It should be cold and slightly puffy. Turn it onto a lightly floured surface and gently press it down with your fingers, rotating the dough as you go. Avoid overworking it—just stretch it into a 12-inch round (or your preferred size). If the dough resists, let it rest for 10 minutes and try again.
Preheat your oven to its highest setting, ideally 500°F or higher (a pizza stone or steel helps). Dust a pizza peel with the 0.25 cup Cornmeal and transfer the shaped dough onto it. Spread a thin layer of the prepared tomato sauce over the dough, leaving a ½-inch border for the crust. Sprinkle the shredded mozzarella evenly over the sauce, then top with the sliced basil.
Bake to Perfection
Carefully transfer the pizza to the preheated oven or pizza stone. Bake for 12-15 minutes until the crust is golden brown and crispy at the edges, and the cheese is bubbly and lightly browned. The crust should sound hollow when tapped on the bottom.
Remove the pizza from the oven and let it rest for 2-3 minutes before slicing. The crust should be chewy and flavorful, with a slightly charred edge from the high heat. Serve immediately while the cheese is still melty and the basil is fresh. Enjoy your slow-fermented masterpiece!
Pro Tips For Making 24 Hour Pizza
- Mix the Dough Cold: I learned this the hard way—using warm hands or water makes the yeast wake up too fast. Keep everything (flour, water, oil) around 70°F or cooler, and mix by hand until just combined. The dough will feel sticky but not wet; overworking it now ruins the texture later.
- Skip the Sugar Shortcut: That 1 teaspoon of sugar isn’t just for flavor—it’s the yeast’s wake-up call. If you’re using honey or maple syrup instead, use half the amount. Too much sweetness throws off the rise, and you’ll end up with a dough that’s more gummy than airy.
- Oil the Bowl Properly: Coat the mixing bowl with extra-virgin olive oil—not just a drizzle, but enough to slick the sides. This prevents the dough from sticking when it doubles in size, and trust me, scraping it off later is a nightmare. Use about 1 tablespoon total.
- Let It Rise Twice: The 24-hour cold rise is non-negotiable, but don’t skip the first room-temp rise (1–2 hours). This builds structure before the long ferment. If your kitchen’s drafty, cover the bowl loosely—yeast needs air but hates cold drafts.
Essential equipment for perfect results
Must-Have Tools
Start with a pizza peel—I love the Ooni Stone Pizza Peel for its durability and heat resistance. It helps transfer your pizza safely from counter to oven without tearing.
A pizza stone or steel is essential too; I use a Lodge Pre-Seasoned Pizza Stone because it retains heat beautifully and creates that perfect crispy crust. 🔥
Oven Essentials
If your oven doesn’t go above 500°F, invest in a pizza-specific oven like the Ooni Koda. It hits 900°F and gives you that authentic wood-fired crust. For home ovens, a thermometer (like the Thermoworks Smoke) ensures accurate temperature control—critical for even baking.
A baking sheet with edges works in a pinch, but a stone or steel is ideal.
Dough Prep Gear
Use a large mixing bowl (at least 5-quart capacity) for the dough—glass or stainless steel works best. A dough scraper helps with sticky dough, and I keep a lightweight rolling pin handy for shaping (though stretching by hand is best).
For measuring, a digital kitchen scale ensures precision—King Arthur’s 11% protein flour works perfectly with this method.
Topping Tools
A sharp pizza cutter (like the Victorinox 8-inch) makes clean slices, while a microplane is perfect for fresh garlic and cheese. For sauce, a small saucepan with a wooden spoon lets you simmer flavors gently.
A fine-mesh strainer helps remove basil stems if you’re not slicing them into ribbons. 🌿
Budget-Friendly Swaps
Skip the pizza stone? A cast-iron skillet works in a pinch—just preheat it in the oven. No pizza peel? Use a large baking sheet with parchment paper. A wooden spoon and measuring cups replace fancy tools, and a sharp knife trims dough edges.
The key is patience—the 24-hour process makes up for any tool gaps!
Nutrition facts
Frequently asked questions
Why does the dough need 24 hours to ferment?
The extended fermentation creates a more flavorful, chewy crust with a perfect open crumb. The slow process allows enzymes to break down gluten and starches, developing deeper flavors and improving texture. This is what gives artisanal pizzas their signature taste and structure—patience pays off in every bite!
Can I use this dough for other recipes besides pizza?
This high-hydration dough works perfectly for focaccia, calzones, or even flatbreads. Just adjust the shaping method—fold for calzones or press into a loaf pan for focaccia. The long fermentation makes the dough more versatile and easier to handle than quick doughs.
What if my dough doesn’t rise after 24 hours?
Don’t worry—this is normal for cold fermentation! The dough should still be slightly puffy and jiggly. If it’s completely flat, check your yeast (it may have expired) or try adding 1 extra teaspoon of sugar to the dough. Cold environments slow fermentation, but the dough will still develop great flavor even without dramatic rising.
Can I make this pizza ahead of time?
Yes! Assemble the pizza (without baking) and refrigerate it for up to 12 hours. When ready to bake, let it sit at room temperature for 30 minutes before baking. This works best with simple toppings like tomato sauce and cheese—avoid delicate toppings like fresh herbs that might wilt.
How do I know when the pizza is fully baked?
Look for a golden brown crust with crispy edges and a slightly charred bottom. The cheese should be bubbly and just starting to brown. Tap the crust—it should sound hollow. If the center seems undercooked, return it to the oven for 1-2 minutes until fully set.

- Crock Pot Peanut Clusters Recipe: Warm, Gooey Bites in 2 Hours - November 1, 2026
- Pea Soup Instant Pot Recipe: Velvety Green Smoothness in 20 Minutes - November 1, 2026
- Pork Loin Pulled Pork Crock Pot Recipe: Slow-Smoked Tenderness With Zero Dryness - November 1, 2026