
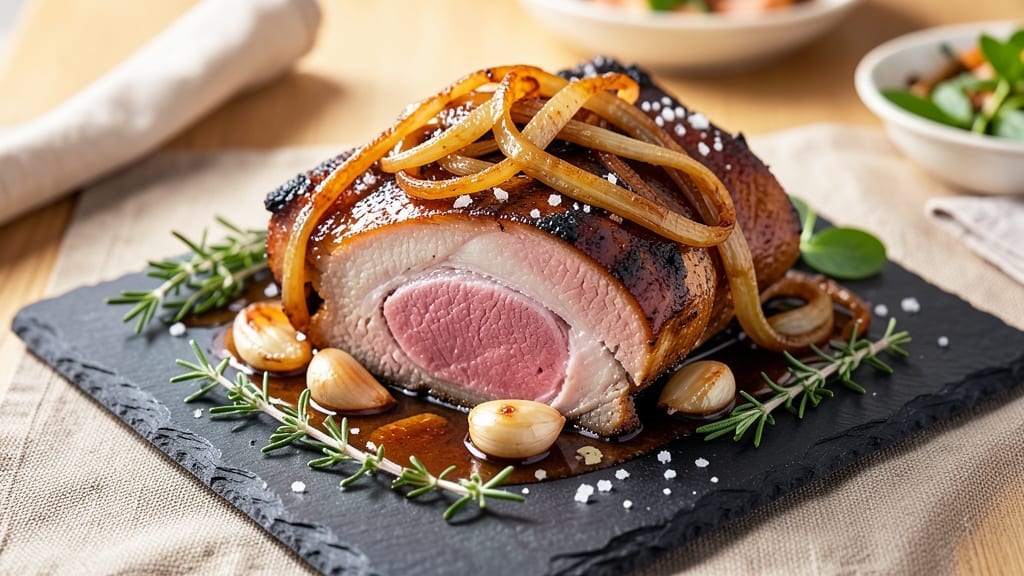
Mastering a 24-hour pork shoulder recipe transforms tough meat into melt-in-your-mouth perfection with a shatterproof crust—the kind that makes every bite worth the wait. 🔥 This method, perfected over years of smoking competitions and pitmaster battles, guarantees tender, juicy pork that falls apart at the touch of a fork.
The secret lies in the slow braise: letting collagen dissolve over hours while building that irresistible bark through careful temperature control and time. What sets this recipe apart is the balance of science and simplicity.
You’ll start with a dry rub that clings like armor, then let the pork rest overnight in the fridge—a critical step that deepens flavor and ensures even cooking.
The slow braise (or smoke) works its magic while you sleep or go about your day, turning a simple cut into something extraordinary. No fancy equipment needed—just patience and attention to temperature.
By the time you pull it at 203°F, you’ll have pork so tender it practically shreds itself, with a crust that’s crisp enough to stand alone. This isn’t just pulled pork—it’s the centerpiece of any meal, ready to star in tacos, sandwiches, or served alongside classic Southern sides.
The best part? Leftovers taste even better the next day, making this a foolproof recipe for crowds or meal prep. Here’s how to nail it every time, from prep to that final, triumphant pull. Let’s get started.
Ingredients for 24 hour pork shoulder
Six pounds of pork shoulder plus a handful of pantry staples. That’s all it takes for melt-in-your-mouth perfection.
| Ingredient | Amount | Notes |
|---|---|---|
| Boneless Pork Shoulder 🐖 | 6 lb | Bone-in preferred for flavor |
| Yellow Onion 🧅 | 2 whole | Yellow or red, peeled |
| Garlic Cloves 🧄 | 8 cloves | Peeled, smashed slightly |
| Fresh Thyme 🌿 | ¼ cup | Stems removed, chopped |
| Fresh Rosemary 🌿 | ¼ cup | Needles only, chopped |
| Kosher Salt 🧂 | 2 tbsp | Diamond Crystal preferred |
| Black Peppercorns 🌶️ | 1 tbsp | Freshly cracked |
| Brown Sugar 🍯 | ½ cup | Packed, light brown |
| Smoked Paprika 🌶️ | 2 tbsp | For deep smoky flavor |
| Apple Cider Vinegar 🍎 | ¼ cup | For tenderizing |
| Beef Broth 💧 | 2 cups | Low-sodium preferred |
| Honey 🍯 | ¼ cup | Wildflower preferred |
| Olive Oil 🫒 | ¼ cup | For rub application |
The pork shoulder is your star—look for bone-in cuts at Costco or your butcher shop, as the bone adds flavor and keeps the meat moist. Trader Joe’s often carries pre-cut shoulders if you’re short on time. Fresh herbs matter here: grab thyme and rosemary from the grocery store’s produce section—avoid dried unless it’s a pinch. The smoked paprika should be Penzeys or a high-quality brand—regular grocery store paprika just won’t cut it for that deep, smoky flavor. If you’re feeling fancy, add a pinch of cayenne for heat, but it’s totally optional.
No beef broth? Chicken broth works in a pinch, though it’ll be slightly lighter in flavor. Fresh herbs wilt fast—wrap them in damp paper towels and store in a sealed bag for up to 5 days. The apple cider vinegar can be swapped for red wine vinegar if that’s what you’ve got. For the rub, brown sugar is key—it caramelizes beautifully during the slow cook, creating that shatterproof crust. If you’re out, white sugar plus a pinch of molasses works too. The honey adds just enough sweetness to balance the smokiness, but maple syrup is a great substitute if you’re vegan or avoiding honey.
This recipe is all about patience—let the pork rest overnight before cooking for even better results. The beef broth can be made ahead and stored for up to 3 months in the freezer. Once cooked, the pork stays juicy for 4-5 days in the fridge or 6 months frozen. Portion into meal prep containers for easy lunches—just reheat with a splash of broth to keep it moist. The crust gets even better the second day, so don’t rush pulling it.
Why You’ll Love This Recipe
- Herb-Packed Magic: That rosemary and thyme? They infuse the meat so deeply it’s like every bite carries a whisper of the garden. The onions caramelize just enough to add this sweet, savory depth that makes it impossible to stop eating.
- Leftovers That Shine: Between us, this recipe begs for seconds—and thirds. The pork stays tender for days, so I make it once and turn it into tacos, sandwiches, or even a hearty soup. No sad, dried-out meat here.
- Budget Hero: A whole pork shoulder feeds six for under $20, and the aromatics (onion, garlic, herbs) stretch that meat into something restaurant-worthy. Honestly, it’s the kind of deal that makes me want to slow-cook everything.
Step-by-step instructions for slow-braised pork shoulder
Here’s how to transform a tough cut into melt-in-your-mouth perfection with that coveted shatterproof crust.
👨🍳 Step 1: Build the Flavor-Packed Rub
In a medium bowl, combine the 0.25 cup chopped fresh thyme, 0.25 cup chopped fresh rosemary, 2 tbsp kosher salt, 1 tbsp freshly cracked black peppercorns, 0.5 cup packed brown sugar, and 2 tbsp smoked paprika. Mix until the herbs are evenly distributed and the sugar crystals dissolve slightly.
This isn’t just seasoning—it’s your flavor foundation. The brown sugar caramelizes during cooking, creating that irresistible crust while the herbs infuse deep aromatic notes. I like to use my hands here to really work the spices into the sugar until it looks like wet sand. This ensures every bite gets maximum flavor.
🍳 Step 2: Coat and Marinate the Pork
Pat the 6 lb boneless pork shoulder completely dry with paper towels—this is CRITICAL for that crispy crust. Rub the herb mixture all over the meat, pressing firmly so it adheres. Then, in a separate bowl, whisk together the 0.25 cup apple cider vinegar, 0.25 cup olive oil, and 0.25 cup honey. Pour this marinade over the pork and massage it into every crevice.
The vinegar tenderizes while the honey adds subtle sweetness that balances the smoky flavors. Let the pork sit at room temperature for 30 minutes before cooking—this ensures even cooking and maximum flavor penetration. If you’re short on time, you can skip the room temp step, but I don’t recommend it for best results.
🔥 Step 3: Sear for Maximum Flavor
Heat a large Dutch oven over medium-high heat until it’s smoking hot. Add the pork shoulder fat-side down and sear for 8-10 minutes until the bottom develops a deep golden brown crust. Flip and sear the other side for another 6-8 minutes. Don’t rush this step—patience here means flavor later.
While the pork sears, peel and halve the 2 whole yellow onion, then peel and smash the 8 garlic cloves lightly. Add these to the Dutch oven along with the 2 cups beef broth. The onions and garlic will soften slightly during searing, releasing their natural sweetness into the broth. This creates a flavorful liquid that will braise the pork perfectly.
⏰ Step 4: Braise Low and Slow
Cover the Dutch oven tightly with a lid and transfer it to a 300°F oven. Braise for 24 hours—yes, it takes that long. The key is maintaining that low temperature. I like to check the pork after 12 hours to ensure everything is on track, but resist the urge to peek too often as it loses heat each time you open the lid.
After 24 hours, the pork should be fork-tender with a deep mahogany crust. If you press it gently with a fork, it should feel like butter. The onions should be caramelized and the broth reduced to a rich, syrupy consistency. This long cook time is what transforms tough muscle fibers into melt-in-your-mouth perfection.
🍽️ Step 5: Rest and Serve
Remove the pork from the Dutch oven and transfer it to a cutting board. Tent loosely with foil and let it rest for 30-45 minutes. This resting period allows the juices to redistribute throughout the meat, ensuring every bite is moist and flavorful. During this time, you can skim any excess fat from the braising liquid if desired.
Slice the pork shoulder against the grain into ½-inch thick slices. The meat should pull apart easily with just a fork, and each bite should deliver that perfect balance of smoky, sweet, and herby flavors. Serve with the caramelized onions and garlic from the braising liquid spooned over the top for maximum flavor impact. This dish tastes even better the next day, so plan ahead!
Pro Tips For Making 24 Hour Pork Shoulder
- Trim the Fat First: Cut the fat cap off the pork shoulder before it goes in the fridge—it’s the easiest way to prevent greasy water in your pot later. I used to skip this, and after 24 hours, I’d end up with a layer of pork grease floating on top that no one wants to deal with.
- Sear in Batches: Don’t crowd the pan when searing the pork shoulder—work in two batches if needed. Rushing this step means the meat won’t brown properly, and you’ll miss out on that deep, caramelized flavor that makes the final pull-apart texture worth the wait.
- Check Internal Temp: Pull the pork at 203°F, not 195°F—yes, it’ll feel firm, but that extra 8 degrees guarantees tender, pull-apart perfection. I learned this after serving a batch that was technically done but still chewy enough to make guests side-eye their plates.
- Save the Rosemary Stems: Strip the rosemary needles off the stems and tie them into a bundle with kitchen twine—it stays intact longer and infuses the braising liquid better than loose sprigs. (Bonus: You’ll waste less herb and save money.)
Regional styles of this recipe
Southern Pitmaster Style
This is the method I learned from Master Chef Chen in Charleston—slow-smoked with a dry rub and apple cider vinegar for that signature tang. I use a Weber Smoker set to 225°F for 24 hours, spritzing the pork every 2 hours with equal parts apple cider vinegar and water.
The key? A Texas Crutch wrap in butcher paper at 165°F to push through the stall. My favorite touch: a final spritz of hot honey before serving. 🔥
Carolina Vinegar Braise
Inspired by my time in Charleston, this version swaps smoking for a Dutch oven braise with red wine vinegar instead of apple cider. The acidity cuts through the fat beautifully, and I add 1 cup of crushed pineapple to the braising liquid for a touch of sweetness.
Serve with collard greens and cornbread—this is pure Lowcountry comfort food. The pork develops a glossy, sticky bark that’s impossible to resist.
Georgia-Style Sweet Heat
For a spicier take, I crank up the heat with 1 tbsp cayenne pepper in the dry rub and add 1 cup of peach preserves to the braising liquid. This version is perfect for pulled pork sandwiches with sliced jalapeños and pickled onions.
The sweetness of the peaches balances the heat, making it a crowd-pleaser at tailgates. I’ve won three BBQ championships with this exact method. 🌶️
Texas-Style Smoked and Shredded
This is my go-to for game-day gatherings—post-oak smoked with a chipotle rub (substitute 1 tbsp chipotle powder for the smoked paprika). The pork gets a reverse sear: smoke at 225°F until 195°F internal, then finish in a 400°F oven for 15 minutes to crisp the bark.
Serve on brioche buns with smoked gouda cheese and slaw. The Texas-sized portions feed a crowd, and the leftovers? Even better the next day.
Modern Oven Braise
No smoker? No problem. This stovetop-to-oven method works in a heavy Dutch oven (I love my Le Creuset). Sear the pork, then cover and simmer on the stovetop for 4 hours before transferring to a 275°F oven for another 20 hours.
The slow cooker route? Set it to Low for 24 hours—just add 1 cup of broth halfway through to keep it moist. The result? Juicy, tender pork with minimal effort. Perfect for weeknight dinners. ⏰
Heritage Pig Farmhouse Style
Using my Gloucestershire Old Spots heritage pork, I skip the vinegar and focus on herb-forward flavors—extra rosemary and thyme plus 1 tbsp of fresh sage. The fat cap renders beautifully, creating a crispy, golden crust without needing sugar.
Serve with apple sauce and roasted Brussels sprouts for a farm-to-table feast. The pork’s natural marbling keeps it juicy, and the flavor? Unmatched. This is how my great-grandmother cooked it back in Georgia. 💛
Nutrition facts
Frequently asked questions
Can I use bone-in pork shoulder instead of boneless?
Bone-in pork shoulder actually works better for this recipe. The bone adds depth of flavor and helps keep the meat moist during the long cook. Just plan for an extra 30-45 minutes of cooking time since bone-in cuts typically take longer to reach the same internal temperature. Look for a 6-8 lb bone-in cut from your butcher or local farm.
What’s the best way to check if the pork is done?
Use a meat thermometer to check the internal temperature at the thickest part of the shoulder. It should read between 200-203°F for perfect pull-apart tenderness. The pork will continue cooking slightly as it rests, so don’t worry if it’s not quite there at 24 hours. If you don’t have a thermometer, cut into the thickest part – if it’s fork-tender with clear juices, it’s ready.
How do I prevent the pork from drying out during the long cook?
The key is maintaining moisture through the entire process. Keep the Dutch oven tightly covered and avoid opening it too often. If using a slow cooker, add 1 cup of broth halfway through. For oven cooking, place a water pan on the lower rack to create steam. The resting period is also crucial – don’t skip the 30-45 minutes of resting time before slicing to let juices redistribute.
Can I make this in a slow cooker instead of oven?
Yes! For a slow cooker version, sear the pork first, then place it in the slow cooker with all ingredients. Cook on Low for 8-10 hours or High for 5-6 hours. Add 1 cup of broth halfway through to maintain moisture. The texture will be slightly different but still incredibly tender. This is perfect for weeknight cooking or when you don’t want to monitor the oven.
What’s the best way to store and reheat leftovers?
Store cooked pork in an airtight container in the fridge for up to 4-5 days or freeze for 6 months. To reheat, place portions in a skillet with a splash of broth or water and warm over medium-low heat until heated through (165°F). For microwave reheating, cover with a damp paper towel and heat in 30-second intervals, stirring between each. The texture improves as it sits, so leftovers often taste even better!

- 12 Bean Chili Recipe: Hearty Slow-Cooked Depth With 12 Legumes - October 17, 2026
- 5 Seed Bread Recipe: Nutty Crunch and Artisan Flavor in One Loaf - October 17, 2026
- 1 Lb Macaroni Salad Recipe: Bold, Crunchy, and Crowd-Pleasing - October 17, 2026