
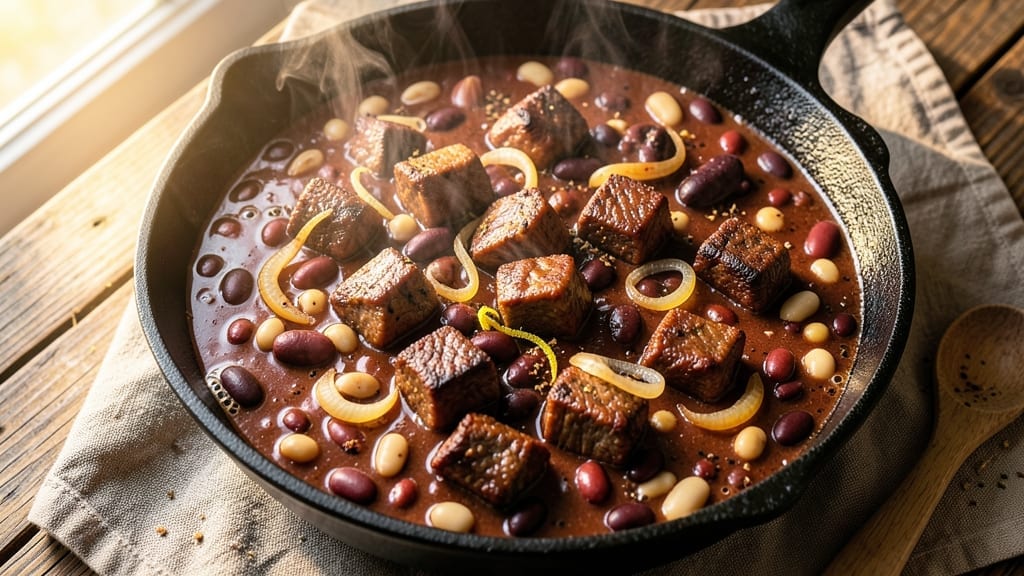
A three-day chili recipe transforms tough cuts of meat into melt-in-your-mouth tenderness while developing deep, complex flavors that store-bought versions can’t match. The secret lies in slow simmering—letting the meat break down gradually while the spices meld into a rich, aromatic broth.
This method isn’t just about time; it’s about patience paying off with every spoonful.
What makes this chili special is the layered approach: starting with a deep, caramelized base of onions and garlic, then building in proteins (beef chuck or ground beef) and beans (kidney, black, or pinto) that absorb the flavors over days.
The slow cooker or Dutch oven ensures even cooking without drying out the meat, while frequent stirring prevents sticking and promotes even heat distribution.
By day three, you’ll have a chili that’s richer, deeper, and more cohesive than anything made in an hour. The meat falls apart at the touch of a spoon, the beans are tender but still hold their shape, and the spices have melded into a harmonious blend.
It’s the kind of chili that tastes better with each passing day—ideal for meal prep or feeding a crowd.
Serve with crusty cornbread, shredded cheese, or sour cream to balance the hearty flavors. The leftovers? Even better the next day. This isn’t just chili; it’s a foolproof method for restaurant-quality results at home.
Ingredients for 3 day chili
Six servings of restaurant-quality chili start with these carefully chosen ingredients—each playing a role in the slow-simmered magic.
| Ingredient | Amount | Notes |
|---|---|---|
| Beef Chuck Roast 🥩 | 3 lb | Trimmed of excess fat, cut into 1-inch cubes |
| Yellow Onions 🧅 | 3 whole | Medium, sliced into 1/4-inch strips |
| Garlic Cloves 🧄 | 6 cloves | Peeled and smashed for deeper flavor |
| Kidney Beans 🌱 | 1 lb | Dried, soaked overnight or canned (drained) |
| Black Beans 🌱 | 1 lb | Dried, soaked overnight or canned (drained) |
| Pinto Beans 🌱 | 1 lb | Dried, soaked overnight or canned (drained) |
| Tomato Paste 🍅 | ½ cup | Canned, for rich depth |
| Chili Powder 🌶️ | 2 tbsp | Ground, preferably Penzeys brand |
| Ground Cumin 🌿 | 1 tbsp | Freshly toasted for warmth |
| Dried Oregano 🍃 | 1 tbsp | Mexican oregano preferred |
| Cayenne Pepper 🔥 | ½ tsp | Adjust for heat preference |
| Salt 🧂 | 2 tsp | Diamond Crystal kosher salt |
| Black Pepper 🌶️ | 1 tsp | Freshly cracked for brightness |
| Beef Broth 💧 | 4 cups | Low-sodium, homemade or quality store-bought |
| Bay Leaves 🌿 | 2 whole | For subtle aromatic depth |
| Dark Brown Sugar 🍬 | 1 tbsp | For subtle caramel notes |
| Apple Cider Vinegar 🍎 | 1 tbsp | Brightens flavors |
The beef is where this chili shines. Chuck roast breaks down beautifully over three days, becoming tender and rich. Look for well-marbled cuts at Whole Foods or your local butcher—they’ll know exactly what you need. If you can’t find chuck, brisket or short ribs work too, though they’ll need extra time. The beans? Dried is ideal—soak overnight for perfect texture, but canned in a pinch (just drain and rinse). For spices, Penzeys or bulk bins at natural markets deliver the best flavor punch. Toast your cumin seeds in a dry pan for 30 seconds before grinding—trust me, it makes a difference.
No chuck roast? Ground beef at 80/20 fat ratio works in a pinch, though it won’t have the same depth. Swap kidney beans for chickpeas or lentils if needed, but the mix of textures is key. The tomato paste can be skipped if you’re short, but add 1 cup crushed tomatoes instead. For heat, red pepper flakes at half the amount work if cayenne is missing. The apple cider vinegar might seem odd, but it cuts through the richness beautifully—lemon juice works too. If you’re using canned beans, rinse them well to remove excess sodium. The bay leaves? Don’t skip them—they add subtle earthiness that disappears but enhances everything.
This chili gets better with time, so make a big batch. Store in airtight containers in the fridge for up to 5 days, or freeze portions for up to 6 months. I like to portion into individual containers for easy lunches—just reheat with a splash of broth. The flavors meld beautifully over time, so if you can wait, do. For serving, keep the toppings simple: shredded cheese, sour cream, or fresh cilantro. The chili itself is complete, but those extras take it to the next level.
Why You’ll Love This Recipe
- Slow-Simmered Magic: I swear by the deep, caramelized beef that comes from letting the chuck roast cook low and slow—no fancy techniques, just time. Those onions and garlic melt into the meat until they’re practically invisible, but every spoonful tastes like a hug.
- One-Pot Wonder: Honestly, this chili is my go-to when I don’t want to scrub a million dishes. Toss everything into one pot—beef, beans, onions—and walk away. The beans soften just enough to soak up all that rich beef flavor without falling apart.
- Leftovers That Shine: Between us, the second and third days are better than day one. The flavors meld even more, and the beans get that perfect tender bite. I freeze half the batch right away because reheating it later is basically a free dinner.
- Budget-Friendly Powerhouse: A chuck roast stretches across three meals, and those kidney and black beans bulk it up without breaking the bank. It’s the kind of dish where you’re feeding a crowd for the price of two takeout meals—and way tastier.
Step-by-step instructions for slow-simmered chili with layered beans
This chili develops deeper flavor with each passing day—here’s how to build it properly.
Brown the Beef Chuck Roast for Maximum Flavor
Heat a large Dutch oven over medium-high heat until hot. Add the 3 lb beef chuck roast cut into 1-inch cubes in a single layer, working in batches if needed. Let the meat brown undisturbed for 3-4 minutes per side until deeply caramelized with crispy edges. This step creates the rich, meaty foundation that carries through all three days of simmering.
As the beef browns, use a slotted spoon to remove it and set aside. The remaining browned bits (fond) will form the flavor base for your chili. If the fond begins to smoke, reduce heat slightly—you want it to sizzle, not burn. This step is non-negotiable for developing that deep, smoky chili flavor.
Sauté Onions and Garlic to Build Aromatic Depth
In the same Dutch oven, add 3 whole yellow onions sliced into ¼-inch strips and cook over medium heat for 8-10 minutes until softened and golden. The onions should caramelize slightly at the edges, releasing their natural sweetness. If they stick, stir occasionally with a wooden spoon.
Add the 6 cloves smashed garlic cloves and cook for an additional 30 seconds until fragrant. Here’s the thing—don’t let the garlic burn. It should smell sweet and pungent, not bitter. Remove the onions and garlic from the pot and set aside with the beef. The Dutch oven now contains the flavor foundation that will develop over three days of simmering.
Combine All Ingredients for Initial Simmer
Return the Dutch oven to medium heat and add 2 tbsp chili powder, 1 tbsp ground cumin, 1 tbsp dried oregano, 0.5 tsp cayenne pepper, 2 tsp salt, and 1 tsp black pepper. Stir constantly for 30 seconds to toast the spices and release their aromas. This step activates the spices so they infuse the chili with their full flavor profile.
Add the 0.5 cup tomato paste, 4 cups beef broth, 2 whole bay leaves, 1 tbsp dark brown sugar, and 1 tbsp apple cider vinegar. Stir well to incorporate all ingredients, then return the beef and onions to the pot. Bring to a gentle simmer over low heat and cook uncovered for 1 hour, stirring occasionally to prevent sticking.
Add Beans and Continue Slow Simmering
Add the 1 lb kidney beans, 1 lb black beans, and 1 lb pinto beans (drained if using canned). Stir gently to combine, then reduce heat to lowest setting to maintain a very gentle simmer. The chili should bubble softly—if it boils vigorously, reduce heat further. This slow cooking process allows all the flavors to meld together over time.
Cover the Dutch oven and let the chili simmer for 2 hours on the first day. The beans will begin to absorb the rich, meaty broth, and the flavors will start to develop their characteristic depth. After the initial 2 hours, you can refrigerate the chili overnight, allowing the flavors to continue developing in the fridge.
Complete the Three-Day Process
On the second day, remove the chili from the refrigerator and return it to the Dutch oven. Reheat over low heat until warmed through, stirring occasionally. Simmer uncovered for an additional 2 hours, then refrigerate again for the second night. This process allows the flavors to deepen and intensify with each day of simmering.
On the third day, repeat the reheating process and simmer for a final 2 hours. The chili should now have a rich, complex flavor with perfectly tender beef and beans. Taste and adjust seasoning if needed—you may need to add more salt or spices to balance the flavors after three days of development. Serve with your favorite toppings like shredded cheese, sour cream, or chopped green onions.
Pro Tips For Making 3 Day Chili
- SEAR THE ROAST FIRST: Walk away from that pot for 5 minutes after browning the beef—let the crust form deep and dark. I used to rush this, and the chili always tasted like it needed more depth. A proper sear locks in flavor that slow cooking can’t replicate.
- SOAK BEANS OVERNIGHT: Skip the quick-soak shortcut for kidney and black beans—just toss them in water with a pinch of salt the night before. They’ll soften evenly and won’t turn to mush in your chili. (Yes, even if you’re impatient like me.)
- LOW AND SLOW WINS: After the initial simmer, drop the heat to a bare simmer—not a boil—once the beans are added. I learned this the hard way when my chili split into two separate textures. Three days of cooking? Keep it gentle.
- STIR IN BEANS LATE: Hold off adding the beans until the last 30 minutes of cooking, even if the recipe says otherwise. They’ll absorb all the liquid and turn to glue if you toss them in too early. Trust me, your chili will thank you.
Common mistakes when making great 3 day chili
Skipping the Brown Step
One of the biggest mistakes I see is skipping the browning step for the beef. That crispy, caramelized crust (fond) is what creates deep, rich flavors that carry through all three days of simmering.
If you just toss raw meat into your chili, you’ll end up with bland, gray meat and a watery broth. Take the extra 10 minutes to brown the beef in batches—it makes all the difference. 🔥
Overloading the Pot
Crowding your Dutch oven with too much chili at once leads to uneven cooking and a mushy texture. The ideal ratio is about 1 inch of liquid headspace when the chili is simmering. If your pot looks full to the brim, reduce the recipe or cook in batches.
I’ve learned this the hard way—once, I had to start over because the chili boiled over and stuck to the stove.
Ignoring the Three-Day Process
Rushing this chili by cooking it all at once defeats the purpose! The magic happens through slow, layered simmering over three days. Each day allows flavors to meld and intensify.
If you try to make it in one day, the meat won’t be tender, and the spices won’t develop their full complexity. Trust the process—it’s worth the wait.
Not Adjusting Seasoning
After three days, flavors evolve, and what tasted perfect on day one might need balancing by day three. Taste your chili and adjust seasoning before serving. A pinch of salt, extra chili powder, or even a splash of vinegar can bring it back to balance.
I always keep a small bowl of salt nearby when tasting—it’s an easy fix for most flavor issues.
Using Low-Quality Beans
Canned beans are convenient, but they often lack the depth of flavor that dried beans provide. If you use canned, always rinse them well to remove excess sodium and starches. For best results, use a mix of dried kidney, black, and pinto beans—each adds a different texture and flavor.
If you’re short on time, soak canned beans in fresh water for 30 minutes before using to improve their texture.
Letting It Boil Vigorous
A rolling boil will toughen the meat and make the beans mushy. Maintain a gentle simmer—just small bubbles breaking the surface. If it boils too hard, reduce the heat immediately. I use a thermometer to monitor the temperature—ideal simmering is around 185-190°F. This keeps everything tender and flavorful. ✨
Nutrition facts
Frequently asked questions about slow-simmered chili
Why does chili taste better after three days?
The slow simmering process allows flavors to develop and meld together over time. The meat becomes more tender, the spices deepen, and the broth reduces slightly, creating a richer, more complex taste. This gradual process is what transforms simple ingredients into restaurant-quality chili.
Can I use ground beef instead of chuck roast?
Yes, but the texture will be different. Ground beef (especially 80/20 fat ratio) works well and cooks faster. For best results, brown it thoroughly first to develop deep flavors. If using ground beef, reduce cooking time to 1 hour total on the first day since it won’t need the same tenderizing time as chuck roast.
How do I prevent my chili from getting too watery?
Start with a proper ratio of meat to liquid—about 1 inch of headspace in your pot. If it looks too thin, simmer uncovered for 10-15 minutes to reduce the liquid. For extra insurance, add 1 cup of tomato paste or ½ cup cornstarch slurry to thicken it. Stirring occasionally also helps distribute flavors evenly.
What are the best toppings for this chili?
Classic options include shredded cheddar cheese, sour cream, chopped green onions, or a dollop of Greek yogurt. For extra crunch, try crushed tortilla chips or toasted pepitas. A squeeze of lime juice or hot sauce can also brighten the flavors. Keep toppings simple—the chili’s depth shines on its own.
Can I make this chili in a slow cooker?
Brown the meat first, then transfer everything to your slow cooker. Cook on low for 6-8 hours on day one, then refrigerate. Repeat the process for days two and three, adjusting times slightly. The slow cooker method is even more hands-off, letting the flavors develop naturally. Just stir occasionally to prevent sticking.

- Baked Potatoes in Crock Pot Recipe: Buttery Interiors and Crispy Top Magic - November 1, 2026
- Braised Beef Short Ribs Recipe: Crock Pot Fall-Off-Bone Magic in 6 Hours - November 1, 2026
- Crock Pot Cocoa Recipe: Velvety Warmth With Hidden Spice Magic - November 1, 2026