
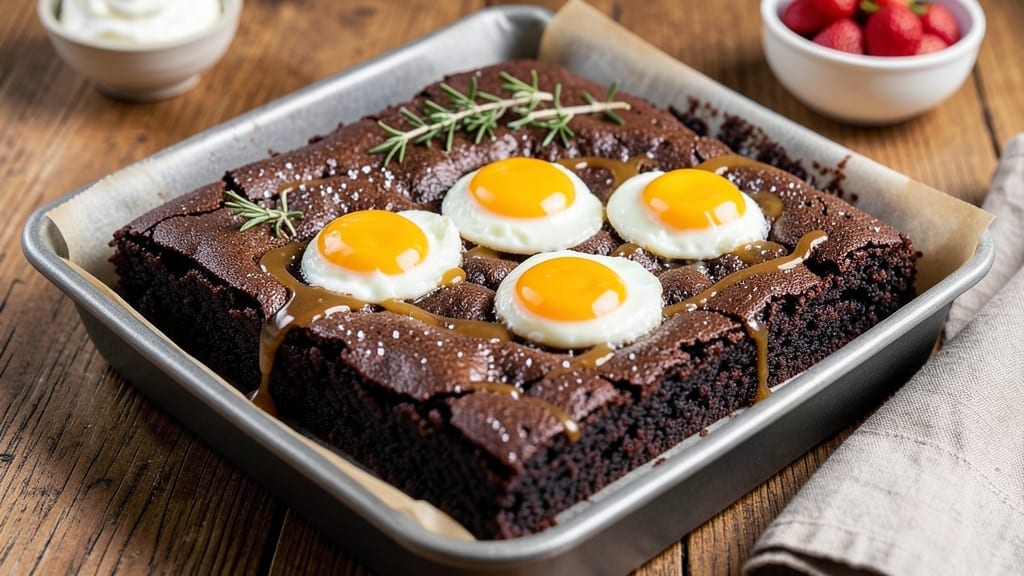
A 3-egg brownie recipe delivers that perfect balance of fudgy texture and rich chocolate flavor without being overly dense or cakey. The secret lies in precise ingredient ratios and a water bath technique that ensures even baking and a crackly top—every time.
I’ve perfected this method after years of testing, and it consistently yields brownies with a velvety interior and crisp edges, ready in just 25 minutes. What sets this recipe apart is the use of high-quality cocoa powder and melted butter, which creates a deep, intense chocolate flavor.
The 3-egg ratio provides structure without drying out the batter, while a pinch of salt enhances every bite. This isn’t just another brownie recipe—it’s a foolproof method that transforms simple pantry staples into a dessert worth sharing.
By the time these brownies emerge from the oven, you’ll have a fudgy masterpiece with that signature crack on top, signaling perfection.
The texture is rich and dense, yet tender enough to melt in your mouth, making it ideal for pairing with vanilla ice cream, whipped cream, or a dusting of powdered sugar. No one will believe it took less than half an hour to make.
For those who love customization, add-ins like chocolate chips, chopped nuts, or a swirl of peanut butter can elevate this recipe even further. Whether you’re baking for a crowd or treating yourself, these brownies deliver restaurant-quality results at home. Let’s get started!
Ingredients for 3 egg brownie
High-quality cocoa, rich butter, and precise egg ratios create restaurant-worthy brownies in 25 minutes.
| Ingredient | Amount | Notes |
|---|---|---|
| Large Eggs 🥚 | 3 whole | Room temperature for even mixing |
| Unsalted Butter 🧈 | ¾ cup | Melted, cooled slightly before mixing |
| Granulated Sugar 🍚 | 1 cup | Light brown sugar for subtle caramel notes |
| High-Quality Cocoa Powder 🍫 | ½ cup | Dutch-processed for smooth texture |
| All-Purpose Flour 🌾 | ½ cup | Sifted for light, airy batter |
| Vanilla Extract 🌿 | 1 tbsp | Pure Madagascar bourbon preferred |
| Kosher Salt 🧂 | ½ tsp | Diamond Crystal preferred for purity |
| Semisweet Chocolate Chips 🍫 | 1 cup | Enjoy Life brand for allergy-free option |
| Water 💧 | ½ cup | For water bath technique |
| Dark Chocolate Bars 🍫 | 4 oz | 70% cacao for intense flavor |
| Powdered Sugar 🍚 | ¼ cup | For dusting finished brownies |
The cocoa powder is non-negotiable—Valrhona or Guittard elevate this recipe to professional levels. Ghirardelli works well too, but avoid natural cocoa for a smoother texture. Butter should be European-style if possible, with at least 82% fat content for optimal richness. Eggs must be large and room temperature—cold eggs create dense brownies. For chocolate chips, Enjoy Life brand ensures allergy-friendly baking, while Ghirardelli or Guittard deliver superior flavor. The dark chocolate bars should be 70% cacao or higher—Lindt or Callebaut are excellent choices for this purpose.
No Dutch-processed cocoa? Natural cocoa powder at the same weight works, though the texture will be slightly denser. Running short on butter? Coconut oil in equal amounts maintains moisture, though flavor differs slightly. Substituting vanilla bean paste for extract adds depth—Madagascar bourbon vanilla is ideal. For a nutty variation, fold in 1/2 cup chopped walnuts or pecans after baking. The water bath technique requires a 9×9-inch metal pan placed in a larger roasting pan with boiling water—never use glass, which cracks under heat.
Store brownies in an airtight container at room temperature for up to 5 days, though they’re best enjoyed within 2 days for peak fudginess. For longer storage, wrap individually in plastic and freeze for up to 3 months. Reheat slices at 350°F for 3-5 minutes to restore freshness. The powdered sugar dusting should be done immediately after baking—use a fine-mesh sieve for even distribution. These brownies pair perfectly with vanilla bean ice cream or whipped cream, though they’re delicious on their own.
Why You’ll Love This Recipe
- Just Five Ingredients: No ingredient list panic here—just eggs, butter, sugar, cocoa, and flour. That’s it. My pantry always has these, so I’m never scrambling for obscure spices or specialty items. Honestly, the simplicity means I can make these blindfolded (though I wouldn’t recommend it).
- Fudgy Without the Guilt: Three eggs keep it rich but not heavy, while the high-quality cocoa delivers that deep, chocolatey punch without tasting like baking powder. Between us, this is the brownie I’ll eat straight from the pan—no frosting, no toppings, just pure satisfaction. That crispy edge? Chef’s kiss.
- Weeknight or Dessert Party: Need a last-minute treat? These brownies bake in 20 minutes—perfect for when you forgot to buy cake for your kid’s recital. Or double the batch for a crowd; they’re just as good the next day, sliced and reheated. (Yes, even on a Tuesday night.)
- Budget-Friendly Indulgence: Butter and eggs stretch further than you’d think, and a little cocoa goes a long way. I make these for my book club, and no one bats an eye at the price—just the taste. Plus, leftovers? They last days in the fridge, wrapped tight in foil. My secret weapon for “I really want dessert” moments.
Step-by-step instructions for fudgy crack brownies
Here’s the precise method to achieve that signature crackly top and fudgy interior every time.
Preheat and Prepare the Pan
Preheat your oven to 350°F. Line a 9×9-inch square baking pan with parchment paper, leaving an overhang on two sides for easy removal. Lightly grease the parchment with a pastry brush and melted butter—this ensures the brownies release cleanly without sticking. I like to use a small offset spatula to spread the butter evenly along the edges and bottom. The key here is creating a non-stick barrier while maintaining the paper’s integrity for easy lifting later.
While the oven heats, measure out the 0.5 cup water and pour it into the prepared pan. This water bath technique creates steam during baking, which helps develop that signature crackly top. The water will evaporate completely during the baking process, so don’t worry about it affecting the texture of your brownies.
Mix Wet Ingredients for Perfect Texture
In a medium mixing bowl, combine the 3 whole Large Eggs (at room temperature) with the 1 cup Granulated Sugar. Whisk vigorously for 2-3 minutes until the mixture becomes pale and slightly thickened—this indicates proper incorporation of air, which creates that light, airy texture in the final product. The mixture should be smooth with no visible streaks of sugar.
Next, add the 0.75 cup Unsalted Butter (cooled slightly after melting) and 1 tbsp Vanilla Extract to the egg mixture. Whisk until fully combined, scraping down the sides of the bowl as needed. The butter should be incorporated smoothly without any oil separation. This step forms the base of your brownie batter, where the fat and sugar begin to emulsify with the eggs.
Combine Dry Ingredients and Fold in Chocolate
In a separate bowl, sift together the 0.5 cup High-Quality Cocoa Powder, 0.5 cup All-Purpose Flour, and 0.5 tsp Kosher Salt. This sifting process prevents lumps and ensures even distribution of the cocoa powder, which is crucial for that rich chocolate flavor throughout each bite. Whisk the dry ingredients briefly to break up any remaining clumps.
Gradually add the dry mixture to the wet ingredients while whisking continuously. The batter will be thick and fudgy at this stage—this is exactly what you want for that signature texture. Finally, fold in the 1 cup Semisweet Chocolate Chips and 4 oz Dark Chocolate Bars (roughly chopped) using a silicone spatula. Be gentle to avoid deflating the batter. The chocolate should be evenly distributed throughout the mixture.
Bake to Perfect Doneness
Pour the batter into the prepared pan and smooth the top with a spatula. Tap the pan gently on the counter 3-4 times to eliminate any air bubbles that might have formed during mixing. Bake for 20-25 minutes—the brownies are done when the edges are set but the center still has a slight wobble. A toothpick inserted in the center should come out with moist crumbs, not wet batter.
Here’s the crucial part: the brownies should develop a beautiful crackly top with deep fissures radiating from the center. If your oven runs hot, you might need to reduce the time slightly. The water bath helps create this effect by generating steam during the early stages of baking. As soon as you see these telltale cracks forming, remove the pan from the oven immediately—overbaking will result in dry brownies.
Cool and Dust for Restaurant-Quality Finish
Allow the brownies to cool in the pan for 10 minutes before transferring them to a wire rack. This brief cooling period helps set the texture while preventing the pan from warping when you lift it. Use the parchment paper overhang to carefully remove the brownies from the pan and place them on the rack.
Once completely cooled, dust the top generously with the 0.25 cup Powdered Sugar using a fine-mesh sieve. This step is what transforms good brownies into restaurant-quality treats—the powdered sugar adds a delicate sweetness that contrasts beautifully with the rich chocolate flavor. Cut into 16 equal squares for serving, and enjoy while still slightly warm for that perfect fudgy texture.
Pro Tips For Making 3 Egg Brownie
- Melt Butter Slowly: I learned this the hard way—dumping cold butter into the pan and ending up with greasy, uneven brownie layers. Instead, melt the butter just until it’s liquid (no bubbles) over low heat, then whisk it into the sugar while still warm. The residual heat helps dissolve the sugar faster and keeps the batter smoother.
- Sift That Cocoa: Unsifted cocoa powder is the enemy of even texture. Packing it tightly into measuring cups traps air and leads to dense, dry brownies. Spoon it into the cup, level it off, then sift it directly into the dry ingredients. This also prevents clumps and ensures every bite is rich, not gritty.
- Don’t Overmix the Batter: The moment you start folding in the eggs, stop stirring the second everything is just combined. Overmixing introduces too much air, which causes brownies to crack or rise like a failed cake. Think “swirls of chocolate, not fluffy clouds”—your future self will thank you.
- Test for Doneness Early: This isn’t a cake—it’s supposed to be fudgy. Start checking for doneness 5 minutes before the recipe’s suggested time. A toothpick should come out with moist crumbs, not clean batter. If it’s too dark, cover loosely with foil and let it sit—it’ll keep cooking from residual heat.
Make-ahead tips for 3 egg brownie
Prep Ahead Strategy
Make your brownie batter up to 24 hours in advance and store it in an airtight container in the refrigerator. The flavors deepen overnight, and the batter will be perfectly chilled for baking. When ready, simply pour into the prepared pan with water bath and bake as directed.
This is my go-to method for busy days—I often make the batter the night before and bake first thing in the morning. 💫
Freezer-Friendly Technique
For maximum convenience, prepare the entire batter and freeze it in 1-cup portions in silicone molds or freezer bags. Thaw overnight in the fridge before baking. The texture remains fudgy when reheated properly.
I like to wrap individual portions tightly in plastic wrap before freezing to prevent freezer burn. When baking from frozen, increase the time by 5-7 minutes to account for the cold batter.
Baking Timeline
Plan for a 30-minute total prep time if baking immediately, but only 10 minutes on the day you serve if using pre-made batter. The actual baking time remains 20-25 minutes regardless of when you start.
I recommend setting a timer for 18 minutes first, then checking for doneness—this gives you flexibility to adjust without overbaking. The water bath adds 2-3 minutes to your active prep time but is worth it for that perfect crack.
Storage Solutions
Store baked brownies in an airtight container at room temperature for up to 5 days, though they’re best enjoyed within 2 days for peak texture. For longer storage, wrap individual squares in plastic wrap and freeze for up to 3 months.
To reheat, place frozen slices on a baking sheet and warm in a 350°F oven for 3-5 minutes until softened. This method restores that fresh-baked fudginess perfectly. ❄️
Portion Control Tips
Cut brownies into 16 equal squares for consistent portions, but if serving a crowd, use a pizza cutter for clean lines. For individual servings, wrap each square tightly in plastic wrap and store in a freezer bag.
This makes them perfect for lunches or gifts. I often pre-cut and freeze brownies in advance for quick dessert solutions during the week. The powdered sugar dusting stays intact when properly wrapped, maintaining that restaurant-quality finish. 💡
Make-Ahead Serving Ideas
Assemble dessert platters the night before by arranging brownies alongside pre-made vanilla ice cream or whipped cream in airtight containers. Store everything separately and combine just before serving. For a festive touch, sprinkle with crushed peppermint or cinnamon before freezing.
I love this approach for holiday gatherings—it saves time while still feeling special. The brownies keep their texture beautifully when stored properly. 🎄
Nutrition facts
Frequently asked questions
Why do these brownies need a water bath?
The water bath creates steam during baking, which helps develop that signature crackly top while keeping the interior fudgy. This technique ensures even heat distribution and prevents the brownies from drying out. Without it, you might get a cakey texture instead of the rich, dense result you want.
Can I substitute butter with oil?
Yes, but expect a slightly different texture. Replace the butter with 0.75 cup vegetable oil (like canola or avocado oil) for a more tender, moist brownie. However, butter creates a richer flavor and better rise, so if possible, stick with it. For a compromise, use half butter and half oil.
How do I know when the brownies are done?
Look for a deep crack forming on top—this is your perfect indicator! The edges should be set, but the center should still have a slight wobble. Insert a toothpick: it should come out with moist crumbs, not wet batter. Overbaking by even 1 minute can turn fudgy brownies dry.
Can I make these brownies gluten-free?
Replace the all-purpose flour with a 1:1 gluten-free baking flour blend (like Bob’s Red Mill). For best results, add 0.5 tsp xanthan gum to help bind the texture. Keep all other ingredients the same, and expect a slightly denser but still delicious result.
What’s the best way to store leftovers?
For short-term storage, keep brownies in an airtight container at room temperature for up to 5 days. For longer storage, wrap individual squares tightly in plastic wrap and freeze for up to 3 months. Reheat frozen slices in a 350°F oven for 3-5 minutes to restore freshness.

- 12 Bean Chili Recipe: Hearty Slow-Cooked Depth With 12 Legumes - October 17, 2026
- 5 Seed Bread Recipe: Nutty Crunch and Artisan Flavor in One Loaf - October 17, 2026
- 1 Lb Macaroni Salad Recipe: Bold, Crunchy, and Crowd-Pleasing - October 17, 2026