
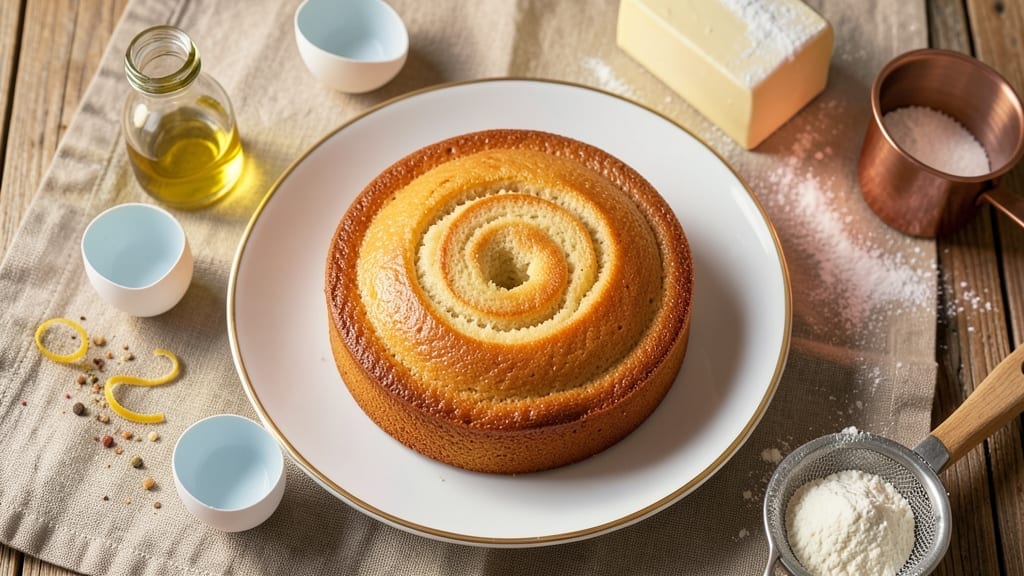
This 3-egg sponge cake delivers effortless layers of airy lightness that crumble like clouds—no special equipment or complicated techniques required. The secret lies in precise mixing methods and vanilla infusion that elevates every bite to restaurant-quality perfection.
I’ve refined this recipe over years of trial and error, ensuring consistent results even for beginners.
The foundation starts with room-temperature eggs and sugar, whipped to a pale, voluminous foam that incorporates air at the molecular level. This creates the signature sponge texture: tender yet sturdy enough to hold fillings or frosting without collapsing.
The vanilla extract isn’t just flavoring—it reacts with the butter to create subtle caramel notes that develop during baking.
By the time it emerges from the oven, you’ll have golden, crack-free layers with a delicate crumb that practically dissolves on your tongue. The cake’s structure comes from proper folding technique and even baking, which prevents the classic dome shape while maintaining perfect moisture.
This is the kind of sponge that makes you question why you ever bought boxed mixes.
Serve it plain with fresh berries, layered with citrus cream, or filled with pastry cream—this versatile base becomes whatever you imagine. The recipe scales beautifully for celebrations or everyday indulgence, always delivering that foolproof lightness you crave in a sponge cake. Let’s get baking!
Ingredients for 3 egg sponge cake
Nine ingredients, three eggs, and a touch of vanilla magic for layers that defy boxed mixes.
| Ingredient | Amount | Notes |
|---|---|---|
| Large Eggs 🥚 | 3 whole | Room temperature, separated |
| Granulated Sugar 🍚 | 1 ½ cups | Superfine preferred for smoothness |
| Unsalted Butter 🧈 | ¾ cup | Cold, cubed, European style preferred |
| All-Purpose Flour 🌾 | 1 ½ cups | Sifted, spooned lightly |
| Pure Vanilla Extract 🌿 | 1 ½ tbsp | Bourbon or Madagascar preferred |
| Baking Powder 🍞 | ½ tsp | Aluminum-free for stability |
| Salt 🧂 | ¼ tsp | Fine sea salt preferred |
| Lemon Zest 🍋 | 1 tbsp | Fresh, organic preferred |
| Lemon Juice 🍋 | 1 tbsp | Freshly squeezed |
The eggs are non-negotiable here—room temperature is critical for proper emulsification. Whole eggs from Pasture-Raised farms have richer yolks, but any large eggs work. The butter? European-style (like Plugrá) has higher fat content, which gives that signature tender crumb. If you can only find regular butter, chill it thoroughly before cubing. The flour should be sifted—this removes lumps and prevents dense spots. I always grab King Arthur flour for its consistent protein level, but any good all-purpose will do.
No vanilla extract? Vanilla bean paste works beautifully—just use half the amount. The lemon zest can be substituted with orange zest if you prefer a citrusier note. Short on baking powder? Baking soda plus cream of tartar (1/4 tsp each) mimics its lift. The sugar should be superfine if possible—it dissolves faster, but regular granulated works in a pinch (just pulse it in a food processor). For a richer flavor, swap half the butter for brown butter—just let it cool completely before mixing.
This batter is delicate—fold gently to avoid deflating the air. Room temperature eggs lose their volume fast, so keep everything ready before starting. The finished cake keeps 3 days in an airtight container at room temperature, wrapped in parchment. For longer storage, slice and freeze portions between parchment—thaw at room temperature. The vanilla infusion deepens over time, so leftovers often taste even better the next day. Always store away from strong odors—this cake absorbs them like a sponge.
Why You’ll Love This Recipe
- No Mixer Needed: I’ll be real—this sponge doesn’t require a stand mixer. Three eggs, a hand whisk, and a bowl are all you need. The secret’s in folding the flour into the egg foam just right, and honestly? It’s easier than it sounds.
- Buttery Vanilla Bliss: That vanilla extract isn’t just for show—it’s the star. The butter melts into the sugar while the eggs whip into light clouds, creating a cake that’s rich but still airy. One bite and you’ll forget about store-bought.
- Weeknight or Celebration: Serve it plain with tea for a lazy afternoon or layer it with jam for a birthday dessert. The same simple base works for both. I’ve even used slices to top yogurt—because why not?
- Leftovers? My Favorite: This cake keeps well for days, making it perfect for meal prep. Slice it up on Monday, and you’ve got a snack or breakfast ready. And since it’s just eggs, flour, and butter, it’s budget-friendly too. Win-win.
Step-by-step instructions for ultra-light vanilla sponge cake
Here’s how to create layers so ethereal they’ll disappear on your tongue—every whisk matters.
Separate Eggs and Whip Yolks to Ribbon Stage
Begin by separating the 3 whole large eggs into yolks and whites, ensuring no yolk traces remain in the whites. Place yolks in a heatproof bowl over a pot of simmering water—this gentle warmth will help them emulsify beautifully. Add the 1.5 cups granulated sugar and whisk vigorously for 5-7 minutes until the mixture triples in volume, becomes pale, and forms ribbons that hold their shape when the whisk is lifted.
This slow, warm incorporation creates tiny air pockets that become the cake’s signature lightness. If the mixture feels grainy, strain it through a fine-mesh sieve to eliminate any sugar crystals that could weigh down your sponge. The yolks should be thick enough to coat the back of a spoon but still flow smoothly.
Whip Egg Whites to Stiff Peaks with Citrus Brightness
In a separate, spotless bowl (any grease will prevent stiff peaks), whip the egg whites with the 1 tbsp lemon zest and 1 tbsp lemon juice on medium-high speed until soft peaks form. Gradually increase speed to high and continue whipping until the whites form glossy, stiff peaks that stand straight when the whisk is lifted—this should take about 3-4 minutes. The lemon adds brightness that cuts through the richness of the butter and vanilla.
Here’s the thing—don’t overwhip or you’ll risk dry, rubbery layers. The whites should hold their shape but still be light enough to fold gently into the yolk mixture. I like to test by lifting the whisk: if the peak curls slightly at the tip, you’re perfect. If it flattens immediately, keep whipping for another 30 seconds.
Fold in Butter and Dry Ingredients with Precision
Cut the 0.75 cup cold unsalted butter into small cubes and fold them into the yolk mixture using a spatula, working quickly to incorporate without deflating the air. Add the 1.5 cups sifted all-purpose flour, 0.5 tsp baking powder, 0.25 tsp salt, and 1.5 tbsp pure vanilla extract, folding gently just until combined—you should still see streaks of flour. This prevents overmixing, which develops gluten and makes the cake dense.
Now carefully fold in the egg whites in three additions, using a gentle “J” motion to preserve those air pockets. The batter should be thick but pourable—if it’s too stiff, you’ve overmixed. Real talk: this is where most home bakers go wrong. The batter should look like thick, glossy pudding with no visible flour streaks.
Bake in Two Thin Layers for Maximum Lightness
Divide the batter evenly between two 8-inch round cake pans lined with parchment paper and greased lightly with butter. Bake in a preheated 350°F oven for 20-25 minutes, or until the tops spring back when gently pressed and a toothpick inserted comes out clean. Rotate the pans halfway through for even baking—this is crucial for perfectly domed layers.
Don’t open the oven door during baking or the cakes will sink. You’ll know they’re done when the edges pull away from the pan slightly and the tops have a matte finish (not shiny). Let them cool in the pans for 10 minutes before transferring to a wire rack to cool completely. Patience here prevents cracking layers.
Assemble with Vanilla Buttercream for Decadent Layers
Once completely cool, level the tops if needed using a serrated knife. For the filling, beat the 0.75 cup cold unsalted butter with 1 cup powdered sugar and 1 tbsp vanilla extract until smooth, then add 1-2 tbsp heavy cream if needed to reach spreading consistency. Sandwich the layers with this buttercream, then dust the outside with a thin layer of powdered sugar for that classic French patisserie look.
The secret to perfect assembly? Work quickly but carefully. Place one layer on a cake stand, spread an even layer of buttercream, then add the second layer. Press down gently but firmly to avoid crushing the delicate sponge. Chill for 1 hour before slicing—this ensures clean cuts and prevents the layers from sliding apart. Serve at room temperature for the ultimate melt-in-your-mouth experience.
Pro Tips For Making 3 Egg Sponge Cake
- Whisk Eggs to Ribbon Stage: Stop when the egg-sugar mix holds a ribbon shape—about 3-5 minutes of vigorous whisking. I used to over-whisk and end up with a dense cake; the moment it looks glossy but still thick enough to leave a trail is perfect. No need to turn it into meringue.
- Melt Butter Slowly: Warm the butter in a bowl over a pot of barely simmering water (double boiler) until fully melted but not hot to the touch. Dumping cold butter straight in? Your batter will seize up. This keeps the texture light and the flavor rich.
- Fold Flour in Last: Add the flour in two batches, gently folding just until combined—no more than 10 strokes. Dumping it all at once or overmixing turns your sponge into a brick. Think “just enough to disappear,” not “thoroughly incorporated.”
- Skip the Overbaking: Pull the cake out when the top springs back to touch but still feels slightly soft—about 25-30 minutes at 350°F (175°C). Let it cool in the pan for 10 minutes first; cutting it too soon makes it gummy. (Yes, even if it looks underdone.)
Essential equipment for great 3 egg sponge cake
Stand Mixer Savings
While not absolutely essential, a stand mixer with a whisk attachment makes this recipe effortless—especially when whipping egg whites to stiff peaks. I use my KitchenAid Artisan Series with the flat beater attachment for the yolks and the whisk attachment for the whites.
The consistent speed prevents over-whipping, which is critical for that signature sponge texture. For budget-friendly alternatives, a hand mixer works perfectly if you’re patient and attentive—just whip in shorter bursts to avoid overheating the egg whites. 💡
Essential Baking Tools
You’ll need three must-have tools to nail this recipe: a fine-mesh sieve for sifting flour (I swear by the OXO Good Grips model), a spatula with a flexible edge (like the Silpat Edge Scraper) for gentle folding, and two 8-inch round cake pans with removable bottoms—Wilton Perfect Results pans are my go-to for even baking.
A digital kitchen scale is optional but invaluable for precise measurements, especially when working with butter and sugar ratios. 🧈
Temperature Control
Room-temperature ingredients are non-negotiable here—eggs, butter, and sugar all need to be between 68-72°F. I keep my eggs in warm water for 10 minutes before separating to ensure they’re ready.
For the butter, I cut it into ½-inch cubes and let them sit on the counter for 30-45 minutes while I prep everything else. Pro tip: Use an instant-read thermometer to check—this makes all the difference in achieving that perfect, airy crumb. ⚡
Vanilla Infusion Kit
While pure vanilla extract works beautifully, I’ve found that a vanilla bean infusion takes this cake to the next level. Simply split a Madagascar vanilla bean lengthwise, scrape out the seeds, and simmer them in ¼ cup water for 10 minutes.
Strain and use the infused water instead of plain water in your buttercream—it adds a complex, floral depth that complements the sponge perfectly. For a budget option, McCormick Pure Vanilla Extract is my reliable store-bought standby. 🌿
Oven Thermometer Check
Your oven’s temperature display isn’t always accurate—oven thermometers are a game-changer. I use the Thermoworks Oven Thermometer to verify my 350°F setting, as even a 25°F discrepancy can affect bake times and cake texture.
If your oven runs hot, reduce the temperature to 325°F and add 5-10 minutes to the baking time. This attention to detail ensures your layers rise evenly without over-browning. 🌡️
Cake Cooling Rack
A wire cooling rack is essential for preventing soggy bottoms and ensuring your cakes cool evenly. I recommend the OXO Good Grips Adjustable Cooling Rack—it’s sturdy enough to hold 8-inch pans without bending.
Let the cakes cool in the pans for 10 minutes before transferring, then finish cooling on the rack. This two-step process prevents cracking and maintains that perfect domed shape. Trust me, skipping this step leads to disappointing results. ❄️
Nutrition facts
Frequently asked questions
Why does this recipe use only 3 eggs?
The 3-egg formula creates the perfect balance of moisture and structure for ultra-light layers. Fewer eggs prevent a dense, heavy texture while still providing enough protein to hold air pockets during baking. This method also reduces the risk of overmixing, which can make traditional sponge cakes tough. The vanilla infusion enhances flavor without needing extra eggs for richness.
Can I make this cake without a stand mixer?
While a mixer makes whipping egg whites easier, you can achieve stiff peaks using a hand mixer or even whisking by hand. Work in short bursts to avoid overheating the whites—about 1 minute on high, then 30 seconds of resting between whips. The key is patience: stop when the peaks hold their shape but still feel soft at the tips.
What’s the secret to crack-free layers?
Two critical steps prevent cracks: cooling properly and even baking. Let the cakes cool in pans for 10 minutes before transferring to a rack, then cool completely before assembling. Also, rotate pans halfway through baking to ensure even heat distribution. If cracks appear, they’re purely cosmetic—just frost over them for a seamless finish!
How do I store leftovers?
Wrap the assembled cake tightly in plastic wrap and store at room temperature for 3 days. For longer storage, slice and freeze portions between parchment paper. Thaw at room temperature for 1-2 hours—microwaving can make the layers gummy. The vanilla flavor actually deepens over time, making leftovers taste even better!
Can I substitute butter for something else?
For a lighter texture, try brown butter (cooled completely) or vegetable shortening—both reduce greasiness. However, butter’s fat content creates that signature tender crumb. If you must substitute, reduce by 1 tablespoon to maintain proper structure. Avoid margarine, as it contains water that can make the cake dense.

- Pea Soup Instant Pot Recipe: Velvety Green Smoothness in 20 Minutes - November 1, 2026
- Pork Loin Pulled Pork Crock Pot Recipe: Slow-Smoked Tenderness With Zero Dryness - November 1, 2026
- Baked Potatoes in Crock Pot Recipe: Buttery Interiors and Crispy Top Magic - November 1, 2026