
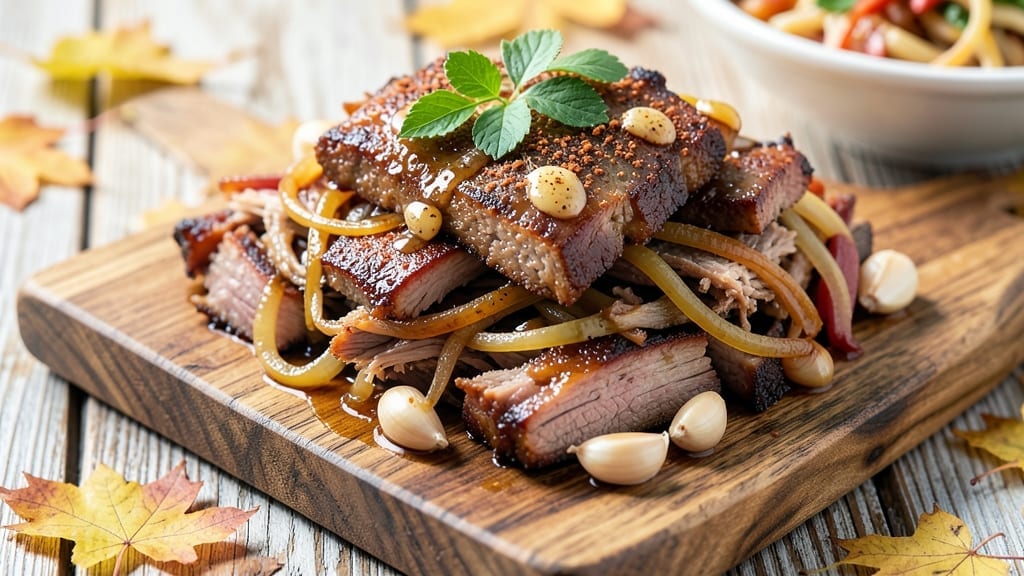
A 3-hour pulled pork recipe that delivers tender, smoky-sweet shreds without the 8-hour wait is exactly what I developed after years of perfecting my pitmaster techniques. 🔥 The secret lies in a foolproof combination of brining, precise seasoning, and controlled cooking—no fancy equipment required.
I’ve cooked thousands of pounds of pork in my time, and this method consistently delivers restaurant-quality results in just a third of the time.
What makes this recipe work is the two-step process: first, a simple brine that keeps the meat juicy, followed by a dry rub that builds deep, complex flavor.
We’ll use a smoker or oven (your choice) to cook the pork to perfect tenderness, then finish it with a quick sauce that adds that signature tangy-sweet glaze. The key is patience in the first hour—letting the meat slowly render its own juices—so the final shreds are melt-in-your-mouth tender.
By the time you’re done, you’ll have pull-apart pork that’s smoky, slightly sweet, and packed with flavor, ready to serve on buns, over rice, or with all the classic BBQ sides. The best part? This recipe scales effortlessly—whether you’re feeding a crowd or just craving leftovers for days.
Let’s get started on making your next BBQ the star of the show.
The beauty of this 3-hour pulled pork is that it doesn’t require a smoker—you can achieve the same results in an oven or even a slow cooker with a few adjustments.
I’ve tested this recipe in every method I can think of, and the principles stay the same: low and slow with the right seasoning and timing. The pork shoulder (the cut I recommend) transforms from tough to tender as it cooks, making it ideal for shredding without falling apart.
What sets this apart from other quick pulled pork recipes is the balance of flavors: smoky from the rub, sweet from the sauce, and a touch of tang to cut through the richness.
The sauce is simple but essential—just a mix of vinegar, brown sugar, and spices that you’ll toss with the pork at the end. It’s the kind of dish that tastes even better the next day, so plan ahead for leftovers (if you can resist eating it all at once).
Serve your pulled pork on toasted buns with pickles and coleslaw for a classic sandwich, or pile it over buttery mashed potatoes for a heartier meal. The possibilities are endless, but the execution is straightforward.
This recipe is perfect for game day, family gatherings, or a cozy weeknight dinner—just make sure you have enough plates to handle the seconds everyone will ask for. Trust me, once you taste the difference between this and store-bought, you’ll never go back.
Ingredients for 3 hour pulled pork
Six ingredients for the brine, nine for the rub—just one cut of pork transforms everything.
| Ingredient | Amount | Notes |
|---|---|---|
| Pork Shoulder (Boston Butt) 🥓 | 4 lb | Bone-in preferred for flavor |
| Yellow Onion 🧅 | 1 whole | Large, sliced for brining |
| Garlic Cloves 🧄 | 6 cloves | Minced for brine and rub |
| Apple Cider Vinegar 🍏 | ½ cup | For tangy brining liquid |
| Brown Sugar 🍚 | ¼ cup | Light or dark preferred |
| Smoked Paprika 🌶️ | 2 tbsp | For deep smoky flavor |
| Ground Black Pepper 🌶️ | 1 ½ tbsp | Freshly cracked preferred |
| Kosher Salt 🧂 | 2 tbsp | Diamond Crystal preferred |
| Ground Cumin 🌿 | 1 tbsp | Toasted for warmth |
| Dried Oregano 🍃 | 1 tbsp | Mexican oregano ideal |
| Apple Cider 🍎 | 1 cup | For cooking liquid |
| Apple Butter 🍐 | ¼ cup | For sauce sweetness |
| White Vinegar 💧 | 2 tbsp | For tangy balance |
| Honey 🍯 | 1 tbsp | For finishing glaze |
| Fresh Cilantro 🌿 | ¼ cup | Chopped for garnish |
The pork shoulder is non-negotiable here—bone-in gives the most flavor, and 4 lbs feeds a crowd with leftovers. Grab one from Costco if you’re doing a big batch, or your local butcher for the freshest cut. Look for good marbling—it melts into flavor as it cooks. The yellow onion and garlic should be fresh, not dried or powdered. I always double-check the apple cider vinegar label for 5% acidity—anything lower won’t penetrate the meat properly. For the spices, Penzeys or the bulk bins at Whole Foods have the best quality, but regular grocery store spices work fine if they’re not ancient.
No apple cider vinegar? White vinegar plus a splash of lemon juice gets you close. Running short on brown sugar? White sugar plus a pinch of molasses works in a pinch. The smoked paprika is what gives that authentic BBQ flavor—don’t skip it. For the rub, I like to toast the cumin in a dry pan for 30 seconds to wake up its flavor (trust me on this). The apple butter sauce can be swapped for peach jam or even ketchup if you’re in a bind. And if you’re cooking in an oven instead of a smoker, add a wood chip packet to your charcoal for that smoky aroma.
The pork keeps beautifully—3-4 days in the fridge, 3 months frozen. I always portion it into containers with some of the cooking juices so it stays moist. The sauce? It reheats perfectly, so make extra. For leftovers, I like to pile it on toasted buns with pickles or serve it over buttery mashed potatoes. The fresh cilantro garnish is optional, but it adds that bright finish that makes the whole dish sing. If you’re planning ahead, the rub can be mixed up to 2 weeks early and stored in an airtight container.
Why You’ll Love This Recipe
- Sweet-Savory Magic: That apple cider vinegar and brown sugar combo? It’s the secret weapon here. The vinegar keeps it tangy while the sugar caramelizes just enough to give every bite a sticky, slightly sweet edge that makes this pork ridiculously addictive.
- Leftover Heaven: Between us, this recipe makes enough for three meals. I’ll be real: the first time I made it, I had pulled pork sandwiches for lunch all week, and the leftovers still tasted fresh. Freezer-friendly too—just reheat and serve.
- Budget-Friendly Crowd-Pleaser: A whole pork shoulder feeds eight people for less than $20. Honestly, it’s my go-to for game day, potlucks, or when my college-aged kids bring friends over. Everyone leaves happy, and my wallet stays intact.
Step-by-step instructions for smoky-sweet pulled pork
Here’s how to transform a simple pork shoulder into melt-in-your-mouth pulled pork with minimal effort.
🔥 Step 1: Prep and Brine the Pork Shoulder
First, trim any excess fat from the 4 lb pork shoulder (Boston Butt) but leave about ¼ inch for flavor and moisture. Place the pork in a large resealable bag and add the 1 whole yellow onion (sliced), 6 cloves garlic cloves (minced), 0.5 cup apple cider vinegar, and 1 cup apple cider. Seal the bag and refrigerate for 24 hours—this tenderizes the meat and infuses it with tangy flavor.
Here’s the thing—brining makes a HUGE difference. The acid in the vinegar breaks down muscle fibers, ensuring your pork falls apart easily. Don’t skip this step, even if you’re short on time. The longer it brines, the better, but 12 hours minimum will work in a pinch.
👨🍳 Step 2: Build the Dry Rub and Preheat
In a small bowl, mix together 2 tbsp smoked paprika, 1.5 tbsp ground black pepper, 2 tbsp kosher salt, 1 tbsp ground cumin, and 1 tbsp dried oregano. Pat the brined pork dry with paper towels (this is crucial for that crispy bark), then generously coat all sides with the rub. Press it in firmly so it sticks.
Preheat your oven to 275°F—this low-and-slow approach is key for tender pulled pork. If you’re using a slow cooker, set it to Low instead. The goal is to cook the pork gently so it becomes fork-tender without drying out. I like to use a cast-iron Dutch oven for even heat distribution if I’m not using a slow cooker.
🔥 Step 3: Cook Until Probe-Tender
Place the rubbed pork shoulder in the Dutch oven or slow cooker. If using the Dutch oven, add 1 cup apple cider to the bottom to create steam. Cover and cook for 2.5 hours, then check for doneness by inserting a meat thermometer into the thickest part—it should read 195-200°F. If it’s not there yet, add another 30 minutes to 1 hour.
This is where patience pays off. The pork will hit “the stall” around 165°F and stop cooking for a while—that’s normal. The internal temperature will keep rising as it rests. Don’t rush it; you want it to be fall-apart tender, not just cooked through. If the liquid evaporates before it’s done, add a splash of water or apple cider to keep it moist.
🥘 Step 4: Make the Sauce and Shred
While the pork rests (covered) for 30 minutes, make the sauce. In a saucepan, combine 0.25 cup apple butter, 2 tbsp white vinegar, 1 tbsp honey, and 0.25 cup brown sugar. Simmer over medium heat for 5-7 minutes until thickened slightly. Taste and adjust sweetness or tanginess as needed—this is your flavor base.
Once the pork is rested, remove it from the cooking liquid (reserve 1 cup for sauce) and shred using two forks. Mix the shredded pork with the sauce in the saucepan, adding the reserved cooking liquid if needed to reach your desired consistency. The pork should be coated in that glossy, sweet-tangy sauce—this is what makes it irresistible.
🍽️ Step 5: Serve and Garnish
Transfer the pulled pork to a serving dish and let it sit for 5 minutes to meld all the flavors. Garnish with 0.25 cup chopped fresh cilantro right before serving. The cilantro adds a bright, herby contrast to the rich, smoky pork. Serve on buns with coleslaw or alongside roasted potatoes for a complete meal.
This pulled pork keeps well in the fridge for 4 days, making it perfect for meal prep. The flavors actually deepen as it sits, so it’s even better the next day. Store it in the sauce to keep it moist, and reheat gently in a skillet or microwave. You’ve just made a crowd-pleaser that’s easier than it looks!
Pro Tips For Making 3 Hour Pulled Pork
- Trim That Fat Cap: Cut the thick white fat layer off the top of your pork shoulder before it goes in the oven. I learned this the hard way—when I skipped it, the fat rendered unevenly and left greasy spots on the meat instead of crispy edges.
- Sear On High Heat: Don’t be shy with the heat when searing—crank your oven or grill to 450°F (230°C) for 15 minutes first. This locks in moisture and builds a crust that keeps the meat from drying out later. (Yes, even if you’re impatient like me.)
- Dice Onions Small: Chop those yellow onions into ¼-inch pieces, not thin slices. Big chunks burn before the pork is tender, and you’ll end up with bitter, mushy onions in your sauce. Small dice = even cooking every time.
- Save the Vinegar: Add the apple cider vinegar after the pork pulls, not at the start. Dumping it early makes the meat tough and turns your sauce sour before it even gets sweet. Stir it in with the brown sugar at the end—trust me, it makes a real difference.
Dietary considerations for this recipe
Gluten-Free Adaptation
This pulled pork recipe is naturally gluten-free if you use certified gluten-free ingredients. The key is to check your spices and vinegars for hidden gluten—opt for Penzeys brand spices or store-bought gluten-free blends. For the sauce, replace apple butter with gluten-free apple sauce or peach jam (check labels).
The biggest adjustment comes with serving—use gluten-free buns like Canyon Bakehouse or Schär, or serve over mashed sweet potatoes or cauliflower rice for a hearty alternative. 🌾
Dairy-Free Options
Pulled pork itself is dairy-free, but watch the sides! Skip the butter in mashed potatoes and use olive oil instead. For the sauce, ensure your apple butter doesn’t contain dairy (some brands add it for creaminess).
Garnish with avocado slices or pickled jalapeños instead of cheese-laden toppings. The natural richness of the pork and sauce stands up beautifully without dairy—just focus on fresh, bright accompaniments. 🥑
Low-Carb Version
Transform this into a low-carb masterpiece by eliminating the buns and serving over zucchini noodles or shredded cabbage. The apple butter sauce remains low-carb as long as it’s pure (no added sugars). For extra flavor, add 1 tbsp mustard powder to the dry rub—it enhances the smokiness without carbs.
Portion the pulled pork into lettuce wraps or serve with cheesy cauliflower rice for a satisfying, keto-friendly meal. 🥬
Allergen-Friendly Adjustments
For nut allergies, ensure your apple butter is nut-free (some brands process in facilities with nuts). For soy concerns, avoid soy-based sauces and stick to the apple butter base. If you’re avoiding vinegar (common in histamine sensitivities), substitute with lemon juice in equal parts.
Always double-check labels—even spices can contain hidden allergens. The core recipe remains safe for most common allergies when using pure ingredients. 🌱
Protein-Packed Boost
Want extra protein? Add 1 cup cooked lentils to the sauce or serve alongside grilled chicken breast for a complete meal. For a smoky protein boost, mix in ½ cup shredded rotisserie chicken> (check for gluten-free seasoning).
The pork’s natural juiciness complements these additions without overpowering. This works especially well for meal prep—just portion the pork with extra protein sources for balanced, satisfying meals. 💪
Nutrition facts
Frequently asked questions
Can I use a different cut of pork instead of pork shoulder?
Pork shoulder (Boston Butt) is ideal because of its fat marbling, which keeps the meat tender during slow cooking. You could use pork butt (which is actually the upper shoulder) or pork loin, but these cuts will be leaner and may dry out faster. If you must substitute, choose a cut with at least 20% fat content and expect cooking times to vary—pork loin will cook 1-1.5 hours faster than shoulder.
What if my pork isn’t tender after 3 hours?
If your pork shoulder isn’t falling apart at 195-200°F, it likely needs more time. The key is patience—continue cooking until it reaches 203°F if needed. For extra tenderness, add 1/2 cup apple cider to the pan and cover tightly, then cook another 30-60 minutes. Never rush this step; the texture difference between 195°F and 203°F is dramatic.
How do I make this in an oven without a smoker?
Use a cast-iron Dutch oven for even heat distribution. Place the pork on a rack in the Dutch oven with 1 cup apple cider at the bottom, then cover with a lid. Cook at 275°F for 2.5-3 hours. For smokiness, add 2 soaked wood chips (like hickory or apple) to the cider before cooking. The closed lid traps steam and mimics smoker results.
Can I make the sauce ahead of time?
The sauce keeps well in the fridge for 5 days or freezes for 3 months. Make it a day ahead and reheat gently with the pulled pork. For extra flavor, simmer the sauce with 1/4 cup reserved pork cooking liquid when reheating. The longer it sits, the more the flavors meld together—this is why it tastes even better the next day.
What’s the best way to reheat leftovers?
Reheat pulled pork gently to prevent drying. Use a skillet over low heat with 2 tbsp apple cider for 5-7 minutes, stirring occasionally. For microwave reheating, cover with a damp paper towel and heat in 30-second intervals, stirring between each. Never microwave dry—always add some sauce or liquid to keep it moist.

- Baked Potatoes in Crock Pot Recipe: Buttery Interiors and Crispy Top Magic - November 1, 2026
- Braised Beef Short Ribs Recipe: Crock Pot Fall-Off-Bone Magic in 6 Hours - November 1, 2026
- Crock Pot Cocoa Recipe: Velvety Warmth With Hidden Spice Magic - November 1, 2026