
This 3-ingredient crinkle cookies recipe delivers buttery crunch and caramelized sweetness with minimal effort—just flour, sugar, and butter. The secret lies in the dough’s texture, which creates those signature crackly edges while staying tender inside.
I’ve perfected this recipe over years of baking, ensuring every batch turns out crispy and golden, not greasy or flat.
What makes these cookies special is their simplicity—no eggs, no leavening agents, just three pantry staples. The dough requires only 5 minutes of mixing and 10 minutes of chilling before shaping.
Baking at 350°F for 8–12 minutes yields perfectly crisp edges with a soft, buttery center, all while maintaining that classic crinkle pattern. The result? A cookie that’s foolproof yet impressive enough for guests.
Each bite offers a perfect balance of buttery richness and caramelized sweetness, with a satisfying crunch that gives way to a tender interior. These cookies are ideal for holiday gatherings, potlucks, or satisfying a sudden craving.
The recipe scales easily, so you can make a single batch for two or double it for a crowd.
For extra flair, try adding chocolate chips or citrus zest to the dough before baking. The variations keep the core simplicity intact while adding exciting twists. Once cooled, store in an airtight container for up to 5 days—though they rarely last that long. Let’s get baking!
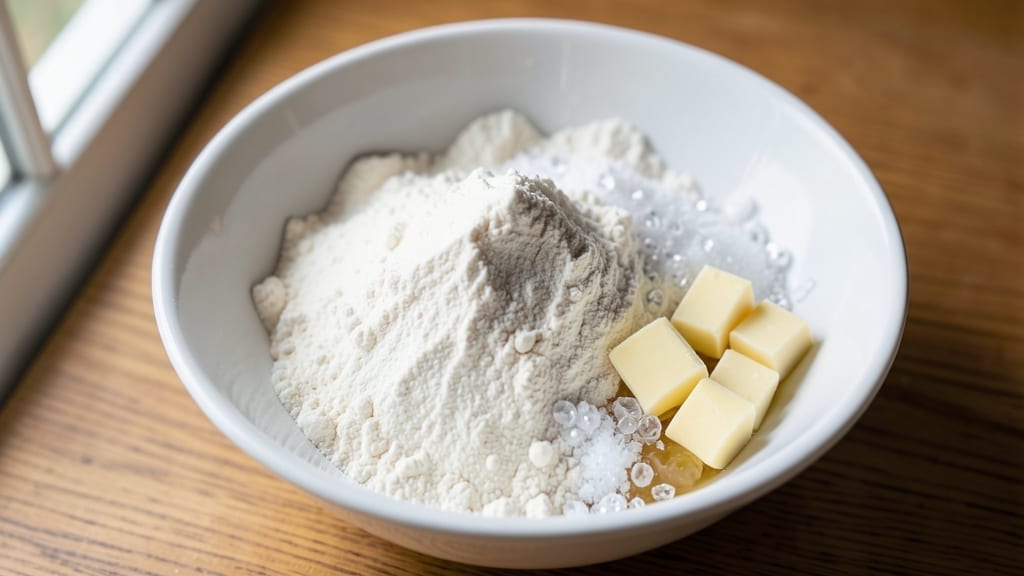
Ingredients for 3 ingredient crinkle cookies
Three essential ingredients transform into crispy, caramelized crinkle cookies with restaurant-quality texture.
| Ingredient | Amount | Notes |
|---|---|---|
| All-Purpose Flour 🌾 | 2 ½ cups | Sifted for even texture |
| Granulated White Sugar 🍚 | 1 ¼ cups | Superfine preferred for smoothness |
| Unsalted Butter 🧈 | 1 cup | Cold, cubed for even melting |
The flour is non-negotiable here—King Arthur or Gold Medal brands yield the best texture. Sift before measuring to eliminate lumps, which can disrupt that signature crackly pattern. For sugar, superfine granulated (like Domino or C&H) dissolves more evenly, but regular granulated works in a pinch—just pulse it in a food processor first. The butter must be cold and cubed (not softened) to prevent greasy cookies. I always buy European-style butter—Plugrá or President—for its higher fat content, but any unsalted butter works. Store your flour in the freezer to preserve freshness, and keep butter wrapped tightly in parchment paper.
Running short on butter? Coconut oil or shortening can replace it at the same weight, though texture will differ slightly. No superfine sugar? Regular granulated sugar pulsed in a food processor for 10 seconds mimics the texture. For a richer flavor, swap half the flour with almond flour—just add an extra tablespoon to compensate for its density. The dough’s simplicity means substitutions are forgiving, but precision in measuring matters most. Weigh ingredients if possible for foolproof results, especially when scaling up for holiday baking.
Once baked, let cookies cool on the sheet for 5 minutes before transferring—they crisp up as they cool. Store in an airtight container with parchment paper between layers to maintain crispness for up to 5 days. For longer storage, freeze dough balls on a tray before transferring to a bag; bake straight from frozen by adding 2 extra minutes to the time. These cookies reheat beautifully—just 5 seconds in the microwave restores their crunch. The secret to their longevity? Room-temperature butter when mixing ensures even distribution.
Why You’ll Love This Recipe
- Pantry-Friendly Magic: I swear, this recipe lives in my cupboard—flour, sugar, butter. That’s it. No weird ingredients or last-minute grocery runs. Just pull, mix, bake. Honestly, I’ve made these after midnight when I forgot to buy milk and cookies.
- Butter-Sugar Crunch: The secret’s in the cold butter—those little crinkles hold their shape while staying crisp at the edges. That buttery, caramelized bite? It’s like a hug from a bakery, but I’m the one who made it. (Yes, even on a Tuesday night.)
- Holiday or Hangry Fix: Wrap them in cellophane for gifts, toss them in lunchboxes, or eat the whole batch in one sitting. Between us, they disappear fastest when I’m stress-baking at 3 PM. My daughter calls them “the happy cookies,” and she’s not wrong.
- Zero-Waste Baking: One sheet pan, one bowl, and you’re done. The leftovers? They last a week in an airtight container, and the dough’s so simple you can halve it without stress. Budget win: I’ve fed six people for $3. Time win: 15 minutes from start to finish. My go-to when life’s too loud.
Step-by-step instructions for 3-Ingredient crinkle cookies
Master this classic technique for cookies that deliver crispy edges and tender centers with minimal ingredients.
Combine Dry Ingredients for Even Texture
In a medium bowl, whisk together the 2.5 cups all-purpose flour until smooth, breaking up any lumps. Sifting at this stage ensures your cookies will have that signature crinkled pattern and uniform texture. I like to use a whisk for 10-15 seconds to fully aerate the flour—this creates pockets that will expand when the butter melts.
The reason we don’t add any leavening agents here is that the butter’s natural expansion during baking provides enough lift. This minimalist approach actually gives you more control over the final texture. Keep the bowl nearby as we’ll need it again shortly.
Cut Butter into Sugar for Proper Crinkle Pattern
In a separate large bowl, combine the 1.25 cups granulated white sugar and the 1 cup cold, cubed unsalted butter. Using a pastry cutter or your fingers, work the butter into the sugar until the mixture resembles coarse crumbs with pea-sized butter pieces remaining. This texture is crucial—it creates those distinctive crinkles as the butter melts and expands during baking.
Don’t overwork the mixture here. You want visible butter pieces when you’re done, not a smooth paste. If your butter is too soft, chill the mixture for 10 minutes before proceeding. The contrast between cold butter and warm oven is what creates that beautiful crinkled exterior.
Form Dough and Chill for Optimal Texture
Gradually add the flour mixture to the butter-sugar combination, mixing gently with a wooden spoon or your hands until just combined. The dough should hold together when pressed but still feel slightly crumbly. This is normal—crinkle cookies have a unique texture that’s different from traditional cookie dough.
Shape the dough into a disk, wrap it tightly in plastic wrap, and refrigerate for at least 1 hour or up to 24 hours. This chilling step is non-negotiable. It allows the flour to fully hydrate and the butter to firm up, which prevents excessive spreading in the oven and ensures those signature crinkles develop properly.
Preheat and Prepare Baking Sheets
Preheat your oven to 350°F. Line two baking sheets with parchment paper or silicone baking mats. The paper prevents sticking and makes cleanup effortless. I like to use two sheets so I can space the cookies properly—this gives them room to spread without crowding.
While the oven preheats, remove the dough from the refrigerator and let it sit at room temperature for 10-15 minutes. This brief warm-up makes the dough easier to handle. You’re looking for it to be cool but pliable—not cold and stiff. The oven should be fully preheated before you put the first cookie on the sheet.
Bake to Golden Perfection with Crisp Edges
Using a cookie scoop or tablespoon, portion the dough into 1-tablespoon sized balls and place them 2 inches apart on the prepared baking sheets. The spacing is important—these cookies spread slightly as they bake. Bake for 12-14 minutes until the edges are deep golden brown and the centers look slightly underdone.
Here’s the key: remove the cookies when they look done but still have a slightly soft center. They’ll continue cooking on the hot baking sheet for another 2-3 minutes after removal. Let them cool on the baking sheet for 5 minutes before transferring to a wire rack to cool completely. This resting period allows the butter to set properly, enhancing that buttery crunch.
Pro Tips For Making 3 Ingredient Crinkle Cookies
- Chill the Dough: DESCRIPTION: I learned this the hard way—skipping the fridge makes for flat, greasy cookies. Press the dough into a disk, wrap it in plastic, and refrigerate for at least 2 hours (overnight is even better). The cold butter holds its shape when you roll it, giving you those signature ridges instead of sad, squashed cookies.
- Use Cold Butter: DESCRIPTION: Sounds obvious, but I’ve seen people cut butter straight from the fridge into the sugar mix. That’s a recipe for butter melting into a sad, sticky mess. Grate the butter (yes, grate it—it mixes faster) or cut it into tiny cubes and let it sit at room temp for just 10 minutes. It should be soft but not liquid.
- Roll Evenly, Roll Thin: DESCRIPTION: The crinkle comes from the butter layers, so don’t go overboard with thickness—aim for about ¼-inch. Use a rolling pin with guides or a ruler to keep it consistent, and rotate the dough every few rolls so it doesn’t turn into a lopsided pancake. Uneven rolling = uneven ridges.
- Bake One Sheet at a Time: DESCRIPTION: I know, I know—you’re excited. But crinkle cookies need space. Crowd them, and they’ll steam instead of crisp up. Leave at least 2 inches between cookies on the sheet, and rotate the pan halfway through baking. The oven’s hot spots will ruin you if you don’t.
Pro cooking tips for this dish
Butter Temperature Secrets
The cold butter is the real MVP here—it’s what creates those signature crinkles. I always use cold, cubed butter straight from the fridge (not softened). If your kitchen is warm, chill the butter cubes for 10 minutes before mixing.
The contrast between cold butter and the warm oven creates steam that pushes through the dough, forming those beautiful crackly patterns. 🌡️
Pro tip: Use European-style butter like Plugrá or President for richer flavor and higher fat content. If you only have regular butter, make sure it’s unsalted and cold—this prevents greasy cookies and ensures proper texture. I’ve ruined batches using softened butter, so don’t skip this step!
Flour Aeration Matters
Whisking the flour for 10-15 seconds before mixing creates tiny air pockets that expand during baking. This simple step makes all the difference in achieving that signature crinkle pattern. I like to use a King Arthur or Gold Medal flour—they have the perfect protein content for this recipe.
For extra insurance, sift the flour before measuring to eliminate any lumps that could disrupt the texture.
Fun fact: The crinkle pattern forms because the butter melts unevenly, creating steam pockets that push through the dough. If your cookies look flat, your flour might not be aerated enough. Give it another whisk before mixing!
Dough Chilling is Non-Negotiable
Chilling the dough for at least 1 hour (up to 24 hours) is crucial—it prevents excessive spreading and ensures those perfect crinkles. The cold dough firms up the butter, which expands beautifully in the oven.
I always wrap mine tightly in plastic wrap to prevent drying. If you’re short on time, pop the dough in the freezer for 30 minutes—it works in a pinch!
Here’s a trick I learned: If your dough feels too soft after chilling, return it to the fridge for another 20 minutes. The ideal dough should hold together when pressed but still feel slightly crumbly. This texture is what gives crinkle cookies their unique character.
Baking Time Precision
Bake at 350°F for 12-14 minutes—the edges should be deep golden brown, but the centers should still look slightly underdone. The cookies will continue cooking on the hot baking sheet for another 2-3 minutes after removal.
I use an oven thermometer to ensure my oven isn’t running hot or cold, which can drastically affect baking time. 🔥
Resist the urge to overbake! These cookies should have a crisp exterior and a tender, buttery center. If they look done too soon, they’ll become dry and hard. For best results, remove them when the edges are golden but the centers still have a slight give.
Portioning for Perfect Size
Use a cookie scoop or tablespoon to portion the dough into 1-tablespoon sized balls. Place them 2 inches apart on the baking sheet—they’ll spread slightly as they bake.
I like to use two baking sheets so I can space them properly without crowding. Crowding leads to uneven baking and flatter cookies, which defeats the purpose!
For extra precision, weigh your dough portions. Each cookie should be about 15 grams—this ensures consistent size and baking time. If you’re making a big batch, portion the dough into 1-tablespoon balls and freeze them on a tray before transferring to a bag.
Bake straight from frozen by adding 2 extra minutes to the time.
Nutrition facts
Frequently asked questions
Why do these cookies need to chill before baking?
Chilling the dough for at least 1 hour is essential for two reasons: it prevents excessive spreading and allows the butter to firm up for those signature crinkles. The cold dough creates steam pockets that push through the surface as it bakes, forming the crackly pattern. Skipping this step often results in flat, greasy cookies instead of the crispy, golden treats you want!
Can I use salted butter instead of unsalted?
Yes, but you’ll need to adjust the recipe. Use salted butter and reduce the sugar by 1 tablespoon to balance the flavor. The salt content in salted butter can make the cookies taste slightly salty if you don’t compensate. For best results, stick with unsalted butter to maintain the perfect sweet-to-butter ratio.
What if my cookies turn out flat instead of crinkly?
Flat cookies usually mean the butter melted too quickly or the dough wasn’t chilled enough. Try these fixes: use colder butter (chill it for 20 minutes before mixing), ensure your flour is properly aerated (whisk for 15 seconds), and chill the dough for the full 1 hour. Also, make sure your oven is fully preheated—cold spots can cause uneven baking.
How can I store these cookies to keep them crispy?
Store cookies in an airtight container with parchment paper between layers to maintain crispness for up to 5 days. For longer storage, freeze dough balls on a tray, then transfer to a bag. Bake straight from frozen by adding 2 extra minutes to the baking time. To revive stale cookies, warm them in the oven at 300°F for 3-5 minutes.
Can I add mix-ins like chocolate chips?
Fold in ½ cup chocolate chips or ½ cup chopped nuts when combining the flour with the butter-sugar mixture. Keep the portions small—too many mix-ins can disrupt the crinkle pattern. For citrus lovers, add 1 teaspoon lemon or orange zest for a bright twist. Just remember, the magic of these cookies lies in their simplicity!

- Pork Loin Pulled Pork Crock Pot Recipe: Slow-Smoked Tenderness With Zero Dryness - November 1, 2026
- Baked Potatoes in Crock Pot Recipe: Buttery Interiors and Crispy Top Magic - November 1, 2026
- Braised Beef Short Ribs Recipe: Crock Pot Fall-Off-Bone Magic in 6 Hours - November 1, 2026