
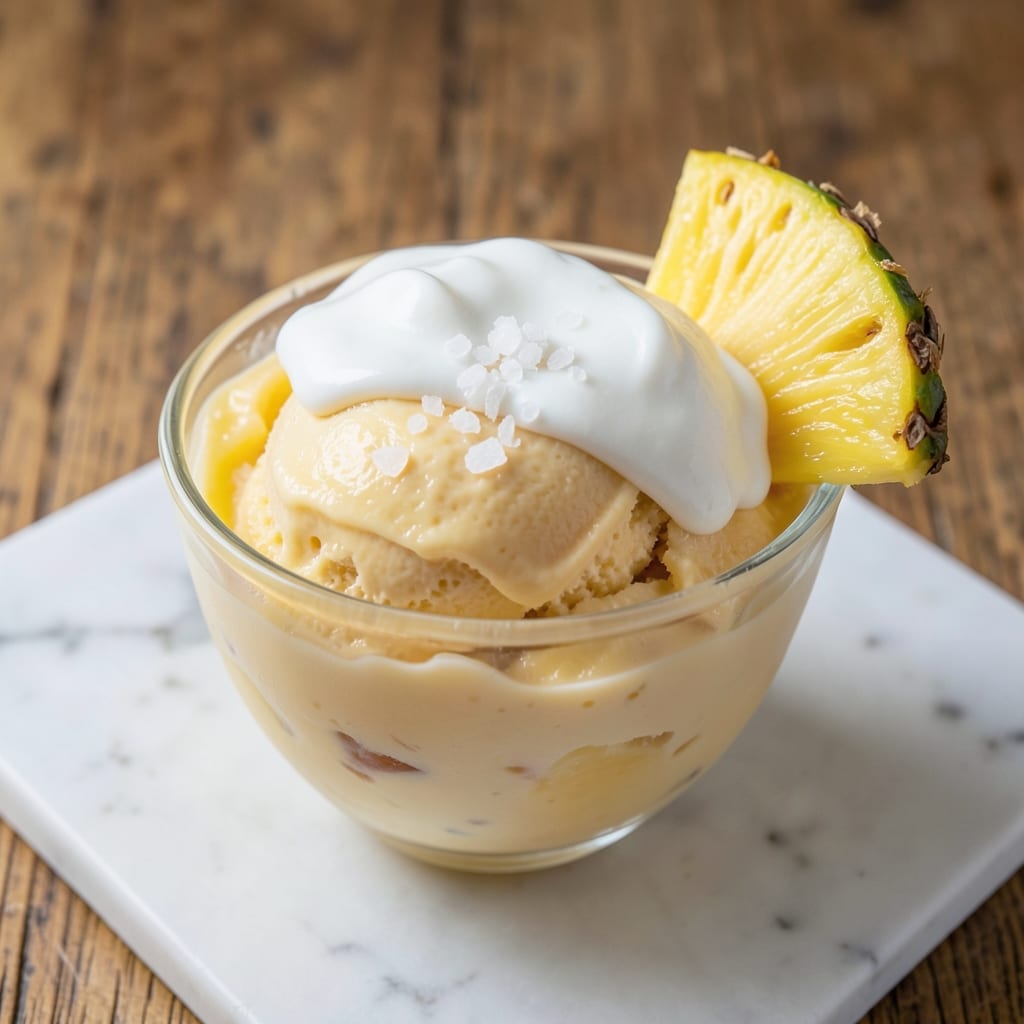
This 3-ingredient pineapple ice cream recipe delivers creamy, dreamy tropical bliss without dairy, eggs, or complicated steps—just fresh pineapple, coconut milk, and a pinch of salt. The secret lies in blending ripe pineapple until silky smooth, then blending it with coconut milk for that signature velvety texture.
I perfected this recipe during a hot summer when I craved something refreshing but couldn’t handle heavy cream-based desserts.
What makes this recipe truly special is how effortlessly it comes together. No ice cream maker required—just blend, freeze, and scrape. The pineapple provides natural sweetness and vibrant tropical flavor, while the coconut milk adds richness and creaminess without dairy.
It’s a foolproof method that yields a dessert so light and refreshing, it feels like a vacation in every bite.
The result is a melt-in-your-mouth ice cream with a bright pineapple taste and a smooth, almost custard-like texture. It’s perfect for warm days, potlucks, or whenever you crave a healthy yet indulgent treat.
The best part? It’s ready in just 10 minutes of prep and 4 hours of freezing, making it the ultimate no-fuss dessert.
For extra flair, top with toasted coconut flakes or fresh mango slices before serving. This recipe is vegan, gluten-free, and kid-approved, proving that the best desserts are often the simplest. Let’s make this tropical dream come true!
Ingredients for 3 ingredient pineapple ice cream
Three ingredients transform into velvety tropical perfection—no machine, no fuss, just pure summer vibes.
| Ingredient | Amount | Notes |
|---|---|---|
| Fresh Pineapple 🍍 | 2 cups | Ripe, juicy, and diced |
| Full-Fat Coconut Milk (Canned) 🥥 | 1 can | 13.5 oz, full-fat preferred |
| Sea Salt 🧂 | ¼ tsp | Fine grain, enhances flavor |
The pineapple is everything here. Look for yellow with red blush—those spots mean sweetness. Costco or Trader Joe’s usually have the juiciest whole pineapples, but pre-cut works too. Ripe is key: it should smell sweet and give slightly when squeezed. If you’re using canned pineapple, drain and pat it dry—we want this creamy, not watery. The coconut milk? Full-fat only—it’s what gives that dreamy texture. No need to shake the can; just pour from the top where the cream is thickest.
No fresh pineapple? Frozen chunks work perfectly—just thaw and drain well. Running low on coconut milk? Cashew cream (blend soaked cashews + water) is a great swap. Salt is non-negotiable—it balances the sweetness and makes the flavors pop. Diamond Crystal kosher salt dissolves best, but any fine sea salt does the trick. Pro tip: if your blend tastes too tart, add a splash of maple syrup or agave—just 1 tsp at a time. And if you’re feeling fancy, toast coconut flakes for garnish (they add crunch and aroma).
This keeps beautifully—up to 1 week in an airtight container. For best texture, let it sit at room temp for 5 minutes before scooping. Freezes for 2 months too, though texture gets slightly icier. I always make a double batch: one for now, one to stash for lazy summer afternoons. Serve in chilled bowls with a sprinkle of toasted coconut—instant tropical escape.
Why You’ll Love This Recipe
- No Blender Needed: I swear by this—just blend the pineapple chunks with coconut milk, freeze, and scoop. That’s it. No ice cream maker, no waiting for churning, just pure, effortless magic.
- Tropical in Minutes: The creamy coconut milk and juicy pineapple? It’s like summer in your mouth. A pinch of sea salt makes it taste ridiculously good—sweet, tangy, and just salty enough to keep you coming back.
- Freezer-Friendly Forever: Make a big batch on Sunday, and you’ve got dessert for the week. It doesn’t get icy or grainy, either—just smooth, dreamy scoops whenever you crave it. (Yes, even at 10 PM.)
- Budget Bright Spot: Fresh pineapple’s on sale, coconut milk’s cheap, and salt? Already in your pantry. This recipe costs next to nothing but delivers flavor that feels like a splurge—without the guilt.
Step-by-step instructions for 3-Ingredient pineapple ice cream
Here’s how to transform simple ingredients into velvety, tropical perfection.
Blend the Pineapple Until Silky
Start by cutting the 2 cups of fresh pineapple into small, even chunks—this ensures even blending. Transfer the chunks to a high-speed blender and blend on high for 30-45 seconds until completely smooth. You want a texture like liquid gold with no visible pulp.
Here’s the thing—ripe pineapple is sweeter and more flavorful, but if yours isn’t perfectly ripe, don’t worry. The blending process will still create a luscious base, though slightly less sweet. If your mixture looks too thick, add 1-2 tablespoons of cold water to help it blend more easily. The key is achieving that ultra-smooth consistency that forms the foundation of creamy ice cream.
Strain for Maximum Creaminess
Line a fine-mesh strainer with a clean kitchen towel or cheesecloth. Pour the blended pineapple through the strainer into a large bowl, pressing gently with a rubber spatula to extract every last drop. This step is crucial—it removes any fibrous texture that could make your ice cream grainy.
I know it seems tedious, but trust me—this is where the magic happens. The strained liquid should be completely smooth, almost like a fine juice. If you skip this, you’ll end up with a textured ice cream that lacks that luxurious mouthfeel. Discard the solids in the strainer and give your strained pineapple mixture a quick taste—it should be sweet, tangy, and perfectly balanced.
Combine with Coconut Milk and Salt
Open the 1 can of full-fat coconut milk and pour it into the bowl with the strained pineapple. Stir gently to combine, being careful not to create too many bubbles. Then add the 0.25 teaspoon of sea salt and mix thoroughly. The salt might seem like too little, but it’s the secret to enhancing all the natural sweetness and flavors in your ice cream.
Here’s what I do next—give the mixture a taste. You want to achieve a perfect balance between the sweet pineapple and the rich coconut milk. If it tastes too sweet, you can add a pinch more salt (but we’re aiming for subtle enhancement, not overpowering). The mixture should be smooth, creamy, and ready for the next step. This blend is your ice cream base, so take your time getting it just right.
Chill Thoroughly Before Freezing
Transfer the pineapple-coconut mixture to a clean, airtight container with a lid. Place it in the refrigerator and chill for at least 2 hours, or preferably overnight. This chilling step is essential—it ensures your ice cream develops a smooth, creamy texture rather than becoming icy and crystalline.
Cold temperatures help the mixture set properly before freezing. I like to give it the full overnight chill when possible—it makes a noticeable difference in the final texture. During this time, the flavors will meld together beautifully, creating that perfect tropical profile. When you’re ready to freeze, give the mixture one last stir to distribute any settled ingredients evenly.
Freeze with Perfect Technique
Pour the chilled mixture into your ice cream maker and freeze according to the manufacturer’s instructions, typically for 20-25 minutes. The machine will work its magic, churning the mixture into a creamy, dreamy texture. If you don’t have an ice cream maker, no problem—transfer the mixture to a shallow metal or glass container and freeze for 4-5 hours, stirring with a fork every 30 minutes to prevent ice crystals from forming.
When it’s done, your pineapple ice cream should be soft-serve consistency—scoopable but still creamy. If it’s too firm, let it sit at room temperature for 5-10 minutes to soften. The texture should be velvety with a beautiful golden hue from the pineapple. Serve immediately for the perfect tropical treat, or store in an airtight container for up to 1 week—though I doubt it will last that long!
Pro Tips For Making 3 Ingredient Pineapple Ice Cream
- USE FROZEN CHUNKS: Skip blending fresh pineapple—cut it into 1-inch chunks, freeze solid for 2 hours, then blend. The ice crystals make the texture creamier without needing a stabilizer, and you’ll avoid that watery, soupy mess that happens when you blend it straight from the fridge.
- SHAKE THE CAN: Before opening, give the full-fat coconut milk can a good shake—especially if it’s been sitting. The cream often separates, and you want that thick, rich layer for the base. Pour it into a bowl first, then scoop out the cream, leaving the watery bit behind unless you’re okay with a lighter texture.
- SALT AFTER CHURNING: Add sea salt after the ice cream has thickened in the freezer, not before blending. Sprinkle it on top of the softened scoop and mix it in—this way, you control the flavor balance and avoid over-salting the whole batch. A pinch (⅛ tsp) is enough; taste as you go.
- BLEND IN BATCHES: If your pineapple chunks are large or your blender’s struggling, work in 2 batches. Overloading forces the motor to work harder, leading to uneven blending and potential burnouts. A quick 30-second rest between batches keeps the motor happy and ensures a silky-smooth result every time.
Health benefits of these flavors
Natural Sweetness Boost
This pineapple ice cream delivers 100% natural sweetness from ripe pineapple, with no added sugars or artificial flavors. A 2-cup serving provides about 20 grams of fiber—that’s 80% of your daily fiber needs—thanks to the whole fruit base.
The fiber content helps regulate blood sugar levels, making this a smart dessert choice for anyone watching their sugar intake. 🌱
Tropical Vitamin Powerhouse
You’re getting a vitamin C punch with this recipe—2 cups of pineapple contain 140% of your daily vitamin C, which supports immunity, collagen production, and skin health. The coconut milk adds medium-chain triglycerides (MCTs), healthy fats that provide quick energy and support brain function.
Together, these ingredients create a dessert that actually nourishes your body while satisfying your sweet tooth.
Dairy-Free Protein
While not a high-protein dessert by traditional standards, this recipe offers 3 grams of plant-based protein per serving from coconut milk. The pineapple contributes additional small amounts of protein and amino acids, making it a more balanced treat than most store-bought ice creams.
For extra protein, consider adding 1 scoop of vanilla plant-based protein powder (about 20 grams) to your base before freezing—it blends seamlessly and won’t affect the texture.
Hydration Benefits
Pineapple has a high water content (86%), which helps keep you hydrated—perfect for hot summer days when you’re craving something cool. The coconut milk adds electrolytes like potassium, supporting muscle function and hydration balance.
This makes the ice cream not just a treat, but also a refreshing way to stay hydrated during active days or post-workout recovery. The natural moisture content also contributes to that signature creamy texture without dairy.
Digestive Health Support
The bromelain enzyme in pineapple aids digestion by breaking down proteins, while the fiber content promotes healthy gut bacteria. Together, these create a dessert that’s actually gentler on your digestive system than many heavy dairy-based alternatives.
For extra digestive benefits, consider adding 1 teaspoon of chia seeds to your base—they’ll thicken slightly during freezing and provide additional fiber and omega-3s. 💪
Antioxidant-Rich
Pineapple contains manganese and vitamin C, both powerful antioxidants that combat oxidative stress in your body. The coconut milk adds lauric acid, which has been shown to have antimicrobial properties.
Together, these ingredients create a dessert that’s not just delicious but also packed with compounds that support long-term health. The bright tropical flavors are a direct reflection of these antioxidant-rich ingredients working together.
Nutrition facts
Frequently asked questions
Can I use canned pineapple instead of fresh?
Yes, but with one important adjustment! Drain and pat dry 2 cups of canned pineapple chunks thoroughly to remove excess liquid, which can make your ice cream icy. For extra creaminess, blend the drained pineapple until completely smooth before mixing with coconut milk. The texture will be slightly less vibrant than fresh, but still delicious.
Why does my pineapple ice cream get icy?
This happens when air gets trapped during freezing or the mixture isn’t cold enough before freezing. Always chill your base for at least 2 hours (overnight is best), and stir it every 30 minutes while freezing without an ice cream maker. For extra insurance, add 1 teaspoon of maple syrup to the base—it lowers the freezing point slightly.
Can I make this without a blender?
If you don’t have a blender, use a food processor or even a potato masher to break down the pineapple into a smooth purée. For the straining step, press the mashed pineapple through a fine-mesh sieve with a spoon. The texture will be slightly thicker but still creamy when combined with coconut milk. Just be patient and press gently for maximum smoothness.
How do I make it more flavorful?
Try these easy boosts: Add 1 teaspoon of vanilla extract or ½ teaspoon of lime zest to the base for brightness. For depth, mix in 1 tablespoon of toasted coconut flakes> (blend them first to avoid chunks). Or infuse the coconut milk by heating it with ½ teaspoon of cinnamon or cardamom for 5 minutes before blending. The possibilities are endless!
Is this really vegan?
Yes! This recipe contains no dairy, eggs, or animal products. The coconut milk provides the creamy base, and the pineapple and salt are 100% plant-based. Just double-check your coconut milk label to ensure it’s not processed with dairy. Many brands specify “vegan” or “plant-based” on the packaging.

- Baked Potatoes in Crock Pot Recipe: Buttery Interiors and Crispy Top Magic - November 1, 2026
- Braised Beef Short Ribs Recipe: Crock Pot Fall-Off-Bone Magic in 6 Hours - November 1, 2026
- Crock Pot Cocoa Recipe: Velvety Warmth With Hidden Spice Magic - November 1, 2026