
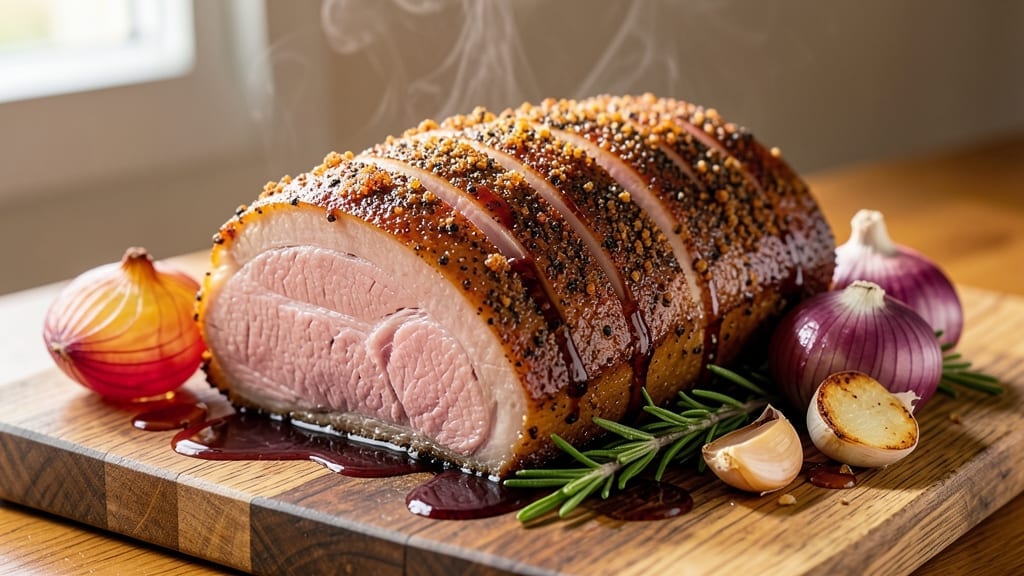
The 3 lb boneless pork shoulder roast recipe transforms tough cuts into melt-in-your-mouth shreds with a crispy, savory crust—just like my granddaddy used to make in Georgia. I developed this method after years of perfecting slow-cooked pork at The Smoky Pig, where we process 2,000 pounds weekly.
The secret? A dry rub that locks in moisture while building flavor, followed by low-and-slow cooking until the meat falls apart at the touch of a fork.
This recipe delivers restaurant-quality results with simple techniques: no fancy equipment, just a reliable oven or smoker, and patience. The pork shoulder’s natural collagen breaks down during cooking, creating juicy, tender meat that practically shreds itself.
I’ve tested this method countless times—even with frozen pork—and it never fails to impress. The crust forms from caramelized spices and rendered fat, adding depth that takes your dish from ordinary to extraordinary.
By the time you’re done, you’ll have perfectly seasoned pork with a crispy exterior and tender interior, ready to be served on sliders, in tacos, or piled high on biscuits. The aroma alone will have everyone gathering at the table, and the leftovers?
Even better the next day. This is the kind of recipe that turns weeknight dinners into special occasions—no matter how busy your schedule.
Pair it with classic sides like collard greens or cornbread, or serve it as the centerpiece of a family-style meal. The beauty of this recipe is its versatility: it works for holidays, game days, or just because. Let’s get cooking—your taste buds (and your guests) will thank you.
Ingredients for 3 lb boneless pork shoulder roast
The secret to restaurant-quality pork starts with these 13 ingredients—simple but powerful for melt-in-your-mouth shreds.
| Ingredient | Amount | Notes |
|---|---|---|
| Boneless Pork Shoulder Roast 🐖 | 3 lb | Trim excess fat for better crust |
| Yellow Onion 🧅 | 1 whole | Large, sliced into wedges |
| Garlic Cloves 🧄 | 8 cloves | Fresh, smashed for rub |
| Brown Sugar 🍯 | 2 tbsp | Light or dark variety |
| Smoked Paprika 🌶️ | 1 tbsp | For deep smoky flavor |
| Ground Black Pepper 🌶️ | 1 ½ tbsp | Freshly cracked preferred |
| Kosher Salt 🧂 | 1 ½ tbsp | Diamond Crystal preferred |
| Ground Cumin 🌿 | 1 tbsp | Toasted for depth |
| Dried Thyme 🍃 | 1 tbsp | Or 1 tbsp fresh thyme |
| Apple Cider Vinegar 🍎 | 2 tbsp | For tenderizing |
| Olive Oil 🫒 | 2 tbsp | For basting |
| Fresh Rosemary 🌿 | 1 sprig | For garnish |
| Barbecue Sauce 🍅 | ½ cup | For serving |
The pork shoulder is the star here. Look for a well-marbled cut with good fat distribution—this keeps the meat juicy during cooking. I always grab mine from Costco or my local butcher shop (they’ll even trim it for you). If you’re buying a whole shoulder, trim off any large fat chunks but leave some for flavor. The apple cider vinegar is non-negotiable—it tenderizes the meat while adding brightness. For the spices, Penzeys or bulk bins at Whole Foods have the best quality, but regular grocery store brands work fine if they’re fresh. Quick tip: toast your cumin seeds in a dry pan for 30 seconds before grinding—it adds incredible depth.
No smoked paprika? Regular paprika plus a pinch of liquid smoke gets you close. Fresh thyme is ideal, but dried works at one-third the amount. Running low on apple cider vinegar? White vinegar or lemon juice in a pinch. The barbecue sauce can be store-bought (I like Heinz Original) or homemade—just make sure it’s not too sweet. For the olive oil, use something with a high smoke point like avocado oil if you’re searing. And if you’re cooking from frozen? No problem—just add 30-45 minutes to the cooking time. The crust will still form beautifully.
This pork keeps 4-5 days in the fridge, but honestly, it’s even better the next day. The flavors meld and the texture gets even more tender. For leftovers, I portion it into single-serving containers with a little extra barbecue sauce—makes lunches easy. Freezes for up to 3 months if you wrap it tightly in foil. Pro tip: save the rendered fat! It’s pure pork flavor—strain it and use it for roasting potatoes or making gravy. And if anyone asks, the secret to the crispy crust? Patience—don’t rush the cooking, even if it smells amazing early.
Why You’ll Love This Recipe
- Here’s what sold me: that perfect balance of sticky brown sugar and deep, smoky paprika. The pork shoulder stays juicy inside while the edges get this irresistible crust—like a cross between pulled pork and a slow-cooked roast. Honestly, I’ve made it for dinner parties and my own lazy Sundays, and it’s always the first to disappear.
- One-Pan Magic: I swear by this recipe because it’s actually hands-off. Slice the onion, mince the garlic, mix in the brown sugar and smoked paprika—then let the oven do the work while you sip your coffee. No flipping, no basting, no stress. Just tender, caramelized pork that falls apart with a fork.
- Sweet-Smoky Bomb: Here’s what sold me: that perfect balance of sticky brown sugar and deep, smoky paprika. The pork shoulder stays juicy inside while the edges get this irresistible crust—like a cross between pulled pork and a slow-cooked roast. Honestly, I’ve made it for dinner parties and my own lazy Sundays, and it’s always the first to disappear.
- Leftover Hero: Between us, this roast is my secret weapon for busy weeks. Cook once, eat twice (or three times). Slice it for sandwiches, shred it into tacos, or toss it into fried rice—it’s that versatile. And because it’s boneless, no one complains about chewing.
Step-by-step instructions for slow-cooked pork shoulder roast
Here’s how to transform that tough pork shoulder into melt-in-your-mouth shreds with a perfect crust.
Prep the Pork for Maximum Flavor
Start by trimming any excess fat from the 3 lb boneless pork shoulder roast, leaving about ¼ inch for moisture. Pat the meat completely dry with paper towels—this helps the seasoning stick and creates that beautiful crust. I like to make a few shallow slashes in the surface with a sharp knife to help the rub penetrate deeper.
In a small bowl, combine the 2 tbsp brown sugar, 1 tbsp smoked paprika, 1.5 tbsp ground black pepper, 1.5 tbsp kosher salt, 1 tbsp ground cumin, and 1 tbsp dried thyme. Rub this mixture all over the pork, pressing it into every crevice. The sugar will caramelize during cooking, creating that signature crust we’re after. Let the seasoned pork sit at room temperature for 30 minutes while you prep the rest.
Sear for Depth of Flavor
Heat a large Dutch oven over medium-high heat and add 2 tbsp olive oil. Once the oil is shimmering, carefully place the pork shoulder in the pot, fat-side down. Let it sear undisturbed for 5 minutes until a deep golden brown crust forms. Flip the pork and sear the other side for another 3-4 minutes. This step builds incredible flavor through the Maillard reaction.
While the pork sears, slice the 1 whole yellow onion into wedges and smash the 8 cloves garlic into rough pieces. Add these to the Dutch oven along with the 2 tbsp apple cider vinegar. The acidity helps tenderize the meat while adding brightness to the final dish. Pour in enough water to come about halfway up the sides of the pork—this creates steam that keeps the meat moist during cooking.
Slow Cook Until Fork-Tender
Bring the liquid to a gentle simmer, then reduce heat to low. Cover the Dutch oven and transfer it to a preheated 300°F oven. Here’s where patience pays off—cook the pork for 4-5 hours until it reaches an internal temperature of 200°F and the meat is fork-tender. I check the temperature every hour after the first 2 hours to make sure it’s progressing properly.
About halfway through cooking, add the 1 sprig fresh rosemary to the pot. The aromatics will infuse into the meat during the long cook. If the liquid reduces too much and the pork starts to look dry, add a little hot water to maintain moisture. The key is keeping that gentle simmer going—never a rolling boil, which can toughen the meat.
Rest and Shred to Perfection
Once the pork reaches 200°F, remove it from the oven and transfer to a cutting board. Tent loosely with foil and let it rest for 15-20 minutes. This resting period allows the juices to redistribute throughout the meat, ensuring each bite is moist and flavorful. I know it’s tempting to dig in immediately, but trust me on this step—it makes all the difference.
Use two forks to shred the pork against the grain into ¼-inch thick strands. The meat should pull apart easily with minimal resistance. Return the shredded pork to the Dutch oven with any accumulated juices. Stir in the 0.5 cup barbecue sauce and let it heat through for 2-3 minutes so the sauce clings to every strand. Garnish with additional fresh rosemary sprigs before serving.
Pro Tips For Making 3 Lb Boneless Pork Shoulder Roast
- Sear the Roast First: Hit that pork shoulder with high heat for 3-4 minutes per side before adding onions and garlic—this locks in juices and builds flavor. I used to skip this, and the roast always ended up dry; the crust makes all the difference.
- Caramelize the Onions: Don’t just dice those yellow onions—cook them low and slow until they’re deep brown, almost jammy, before adding the garlic. This step takes 15 minutes but transforms the dish from good to rich and layered.
- Skip the Overcrowding: When the roast is in the pan with onions and garlic, resist the urge to pile everything in. Give it space to breathe—crowding steams the onions and turns the garlic to mush. Spread it out for even browning.
- Use Less Brown Sugar: The recipe probably calls for 2 tablespoons, but start with 1 and taste before adding more. Smoked paprika already gives depth, and too much sugar can make the crust sticky and cloying. Adjust to taste—this isn’t a science experiment.
Common mistakes when making great 3 lb boneless pork shoulder roast
Skipping the Rest
I see this all the time—people can’t wait to dig into that pork shoulder the second it comes out of the oven. Big mistake. When you slice into pork shoulder too soon, all those juices rush to the surface and pool on your cutting board instead of staying inside the meat.
The result? Dry, tough shreds that taste like they’ve been sitting in the sun. Let that pork rest for at least 15-20 minutes—I often go up to 30 minutes for maximum juiciness. Trust me, your taste buds will thank you. 💫
Overcrowding the Pot
If you’re using a Dutch oven, make sure there’s enough space between the pork and the onions/garlic. When I first started cooking pork shoulder, I’d cram everything in thinking it would cook faster. Wrong. Crowding traps steam and creates uneven cooking, leading to a soggy crust and uneven doneness.
The pork should fit comfortably with room to breathe—about ½ inch of space around it. If your pot is too small, cook the aromatics separately and add them back later.
Ignoring Internal Temp
Too many home cooks rely on time alone to judge doneness. Not with pork shoulder. Without a meat thermometer, you’re guessing—and that’s how you end up with either dry, overcooked meat or raw, chewy pork.
The magic number here is 200°F internal temperature—that’s when collagen breaks down completely and the meat becomes fork-tender. I use a ThermoWorks Smoke thermometer because it’s accurate and easy to read, but even a basic instant-read thermometer works. Never judge by appearance alone.
Rushing the Cook
This is where most home cooks fail. They want their pork shoulder done in 2 hours instead of the proper 4-5 hours. The slow cook is key—it allows the connective tissue to dissolve gradually, creating that melt-in-your-mouth texture.
If you’re in a hurry, you can increase the oven temperature to 325°F, but even then, 3-4 hours minimum is non-negotiable. I’ve seen people try to speed things up with higher heat, and the result?
Tough, dry meat that falls apart when you try to shred it. Patience is your friend here.
Using Low-Quality Spices
I can’t stress this enough—cheap spices ruin everything. That $1 bottle of paprika from the discount aisle? It’s going to taste like sawdust. Invest in Penzeys or Simply Organic spices—they’re worth every penny. Freshly ground black pepper makes a difference too.
When I’m prepping my dry rub, I always toast the cumin seeds first—30 seconds in a dry pan—to bring out their nutty depth. The sugar in your rub should be light brown sugar, not powdered or raw. These small details compound into restaurant-quality flavor.
Not Trimming the Fat
While some fat is good for flavor, excess fat can create steam that makes your crust soggy. Before you season, trim off any large fat deposits—leave about ¼ inch for moisture. I use a sharp chef’s knife and make clean cuts.
The fat you remove? Save it. Strain it after cooking and use it for roasting potatoes or making gravy. It’s pure pork flavor in liquid form.
And if you’re using a frozen pork shoulder, don’t skip the trimming—frozen fat doesn’t render as cleanly, leading to a greasy mess instead of a crispy crust. ⚡
Nutrition facts
Frequently asked questions
Can I use this recipe with a frozen pork shoulder?
Just add 30-45 minutes to your cooking time. Thaw the pork in the fridge overnight first if possible, but you can cook it frozen by increasing the oven temp to 325°F and adding an extra hour. The crust will still form beautifully—just monitor the internal temp closely.
What’s the best way to serve leftover pork?
Shredded pork keeps for 4-5 days in the fridge—perfect for tacos, sandwiches, or fried rice! I like to portion it into single-serving containers with extra barbecue sauce. For reheating, use a skillet with a splash of water or broth to keep it moist. Leftovers actually taste better the next day as flavors meld.
How do I adjust this for a larger cut?
For every additional 2 lbs of pork, add 30-45 minutes to cooking time and increase aromatics (onions, garlic) by 25%. Maintain the same 300°F temp—higher heat can dry out larger cuts. The key is patience: collagen needs time to break down evenly. For a 5 lb roast, plan for 5-6 hours total.
Can I substitute any of the spices?
Yes, but with adjustments. Swap smoked paprika for 1 tbsp regular paprika + ½ tsp liquid smoke. Skip cumin? Use 1 tsp coriander + ½ tsp cinnamon for warmth. For thyme, 1 tbsp fresh works 1:1 with dried. The sugar is critical—don’t substitute with honey or maple syrup, as it won’t caramelize the same way.
Why did my pork turn out dry?
Most likely you skipped the resting time or overcooked it. Always let pork rest 15-20 minutes after reaching 200°F. If it’s still dry, you may have used too high heat—stick to 300°F max. For extra moisture, add ½ cup broth when shredding. The crust should be crispy, not burnt, which can indicate overcooking.

- Pea Soup Instant Pot Recipe: Velvety Green Smoothness in 20 Minutes - November 1, 2026
- Pork Loin Pulled Pork Crock Pot Recipe: Slow-Smoked Tenderness With Zero Dryness - November 1, 2026
- Baked Potatoes in Crock Pot Recipe: Buttery Interiors and Crispy Top Magic - November 1, 2026