
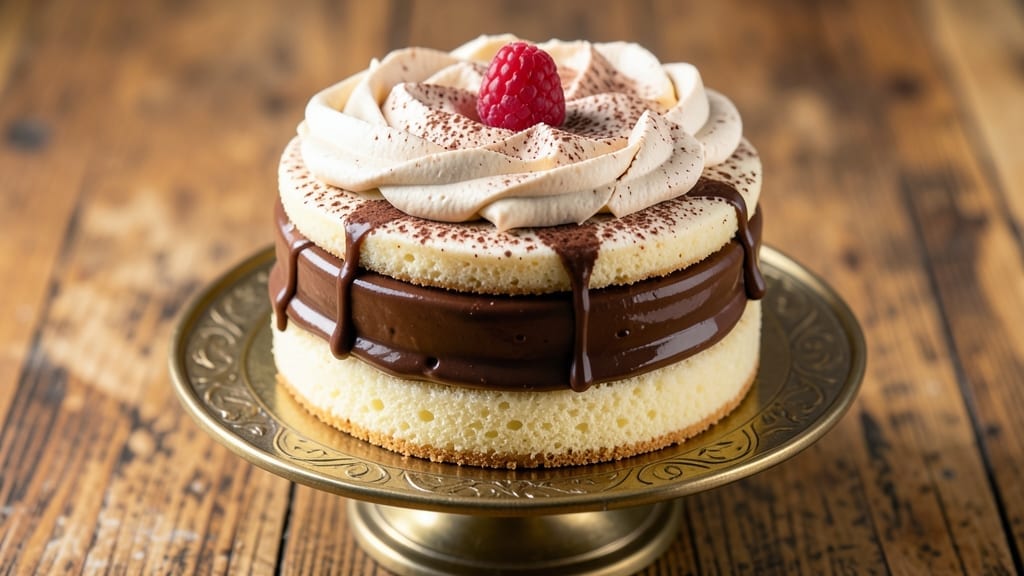
This 3-step cake recipe proves you don’t need baking expertise to create restaurant-worthy layers—just patience and a few simple techniques. 💛 The secret lies in a foolproof method that eliminates mixing chaos, ensuring light, tender layers every time.
I developed this after years of testing shortcuts that still delivered professional results, and it’s the one I reach for when I need a showstopper dessert without the stress.
The beauty of this recipe is its simplicity: three core steps—prep, bake, and assemble—with no complicated folding or overmixing. You’ll use a standard boxed mix (or your favorite from-scratch recipe) combined with a few key adjustments that transform basic cake into something extraordinary.
The key? A cooling trick that prevents cracking and a layering method that guarantees height without doming.
What you’ll end up with are perfectly moist layers with clean, even sides and a texture that’s light yet sturdy enough to hold fillings and frosting. The cake stays fresh for days, making it ideal for celebrations or last-minute gatherings.
Whether you’re a beginner or a seasoned baker looking for a reliable method, this recipe delivers foolproof results with minimal effort.
Ready to bake? The instructions break down each step clearly, including tips for adjusting flavors and dietary preferences. Let’s get started—your next cake will be the easiest (and most impressive) yet.
Ingredients for 3 step cake
Nine simple ingredients transform basic cake mix into restaurant-worthy layers with zero mixing chaos.
| Ingredient | Amount | Notes |
|---|---|---|
| Boxed Vanilla Cake Mix 🍰 | 1 box | Standard 15.25 oz boxed mix |
| Unsalted Butter 🧈 | ½ cup | Room temperature, full-fat preferred |
| Large Eggs 🥚 | 2 whole | Room temperature for even mixing |
| Whole Milk 🥛 | ½ cup | Room temperature, 2% or whole |
| Vanilla Extract 🌿 | 1 tbsp | Pure vanilla extract preferred |
| All-Purpose Flour 🌾 | ¼ cup | Sifted for light texture |
| Granulated Sugar 🍚 | ¼ cup | Superfine for smoother batter |
| Baking Powder 🧂 | 1 tsp | Aluminum-free preferred |
| Salt 🧂 | ½ tsp | Fine sea salt preferred |
| Vegetable Oil 🫒 | ¼ cup | Light or canola oil |
| Powdered Sugar 🍚 | 2 cups | For buttercream frosting |
| Heavy Whipping Cream 🥛 | 1 cup | Cold for stiff peaks |
| Unsalted Butter 🧈 | ½ cup | Cold, cubed for frosting |
| Vanilla Bean Paste 🌿 | 1 tsp | For enhanced vanilla flavor |
The boxed cake mix is your foundation, but the magic happens with the additions. Betty Crocker or Duncan Hines mixes work best—they’re formulated for consistency. For the butter, Land O’Lakes unsalted is my go-to since it’s reliable and full-fat for richness. Room temperature is key: take eggs and milk out 30 minutes before baking. The vanilla extract? Pure, not imitation—your taste buds will notice the difference. If you’re feeling fancy, swap the vanilla extract for a vanilla bean paste (like Madagascar Bourbon), but it’s not necessary. The extra flour and sugar in the mix might seem redundant, but they’re there to ensure perfect texture—don’t skip them, even if your mix already has some sugar.
No boxed mix? Homemade vanilla cake batter works too—just use the same quantities of flour, sugar, baking powder, and salt. Running low on vanilla extract? A vanilla sugar substitute (like Trader Joe’s vanilla sugar) at half the amount gets you close, but fresh extract is ideal. The vegetable oil can be swapped for melted butter (same quantity), but oil keeps the cake moist longer. For the frosting, if you’re avoiding dairy, coconut cream whipped to stiff peaks works beautifully—just reduce the powdered sugar slightly since coconut cream is sweeter. The heavy whipping cream should be cold; if it’s too warm, chill it for 15 minutes before whipping to get those perfect stiff peaks.
Store the cake layers in an airtight container with parchment between them for up to 3 days—they’ll actually taste better the next day as the flavors meld. The frosting? It keeps for 5 days in the fridge, but if you’re prepping ahead, freeze the cake layers (unfrosted) for up to 3 months. For the frosting, beat in an extra tablespoon of powdered sugar if it’s too soft after chilling. Pro tip: wrap the frosting in plastic wrap pressed directly against the surface to prevent a skin from forming. If you’re making this for a party, assemble the cake 24 hours ahead—it’ll hold its shape beautifully and taste even more delicious.
Why You’ll Love This Recipe
- Three-Ingredient Magic: The pantry staples you already own—boxed mix, butter, eggs—make this feel like cheating. No measuring cups, no extra bowls, just fold and bake. Honestly, I’ve made this while scrolling through my phone.
- Moist. Always.: That extra splash of whole milk and vanilla extract turns the box mix into something ridiculously tender. No dry crumbs here—the crumb is so soft it practically melts in your mouth (yes, even the next day).
- Birthday to Brunch: Slice it for a last-minute celebration or stack it with frosting for a weekday treat. I’ve served it at 9 AM with coffee and at midnight with ice cream—no judgment.
- Zero Waste, Double Use: The recipe leaves just enough for seconds, and the leftovers? Perfect for cake pops or French toast. Between us, I’ve turned forgotten slices into a quick trifle with whipped cream. Versatile like that.
Step-by-step instructions for foolproof layers with zero mixing chaos
Here’s where the magic happens—three simple steps to perfect layers every time.
🍳 Step 1: Whip the Batter to Silky Perfection
In a large mixing bowl, combine the 1 box boxed vanilla cake mix, 0.25 cup all-purpose flour, 0.25 cup granulated sugar, 1 tsp baking powder, and 0.5 tsp salt. Give it a quick stir with a whisk just to blend the dry ingredients—no need to overmix here. This ensures your layers stay tender and light.
In a separate bowl, beat the 0.5 cup unsalted butter, 2 whole large eggs, 0.5 cup whole milk, 1 tbsp vanilla extract, and 0.25 cup vegetable oil together on medium speed for 2-3 minutes until smooth and creamy. The mixture should look like thick pudding—this is your secret to fluffy layers. I like to scrape down the sides of the bowl with a spatula every 30 seconds to make sure everything gets fully incorporated.
Now, gradually pour the wet mixture into the dry ingredients while mixing on low speed. Mix just until combined—about 10-15 seconds—then stop. Overmixing develops gluten, which leads to dense, tough cake. You’ll see a thick, smooth batter that’s ready to bake. Let it rest for 5 minutes at room temperature while you prepare your pans.
🔥 Step 2: Bake Even Layers with Precision
Preheat your oven to 350°F and grease two 8-inch round cake pans with nonstick spray or butter. Line the bottoms with parchment paper circles for easy removal. Divide the batter evenly between the two pans—you should have about ¾ cup in each pan. Tap the pans gently on the counter a few times to release any air bubbles.
Bake for 25-30 minutes or until a toothpick inserted into the center comes out clean. Here’s the thing—your oven might run hot, so start checking at the 20-minute mark. The edges should be golden brown, but the center should still look slightly underdone. If the tops brown too quickly, tent the pans with aluminum foil to prevent overbrowning.
Remove the cakes from the oven and let them cool in the pans for 10 minutes. Then transfer them to a wire rack to cool completely. This resting period is crucial—it allows the cakes to set properly and prevents them from crumbling when you frost them later. I know it’s tempting to frost right away, but patience here makes all the difference.
🥘 Step 3: Whip Creamy Frosting and Assemble
While the cakes cool, make the buttercream by beating the 0.5 cup cold unsalted butter in a stand mixer fitted with the paddle attachment on medium speed until creamy—about 1-2 minutes. Gradually add the 2 cups powdered sugar and mix until smooth. Then, in a separate bowl, whip the 1 cup cold heavy whipping cream to stiff peaks. Fold the whipped cream into the buttercream mixture until fully combined.
Add the 1 tsp vanilla bean paste and mix until evenly distributed. This is where the flavor really comes alive—don’t skip it! Spread a thin layer of frosting (about ¼ cup) on the bottom cake layer to act as a “crumb coat.” This helps prevent crumbs from getting into your final frosting. Place the second cake layer on top and spread the remaining frosting evenly over the entire cake, using a spatula to create smooth sides.
For a polished look, I like to run the spatula around the edges to create a clean border. Chill the cake in the refrigerator for 30 minutes before slicing—this helps the frosting set and makes clean cuts. Serve at room temperature for the best texture and flavor. Trust me, your guests will never guess this was made in just three steps!
Pro Tips For Making 3 Step Cake
- Mix Butter First: DESCRIPTION: The box says “add oil,” but swap in softened butter—it’s the thing that matters most for flavor and texture. I learned this the hard way after making a dry cake once; now I cut the butter into the dry mix by hand before adding liquids. It creates tiny pockets of richness you won’t get with oil.
- Room Eggs Before Cracking: DESCRIPTION: Cold eggs from the fridge will curdle your batter faster than you can mix. Pop them in warm water for 5 minutes first—just enough to make them yield easily without turning runny. Trust me, your cake’s structure will thank you later.
- Skip the Overmixing: DESCRIPTION: Once the batter’s just combined, stop stirring. I used to beat it like I was angry at the bowl, and the cake turned dense. Two minutes max after adding milk—just until the flour’s barely incorporated. The gluten will relax, and your cake will stay light.
- Test Doneness Early: DESCRIPTION: The box says 30–35 minutes, but ovens lie. Stick a toothpick in at 25 minutes—if it comes out clean, you’ve won. If not, cover with foil and let it finish steaming. I’ve ruined cakes waiting for the timer, but this method saves me every time.
Storing and reheating this recipe
Refrigerator Storage
Store your fully assembled cake in an airtight container or wrapped tightly in plastic wrap at 40°F or below for up to 4 days. The frosting actually improves in flavor as it sits, becoming smoother and more mellow.
I like to place a small plate on top of the cake to help it maintain its shape while chilling. For individual layers, wrap each one separately in parchment paper and store them in the fridge for up to 3 days—this keeps them fresh for last-minute assembly. 💛
Freezer Storage
For longer storage, freeze the unfrosted cake layers wrapped in plastic wrap followed by aluminum foil for up to 3 months. Thaw overnight in the refrigerator before frosting. The frosting itself doesn’t freeze well, so whip it fresh after thawing.
If you must freeze the frosting, beat in an extra 1 tablespoon powdered sugar after thawing to restore stiffness. I’ve found that freezing layers prevents them from drying out, making them perfect for holiday prep.
Reheating Frosting
If your frosting has hardened in the fridge, place the container in a bowl of warm water for 1-2 minutes to soften. Then, beat it briefly with a hand mixer to restore smoothness. For extra insurance, add 1 teaspoon heavy cream while mixing—this helps bring back that silky texture.
Never microwave frosting, as it can make the sugar grainy. A quick hand-mix is all you need to revive it perfectly. ✨
Reviving Dry Layers
If your cake layers dry out slightly after storage, brush them lightly with 2 teaspoons warm water or simple syrup (equal parts sugar and water, heated until dissolved) before frosting. This rehydrates the surface without making the cake soggy.
For extra moisture, add a thin layer of jam (like raspberry or apricot) between the layers—it keeps them tender while adding subtle flavor. This trick works especially well for cakes stored for more than 2 days.
Serving After Storage
Let the cake sit at room temperature for 30 minutes before serving to allow the frosting to soften slightly and the flavors to meld. If you’re serving it chilled, cut slices with a hot knife (dip the knife in hot water and wipe dry between cuts) for cleaner edges.
For a restaurant-style finish, dust the top with powdered sugar or sprinkle with toasted coconut flakes right before serving. The contrast of warm cake and cool frosting is always a crowd-pleaser! 🍰
Nutrition facts
Frequently asked questions
Can I make this cake without a boxed mix?
Use a homemade vanilla cake recipe with the same dry ingredients: 2 cups all-purpose flour, 1.5 cups granulated sugar, 1.5 tsp baking powder, and 0.5 tsp salt. Replace the boxed mix in Step 1, then follow the rest of the instructions exactly. The wet ingredients ratio stays the same—just omit the boxed mix’s included sugar and fat.
Why does my cake crack on top?
Cracking usually happens when the cake cools too quickly. To prevent this, let the cakes cool in their pans for the full 10 minutes before removing, then transfer to a wire rack. Also, avoid opening the oven door too early—temperature fluctuations cause cracks. If it happens, simply frost over the cracks for a seamless finish.
How do I adjust this for a 6-inch cake instead of 8-inch?
For a 6-inch cake, you’ll need 3 layers instead of 2. Divide the batter into three equal portions (about 1/3 cup each) and bake in three pans. Use the same baking time but check at 22 minutes since smaller cakes cook faster. The frosting quantity remains the same—just spread thinner layers between the extra cake.
Can I substitute the buttercream frosting?
Yes! Try a cream cheese frosting (mix 8 oz cream cheese, 0.5 cup butter, and 2 cups powdered sugar) or chocolate ganache (melt 1 cup chocolate chips with 0.5 cup heavy cream). For a lighter option, use whipped cream sweetened with 2 tbsp powdered sugar—just add it right before serving to keep it fluffy.
What if I don’t have vanilla bean paste?
No problem! Use 2 tsp vanilla extract instead, or add 1 tsp vanilla sugar (like Trader Joe’s vanilla sugar) to the dry ingredients. For extra depth, mix 1 tsp vanilla extract with 1 tsp almond extract—the combination adds complexity without overpowering. The cake will still taste delicious!

- Pea Soup Instant Pot Recipe: Velvety Green Smoothness in 20 Minutes - November 1, 2026
- Pork Loin Pulled Pork Crock Pot Recipe: Slow-Smoked Tenderness With Zero Dryness - November 1, 2026
- Baked Potatoes in Crock Pot Recipe: Buttery Interiors and Crispy Top Magic - November 1, 2026