
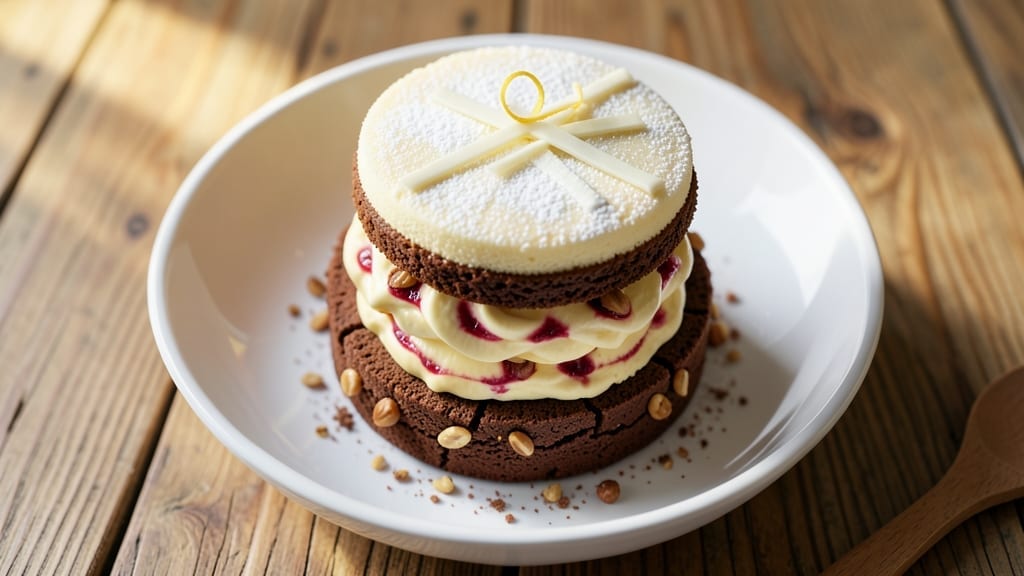
This 3D cake recipe proves you don’t need advanced baking skills—just patience and precision to craft edible magic. This recipe transforms simple layers into a stunning illusion with geometric angles and edible glitter accents that catch the light beautifully.
The key lies in structural support and careful assembly, ensuring your cake stands tall and wows every time.
We’ll use a sturdy vanilla sponge cake base, filled with buttercream that holds its shape while supporting the dramatic 3D elements. The secret to stability comes from baking time adjustments and strategic layering—each tier must be perfectly level to prevent wobbling.
For beginners, we’ll start with a classic pyramid design before exploring more intricate patterns.
What you’ll achieve is a cake that looks like it belongs in a bakery display case, complete with crisp edges, smooth surfaces, and shimmering details that make it feel like a centerpiece.
The edible glitter adds that extra touch of sophistication without compromising texture. This recipe proves that even complex designs can be mastered with the right techniques.
The best part? You can customize the design to match any theme—birthday celebrations, weddings, or just because. Whether you’re creating a geometric masterpiece or a whimsical character cake, the principles remain the same. Let’s bring your vision to life with these step-by-step instructions.
Ingredients for 3d cake
Sturdy layers, precise assembly, and shimmering details create this showstopping 3D masterpiece.
| Ingredient | Amount | Notes |
|---|---|---|
| All-Purpose Flour 🌾 | 3 ½ cups | Sifted for light texture |
| Granulated Sugar 🍚 | 2 ½ cups | Superfine for smooth batter |
| Unsalted Butter 🧈 | 1 ½ cups | Room temperature, European style preferred |
| Large Eggs 🥚 | 6 whole | Room temperature, separated |
| Vanilla Extract 🌿 | 2 tsp | Pure Madagascar bourbon |
| Baking Powder 🧂 | 2 tsp | Fine grain, not caking powder |
| Salt 🧂 | ½ tsp | Diamond Crystal kosher |
| Milk 🥛 | ¾ cup | Whole milk for richness |
| Powdered Sugar 🍚 | 4 cups | Confectioners' sugar, sifted |
| Heavy Cream 🥛 | 2 cups | Cold, heavy whipping cream |
| Edible Glitter ✨ | ½ oz | Fine silver or gold flakes |
| Food Coloring 🎨 | 1 tsp | Gel-based, vibrant color |
| Cake Stands 🎂 | 2 whole | Tiered or geometric design |
| Parchment Paper 📄 | 1 sheet | For level baking |
| Leveling Tool 🔪 | 1 whole | Serrated knife or cake leveler |
The European-style butter makes all the difference here—look for brands like Plugrá or Miyoko’s at specialty stores. Sifted flour prevents dense layers, and superfine sugar ensures a silky texture. For the edible glitter, Dritz or Wilton brands are reliable, but check for non-toxic certification. The gel food coloring (like Wilton’s) keeps vibrant hues without altering texture. If you can’t find superfine sugar, pulse regular granulated in a food processor for 30 seconds—game changer for smoothness.
No powdered sugar? Sift regular granulated sugar—it won’t dissolve as smoothly, but works in a pinch. Running out of heavy cream? Whipped coconut cream mimics the texture, though flavor shifts slightly. For the vanilla extract, imitation won’t cut it—Madagascar bourbon delivers the richest depth. The cake stands can be DIY with sturdy cardboard wrapped in parchment, but Wilton’s tiered stands elevate the presentation. Pro tip: Chill your buttercream for 30 minutes before assembling to prevent melting during layering—trust me on this.
Store baked layers airtight at room temperature for up to 2 days before assembly to prevent sogginess. The buttercream filling keeps for 3 days in the fridge, but bring to room temp before using. Once decorated, display at room temperature—humidity causes glitter to clump. For long-term storage, freeze fully assembled cakes (without glitter) for up to 1 month, thawing overnight in the fridge before serving. The edible glitter loses sparkle after 24 hours, so add it fresh before serving.
Why You’ll Love This Recipe
- No Mixer Needed: I swear by this recipe because it only requires a bowl and a whisk—no stand mixer or fancy gadgets. The butter and sugar get creamed by hand in minutes, and the eggs blend right in without fuss. Honestly, it’s the kind of cake that makes me feel like a baking pro, even when I’m in sweatpants.
- Vanilla Butter Bliss: That rich vanilla extract and melted butter combo? It’s what turns this into a showstopper. The crumb is tender but sturdy, and the flavor is so pure it makes store-bought cake taste like a sad afterthought. (Yes, even on a Tuesday night.)
- Layer Magic for Any Event: This recipe builds height effortlessly—three tiers with just one batter. Whether it’s a birthday, holiday dessert, or just because, the layers stack like a dream. I’ve even used it for a last-minute office celebration (my coworkers still talk about it).
- Budget-Friendly Leftovers: Flour, sugar, butter—these are pantry staples that won’t break the bank. And the best part? The cake keeps well for days, so you can bake once and enjoy slices for a week. My kids beg for seconds, and I never feel guilty about the leftovers.
Step-by-step instructions for creating a 3D cake masterpiece
Let’s bring this illusion to life with precise layers and professional techniques.
Prepare the Cake Batter for Perfect Layers
Preheat your oven to 350°F and line two 8-inch round cake pans with the parchment paper, ensuring the paper touches the bottom and sides for easy removal. In a large mixing bowl, cream together the 1.5 cups unsalted butter and 2.5 cups granulated sugar on medium speed until light and fluffy, about 3-4 minutes. This step is crucial—you’re incorporating air to create that light, airy texture perfect for 3D cakes.
Add the 6 whole large eggs one at a time, mixing well after each addition. Then whisk in the 2 tsp vanilla extract and 0.75 cup milk. In a separate bowl, sift together the 3.5 cups all-purpose flour, 2 tsp baking powder, and 0.5 tsp salt. Gradually fold the dry ingredients into the wet mixture until just combined—overmixing develops gluten, which can make your cake dense. The batter should be smooth and slightly thick, like heavy pudding.
Bake and Level the Cake Layers
Divide the batter evenly between the two prepared cake pans. Bake for 25-30 minutes or until a toothpick inserted into the center comes out clean. Let the cakes cool in the pans for 10 minutes before transferring them to a wire rack to cool completely. This gradual cooling prevents cracking, which is especially important for delicate 3D designs.
Once fully cooled, use the leveling tool to create perfectly even surfaces on each cake layer. This step is non-negotiable for clean, professional-looking tiers. If you don’t have a leveling tool, a serrated knife works well—just take your time to create a smooth, flat surface. Trim any uneven edges and discard them to maintain the perfect shape for your 3D illusion.
Create the Illusion Layers with Buttercream
In a large mixing bowl, beat the 2 cups heavy cream until soft peaks form. Gradually add the 4 cups powdered sugar, mixing until smooth and fully incorporated. Add the 1 tsp food coloring and mix until evenly distributed. This will be your base buttercream for the illusion layers.
Divide the buttercream into two bowls. To one bowl, add half of the 0.5 oz edible glitter and mix until evenly distributed. This will create your “highlight” layer for the 3D effect. Spread a thin layer of plain buttercream on one cake layer, then place it on one of the cake stands. Repeat with the second layer, but this time spread the glitter-infused buttercream on top before placing the second layer. This contrast will create the optical illusion of depth when viewed from certain angles.
Assemble and Decorate the 3D Cake
Place the second cake layer on top of the first, creating a slight offset to enhance the 3D effect. Use small dollops of buttercream to secure the layers in place, then smooth the sides with a spatula. For the final touch, pipe a border of buttercream around the base of the cake and add small decorative elements like piped rosettes or delicate curls to draw attention to the illusion.
To complete the 3D effect, carefully dust the top layer with the remaining edible glitter using a fine sieve. This adds a magical shimmer that enhances the dimensional appearance. Place the cake in the refrigerator for 30 minutes before serving to allow the buttercream to set slightly, ensuring your masterpiece holds its shape and sparkles under the light.
Pro Tips For Making 3d Cake
- Melt Butter Slowly: I learned this the hard way—dumping cold butter straight into the mix makes lumps that never fully dissolve. Instead, cut it into small cubes and warm them in the microwave for 20 seconds before adding to the sugar. That way, it melts evenly and blends into a smooth paste without turning the batter greasy.
- Sift the Flour Twice: This isn’t the prettiest method, but it’s the tastiest. Sift the flour before measuring and again when folding it into the wet ingredients. Why? Packed flour adds weight and density, and a 3D cake already relies on structure—don’t sabotage it with clumps.
- Room-Temp Eggs Matter: Cold eggs mix unevenly and can cause the batter to curdle, leading to a cake that collapses when baking. Take them out of the fridge 30 minutes before using—yes, even if you’re impatient like me. Room temperature eggs whip up smoother and distribute evenly.
- Don’t Overmix the Batter: I used to beat this like I was punishing the mixer, and my cakes turned out tough and dry. Stop mixing as soon as the flour disappears—overworking the gluten makes the texture dense. A few lumps? That’s fine. A cake that’s chewy instead of light? Not fine.
Dietary considerations for these flavors
Gluten-Free Adaptations
For a gluten-free version, replace the all-purpose flour with a 1:1 gluten-free baking flour blend like King Arthur Measure for Measure or Bob’s Red Mill. These blends include xanthan gum, which mimics gluten’s structure and helps your cake hold its shape for that critical 3D effect.
You’ll need 3.5 cups of the blend, sifted just like the original recipe. 🌾
Add ½ tsp xanthan gum to the dry ingredients if your blend doesn’t already contain it—this ensures proper structure. Reduce the milk to ⅔ cup to compensate for the blend’s moisture differences. For extra stability, chill the batter for 30 minutes before baking to prevent spreading.
Dairy-Free Options
Swap the unsalted butter for Earth Balance vegan butter or Miyoko’s cultured cashew butter, both of which work beautifully in cake recipes. Use 2 cups of dairy-free butter, softened to room temperature.
For the heavy cream, substitute full-fat coconut cream (chilled overnight) or Silk unsweetened coconut cream. Whip it until stiff peaks form before adding the powdered sugar.
Replace the whole milk with unsweetened almond milk or oat milk—both add richness without altering the texture. The edible glitter remains safe for dairy-free diets, but always check labels for cross-contamination warnings. Chill the final cake for 45 minutes to help the coconut cream set properly.
Nut-Free Considerations
If nut allergies are a concern, avoid coconut-based substitutes and opt for olive oil instead of butter. Use 1.5 cups of high-quality extra virgin olive oil (like California Olive Ranch) to replace the butter in the cake batter.
For the buttercream, whip 2 cups of vegan margarine (such as Country Crock Plant Butter) with the powdered sugar and coconut cream alternative.
Use sunflower seed milk or soy milk instead of almond milk for the cake batter. These alternatives maintain the moisture balance without introducing nuts. Always double-check labels on edible glitter and food coloring for nut-free processing facilities.
Sugar-Free Alternatives
For a sugar-free version, replace the granulated sugar and powdered sugar with monk fruit sweetener or erythritol. Use 2.5 cups of monk fruit sweetener (like Lakanto) for the cake batter and 4 cups of erythritol (like Swerve) for the buttercream.
These sweeteners measure cup-for-cup but yield a slightly denser texture, so reduce the milk to ½ cup to compensate.
Skip the edible glitter, as it often contains sugar, and use sugar-free luster dust (like Wilton’s) for a shimmering effect. The food coloring should be sugar-free and gel-based to avoid altering the texture. Chill the cake for 1 hour before serving to help the alternative sweeteners stabilize.
Allergen-Friendly Tips
For egg-free adaptations, replace the 6 eggs with 6 tablespoons of aquafaba (chickpea brine) or FlaxPlus egg replacer. Whisk the aquafaba until stiff peaks form before folding into the batter.
If using FlaxPlus, mix 1 tablespoon of the powder with 3 tablespoons of water per egg replacement and let it thicken for 5 minutes before adding.
For soy-free diets, ensure your food coloring and edible glitter are soy-free, as some brands use soy lecithin as a binder. Always check labels for hidden allergens. When in doubt, opt for certified allergen-free brands like Wilton or Dritz for food-safe products.
Nutrition facts
Frequently asked questions
How do I prevent my 3D cake from collapsing during assembly?
Chill your cake layers for 30 minutes before assembling to firm up the buttercream. Use small dollops of buttercream as “glue” between layers, and place them in a cool spot for 15 minutes before adding the next tier. A doweling system (wooden skewers inserted through the sides) adds hidden support for taller designs.
Can I make this 3D cake without a leveling tool?
Use a serrated knife or long bread knife to trim uneven tops. Place the cake on a cutting board, hold the knife at a 45-degree angle, and saw gently back and forth. For extra precision, use a ruler as a guide to keep cuts perfectly straight.
What’s the best way to create more dramatic 3D effects?
Try these pro techniques: Angle your cake stands slightly to create depth, use contrasting colors in your buttercream layers, or add edible geometric shapes (like fondant triangles) between tiers. For advanced designs, consider carving negative space into the cake layers to reveal different colors underneath.
How long does it take to decorate a 3D cake?
Plan for 2-3 hours total, including drying time. The buttercream needs 30 minutes to set between layers, and the final glitter application should be done 1 hour before serving. Work in a cool, dry environment to prevent buttercream from melting prematurely.
Can I transport a 3D cake without it falling apart?
Use a sturdy cake box with custom foam inserts to support each tier. Wrap the cake in plastic wrap before boxing to prevent moisture loss. For long trips, place the box in your car trunk (not the passenger area) and keep it at room temperature—never refrigerate during transport.

- 12 Bean Chili Recipe: Hearty Slow-Cooked Depth With 12 Legumes - October 17, 2026
- 5 Seed Bread Recipe: Nutty Crunch and Artisan Flavor in One Loaf - October 17, 2026
- 1 Lb Macaroni Salad Recipe: Bold, Crunchy, and Crowd-Pleasing - October 17, 2026