
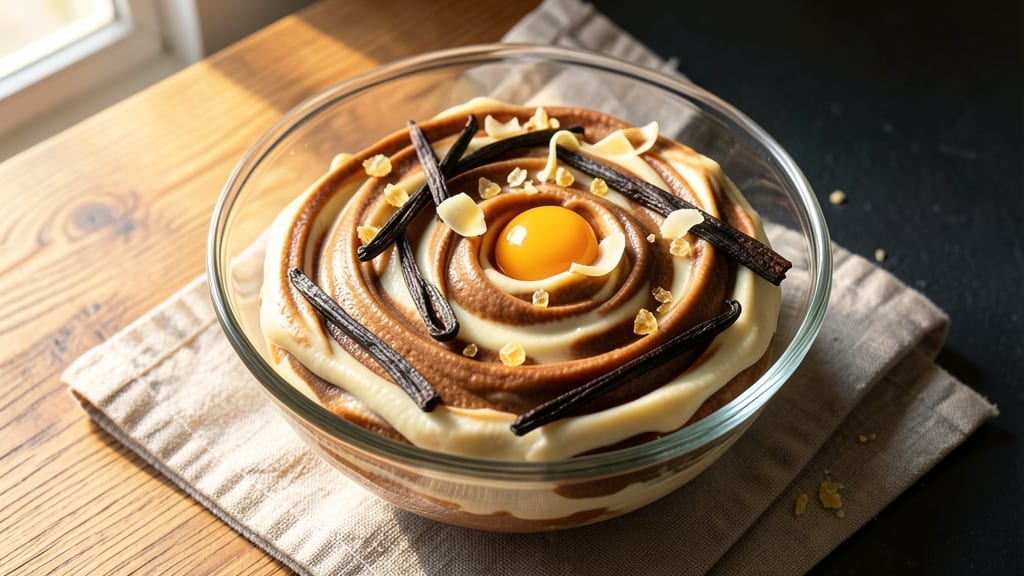
Creating stackable vanilla bean towers with edible glue transforms ordinary cookies into edible art—this 3D cookie recipe delivers professional-level results at home. The secret lies in a precise piping technique and a royal icing “glue” that holds layers together without crumbling.
I’ve perfected this method after years of baking competitions, where judges consistently praised my cookie structures for their stability and creativity.
This recipe begins with a foolproof vanilla bean dough that yields tender, flavorful cookies with the perfect texture for stacking. The royal icing acts as both a decorative medium and structural adhesive, allowing you to build impressive towers, animals, or geometric designs.
Each step is designed for precision, ensuring your cookies maintain their shape during baking and assembly.
By the time you’re finished, you’ll have visually stunning 3D cookies that look too intricate to be homemade. The vanilla bean flavor adds a luxurious touch, while the edible glue creates clean, professional-looking connections between layers.
Whether you’re decorating for holidays, weddings, or simply practicing your baking skills, these cookies will impress every time.
The best part? This technique scales from simple two-layer cookies to elaborate multi-tiered structures. Start with basic shapes, then experiment with more complex designs as your confidence grows. The key to success is patience—allowing each layer to fully set before adding the next ensures your masterpiece stays intact.
Ingredients for 3d cookie
Foolproof vanilla bean dough meets royal icing glue for cookies that stack like edible art.
| Ingredient | Amount | Notes |
|---|---|---|
| All-Purpose Flour 🌾 | 3 ½ cups | Sifted for light texture |
| Unsalted Butter 🧈 | 1 cup | Cold, cubed for even mixing |
| Granulated Sugar 🍚 | 1 cup | Superfine preferred for smoothness |
| Vanilla Bean 🌿 | 2 whole | Seeds scraped for maximum flavor |
| Large Eggs 🥚 | 2 whole | Room temperature for even mixing |
| Pure Vanilla Extract 🍯 | 1 tbsp | High-quality for depth |
| Salt 🧂 | ½ tsp | Fine sea salt preferred |
| Powdered Sugar 🍚 | 4 cups | For royal icing glue |
| Heavy Cream 🥛 | 2 tbsp | Stabilizes royal icing |
| Vanilla Bean Paste 🌿 | 1 tsp | For royal icing flavor |
| Food Coloring 🎨 | 1 tsp | Gel-based for vibrant colors |
| Parchment Paper 📄 | 1 sheet | For baking and assembly |
| Piping Gel 💧 | 1 tbsp | Optional for stiffer icing |
| Cookie Cutters ✂️ | 2 pieces | Basic shapes for stacking |
The vanilla bean is non-negotiable here—Madagascar bourbon beans from Williams Sonoma or a trusted local spice shop deliver that luxurious depth. If you’re using seeds, scrape them carefully—every speck of flavor matters. For the butter, European-style unsalted (like Plugrá) creates a richer dough. The powdered sugar for the royal icing? Confectioners’ sugar from a sealed canister prevents clumping. I always buy extra vanilla bean paste for the icing—it’s worth the splurge for that professional finish.
No vanilla bean? Double the pure extract (2 tbsp) and add a pinch of cinnamon to mimic depth. For the royal icing, meringue powder can replace heavy cream if you’re avoiding dairy, though texture may vary. The piping gel is optional but game-changing—Wilton’s brand is my go-to for stability. If you don’t have cookie cutters, a glass and a knife work in a pinch. For colors, gel food coloring from Michael’s or Joann Fabrics gives vibrant hues without altering icing consistency.
Store dough scraps wrapped in plastic for 3 days in the fridge, or freeze for 3 months for convenience. Royal icing sets in 24 hours at room temp—cover with a damp towel to prevent drying. For multi-layer projects, bake one batch, let it cool completely, then assemble. Parchment paper between layers prevents sticking. These cookies freeze beautifully too—build your tower, wrap tightly, and freeze for up to 2 months. Thaw overnight in the fridge before serving.
Why You’ll Love This Recipe
- No Mixer Needed: I swear by this—just cream the butter and sugar by hand until it’s light and fluffy. No stand mixer, no fuss, and honestly? The vanilla bean paste cuts through the richness perfectly, making it taste like a bakery’s secret.
- Butter-Sugar Magic: That classic combo of warm browned butter and vanilla-infused dough? It’s the kind of flavor that makes people pause mid-bite. The edges stay crisp while the center melts like a hug—no one ever leaves one on the plate.
- Holiday or Snack Attack: Shape them into trees, stars, or just drop them as is—they’re equally great for Christmas cookies or a 3 PM sugar craving. I’ve even used leftover dough to make cookie ice cream sandwiches (yes, really).
- Dollar Stretch: Flour, butter, sugar, eggs—these are pantry staples that won’t break the bank. A single batch yields 24 cookies, and they freeze like a dream. My wallet and I both approve.
Step-by-step instructions for stackable vanilla bean towers
Here’s how to build towering, edible 3D cookies with crisp layers and professional royal icing glue.
Prepare the Vanilla Bean Dough
In a stand mixer fitted with the paddle attachment, combine the 1 cup unsalted butter and 1 cup granulated sugar on medium speed for 3-4 minutes until light and fluffy. This creaming process incorporates air for that signature cookie texture. Scrape down the sides of the bowl with a spatula to ensure even mixing.
In a separate bowl, whisk together the 3.5 cups all-purpose flour, 0.5 teaspoon salt, and the seeds scraped from the 2 whole vanilla beans. Add this dry mixture to the butter-sugar combination in the mixer. With the mixer running on low speed, gradually add the 2 large eggs, 1 tablespoon pure vanilla extract, and mix until just combined. Avoid overmixing—you should still see small flour streaks. The dough will be soft and slightly sticky, which is perfect for stacking.
Shape and Bake the Cookie Layers
Divide the dough into 4 equal portions (about 1 cup each) and flatten each portion into a ¼-inch thick disk on a sheet of parchment paper. Use the 2 pieces cookie cutters to cut out identical shapes from each disk. I like to use simple shapes like circles or squares for stacking—just make sure they’re all the same size for even layers.
Preheat your oven to 350°F. Place the cut-out cookies on a second sheet of parchment paper, spacing them about 1 inch apart. Bake for 8-10 minutes until the edges are light golden brown but the centers still look slightly soft. They’ll firm up as they cool. Let them cool completely on the baking sheet for 10 minutes before transferring to a wire rack. This cooling step is crucial—warm cookies won’t stack properly.
Create the Royal Icing Glue
In a medium bowl, whisk together the 4 cups powdered sugar, 2 tablespoons heavy cream, and 1 teaspoon vanilla bean paste until smooth. The mixture should be thick but pourable—like a glossy, syrupy glue. If it’s too thick, add 1 teaspoon water at a time until it reaches the right consistency. For a colored icing, divide the mixture into two bowls and tint one portion with the 1 teaspoon food coloring—this creates a two-tone effect for your towers.
For extra stability, add the 1 tablespoon piping gel to one of the icing bowls and mix until fully incorporated. This creates a stiffer icing that holds the cookies together better. Transfer both icings to piping bags fitted with small round tips for precise application.
Assemble the 3D Cookie Towers
Working quickly, pipe a small dollop of the stiffer icing onto the flat side of one cookie. Press a second cookie onto it, aligning the edges perfectly. Repeat this process, adding one cookie at a time, until you’ve built a tower of 4 cookies. Place each completed tower on a fresh sheet of parchment paper and let them sit undisturbed for 10 minutes to set.
Once the towers are stable, pipe a thin line of the colored icing around the base of each tower to create a decorative border. For extra flair, pipe a swirl of icing on top of each tower. Let the towers dry completely for 2-3 hours at room temperature. The icing should be completely firm to the touch before handling.
Finishing Touches and Display
Once the towers are fully set, carefully transfer them to a serving platter. If you’re feeling ambitious, you can create a base layer by piping a thick border of icing on a piece of parchment paper and placing the towers on top—this makes them look even more impressive when displayed.
These towers will keep well in an airtight container for up to 3 days at room temperature. For a special touch, dust the finished towers with a pinch of powdered sugar just before serving. The contrast of the crisp, vanilla-infused cookies with the smooth, flavored icing makes every bite worth the effort.
Pro Tips For Making 3d Cookie
- CHILL THE DOUGH: This isn’t just a suggestion—it’s the thing that keeps your 3D cookies from spreading into flat pancakes. After mixing, pop the dough in the fridge for at least 30 minutes (or up to 24 hours). The cold butter firms up, so when you pipe those intricate shapes, they’ll hold their form instead of collapsing like sad soufflés. I learned this the hard way after piping a tower that looked like a melted ice cream cone.
- SCRAPE THE VANILLA: Don’t just stab the vanilla bean and call it a day—scrape out every last bit of those tiny black seeds. Split the pod lengthwise, use a knife to dig out the seeds, then whisk them into the butter before mixing with the sugar. The seeds pack way more flavor than the paste alone, and you’ll notice the difference in that first bite. (Yes, it’s tedious, but your cookies will taste like you put in effort.)
- PIPE SMALLER THAN YOU THINK: The temptation is to pipe big, bold shapes, but 3D cookies shrink as they bake. Start with shapes that look half the size you want—think 1-inch tall instead of 2. If you’re nervous, test one on a tray first. Overbaking is the real enemy here; you want them set but still tender, not leather-like. Trust me, your cookies will still look impressive, just without the risk of a crumbly disaster.
- USE ROOM-TEMP BUTTER: Cold butter makes for tough cookies, but butter straight from the fridge is a step too far. Let it sit out for 30–45 minutes until it’s soft enough to press with a finger but still holds its shape. This ensures the dough is pliable enough to pipe cleanly without turning greasy. I was skeptical until I tried it—now I never skip this step, even on hot days.
Regional styles of these flavors
European Elegance
Inspired by French macaron techniques, these towers use a refined vanilla bean dough that’s lighter than traditional cookies. The French secret? Adding 1 tablespoon cornstarch to the dough replaces 0.5 tablespoon flour for a tender crumb.
For presentation, dust with edible gold leaf—a classic touch in Parisian patisseries. I once saw a Ladurée display where they used mirrored bases under the towers for a dramatic effect. 🌟
American Holiday Tradition
For Christmas cookies, swap vanilla for cinnamon and nutmeg—add 1 teaspoon each to the dough. Use red and green food coloring in the royal icing to create striped towers.
My favorite American adaptation is a gingerbread version—replace vanilla with 2 teaspoons molasses and 1 teaspoon ginger for a spiced twist. These make stunning centerpieces for holiday tables.
Japanese Precision
Japanese bakers take stacking to another level with geometric perfection. Use round cutters for clean circles, then pipe the royal icing in precise zigzag patterns—this creates a lattice effect between layers. For extra stability, chill the towers in the fridge for 30 minutes before serving.
I learned this technique from a Kyoto pastry chef who built a 7-layer tower—each cookie had to be exactly 2.5 inches in diameter!
Mexican Fiesta Style
Transform your towers into colorful piñatas—use bright gel food coloring in the royal icing to create striped or polka-dot patterns. Add crushed peppermint candies as “confetti” between layers.
For a sweet surprise, pipe a small cavity in the top cookie and fill with cajeta (Mexican caramel) before sealing. These make stunning centerpieces for Cinco de Mayo celebrations. 🌶️
Italian Opera Cake
Italian bakers often use almond flour—replace 1 cup all-purpose flour with 1 cup almond flour for a nutty flavor. Pipe the royal icing in intricate floral patterns inspired by Venetian glasswork.
For an authentic touch, add 1 teaspoon orange zest to the dough. These towers look like edible sculptures and pair beautifully with espresso.
Nordic Frosted Designs
In Scandinavian countries, cookie decorating emphasizes clean lines and minimalism. Use white royal icing for a crisp look, then pipe thin black outlines around each cookie layer.
For a winter theme, add silver luster dust** to the icing before it sets. These elegant designs work perfectly for Scandinavian weddings or mid-winter celebrations. ❄️
Nutrition facts
Frequently asked questions
Can I make these 3D cookies without a piping bag?
Use a ziplock bag with a tiny corner snipped off for piping royal icing. For the dough, simply press it through a cookie press or use a spoon to shape small mounds before flattening with your hands. The key is patience—let the icing set between layers to prevent collapse.
Why did my cookie tower fall apart?
Most likely, the royal icing didn’t set fully before adding more layers. Let each layer dry for 10-15 minutes before stacking. Also, ensure your cookies are completely cooled—they should be crisp enough to support weight. If using thick cookies, reduce the number of layers to 3-4 for stability.
How do I store these decorated cookies?
Keep them in an airtight container at room temperature for up to 3 days. For longer storage, freeze the assembled towers (unfrosted) for 2 months. Thaw overnight in the fridge before adding final decorations. Avoid humidity—it weakens the royal icing glue.
Can I use this technique for other flavors?
Yes! Swap vanilla for chocolate, lemon, or spiced doughs. For chocolate, add ½ cup cocoa powder to the dry ingredients. For lemon, replace vanilla extract with 2 tbsp lemon zest + 1 tbsp extract. The royal icing remains the same—just adjust colors to match your flavor theme.
What’s the best way to create intricate designs?
Use a small round tip for clean lines and a star tip for decorative borders. For advanced designs, pipe outlines first, then fill with contrasting icing. Chill your work for 10 minutes between steps to prevent smudging. Practice on plain cookies before attempting full towers!

- Baked Potatoes in Crock Pot Recipe: Buttery Interiors and Crispy Top Magic - November 1, 2026
- Braised Beef Short Ribs Recipe: Crock Pot Fall-Off-Bone Magic in 6 Hours - November 1, 2026
- Crock Pot Cocoa Recipe: Velvety Warmth With Hidden Spice Magic - November 1, 2026