
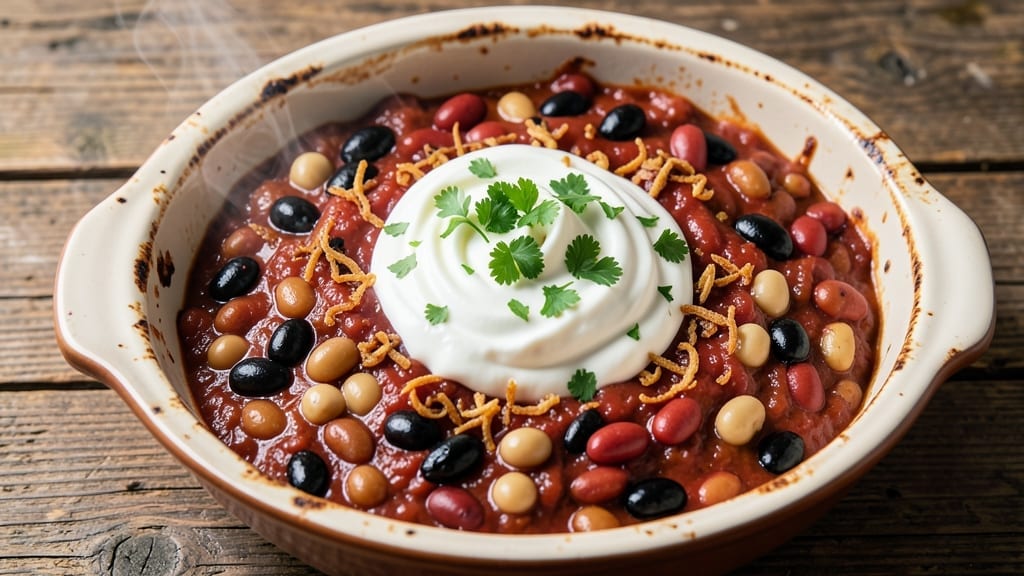
This 4 bean casserole recipe delivers comfort in every creamy, tomato-kissed bite—especially after it rests overnight, when flavors meld into pure satisfaction. The secret lies in layering tender beans, rich tomato sauce, and a crispy cheese topping that transforms this dish into a weeknight hero.
I’ve perfected this recipe through countless batches, ensuring it’s foolproof yet flexible enough to adapt to dietary preferences.
The magic happens in the slow bake, where canned beans soften just enough to absorb the velvety tomato-cream sauce without falling apart. A sprinkle of sharp cheddar on top creates that coveted golden crust while keeping the interior tender.
This isn’t just a side dish—it’s a hearty main that feeds a crowd or satisfies solo cravings with equal ease.
What makes this casserole truly special is how it improves overnight, developing deeper, more complex flavors that turn simple pantry ingredients into something extraordinary. The creamy sauce clings to every bean, creating bites that are both comforting and restaurant-worthy.
Whether you’re serving it at a family gathering or meal prepping for the week, this dish delivers guaranteed results.
For those watching their dairy intake, simply swap the cheese for a dairy-free alternative or sprinkle with nutritional yeast for a cheesy flavor without the cheese.
The beauty of this recipe lies in its adaptability—it’s hearty enough to stand alone or pair perfectly with crusty bread, fresh salad, or roasted vegetables. Here’s how to make it shine.
Ingredients for 4 bean casserole
Pantry staples and four simple beans create this creamy, tomato-kissed comfort dish.
| Ingredient | Amount | Notes |
|---|---|---|
| Canned Kidney Beans 🍲 | 1 can | Drained and rinsed thoroughly |
| Canned Black Beans 🍲 | 1 can | Drained and rinsed thoroughly |
| Canned Great Northern Beans 🍲 | 1 can | Drained and rinsed thoroughly |
| Canned Pinto Beans 🍲 | 1 can | Drained and rinsed thoroughly |
| Tomato Sauce 🍅 | 2 cups | Canned, no sugar added |
| Heavy Cream 🥛 | 1 cup | Full-fat for best texture |
| Mayonnaise 🥫 | ½ cup | For creamy richness |
| Sharp Cheddar Cheese 🧀 | 1 ½ cups | Shredded, sharp flavor preferred |
| All-Purpose Flour 🌾 | 2 tbsp | For thickening sauce |
| Dried Thyme 🌿 | 1 tsp | Or 1 tbsp fresh thyme |
| Garlic Powder 🧄 | 1 tsp | Freshly ground preferred |
| Onion Powder 🧅 | 1 tsp | For depth of flavor |
| Salt 🧂 | 1 tsp | Kosher or sea salt |
| Black Pepper 🌶️ | ½ tsp | Freshly ground preferred |
| Olive Oil 🫒 | 1 tbsp | For greasing baking dish |
The beans are the heart of this casserole, so choose high-quality canned varieties—look for brands like Libby’s or Bush’s for consistent texture. Draining and rinsing them thoroughly removes excess sodium and prevents a watery casserole. For extra flavor, I often add a splash of the liquid from the can to the sauce. The sharp cheddar matters too—Kraft or Cabot shreds beautifully and delivers that perfect tangy bite. If you’re using pre-shredded cheese, toast it in the oven for 5 minutes to remove excess moisture before sprinkling on top.
No heavy cream? Coconut milk or cashew cream works beautifully for a dairy-free version, though the texture will be slightly lighter. Running out of mayo? Greek yogurt or sour cream adds creaminess, though the flavor profile shifts a bit. The tomato sauce can be homemade (simmer crushed tomatoes with garlic and thyme) or store-bought—just check for added sugars. For a vegetarian twist, ensure your tomato sauce contains no meat-based additives. The flour is crucial for thickening the sauce—if you’re gluten-free, use cornstarch instead at the same ratio.
This casserole tastes even better the next day, so make it ahead and refrigerate if possible. It keeps well for 4-5 days in the fridge, and portions beautifully for meal prep. For reheating, cover with foil and bake at 350°F until bubbly—about 20-25 minutes. The cheese topping gets crispy with reheating, so if you prefer it softer, add a splash of milk when warming. Freezes beautifully for up to 3 months, though the texture may change slightly after thawing.
Why You’ll Love This Recipe
- No Pantry? No Problem: I swear by this recipe when I forget to stock up—just open four cans of beans (kidney, black, great northern, pinto), dump them in, and let the tomato sauce tie it all together. The beans’ natural textures and flavors shine without extra fuss.
- Crowd-Pleasing Crunch: That crispy top layer? Chef’s kiss. I toast the beans in the oven until they’re golden and crunchy, then smother them in melted cheese—everyone (even my picky teen) reaches for seconds. The smoky tomato base keeps it rich without being heavy.
- Meal Prep MVP: Between us, this is my go-to for busy weeks. I make a double batch on Sundays, store it in the fridge, and reheat portions all week—perfect for lunches or last-minute dinners. The flavors actually improve after sitting overnight (trust me).
- Budget Magic: Honestly, this recipe saved me during tight months. Four cans of beans and a jar of sauce cost pennies but feed my family for days. Plus, no one complains when dinner’s this satisfying—win-win for my wallet and my sanity.
Step-by-step instructions for creamy tomato-bean bake
This method delivers a rich, velvety texture that thickens beautifully overnight.
Prepare the Bean Mixture
In a large bowl, combine all 1 can drained kidney beans, 1 can drained black beans, 1 can drained great northern beans, and 1 can drained pinto beans. I like to use my hands to gently mash about one-third of each bean type—this creates a thicker, more cohesive texture without losing the bean integrity. The mixture should look like a chunky, rustic bean mash with some whole beans remaining for texture.
Transfer the bean mixture to a 9×13-inch baking dish. This size works perfectly for even baking and easy serving. Spread the beans evenly across the bottom, pressing down gently to create a compact base. This prevents shifting during baking and ensures the sauce soaks in uniformly.
Create the Creamy Sauce Base
In a medium saucepan, whisk together 2 cups tomato sauce, 1 cup heavy cream, 0.5 cup mayonnaise, 2 tbsp all-purpose flour, 1 tsp dried thyme, 1 tsp garlic powder, 1 tsp onion powder, 1 tsp salt, and 0.5 tsp black pepper. The flour acts as a natural thickener, while the cream and mayo create that signature creamy texture.
Cook the mixture over medium heat for 5-7 minutes, stirring constantly with a wooden spoon, until it thickens to a pudding-like consistency. You’ll know it’s ready when it coats the back of a spoon smoothly and leaves a slight trail when you run your finger through it. Remove from heat immediately to prevent over-thickening.
Assemble and Bake the Casserole
Pour the warm sauce evenly over the bean mixture in the baking dish. Use a spatula to spread it gently, making sure every bean gets coated. Sprinkle 1.5 cups shredded sharp cheddar cheese evenly over the top. The cheese will melt into a golden, bubbly crust during baking.
Cover the dish tightly with aluminum foil and bake at 350°F for 30 minutes. This initial covered baking allows the flavors to meld without the top drying out. After 30 minutes, remove the foil and continue baking for another 15-20 minutes until the top is golden brown and bubbly. The edges should be slightly crispy while the center remains creamy.
Rest and Serve for Maximum Creaminess
Remove the casserole from the oven and let it rest for 10 minutes before serving. This resting period allows the juices to redistribute throughout the dish, ensuring each bite is rich and creamy. The casserole will be hot but not scalding—perfect for serving immediately.
For best results, refrigerate any leftovers and reheat gently in the microwave or oven the next day. The flavors deepen overnight, and the texture becomes even more velvety. Serve with crusty bread or over rice to soak up every last bit of that creamy tomato-bean sauce.
Pro Tips For Making 4 Bean Casserole
- Drain and Rinse Beans: Beans straight from the can taste like a salt mine. After draining, give them a quick rinse under cold water—especially the kidney beans, which soak up the most sodium. I learned this the hard way when my first batch tasted like a salty brick.
- Simmer Sauce First: Don’t just dump everything in raw. Warm the tomato sauce in a saucepan for 5 minutes before mixing it with the beans—this cuts the starchiness and thickens it naturally. (Yes, even if you’re impatient like me.)
- Layer Beans Strategically: Pinto beans on the bottom, kidney beans on top—they stay firmer when baked. Great Northern beans in the middle keep things from getting mushy, and black beans on the sides prevent them from sinking out of sight. (Your future self will thank you.)
- Add Cheese Mid-Bake: Sprinkle cheese on top after 20 minutes of baking, not before. This keeps it from burning into a sad, brown crust while still getting that perfect melt. (I skip this when I’m lazy, but the dish is noticeably better when I don’t.)
Common mistakes when making this recipe
Overcooking the Beans
Never boil the beans before adding them to the casserole—that’s a fast track to a mushy disaster. Canned beans are already pre-cooked, so draining and rinsing is all you need.
If you’re tempted to simmer them, resist! Overcooking breaks down their texture, turning your casserole into a sad, watery bean purée. 🥱
Skipping the Thickening Step
The flour in the sauce isn’t optional—it’s what transforms this from a soupy mess to a creamy masterpiece. Whisk it thoroughly into the cold cream and mayo first, then heat gently.
If you skip it, your sauce will separate or stay too thin. I’ve learned this the hard way after a particularly runny batch that required emergency cornstarch rescue!
Uneven Cheese Distribution
Don’t just sprinkle cheese randomly on top—distribute it evenly for that perfect golden crust. Use your fingers to spread it in a thin layer, leaving just enough gaps for the sauce to peek through.
I once made the mistake of piling all the cheese in the center, resulting in a dry middle and a cheese mountain that collapsed during baking. 🧀
Baking Without Foil
The foil during the first 30 minutes is non-negotiable—it traps steam and ensures your casserole cooks evenly. Without it, the top will dry out before the center gets hot enough.
After removing the foil, watch closely for the last 15 minutes to prevent over-browning. A toothpick inserted in the center should come out warm, not boiling.
Not Resting Before Serving
That 10-minute rest isn’t just for show—it lets the juices redistribute so every bite is creamy, not soupy. I’ve caught myself rushing this step only to serve a casserole where the sauce pooled at the bottom.
Patience here makes all the difference between a good dish and a great one. ✨
Using Low-Quality Cheese
Pre-shredded cheese contains anti-caking agents that prevent a proper melt, resulting in a grainy, dry topping. Always shred your own cheese using a box grater for the best texture. If you must use pre-shredded, toast it in the oven for 5 minutes before sprinkling to remove some of the additives.
The difference in texture is night and day! 🧀
Nutrition facts
Frequently asked questions
Can I substitute one of the beans for something else?
Swap any bean for chickpeas, white beans, or even lentils for a different texture. Just keep the total volume the same. For a protein boost, add cooked crumbled bacon or diced ham (about ½ cup) to the bean mixture. The key is maintaining that chunky texture—avoid using refried beans or overly soft varieties.
How can I make this dairy-free?
Replace the heavy cream with 1 cup coconut milk and the mayo with ½ cup cashew cream. For cheese, use 1.5 cups shredded dairy-free cheddar or sprinkle with 2 tbsp nutritional yeast for a cheesy flavor. The texture will be slightly lighter but still delicious.
Why does my casserole turn out watery?
Watery results usually mean the beans weren’t drained well or the sauce wasn’t thickened enough. Always rinse beans thoroughly and press them in the baking dish to remove excess liquid. For the sauce, cook it longer until it reaches a pudding-like consistency. A quick fix is to add 1 tbsp cornstarch to the sauce and simmer for 2 more minutes.
Can I make this in a smaller baking dish?
Yes, but the baking time may change. For a 8×8-inch dish, reduce the recipe by half and bake for 25-30 minutes covered, then 10-15 minutes uncovered. The smaller surface area will cook faster, so watch closely to avoid over-browning. A 9×9-inch dish works well too—just reduce the recipe by ⅓.
What’s the best way to reheat leftovers?
For the creamiest results, cover with foil and reheat at 350°F for 20-25 minutes. If using the microwave, heat in 1-minute intervals on medium power, stirring between each interval. Add a splash of milk or water if it seems dry. The texture improves when reheated gently—avoid high heat, which can make the top rubbery.

- 12 Bean Chili Recipe: Hearty Slow-Cooked Depth With 12 Legumes - October 17, 2026
- 5 Seed Bread Recipe: Nutty Crunch and Artisan Flavor in One Loaf - October 17, 2026
- 1 Lb Macaroni Salad Recipe: Bold, Crunchy, and Crowd-Pleasing - October 17, 2026