
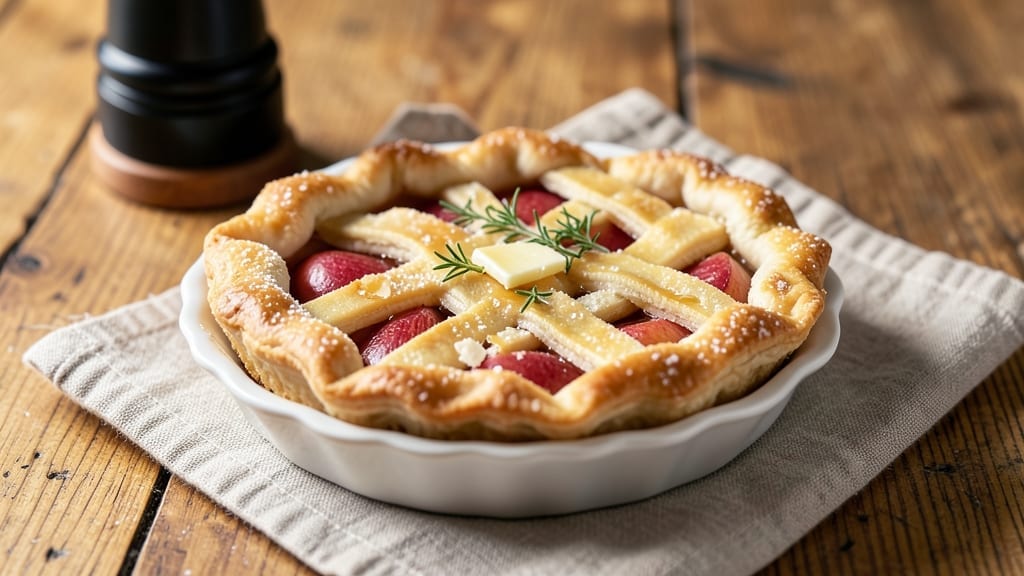
This 4-inch apple pie recipe delivers all the cozy comfort of a classic pie in perfect bite-sized portions—ideal for potlucks, parties, or satisfying a single craving. 🍏 The secret lies in a flaky, buttery crust that holds its shape while baking, paired with a spiced apple filling that balances sweetness and tang.
I’ve perfected this recipe to ensure every mini pie has a golden crust and tender, caramelized apples inside.
The beauty of these mini pies is their versatility—whether you use a store-bought crust for convenience or roll out your own homemade dough, the results are consistently impressive. Baking at 375°F for 25-30 minutes ensures a crisp exterior and perfectly set filling, while optional lattice toppings add visual appeal.
The filling’s cinnamon and nutmeg blend creates warmth that makes these pies irresistible.
What you’ll end up with is a batch of individual apple pies that look elegant enough for a holiday table but require minimal effort.
The crust stays tender yet sturdy, the apples soften just enough to release their juices, and the aroma filling your kitchen will have everyone asking for seconds. These pies are perfect for scaling—make a dozen for a gathering or just a few for a cozy night in.
Serve them warm with a dusting of powdered sugar or a drizzle of caramel for extra indulgence. The recipe includes tips for adjusting spice levels or swapping apple varieties, so you can customize each batch to your taste. Let’s get baking!
Ingredients for 4 inch apple pie
Cozy flavors in perfect mini portions—flaky crust, spiced apples, and buttery goodness.
| Ingredient | Amount | Notes |
|---|---|---|
| All-Purpose Flour 🌾 | 3 cups | Spooned and leveled for accuracy |
| Unsalted Butter 🧈 | 1 cup | Cold, cubed for flaky crust |
| Granulated Sugar 🍚 | ½ cup | For crust sweetness |
| Ice Water 💧 | ½ cup | Chilled for pie crust |
| Salt 🧂 | ½ tsp | Fine sea salt preferred |
| Apples (Granny Smith + Honeycrisp) 🍎 | 3 lb | Peeled, cored, sliced 1/4-inch thick |
| Granulated Sugar 🍚 | ¾ cup | For apple filling sweetness |
| Light Brown Sugar 🍚 | ¼ cup | Packed for depth |
| Ground Cinnamon 🌿 | 2 tsp | Freshly ground preferred |
| Ground Nutmeg 🌿 | ½ tsp | Freshly grated for warmth |
| Lemon Juice 🍋 | 1 tbsp | Freshly squeezed |
| All-Purpose Flour 🌾 | 2 tbsp | For dusting and filling |
| Powdered Sugar 🍚 | ¼ cup | For dusting finished pies |
| Egg Wash 🥚 | 1 whole | 1 egg beaten with 1 tsp water |
The crust is where it all begins. Store-bought pie crust works in a pinch, but homemade delivers that signature flakiness. For the dough, Bubbie’s or Pillsbury refrigerated crust saves time, but if you’re rolling your own, keep everything cold—cold butter and ice water are non-negotiable for that tender, layered texture. The apples? Granny Smith for tartness, Honeycrisp for sweetness—mix them for balance. Peeling isn’t mandatory, but it keeps the filling cleaner if you prefer a smoother texture. Look for apples that are firm and free of bruises at Whole Foods or local markets—they’ll hold up better during baking.
No Granny Smith? Fuji or Braeburn work just as well—just adjust the sugar slightly if they’re sweeter. Short on cinnamon? Cardamom at half the amount adds a unique twist. The lemon juice is key—it keeps the apples from browning while adding brightness. For a gluten-free option, swap the all-purpose flour for a 1:1 gluten-free blend, but add an extra tablespoon to account for density. And if you’re feeling fancy, toss in a handful of toasted pecans or walnuts for crunch. The egg wash? Don’t skip it—it gives that golden sheen that makes these mini pies look bakery-fresh.
These pies are best served warm, straight from the oven. Store any leftovers in an airtight container at room temperature for up to 2 days, or freeze for 3 months—just reheat in a 350°F oven for 10 minutes to restore that crisp crust. The filling keeps well too, so you can prep it ahead and assemble just before baking. For parties, I always make a double batch—they disappear faster than you’d think! And trust me, the aroma alone will have everyone gathering in your kitchen.
Why You’ll Love This Recipe
- No-Roll Crust Magic: I swear by this butter-and-flour trick—just mix, chill, and press. No rolling pin, no stress, and that flaky, golden edge? It’s the kind of crust that makes you feel like a baker, even when you’re not.
- Sweet Simplicity Wins: Honestly, the flavor is what keeps me coming back. A little sugar in the dough? It caramelizes just enough to make every bite taste like a hug. Plus, the butter—rich but not overpowering—lets the apples shine without fighting for attention.
- Portion Control Perfection: Four-inch pies are my secret weapon for gatherings. They’re big enough to impress but small enough to eat without committing to a whole dessert. (Yes, even when my in-laws bring their famous pecan pie.)
- Budget-Friendly Leftovers: Between us, this recipe uses pantry staples, and the leftovers? They’re even better the next day. I’ll often bake two, freeze one, and pull it out for a lazy Sunday breakfast—warm, buttery, and still delicious.
Step-by-step instructions for mini apple pies
Here’s how to make these perfect handheld apple pies with a flaky crust and spiced filling.
👨🍳 Step 1: Make the Flaky Crust
In a large bowl, combine the 3 cups all-purpose flour and 0.5 tsp salt. Cut in the 1 cup cold cubed unsalted butter using a pastry cutter or your fingers until the mixture resembles coarse crumbs with pea-sized butter pieces. This texture is key for flaky layers.
Add the 0.5 cup ice water and 0.5 cup granulated sugar all at once. Mix gently with a fork until the dough just comes together when pressed. Avoid overworking—just until it forms a shaggy mass. Turn the dough onto a lightly floured surface and divide it into 12 equal portions (about 3 ounces each).
Shape each portion into a 4-inch round disc, wrap in plastic, and refrigerate for at least 1 hour. This chilling step prevents shrinking and makes rolling easier. I like to flatten them slightly with my palm while they chill to save time later.
🍳 Step 2: Prepare the Apple Filling
Core, peel, and slice the 3 lb apples into ¼-inch thick slices. Toss them immediately with 1 tbsp lemon juice to prevent browning while you work. This keeps the apples vibrant and bright in your filling.
In a large bowl, combine the sliced apples with the 0.75 cup granulated sugar, 0.25 cup packed light brown sugar, 2 tsp ground cinnamon, 0.5 tsp ground nutmeg, and 2 tbsp all-purpose flour. Toss gently but thoroughly to coat each slice evenly. The flour helps thicken the filling as it bakes.
Let the filling sit for 10 minutes at room temperature. This allows the juices to slightly soften the apples and makes them easier to work with when assembling. You’ll know it’s ready when the mixture looks moist but not soupy.
🥘 Step 3: Assemble the Mini Pies
Preheat your oven to 375°F and line two baking sheets with parchment paper. Roll out one chilled dough disc at a time on a lightly floured surface to about ⅛-inch thickness. Use a 4-inch round cutter to cut out circles—this size gives you perfect mini pie proportions.
Place one dough circle in each spot on your prepared baking sheets. Fill each crust with about ¼ cup of the apple filling, mounding it slightly in the center. Press down gently to create a ¼-inch thick layer—this ensures even baking and prevents overflow.
Roll out the remaining dough and cut additional circles to create tops. Brush the edges of the filled bottom crusts with water, then place the tops over them. Crimp the edges using a fork or your fingers to seal tightly. Brush the tops with the egg wash for that golden finish we all love.
🔥 Step 4: Bake to Golden Perfection
Bake the mini pies on the middle rack for 25-30 minutes until the crusts are deep golden brown and the filling is bubbling. The edges should look set, but the tops might still have a few soft spots—this is normal and prevents overbaking.
For the last 5 minutes, sprinkle the pies with ¼ cup powdered sugar through a fine-mesh sieve. This creates that beautiful dusting we associate with classic apple pies. Watch closely during this time—powdered sugar burns easily, so remove them as soon as they’re golden.
Let the pies cool on the baking sheets for 10 minutes before transferring to a wire rack. This resting period helps the filling set slightly and makes them easier to handle. Serve warm with vanilla ice cream or whipped cream for that ultimate comfort experience.
Pro Tips For Making 4 Inch Apple Pie
- Chill the Dough Properly: Stick the rolled crust in the fridge for at least 15 minutes before cutting—yes, even if you’re eager. I learned this the hard way when my first attempt shrunk like a sad balloon in the oven. Cold dough handles the pie dish better and stays crisp.
- Cut Butter in Small Pieces: Use tiny, pea-sized chunks of cold butter when making the crust—no big clumps. I used to eyeball it and ended up with a greasy mess. Small pieces melt evenly and create flaky layers without turning your crust into butter pudding.
- Prevent Overfilling the Crust: Fill the crust only halfway with apples—this is non-negotiable for a 4-inch pie. I once stuffed it to the brim, and the filling exploded like a volcano when it baked. A lighter fill = even cooking and no soggy bottom.
- Use Cornstarch for Juicy Apples: Toss your sliced apples with 1 tablespoon of cornstarch before baking—it’s the thing that matters most for texture. I skipped this once, and the pie turned into a syrup-soaked disaster. The starch keeps the filling firm and flavorful.
Pro cooking tips for 4 inch apple pie
Crust Perfection
The secret to a flaky crust lies in keeping everything cold—your butter, your water, and even your hands. I swear by using cold cubed butter straight from the fridge, not softened. Cut it into small cubes and work quickly to avoid melting.
If your dough feels too warm, pop it back in the fridge for 10 minutes before rolling. And here’s a pro tip: Chill your rolling pin in the freezer for 5 minutes before using it—this prevents the dough from sticking and makes rolling a breeze. 🧈
Filling Consistency
Your apple filling should be moist but not soupy—think of it like a thick compote. If it looks too wet after tossing with spices, add 1 extra tablespoon of flour.
I’ve learned the hard way that undercooked filling can make your pies soggy, so don’t rush the baking time. The filling is done when it’s bubbling and the edges are set, even if the center still looks soft.
For extra insurance, I like to poke the filling with a toothpick—it should come out clean or with just a few moist crumbs. 🍎
Even Baking
Mini pies bake faster than their full-sized counterparts, so rotate your baking sheets halfway through the baking time to ensure even browning. I use a light-colored baking sheet (like the Wilton Half-Sheet Pans) because they reflect heat better and help prevent the bottoms from burning.
If your oven runs hot, reduce the temperature to 350°F and add 2-3 extra minutes to the baking time. And never stack pies—give them space to breathe, or they’ll steam instead of crisp up. 🔥
Crimping Like a Pro
Sealing the edges properly prevents filling from leaking out during baking. My go-to method is using a fork—press down firmly along the edge to create a decorative, secure seal. For a smoother look, use your fingers to pinch the edges tightly.
If you’re feeling fancy, try a lattice top by cutting strips of dough and weaving them over the filling. Just be sure to brush the lattice with egg wash so it crisps up beautifully. 🍰
Timing the Sugar
Sprinkling powdered sugar in the last 5 minutes of baking is a game-changer—it adds that classic pie look and a touch of sweetness. But watch it like a hawk! Powdered sugar burns fast, so remove the pies as soon as they’re golden.
If you’re short on time, sprinkle the sugar right after baking while the pies are still warm. Pro move: Use a fine-mesh sieve to get an even dusting without clumps. 💫
Resting for Success
Pies need time to set after baking—10 minutes on the baking sheet is non-negotiable. This resting period lets the filling firm up slightly and prevents the crust from getting soggy when you transfer them.
I also like to let them cool on a wire rack for another 5 minutes before serving. This extra step makes all the difference in texture, trust me!
And if you’re making them ahead, store them at room temperature in an airtight container for up to 2 days—they taste just as good the next day. ⏰
Nutrition facts
Frequently asked questions
Can I use store-bought crust for these mini apple pies?
Store-bought crusts like Pillsbury or Bubbie’s refrigerated dough work perfectly for these mini pies. Just follow the package instructions for rolling and cutting 4-inch circles. For extra flakiness, brush the crust with a little egg wash before baking. The convenience saves time without sacrificing quality.
How do I prevent the crust from getting soggy?
Prevent soggy crusts by pre-baking the bottom crusts for 3-4 minutes at 375°F before adding filling. Another trick is to sprinkle 2 tbsp cornstarch in the bottom crust before filling. Let the pies rest for 10 minutes after baking to help the filling set properly. This ensures your crust stays crisp and sturdy.
Can I make these mini pies ahead of time?
Yes, you can prep them up to 2 days ahead! Assemble the pies (unbaked) and refrigerate in an airtight container. Bake straight from the fridge, adding 2-3 extra minutes to the baking time. For longer storage, freeze unbaked pies for up to 1 month. Thaw overnight in the fridge before baking as directed.
What’s the best way to serve these mini apple pies?
Serve them warm with classic pairings like vanilla ice cream, whipped cream, or a scoop of caramel sauce. For a fancy touch, dust with powdered sugar or add a sprinkle of toasted pecans. These mini pies are perfect for parties—arrange them on a platter with a side of cinnamon ice cream for a stunning dessert spread.
Can I make a gluten-free version?
Yes! Use a 1:1 gluten-free flour blend for the crust and add 1 extra tbsp of flour to the filling to help thicken it. For the crust, you may need 1 extra tbsp of ice water as gluten-free dough tends to be drier. Chill the dough 30 minutes extra before rolling to prevent sticking. The texture will be slightly different but still delicious.

- 12 Bean Chili Recipe: Hearty Slow-Cooked Depth With 12 Legumes - October 17, 2026
- 5 Seed Bread Recipe: Nutty Crunch and Artisan Flavor in One Loaf - October 17, 2026
- 1 Lb Macaroni Salad Recipe: Bold, Crunchy, and Crowd-Pleasing - October 17, 2026