
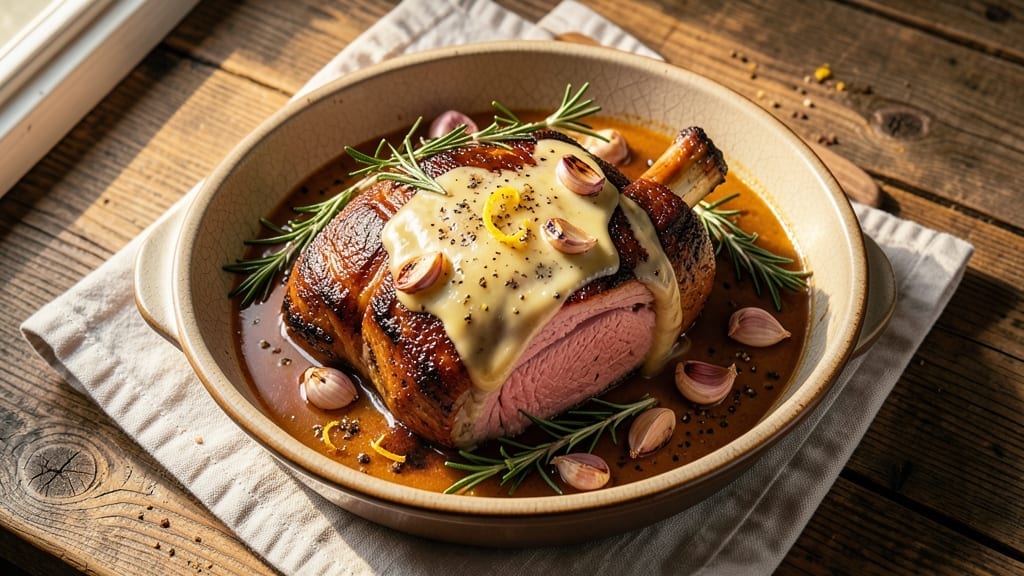
A 4 lb bone-in rib roast cooked to juicy perfection with a caramelized crust is the centerpiece every holiday table deserves. This reverse-searing method transforms tough cuts into melt-in-your-mouth tenderness while locking in flavor. I’ve perfected it over years of testing—no guesswork, just foolproof results that impress even skeptical guests.
The secret lies in low-and-slow cooking followed by a high-heat sear, which builds that coveted crust without drying out the meat. You’ll need just five simple ingredients: the roast itself, coarse salt, black pepper, butter, and aromatics like garlic and rosemary.
The process takes about 3 hours total, but most of that is hands-off time—ideal for busy cooks who want restaurant-quality results.
What you’ll end up with is a roast that slices effortlessly, revealing pink centers and a deep mahogany crust. The bone stays crispy, adding extra flavor with every bite, while the meat itself is so tender it nearly falls apart.
This isn’t just dinner—it’s an experience that turns ordinary weeknights into memorable feasts.
Pair it with roasted potatoes, caramelized onions, or a bold red wine reduction for a complete meal. The leftovers? Even better the next day. Let’s get started on mastering this timeless cut.
Ingredients for 4 lb bone in rib roast
Five ingredients transform a simple roast into a showstopping centerpiece—juicy, caramelized perfection every time.
| Ingredient | Amount | Notes |
|---|---|---|
| Bone-In Rib Roast 🥩 | 4 lb | Prime grade, well-marbled |
| Coarse Kosher Salt 🧂 | 1 ½ tbsp | Diamond Crystal preferred |
| Freshly Ground Black Pepper 🌶️ | 1 tbsp | Freshly cracked for intensity |
| Unsalted Butter 🧈 | ½ cup | Cold, cubed for searing |
| Garlic Cloves 🧄 | 6 whole | Smash slightly for aroma |
| Fresh Rosemary Sprigs 🌿 | 4 whole | Woodsy stems intact |
| Extra-Virgin Olive Oil 🫒 | 2 tbsp | For basting and sear |
The rib roast is non-negotiable here—prime grade with good marbling is key for that melt-in-your-mouth texture. Most butchers will trim it for you, but if you’re buying whole, ask for the bone left intact. Costco or Whole Foods carry excellent cuts, but any reputable grocery store’s meat department should have it. Look for vibrant color and firm fat—no grayish hues. The garlic and rosemary? Fresh is essential—dried just won’t cut it for this dish. I always grab extra sprigs of rosemary since they add so much aroma.
No coarse kosher salt? Diamond Crystal or Morton’s are the gold standards, but any coarse salt works in a pinch. Freshly ground black pepper is worth the investment—pre-ground loses potency fast. Butter matters too: unsalted, cold, and cubed for that perfect sear. Short on rosemary? Thyme works too, but rosemary’s piney notes are signature here. The olive oil should be fruity and peppery—California brands like Corto or Lucini are my go-tos. If you’re feeling fancy, add a splash of red wine to the butter during the sear for extra depth.
The roast reheats beautifully—350°F for 20 minutes brings it back to life. Store leftovers wrapped tightly in the fridge for 3-4 days, or freeze for up to 3 months by vacuum-sealing. I always slice against the grain for maximum tenderness. The bone? Save it for stock—it’s packed with flavor. For a shortcut, you can prep everything the night before: season the roast, refrigerate uncovered for better crust, and just start the slow cook.
Why You’ll Love This Recipe
- Minimal Prep, Max Impact: I swear by this—just salt, pepper, and butter. No fancy rubs, no hours of marinating. That bone-in roast? It practically seasons itself while it roasts, and the garlic cloves tucked into the butter? Pure lazy genius.
- Crispy-Creamy Magic: The crust on this thing is chef’s kiss—golden and crackling—while the inside stays so tender it melts like butter. Honestly, the first time I cut into it, I nearly dropped the knife. That’s the power of a hot pan sear and low-and-slow roasting.
- Leftovers for Days: Between us, this roast feeds my family for three meals—sliced thin for sandwiches, diced into pasta, or shredded for tacos. I’ll be real: the second day is when it really shines, because the flavors deepen like a good wine. (And yes, even my picky husband asks for seconds.)
- Weeknight Hero: No fancy plating, no stress—just a roast that smells amazing while it cooks. I’ve pulled this off for game nights, Sunday dinners, and even a last-minute date night. The bone stays juicy, the table stays clean, and everyone leaves happy. That’s my kind of recipe.
Step-by-step instructions for reverse-seared rib roast
Here’s how to transform a simple roast into a showstopper with a caramelized crust and melt-in-your-mouth tenderness.
Prepare the Roast with Dry Brine
Pat the 4 lb Bone-In Rib Roast completely dry with paper towels—this is non-negotiable for that perfect crust. In a small bowl, mix the 1.5 tbsp Coarse Kosher Salt and 1 tbsp Freshly Ground Black Pepper. Rub this generously all over the roast, pressing the seasoning into the meat so it adheres well.
Place the seasoned roast on a wire rack set over a rimmed baking sheet. Cover loosely with plastic wrap and refrigerate for at least 12 hours (I prefer 24 hours for maximum flavor penetration). This dry brine transforms the meat by drawing out moisture, which allows for better browning and more concentrated flavor. Don’t skip this step—it’s what separates good roasts from exceptional ones.
Low-Temperature Oven Roast to Medium Rare
Remove the roast from the refrigerator 1 hour before cooking to bring it to room temperature. Preheat your oven to 275°F—this low temperature ensures even cooking without drying out the meat. Place the roast fat-side up on the wire rack and roast for 2 to 2.5 hours, or until the internal temperature reaches 115°F on a meat thermometer inserted into the thickest part of the roast.
Resist the urge to peek or move the roast during cooking. The goal is to cook it slowly and evenly, allowing the collagen in the connective tissue to break down and render into flavorful juices. You’ll know it’s ready when the meat feels soft to the touch and the thermometer confirms 115°F. This is the perfect starting point for the reverse sear.
Create the Garlic Butter Baste
While the roast is cooking, prepare the garlic butter baste. In a small saucepan, melt the 0.5 cup Unsalted Butter over low heat. Add the 6 whole Garlic Cloves (lightly smashed) and 4 whole Fresh Rosemary Sprigs, and cook for 3-4 minutes until the garlic is fragrant but not browned. Remove from heat and let the mixture cool slightly—you want it warm but not hot when you baste the roast.
Strain the garlic butter through a fine-mesh sieve to remove the rosemary sprigs and garlic cloves, discarding the solids. Keep the infused butter warm in a small bowl. This aromatic butter will add a luxurious finish to your roast, enhancing its natural flavors and creating a beautiful crust.
Sear for a Caramelized Crust
Increase your oven temperature to 450°F. Heat a large oven-safe skillet over high heat until it’s very hot. Add 2 tbsp Extra-Virgin Olive Oil and swirl to coat the bottom evenly. Place the roast in the skillet, fat-side down, and sear for 5 minutes until the fat renders and the bottom develops a deep golden-brown crust.
Using tongs, carefully flip the roast and baste it generously with the garlic butter. Return the skillet to the oven and roast for an additional 5-7 minutes, basting once more halfway through, until the internal temperature reaches 125-130°F and the crust is deeply caramelized. This high-heat sear locks in the juices while creating that coveted crust.
Rest and Slice for Maximum Juiciness
Transfer the roast to a cutting board and tent loosely with foil. Let it rest for 15-20 minutes—this is crucial for redistributing the juices throughout the meat. During this time, the internal temperature will rise to a safe 135-140°F, ensuring a perfect medium-rare finish.
Slice the roast against the grain into ½-inch thick slices. Serve immediately with the pan juices strained and reduced slightly if desired. The result should be a roast with a deep, caramelized crust, tender meat that practically melts in your mouth, and layers of garlic and rosemary flavor in every bite. This is the kind of roast that makes your table the center of attention.
Pro Tips For Making 4 Lb Bone In Rib Roast
- Sear It Hard: That first sear isn’t just for looks—it’s the flavor foundation. Use a screaming-hot pan or cast iron until the butter foams and the meat releases a deep brown crust. I used to rush this, and the roast always tasted flat. High heat. Seriously, crank it up.
- Salt the Night Before: Coarse kosher salt needs time to work its magic. Pat the roast dry, then salt it generously and let it sit uncovered in the fridge for at least 12 hours. After burning three batches with last-minute salting, I finally figured out this was the thing that matters most for that perfect crust and seasoning balance.
- Skip the Crowding: Once you’ve seared the roast, don’t smother it in garlic cloves or butter like it’s a Thanksgiving turkey. A few smashed cloves and 2 tablespoons of butter are enough—any more, and you’ll steam the meat instead of letting that crust form. (Yes, even if you’re impatient like me.)
- Start Hot, Finish Low: Roast the rib eye at 450°F for the first 15 minutes to kickstart the crust, then drop to 325°F for the rest. I was skeptical until I tried it—this guarantees a crispy exterior without drying out the interior. Use a meat thermometer; aim for 130°F for medium-rare, then rest it under foil for 5-10 minutes. (Your future self will thank you.)
Flavor customization for this 4 lb bone in rib roast
Classic Herb Variations
Swap the rosemary for thyme or sage if you prefer earthier notes—both work beautifully with the garlic butter. I love adding 1 tbsp chopped parsley to the garlic butter for a fresh finish.
For a French-inspired twist, include 1 sprig fresh tarragon alongside the rosemary. The key is balancing flavors: never exceed 4 sprigs total to avoid overpowering the meat. 🌿
Spicy Kick Options
For heat lovers, add ½ tsp crushed red pepper flakes to the dry brine mix or sprinkle 1 tsp smoked paprika over the roast before searing. I also like a pinch of cayenne pepper in the garlic butter for subtle warmth.
Start with ¼ tsp and adjust to taste—spicy flavors intensify during resting. 🌶️
Sweet Glaze Finishes
Brush the roast with 2 tbsp balsamic reduction during the final sear for a tangy contrast. For caramelized sweetness, mix 1 tbsp brown sugar with the garlic butter before basting.
A drizzle of honey (1 tsp) in the last minute of searing adds a luxurious finish. These work best with medium-rare doneness. 🍯
Umami Boosters
Enhance depth with 1 tsp soy sauce in the garlic butter or a sprinkle of miso paste (½ tsp) on the roast before searing. For extra richness, add 1 tsp Worcestershire sauce to the dry rub. These additions complement the beef’s natural flavors without overpowering them. 💫
Regional Twists
For a Texas-style version, add ½ tsp ground cumin and ¼ tsp chili powder to the dry rub. In the Pacific Northwest, swap rosemary for fresh cedar sprigs (lightly toasted) for a woodsy aroma.
Italian cooks often use fresh oregano instead of rosemary. Each variation keeps the reverse-sear method intact while adding local character. 🗺️
Nutrition facts
Frequently asked questions
Can I use this recipe for a different weight rib roast?
The reverse-sear method works for roasts between 3-6 lbs, but adjust cooking times accordingly. A 3 lb roast will finish in about 1.5-2 hours at 275°F, while a 6 lb roast may need 3 hours. Always use a meat thermometer—115°F for the initial slow cook is your target before searing. The crust time remains similar since it’s based on surface area, not weight.
Why does the recipe call for dry brining instead of wet?
Dry brining creates a better crust by drawing moisture to the surface, which caramelizes beautifully during searing. Wet brining (soaking in saltwater) can make the meat too moist and dilute flavors. For this recipe, the 12-24 hour dry brine concentrates seasoning and ensures that perfect golden-brown exterior while keeping the interior juicy. It’s especially important for bone-in cuts where moisture control matters most.
What if my oven doesn’t go as low as 275°F?
Use the lowest temperature setting available—even 250°F works if that’s your minimum. The key is slow cooking to 115°F internal temp before searing. If your oven runs hot, consider using an oven thermometer to verify accuracy. For broiler-only ovens, cook in a 350°F oven for 50-60 minutes longer than the recipe suggests, checking frequently with a thermometer. The sear step remains the same.
How do I know when the roast is done during the final sear?
Watch for two things: 125-130°F internal temperature and a deep mahogany crust. The crust should be dark brown with crispy edges—almost like bark. If you’re unsure, slice into a small section: the meat should be slightly pink in the center (medium-rare) with juices running clear. Never rely on color alone—always use a meat thermometer for accuracy. The resting period will carry it to 135-140°F safely.
Can I make this ahead of time for a holiday meal?
Prepare the dry brine the night before and refrigerate uncovered (this improves crust formation). On cooking day, complete the reverse sear as directed, then slice and serve immediately. For leftovers, reheat slices in a 350°F oven for 15-20 minutes with a splash of beef broth to revive moisture. The roast actually tastes better the next day as flavors meld. Store sliced portions in an airtight container for up to 4 days.

- 12 Bean Chili Recipe: Hearty Slow-Cooked Depth With 12 Legumes - October 17, 2026
- 5 Seed Bread Recipe: Nutty Crunch and Artisan Flavor in One Loaf - October 17, 2026
- 1 Lb Macaroni Salad Recipe: Bold, Crunchy, and Crowd-Pleasing - October 17, 2026