
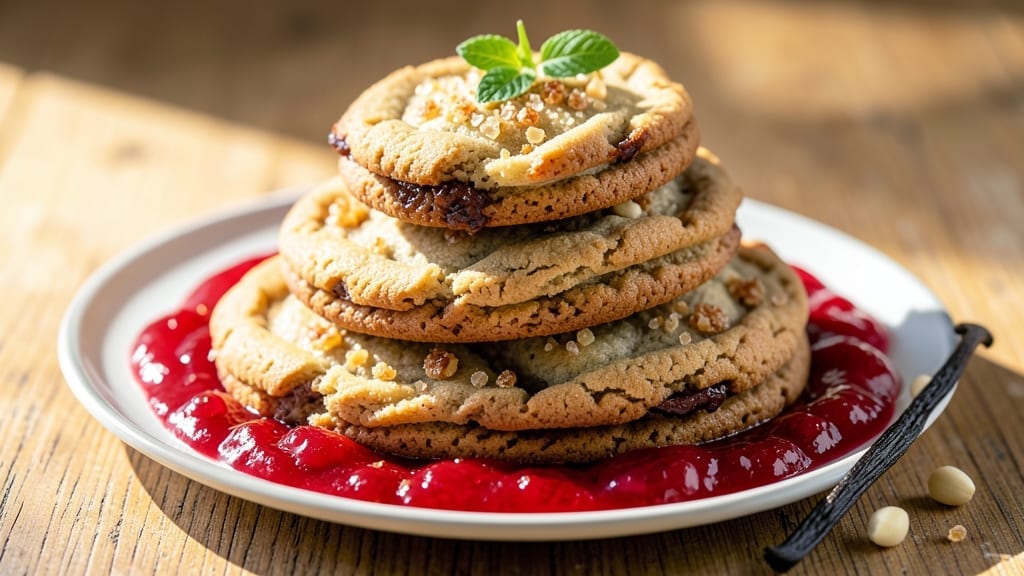
This 48-hour cookie recipe transforms ordinary dough into extraordinary flavor through time and patience—like aging fine wine, but for dessert. 💛 The secret lies in letting the dough rest for two full days, allowing flour to fully hydrate and flavors to meld into something deeply complex.
I developed this method after years of testing, and the results are cookies with a texture that’s perfectly crisp at the edges and tender in the center, with a flavor that’s richer than anything you’ll find in a store-bought package.
The process is simpler than you might think, requiring just a few basic ingredients and minimal effort upfront. You’ll mix the dough, shape the cookies, and let them rest in the refrigerator while the real magic happens—slow fermentation that develops depth and prevents spreading.
The key is maintaining consistent humidity in your fridge to keep the dough from drying out, which ensures those cookies bake up just as you imagined.
By the time you pull them from the oven, you’ll have cookies with a golden, crackly crust and a soft, melt-in-your-mouth interior, all infused with warm spices or rich chocolate that have had time to fully integrate.
The aroma alone will have everyone in your house gathering around the kitchen, and the first bite will confirm what you already knew: patience pays off in the best way possible.
These cookies are perfect for holidays, gifts, or simply treating yourself—just be prepared to make a double batch because they disappear faster than you can say “48 hours.”
The beauty of this recipe is that it works equally well with classic chocolate chip, spiced gingerbread, or even a sophisticated brown butter flavor profile. Let’s get started on creating something truly special.
Ingredients for 48 hour cookie
Basic pantry staples that transform into extraordinary cookies with just 48 hours of patience.
| Ingredient | Amount | Notes |
|---|---|---|
| All-Purpose Flour 🌾 | 3 ½ cups | Sifted for light texture |
| Unsalted Butter 🧈 | 1 cup | Cold, cubed for even mixing |
| Granulated Sugar 🍚 | ¾ cup | White or light brown |
| Brown Sugar 🍚 | ½ cup | Packed firmly for accuracy |
| Large Eggs 🥚 | 2 whole | Room temperature for blending |
| Vanilla Extract 🌿 | 1 tbsp | Pure, high-quality extract |
| Salt 🧂 | ½ tsp | Fine sea salt preferred |
| Ground Cinnamon 🌶️ | 1 tsp | Freshly ground for warmth |
| Ground Nutmeg 🌶️ | ¼ tsp | Freshly grated preferred |
| Semisweet Chocolate Chips 🍫 | 2 cups | High-quality chocolate chips |
| Heavy Cream 🥛 | ¼ cup | Cold for stability |
The butter makes all the difference here—cold cubes mix better and create more pockets of air for that signature tender crumb. Plugrá or Land O’Lakes are my go-tos, but any unsalted butter works. Flour? King Arthur or Gold Medal are my favorites—they’re reliable and give that perfect light texture. I always weigh my flour for accuracy, but if you’re scooping, spoon it in and level off to avoid packing. The chocolate chips? Ghirardelli or Guittard are worth the splurge—they melt perfectly and add that rich depth of flavor that makes these cookies truly special.
No vanilla extract? Vanilla bean paste or even vanilla sugar will work in a pinch—just adjust the amount to taste. Running low on brown sugar? White sugar plus a splash of molasses mimics the flavor. The spices are where the magic happens—if you’ve got fresh nutmeg, grate it yourself for that extra warmth. No nutmeg? Skip it or use extra cinnamon. For the chocolate chips, if you’re feeling fancy, swap in chopped dark chocolate or white chocolate for a fun twist. And if you’re making a double batch, use 3 cups of chocolate chips—trust me.
This dough is a two-day project, so plan ahead. Wrap it tightly in plastic wrap, then place it in a sealed container to keep moisture in. Store in the fridge for the full 48 hours—don’t rush it! When you’re ready to bake, let the dough sit at room temperature for about 1 hour before rolling. The cookies will keep in an airtight container at room temperature for 5-7 days, but honestly, they won’t last that long. Freeze the dough balls for up to 3 months if you’re prepping ahead.
Why You’ll Love This Recipe
- These work for everything: holiday gifts (they keep for weeks), after-school snacks (my kid’s favorite), or a last-minute dessert when guests show up. Freeze half the dough—no one will know they’re not fresh.
- No Mixer Needed: I swear by this—just cream the butter and sugars by hand (or with a spoon) until it’s light and fluffy. No electric mixer, no fuss, and the cookies still turn out tender with that perfect chew.
- Butter-Sugar Magic: That combo of brown and granulated sugar? It’s what makes these cookies ridiculously good—the brown sugar keeps them soft, while the granulated gives that crisp edge. (Yes, even on a Tuesday night.)
- Party or Pantry: These work for everything: holiday gifts (they keep for weeks), after-school snacks (my kid’s favorite), or a last-minute dessert when guests show up. Freeze half the dough—no one will know they’re not fresh.
Step-by-step instructions for deeply flavorful overnight cookies
Here’s how to transform simple ingredients into cookies with intense flavor and perfect texture.
👨🍳 Step 1: Mix Dry Ingredients and Chill the Butter
In a medium bowl, whisk together the 3.5 cups all-purpose flour, 1 tsp ground cinnamon, 0.25 tsp ground nutmeg, and 0.5 tsp salt. Set this mixture aside. In a separate small bowl, combine the 0.75 cup granulated sugar and 0.5 cup brown sugar—I like to press the brown sugar firmly into the measuring cup to pack it properly.
Now for the butter: Cut the 1 cup unsalted butter into ½-inch cubes and place them in a small bowl. Refrigerate both bowls for 30 minutes while you prepare the wet ingredients. Chilling the butter prevents it from melting too quickly when mixed, which helps create those signature tender layers in 48-hour cookies. The dry ingredients can chill too—they’ll absorb moisture better after resting.
🍳 Step 2: Cream Butter and Sugars to Peak Fluffiness
Remove the butter cubes from the fridge and let them sit at room temperature for 5 minutes until slightly softened but still cool to the touch. In a stand mixer fitted with the paddle attachment, beat the butter on medium speed for 2-3 minutes until light and fluffy—you should see ribbons form when the paddle lifts.
Gradually add the combined sugars, mixing on medium speed for another 3-4 minutes until the mixture is pale and nearly doubled in volume. This creaming process incorporates air, which creates those beautiful crackly tops and helps the cookies spread just enough. Here’s the thing—don’t rush this step. The butter needs time to emulsify properly with the sugars for maximum tenderness.
👨🍳 Step 3: Add Eggs, Vanilla, and Cream for Richness
Add the 2 whole large eggs, one at a time, mixing on low speed for 30 seconds after each addition. Scrape down the sides of the bowl to ensure even incorporation. Then add the 1 tbsp vanilla extract and 0.25 cup cold heavy cream, mixing on low speed until just combined—about 1 minute total.
The cold heavy cream adds moisture and richness that develops beautifully over the 48-hour period. I always use room-temperature eggs because they blend more smoothly, but keep the cream cold until the very last moment to maintain stability in the dough. The mixture should look thick and slightly curdled—that’s normal and will resolve when we add the dry ingredients.
🥘 Step 4: Combine and Fold in Chocolate Chips
With the mixer on low speed, gradually add the sifted dry ingredients to the wet mixture, mixing just until combined—about 30-45 seconds. You’ll still see some flour streaks, and that’s perfect. Overmixing develops gluten and makes cookies tough. Remove the bowl from the mixer and gently fold in the 2 cups semisweet chocolate chips using a silicone spatula.
For even distribution, I like to divide the dough in half and fold the chocolate chips into each portion separately. This ensures every bite has those melty pockets of chocolate. The dough will be thick and slightly sticky—this is exactly what we want for the 48-hour development. Wrap the dough tightly in plastic wrap and refrigerate for at least 24 hours (I prefer 48 hours for maximum flavor development).
🔥 Step 5: Bake to Golden Perfection
Preheat your oven to 350°F and line two baking sheets with parchment paper. Remove the dough from the fridge and let it sit at room temperature for 15-20 minutes while the oven preheats. Scoop the dough into 2-tablespoon portions (I use a cookie scoop for uniform size) and place them 3 inches apart on the prepared sheets.
Bake for 11-13 minutes until the edges are golden brown but the centers still look slightly underdone. They’ll continue cooking on the hot pan after you remove them from the oven. Let them cool on the baking sheet for 5 minutes before transferring to a wire rack. The centers should be soft and slightly gooey—this is the magic of the 48-hour process at work!
Pro Tips For Making 48 Hour Cookie
- Cream Butter Slowly: Use a wooden spoon or your hands to mix softened butter with sugars—don’t just dump and pulse. I learned this the hard way when my first batch turned out greasy; the butter needed time to emulsify properly, not just get mashed together.
- Measure Brown Sugar Right: Pack it firmly into the measuring cup—no tapping, just press down with a spoon until it’s level. I was skeptical until I tried it; loose brown sugar throws off moisture and makes cookies spread too much.
- Chill Dough Twice: Divide the dough into balls, refrigerate for 2 hours, then freeze for 30 minutes before baking. The first chill firms it up, and the second prevents overbrowning—yes, even if you’re impatient like me.
- Use Room-Temp Eggs: Let eggs sit out for 30 minutes before mixing—cold eggs can make the dough stiff and cookies dense. I skip this when I’m lazy, but the texture is noticeably better when they’re at room temperature.
Best sauces and condiments for this 48 hour cookie
Classic Vanilla Glaze
This simple glaze elevates your cookies to bakery-quality perfection. Mix ½ cup powdered sugar with 2-3 tbsp milk (or heavy cream for extra richness) and ½ tsp vanilla extract.
Drizzle over cooled cookies and let set for 10 minutes before serving. I like to add a pinch of salt to balance the sweetness—it makes all the difference! 💛
Brown Butter Frosting
For a sophisticated twist, make brown butter frosting by cooking ½ cup unsalted butter in a light-colored saucepan over medium heat until golden brown and nutty (about 5-7 minutes). Cool completely, then beat with 1 cup powdered sugar and 1 tbsp vanilla extract until fluffy.
Spread between two layers of cookies or drizzle over individual cookies for a gourmet touch.
Spiced Maple Drizzle
Perfect for fall flavors, combine ¼ cup pure maple syrup with 1 tbsp brown sugar and ½ tsp ground cinnamon. Warm gently in a small saucepan over low heat for 2-3 minutes, then brush over cooled cookies.
The warm spices complement the cookie’s flavor beautifully, and the maple adds a subtle depth that’s hard to resist. ✨
Salted Caramel Sauce
Melt ½ cup granulated sugar in a heavy saucepan over medium heat until it turns a deep amber color. Slowly whisk in ¼ cup heavy cream and ¼ cup unsalted butter, stirring constantly until smooth.
Remove from heat and stir in ½ tsp flaky sea salt. Drizzle over cookies while still warm for a gooey, salty-sweet finish that’s always a crowd-pleaser.
Lemon-Zest Glaze
Brighten your cookies with a zesty glaze made from ½ cup powdered sugar, 1 tbsp fresh lemon juice, and 1 tsp lemon zest. Whisk until smooth and drizzle over cookies.
The acidity cuts through the richness, making each bite feel fresh and vibrant. I love this pairing with the warm spices in the dough—it’s like a little burst of sunshine! 🍋
Chocolate Ganache
For chocolate lovers, melt ½ cup semisweet chocolate chips with ¼ cup heavy cream in a heatproof bowl set over a pot of simmering water. Stir until smooth, then let cool slightly before drizzling over cookies.
For extra decadence, fold in 1 tbsp crushed hazelnuts or toasted coconut flakes before drizzling. The contrast of warm cookies and cool ganache is pure magic.
Nutrition facts
Frequently asked questions
Why does the dough need 48 hours to develop flavor?
The extended resting time allows the flour to fully hydrate and gluten to relax, creating a tender crumb. The sugars and fats also have time to fully emulsify, intensifying flavors through slow chemical reactions that mimic aging in wine or cheese. This process also prevents excessive spreading during baking.
Can I make these cookies with less than 48 hours?
Yes, but the flavor won’t be as developed. For 24 hours, you’ll get better texture, while 36 hours gives deeper flavor. The full 48 hours is ideal for maximum richness, but even 12 hours will be better than fresh dough. Just note the cookies may spread slightly more with shorter resting.
What’s the best way to store the dough before baking?
Wrap the dough tightly in plastic wrap, then place it in an airtight container to prevent drying. Store in the fridge for up to 72 hours (though 48 hours is optimal). For longer storage, freeze the dough balls for up to 3 months—thaw overnight in the fridge before baking.
Why did my cookies spread too much during baking?
Overmixing the dough or using warm butter can cause excessive spreading. Always chill the butter and mix just until combined. Also ensure your dough rested the full 48 hours—proper resting helps control spread. For thicker cookies, chill the dough balls for 15 minutes before baking.
Can I substitute ingredients if I don’t have everything?
For the butter, use vegetable shortening for a lighter texture. No heavy cream? Use milk or buttermilk (reduce by 1 tbsp). For chocolate chips, try chopped nuts or dried fruit. The spices are flexible too—skip nutmeg or use extra cinnamon. The recipe is designed to be adaptable while keeping that signature 48-hour magic!

- Baked Potatoes in Crock Pot Recipe: Buttery Interiors and Crispy Top Magic - November 1, 2026
- Braised Beef Short Ribs Recipe: Crock Pot Fall-Off-Bone Magic in 6 Hours - November 1, 2026
- Crock Pot Cocoa Recipe: Velvety Warmth With Hidden Spice Magic - November 1, 2026