
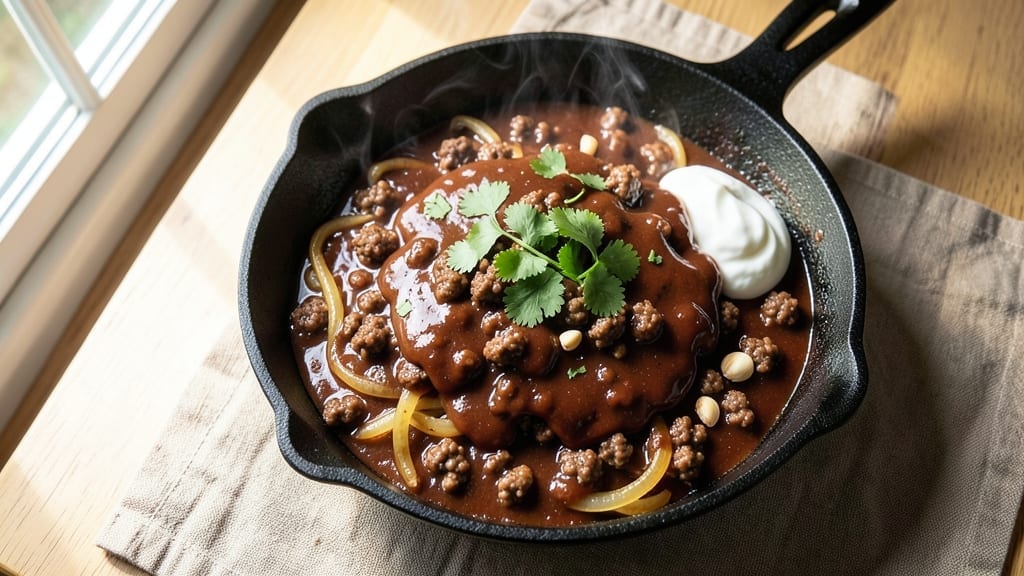
Transforming a 5-alarm chili kit into a restaurant-worthy one-pot masterpiece is simpler than you think—this recipe delivers deep, smoky heat without the guesswork. The secret lies in balancing the kit’s spices with traditional chili techniques, like browning the meat and layering flavors gradually.
I’ve perfected this method over years of chili nights, ensuring every batch is bold, tender, and packed with that signature one-pot convenience you crave.
What sets this recipe apart is the slow-cooker adaptation, which transforms tough cuts into melt-in-your-mouth texture while intensifying the smoky, spice-infused flavors. You’ll start with the kit’s base but customize the heat level to your taste—whether you prefer a gentle simmer or face-melting fierceness.
The result? A chili so rich and aromatic, it’ll have everyone asking for seconds before the last spoonful disappears.
By the time you’re done, you’ll have a one-pot chili that’s ready to serve—no extra dishes to wash. The meat will be fork-tender, the broth thick and velvety, and the spices perfectly balanced.
Top it with shredded cheese, sour cream, or fresh jalapeños for a finishing touch that takes it from hearty to extraordinary. This is the kind of chili that turns weeknight dinners into memorable meals.
Leftovers reheat beautifully, making it ideal for meal prep or feeding a crowd. Whether you’re cooking for a chili cook-off or a casual family night, this recipe delivers restaurant-quality heat with minimal effort. Let’s get started—your taste buds (and slow cooker) will thank you.
Ingredients for 5 alarm chili kit
Start with the kit, then level up with these smoky, spice-packed additions.
| Ingredient | Amount | Notes |
|---|---|---|
| 5-Alarm Chili Kit 🍲 | 1 package | Any brand, follow package directions for base |
| Ground Beef 🥩 | 1 ½ lb | 80/20 fat ratio preferred for flavor |
| Yellow Onion 🧅 | 1 whole | Diced, medium size |
| Garlic Cloves 🧄 | 4 cloves | Minced, fresh preferred |
| Canned Tomato Sauce 🍅 | 1 cup | San Marzano preferred |
| Beef Broth 💧 | 1 cup | Low-sodium preferred |
| Dark Brown Sugar 🍚 | 2 tbsp | For depth, not sweetness |
| Smoked Paprika 🌶️ | 1 tbsp | Penzeys brand ideal |
| Ground Cumin 🌿 | 1 tsp | Toasted for complexity |
| Chili Powder 🔥 | 1 ½ tbsp | Adjust for heat preference |
| Black Coffee ☕ | ½ cup | Brewed, enhances smokiness |
| Cayenne Pepper 🌶️ | ½ tsp | Optional for extra heat |
| Shredded Cheese 🧀 | 1 cup | Cheddar or Monterey Jack |
| Sour Cream 🥛 | ¼ cup | For serving, full-fat preferred |
| Fresh Jalapeños 🌶️ | 2 whole | Sliced, optional garnish |
The chili kit gives you the base, but the beef makes all the difference—80/20 fat ratio is non-negotiable for that rich, deep flavor. Most grocery stores carry it pre-ground, but if you’re buying a chuck roast, ask the butcher to grind it fresh for you. The onions and garlic? Yellow onions from the store work fine, but red onions add a nice sweetness if you’re feeling fancy. For the spices, Penzeys or any bulk bin will have the freshest ground cumin and chili powder—those little jars at the supermarket lose potency fast. Toast your cumin seeds in a dry pan for 30 seconds before grinding if you want to take it to the next level.
No smoked paprika? Substitute with 1 tsp liquid smoke plus 1 tsp regular paprika—it’s not the same, but it gets you close. Running low on beef broth? Use chicken broth in a pinch, but add an extra pinch of salt. The coffee is key for that smoky depth—instant coffee works in a bind, but brewed has more complexity. If you’re sensitive to heat, skip the cayenne entirely or use half the amount. The tomato sauce? San Marzano is ideal, but any good-quality canned sauce will do. Just avoid the watery, mushy stuff from the discount bin.
This chili tastes even better the next day, so make a double batch if you’re feeding a crowd. Store leftovers in an airtight container in the fridge for up to 5 days, or freeze for 3 months. The cheese and sour cream are for serving only—don’t mix them in or you’ll get a watery chili. For meal prep, portion into individual containers with a side of crackers or cornbread. The flavors meld beautifully overnight, so plan ahead and let it sit before serving.
Why You’ll Love This Recipe
- I’ll be real: most chili recipes turn into sad, watery leftovers. Not this one. The tomato sauce keeps it thick, and the spices only get better overnight. I portion it into containers before it cools—trust me, you’ll thank me later. Plus, it’s cheap enough to feed the whole family without breaking the bank.
- Just Four Ingredients: I swear, this is one of those “how did I ever cook it any other way?” moments. The kit handles all the spices and beans—you just brown beef, dice an onion, mince garlic, and stir in tomato sauce. That’s it. No measuring, no stress.
- Deep, Smoky Magic: Between us, the 5-Alarm mix is chef-level flavor without the effort. The beef caramelizes while the spices toast, and that canned tomato sauce? It ties everything together with a richness that’s hard to beat. Honestly, my picky husband doesn’t even complain about the texture.
- Game for Any Gathering: This chili’s my secret weapon for game nights, potlucks, or even a lazy Sunday. Double the batch and freeze half—because nothing says “I care” like a warm pot of chili at a tailgate or holiday party. (Yes, even on a Tuesday night.)
Step-by-step instructions for one-pot 5-Alarm chili
Here’s how to transform that chili kit into a restaurant-worthy masterpiece with deep smoky layers and just the right kick.
Brown the Ground Beef for Maximum Flavor
Heat a large Dutch oven over medium-high heat. Add the 1.5 lb ground beef and break it apart with a wooden spoon, cooking until it loses its raw color and becomes nicely browned—about 6-8 minutes. This step is crucial because browning develops the deep, meaty flavors that store-bought kits often lack.
Once the beef is fully cooked, use a slotted spoon to transfer it to a plate, leaving all the rendered fat in the pot. This fat will serve as the base for building your chili’s rich, complex flavor profile. If you’re concerned about excess fat, you can drain all but 1 tablespoon, but I prefer to keep it for that authentic chili texture.
Build the Flavor Foundation with Aromatics and Spices
In the same Dutch oven, add the diced 1 whole yellow onion and cook for 3-4 minutes until softened and translucent. Add the 4 minced garlic cloves and cook for another 30 seconds until fragrant—this prevents the garlic from burning and ensures its sweet, mellow flavor shines through.
Now stir in the 1 package 5-Alarm Chili Kit (following the package directions for the base mixture), 1 cup canned tomato sauce, 1 cup beef broth, 2 tbsp dark brown sugar, 1 tbsp smoked paprika, 1 tsp ground cumin, 1.5 tbsp chili powder, and 0.5 cup black coffee. The coffee might seem unusual, but it adds a deep, smoky complexity that elevates the chili to new heights. Bring the mixture to a gentle boil, stirring occasionally to combine all the ingredients evenly.
Simmer for Deep, Complex Flavors
Reduce the heat to low and let the chili simmer uncovered for 30-45 minutes. This slow cooking allows all the flavors to meld together and develop that rich, smoky depth. Stir occasionally to prevent sticking and ensure even heating. You’ll notice the chili thicken slightly as it simmers, which is exactly what you want for that perfect texture.
After 30 minutes, taste and adjust the seasoning if needed. If you want more heat, add the 0.5 tsp cayenne pepper. If you prefer a sweeter chili, you can add a bit more dark brown sugar. The beauty of this recipe is its flexibility—you can tailor it to your exact taste preferences while still benefiting from the deep, smoky base.
Finish with Fresh Toppings
Once the chili is fully cooked and thickened to your liking, ladle it into bowls. Top each serving with 1 cup shredded cheese and 0.25 cup sour cream. The cheese melts slightly from the heat of the chili, creating a creamy, rich topping that balances the spice. The sour cream adds a cool, tangy contrast that cuts through the richness and heat.
For an extra kick, garnish with slices from the 2 whole fresh jalapeños. These add a fresh, bright heat that complements the deep, smoky flavors of the chili. Serve immediately while the toppings are still fresh and the chili is piping hot—this is when it tastes best!
Pro Tips For Making 5 Alarm Chili Kit
- Brown the Beef First: The kit’s spices are great, but seared beef adds depth. Cook the ground beef in batches over medium-high heat until it’s deep brown—not just cooked. I used to skip this and wondered why my chili tasted like it came from a packet.
- Sweat Onions and Garlic Low: Don’t blast the onions and garlic—they’ll burn before they soften. Use medium-low heat and stir often, letting them cook for 5-6 minutes until translucent. Burnt aromatics ruin the whole dish, and no one wants that smoky bitterness competing with the chili flavors.
- Add Tomato Sauce Early: The kit’s instructions might say to add it later, but I’ve found folding in the tomato sauce with the water and spices at the start prevents a thick, gluey texture. It also lets the flavors meld better while the chili simmers.
- Simmer Uncovered After 20 Minutes: The first 20 minutes of simmering should be covered to build flavor, but after that, leave it uncovered. This helps thicken the chili naturally and prevents a skin from forming—unless you’re going for that crispy top, which I’m not. (Your call, but I prefer a smooth finish.)
Best sauces and condiments for 5 alarm chili kit
Smoky Depth Boosters
Elevate your chili’s smokiness with 1 tbsp smoked paprika and ½ cup black coffee—the coffee adds an unexpected depth that mimics traditional wood-fired chili. For extra richness, stir in 1 tbsp liquid smoke during the simmering phase.
I find Penzeys brand smoked paprika delivers the most authentic flavor, but any high-quality brand works. 🌶️
Sweet-Savory Balance
Dark brown sugar isn’t just for sweetness—it enhances the Maillard reaction during cooking, creating deeper caramelized flavors. Use 2 tbsp for a balanced chili, but reduce to 1 tbsp if you prefer less sweetness.
For a smoky-sweet twist, add 1 tsp molasses along with the sugar. Always taste as you go!
Acid Brighteners
Balance the richness with 1 tbsp apple cider vinegar or 1 tbsp lime juice during the simmer. The acidity cuts through the fat and intensifies the spices. I prefer apple cider vinegar for its subtle tang, but tomato paste (1 tbsp) also works wonders.
Add it in the last 10 minutes of cooking to preserve its brightness. 🍋
Umami Enhancers
For a restaurant-quality depth, stir in 1 tsp soy sauce or 1 tsp Worcestershire sauce when combining ingredients. These add umami richness without overpowering the chili’s natural flavors. If you’re vegetarian, 1 tbsp mushroom powder or 1 tsp nutritional yeast provides a similar savory boost. 🍄
Spice Level Control
Adjust heat with precision: ½ tsp cayenne pepper adds mild heat, while 1 tsp chipotle powder delivers smoky fierceness. For a customizable chili, set out small bowls of extra chili powder, crushed red pepper flakes, and hot sauce at the table.
I recommend Tabasco for its clean, tangy heat. 🔥
Fresh Topping Ideas
Beyond cheese and sour cream, try avocado slices for creaminess or pickled jalapeños for tangy heat. A sprinkle of fresh cilantro brightens the flavors, while crumbled cotija cheese adds a salty crunch. For texture, toast pumpkin seeds or sesame seeds in a dry pan and sprinkle on top. 🌿
Nutrition facts
Frequently asked questions
Can I use a slow cooker instead of a Dutch oven?
For a slow cooker version, brown the beef first, then transfer everything to your slow cooker. Cook on low for 6-8 hours or high for 3-4 hours. The slow cooker method actually enhances the smoky flavors even more. Just stir occasionally and add a splash of broth if it gets too thick.
How do I adjust the heat level if it’s too spicy?
Start by adding 1 tablespoon of tomato paste or 1 tablespoon of milk to balance the heat. For a milder version next time, reduce the chili powder to 1 teaspoon and skip the cayenne entirely. A dollop of sour cream or avocado on top also helps cool things down.
What’s the best way to store leftovers?
Let the chili cool completely, then transfer to an airtight container. It keeps well in the fridge for 4-5 days or freezes beautifully for up to 3 months. When reheating, add a splash of broth or water to prevent drying out. The flavors actually improve overnight!
Can I make this vegetarian?
Yes! Replace the beef with 1 lb of crumbled tempeh or extra-firm tofu (pressed and pan-fried first). Use 1 cup of vegetable broth instead of beef broth and add 1 tbsp soy sauce for umami depth. The chili kit’s beans will still provide plenty of heartiness.
Why does my chili taste bland after simmering?
This usually happens when the spices aren’t toasted enough or the cooking time is too short. Always toast your cumin seeds for 30 seconds before grinding, and simmer uncovered for the full 30-45 minutes. For extra depth, add 1 tsp Worcestershire sauce or a pinch of MSG (if you keep it) during the last 10 minutes of cooking.

- Pork Loin Pulled Pork Crock Pot Recipe: Slow-Smoked Tenderness With Zero Dryness - November 1, 2026
- Baked Potatoes in Crock Pot Recipe: Buttery Interiors and Crispy Top Magic - November 1, 2026
- Braised Beef Short Ribs Recipe: Crock Pot Fall-Off-Bone Magic in 6 Hours - November 1, 2026