
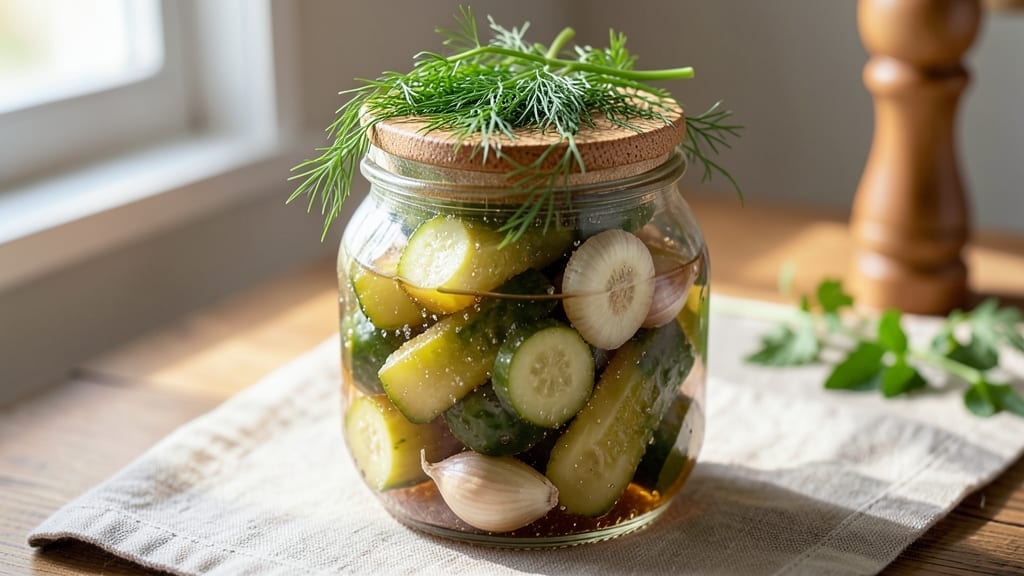
Transforming simple cucumbers into 5-day sweet pickles that rival store-bought versions requires patience and precision—this fermented sweetness develops complex flavors over time. 🌟 The process begins with proper fermentation to preserve the cucumbers while building subtle tanginess, then transitions to sweetening where sugar transforms them into addictive, crunchy treats.
Unlike quick-process recipes, this method ensures depth of flavor and texture that can’t be replicated in hours.
What sets these pickles apart is the balance between fermentation and sweetening—too much sugar too soon ruins the fermentation, while proper timing creates that perfect harmony of tangy and sweet.
You’ll start with fresh cucumbers, salt, and spices, then let nature work its magic for the first 48 hours before introducing the sweet syrup. The result? Pickles with crisp edges and tender centers, coated in a glossy, caramelized glaze that makes them impossible to resist.
This recipe delivers restaurant-quality sweet pickles without the preservatives found in commercial versions. The fermentation process not only enhances flavor but also preserves the pickles naturally, meaning they’ll stay fresh in your fridge for weeks.
Perfect for gift-giving, holiday appetizers, or satisfying that late-night pickle craving, these are the kind of pickles that become a pantry staple once you try them.
Whether you’re a fermentation novice or seasoned crafter, this method is designed to be foolproof while allowing room for customization. Adjust the sweetness level to your preference, experiment with herbs and spices, or even try different vegetables like radishes or carrots.
The key to success lies in patience and attention to detail—every step builds toward that perfect balance of sweet, tangy, and crunchy.
Ingredients for 5 day sweet pickle
Fresh cucumbers, salt, and spices kick off this transformative 5-day journey to restaurant-quality sweet pickles.
| Ingredient | Amount | Notes |
|---|---|---|
| Fresh Kirby Cucumbers 🥒 | 2 lb | Small, firm, unblemished |
| Non-Iodized Sea Salt 🧂 | ¼ cup | Diamond Crystal preferred |
| Granulated White Sugar 🍚 | 2 cups | Organic preferred for purity |
| White Vinegar 💧 | 1 cup | Distilled for clarity |
| Fresh Dill Weeds 🌿 | ½ cup | Packed, stems removed |
| Garlic Cloves 🧄 | 6 cloves | Peeled, smashed slightly |
| Mustard Seeds 🌶️ | 1 tbsp | Whole, light toasted |
| Black Peppercorns 🌶️ | 1 tsp | Crushed lightly |
| Red Pepper Flakes 🌶️ | ½ tsp | Adjust for heat preference |
| Water 💧 | 3 cups | Filtered preferred |
| Fresh Juniper Berries 🌲 | 2 whole | Optional, for complexity |
| Lemon Peels 🍋 | 1 whole | Organic, unblemished |
The cucumbers are non-negotiable—Kirby cucumbers are ideal for their crisp texture and small size, but any firm, blemish-free variety works. Whole Foods or local farms often carry them, but Trader Joe’s usually has them too. Look for vibrant green skin and avoid any with soft spots. The salt should be non-iodized sea salt—iodized can interfere with fermentation. Diamond Crystal is my go-to because it dissolves more easily, but any fine sea salt will do. For the spices, Penzeys or bulk bins at natural markets ensure maximum freshness—mustard seeds and peppercorns should smell aromatic, not stale. Fresh dill is a game-changer, so grab a bunch and use half now, half later for garnish.
No fresh dill? Dried dill at one-third the amount works in a pinch, but fresh is worth hunting down. Running low on mustard seeds? Ground mustard at half the amount can substitute, though texture will differ. The vinegar can be swapped for apple cider vinegar if you prefer a fruitier tang, but distilled keeps things clear. For the sugar, raw cane sugar adds subtle molasses notes, while powdered sugar dissolves faster. The juniper berries are optional but add a piney depth—Trader Joe’s sells them pre-packaged. Lemon peels should be organic to avoid wax, and the zest is what matters, so don’t worry about removing all the pith.
This isn’t a quick fix—5 days of fermentation is essential for developing that perfect tang-sweet balance. Store the fermenting jars in a cool, dark place (like a pantry) for the first 48 hours, then move them to the fridge to slow fermentation. The pickles will keep in the fridge for up to 3 months once fully sweetened. For gift-giving, transfer to sterilized jars with a tight seal—Ball jars work beautifully. Freeze extras in portions if you won’t use them all; they’ll last 6 months in the freezer, though texture softens slightly.
Why You’ll Love This Recipe
- No-Fuss Prep: I swear by this recipe because it’s literally five minutes of active work—just slice those Kirby cucumbers, layer them in a jar, and dump the brine on top. The rest? Time does all the magic while you’re out living your life.
- Crisp-Sweet Magic: That perfect balance of sugar and vinegar? It’s like a hug for your taste buds. The dill weaves in freshness while the sea salt keeps it from being too saccharine—trust me, your sandwiches will never taste the same again.
- Meal Prep Hero: Honestly, I make a big batch every Sunday and keep it in the fridge for the week. It’s my go-to for burgers, tacos, or just snacking straight from the jar—no fuss, no waste, and zero last-minute grocery runs.
- Budget-Friendly Staple: Five ingredients, all cheap and easy to find. The cucumbers stay crisp for days, the sugar stretches forever, and you’re left with jars of tangy goodness that cost pennies to make. My wallet and my taste buds thank me.
Step-by-step instructions for fermented sweet pickles
Transform humble cucumbers into jewel-toned sweet pickles with this five-day fermentation method.
👨🍳 Step 1: Prepare the Cucumbers and Brine
Wash the 2 lb fresh Kirby cucumbers thoroughly under cold water, then trim off the blossom ends. Cut each cucumber into ½-inch thick slices or spears—smaller pieces pickle faster, but spears hold their shape better. Pack the cucumbers tightly into a clean, wide-mouth quart jar, pressing down gently to remove air bubbles.
In a separate bowl, dissolve the 0.25 cup non-iodized sea salt completely in the 3 cups water. Stir until the salt fully integrates—no grains should remain. This brine is the foundation of your sweet pickles, so proper dissolution is critical. I like to use a wooden spoon for stirring to avoid metallic flavors.
🍳 Step 2: Layer Aromatics and Pour the Brine
Create a fragrant layer in the jar by adding the 6 smashed garlic cloves, 1 tbsp mustard seeds, 1 tsp crushed black peppercorns, and 0.5 tsp red pepper flakes directly on top of the cucumbers. Pack them down slightly to ensure they make contact with the brine. This layer will infuse the pickles with deep, complex flavors.
Add the 0.5 cup fresh dill weeds, 2 whole juniper berries (if using), and 1 whole lemon peels (cut into thin strips) to the jar. Pour the prepared brine over everything until the cucumbers are completely submerged by at least 1 inch. Tap the jar gently on the counter to release any trapped air bubbles. The cucumbers should float slightly but remain covered.
⏰ Step 3: Ferment at Room Temperature
Cover the jar loosely with a clean kitchen towel or paper towel secured with a rubber band. This allows airflow while keeping out contaminants. Place the jar in a location where the temperature remains consistently between 65-75°F—a cool pantry or basement works well. Ferment for 3 days, checking daily to ensure the cucumbers stay submerged.
After 24 hours, you’ll notice tiny bubbles forming on the surface and the brine may look slightly cloudy—this is normal fermentation at work. If any cucumbers float above the brine, gently press them down with a clean utensil. The flavor will develop gradually, becoming tangy and slightly sour by day three. Here’s where the magic happens—patience pays off with incredible depth of flavor.
🍳 Step 4: Sweeten and Acidify the Pickles
After the initial 3-day fermentation, remove the jar from fermentation and carefully pour off half of the existing brine into a separate container. In a saucepan over medium heat, combine the reserved brine with the 2 cups granulated white sugar and 1 cup white vinegar. Bring to a gentle simmer, stirring constantly until the sugar dissolves completely—this should take about 3-4 minutes.
Pour the sweetened vinegar mixture back over the cucumbers in the jar, ensuring they remain fully submerged. The liquid should look syrupy and slightly cloudy. Return the jar to room temperature for another 2 days of fermentation. The pickles will absorb the sweetness while maintaining their tangy fermented character. This balancing act creates that perfect sweet-tart flavor profile we all love.
🥘 Step 5: Store and Enjoy Your Sweet Pickles
After the full 5-day fermentation period, transfer the jar to the refrigerator where the pickles will continue to develop flavor and mellow in acidity. They’ll be ready to enjoy immediately, but their flavor will continue improving for up to 2 weeks. The pickles should have a beautiful golden hue, crisp texture, and that signature sweet-tangy flavor that outshines store-bought versions.
To serve, simply remove a few pickles from the jar along with some of the flavorful liquid. The brine becomes part of the experience—don’t drain it! These pickles make an excellent topping for sandwiches, burgers, or charcuterie boards. The combination of sweet, tangy, and slightly spicy flavors creates a truly memorable culinary experience.
Pro Tips For Making 5 Day Sweet Pickle
- Trim the Ends: Kirby cucumbers have tough stems—cut them off and trim the very tips, even if the recipe doesn’t say it. I learned this the hard way when my first batch had weirdly mushy ends after five days. A quick snip with kitchen shears saves you from regret.
- Pack Tight, Then Weigh: Stuff your jar firmly with cucumbers, but don’t overcrowd—leave a 1-inch headspace. After adding brine, press down again to submerge everything. I used to eyeball it, but now I weigh the jar before and after: aim for a 1:1 ratio of cucumbers to brine by volume. The pickles stay crisp when they’re fully immersed.
- Sugar First, Then Salt: Mix the sugar into the vinegar before adding salt—it dissolves faster and coats the cucumbers evenly. I was skeptical until I tried it: the pickles develop that signature sweet-tangy balance without grainy sugar clumps. Skip the stirring shortcut; let it sit for 10 minutes so the syrup thickens slightly.
- Dill Bundles, Not Sprinkles: Tie 3-4 sprigs of dill into a loose bundle with twine and drop it into the jar before adding cucumbers. The flavor infuses deeper, and you avoid the sad, wilted dill floating on top. Pro move: crush 1-2 sprigs lightly between your palms first—they’ll release oils that make the brine smell like a summer picnic.
Make-ahead tips for this dish
Prep Ahead Timeline
Start by prepping your cucumbers and brine the night before—this gives the salt time to fully dissolve without rushing. I like to set out my 2 lb Kirby cucumbers and 0.25 cup sea salt on the counter so they’re ready to go first thing in the morning.
This 12-hour head start ensures your brine is perfectly saturated and ready for layering. 🌟
Fermentation Station
Designate a dedicated fermentation spot in your kitchen where the temperature stays between 65-75°F—this could be a pantry corner or even a closet. I keep a small digital thermometer nearby to monitor consistency.
Place a shallow dish underneath your jar to catch any potential drips during the 3-day fermentation period. This prevents messes and makes cleanup effortless.
Sweet Syrup Prep
While your pickles ferment, prepare the sweet syrup ingredients in advance. Mix the 2 cups sugar and 1 cup vinegar in a bowl with 1 cup reserved brine—this lets the sugar dissolve completely overnight.
Store it in the fridge until you’re ready to combine it with your fermented pickles on day 3. This 24-hour prep ensures a smooth, lump-free syrup that coats your pickles perfectly.
Storage Solutions
Once your pickles are fully fermented and sweetened, transfer them to sterilized glass jars with tight-sealing lids. I use Ball mason jars because they’re airtight and preserve flavor beautifully.
Label each jar with the date—these pickles will keep in the fridge for up to 3 months, with peak flavor developing after 1-2 weeks of refrigeration.
Batch Freezing Tips
For larger batches, freeze individual portions in quart-sized freezer bags with 1-inch headspace for expansion. Lay them flat to freeze quickly, then stack vertically to save space. Thaw overnight in the fridge before serving—this preserves texture better than microwave reheating.
Frozen pickles maintain their quality for 6 months, making them perfect for meal prep or holiday gifting.
Gift-Worthy Packaging
When gifting your sweet pickles, use wide-mouth jars with decorative labels. I like to include a small card with care instructions: “Store in fridge, enjoy within 3 months.” Add a sprig of fresh dill on top for presentation—it looks stunning and reminds recipients of your homemade touch.
These make incredible hostess gifts or office party favors that always disappear quickly! ✨
Nutrition facts
Frequently asked questions
Can I use regular table salt instead of sea salt?
While you can substitute table salt, it’s not ideal. Table salt contains anti-caking agents that may affect fermentation quality. If using table salt, reduce the amount to 0.20 cup since it’s more concentrated. For best results, stick with non-iodized sea salt—it dissolves more evenly and won’t interfere with the fermentation process.
What happens if my pickles float to the surface?
Floating is normal during fermentation! Just gently press them down with a clean utensil to keep them submerged. If they stay afloat, they may be too mature—try using slightly younger cucumbers next time. The key is maintaining 1 inch of brine coverage at all times to prevent mold growth.
How do I adjust the sweetness level?
For less sweetness, reduce sugar to 1.5 cups and add 0.5 cup extra vinegar to balance. For extra sweetness, increase sugar to 2.5 cups and reduce vinegar to 0.75 cup. Taste test the syrup before adding it to the jar—you can always adjust later by adding more sweetened brine.
Can I make these pickles without vinegar?
Technically yes, but vinegar is crucial for both preservation and flavor. Without it, your pickles will ferment longer and may develop more sourness. If avoiding vinegar, increase the fermentation time to 7-10 days and add lemon juice (0.5 cup) for acidity. The texture will be slightly different but still delicious.
Why do my pickles smell bad after 2 days?
Bad smells usually mean mold or improper fermentation. Check for white fuzz (mold)—discard immediately. If the smell is more like rotten eggs, your temperature may be too warm (>75°F). Move to a cooler spot (65-75°F) and monitor closely. Always use clean jars and utensils to prevent contamination.

- Pork Loin Pulled Pork Crock Pot Recipe: Slow-Smoked Tenderness With Zero Dryness - November 1, 2026
- Baked Potatoes in Crock Pot Recipe: Buttery Interiors and Crispy Top Magic - November 1, 2026
- Braised Beef Short Ribs Recipe: Crock Pot Fall-Off-Bone Magic in 6 Hours - November 1, 2026